Einleitung
Folge dieser Anleitung, um mit den Klebestreifen der Ersatzakkus in vielen neueren iPhone Modellen gut zu befestigen. Jedes Mal, wenn du den Akku austauschst, musst du die Klebestreifen ebenfalls ersetzen. Leider lassen sich die Klebestreifen leicht beschädigen, wenn sie nicht korrekt angebracht werden. Daher kann es sinnvoll sein, einen Satz Ersatzstreifen zur Hand zu haben, wenn du diese Anleitung das erste Mal durchführst.
Die größeren iPhone "Plus" Modelle werden mit drei anstatt zwei Streifen befestigt, aber die Prozedur ist dieselbe.
Du solltest zuerst den Akku entfernen, indem du eine der unten verlinkten Anleitungen durchführst. Hinweis: iPhone 5 und ältere Modelle verwenden keine Klebestreifen.
- iPhone 6 Akku ersetzen
- iPhone 6 Plus Akku ersetzen
- iPhone 6s Akku ersetzen
- iPhone 6s Plus Akku ersetzen
- iPhone 7 Battery Replacement
- iPhone 7 Plus Akku ersetzen
Der Ersatz von Akkuklebestreifen in anderen iPhone Modellen wird in folgenden Anleitungen beschrieben:
Ersatzteile
-
-
Wenn der neue Akku mit Klebestreifen versehen ist, dann gehe gleich zu Schritt 7 über.
-
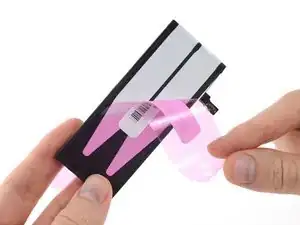
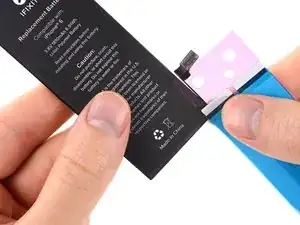
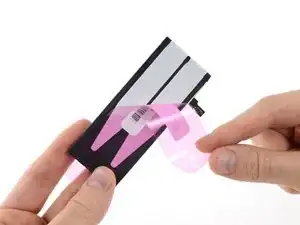
Entferne andernfalls die kleine(n) Plastikfolie(n) (wenn vorhanden ), mit der/denen die flachen Enden der Klebestreifen bedeckt sind.
-
-
-
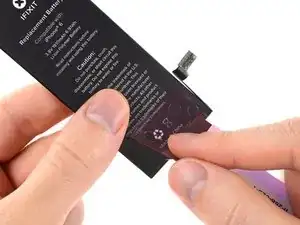
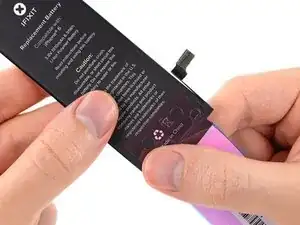
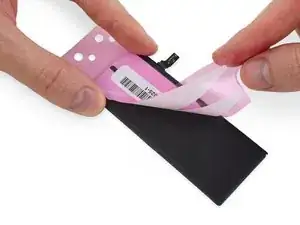
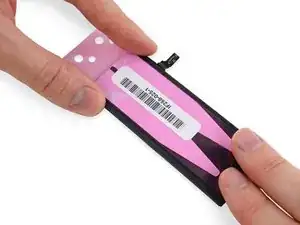
Halte den Akku so, dass der Akkuanschluss nach unten rechts zeigt. Richte die freigelegten Stellen des Klebestreifens an der unteren Kante der Vorderseite des Akkus aus und drücke sie leicht fest.
-
-
-
Drehe den Akku um und lege ihn auf eine flache Unterlage.
-
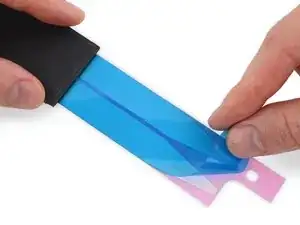
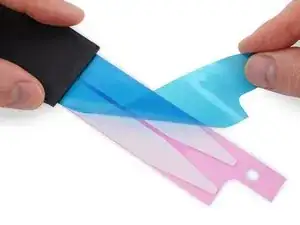
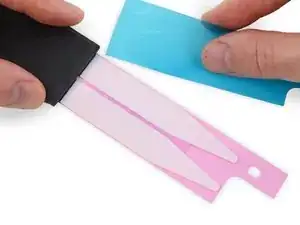
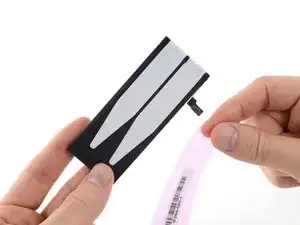
Entferne von der spitzen Seite ausgehend die blaue Plastikfolie.
-
Wenn das passiert und du hast deine Streifen von iFixit bezogen, dann kannst du uns kontaktieren und wir senden dir einen Ersatz zu.
-
In der Zwischenzeit kannst du dein iPhone vorläufig zusammenbauen, indem du den Akku mit einem Stück doppelseitigem Klebeband befestigst.
-
-
-
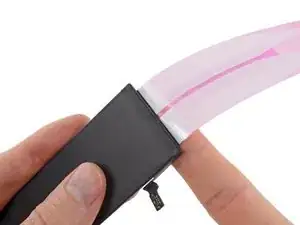
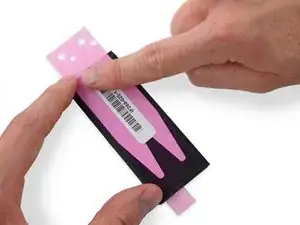
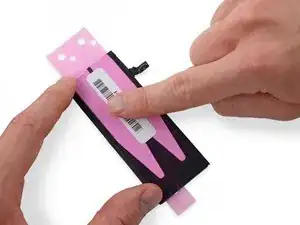
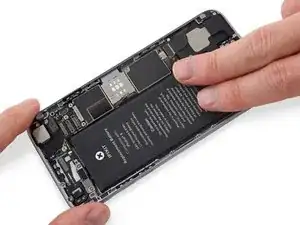
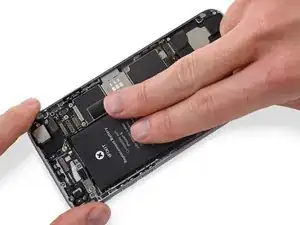
Drücke die Streifen fest mit deinen Fingern oder einem Stück Stoff auf die ganze Rückseite des Akkus.
-
-
-
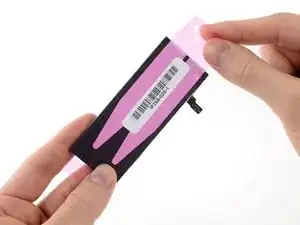
Entferne behutsam die restliche Plastikfolie komplett vom Akku und lege die zweite Klebeseite frei.
-
-
-
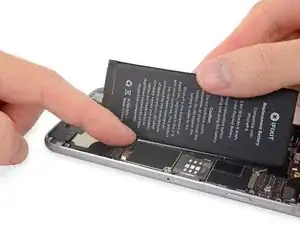
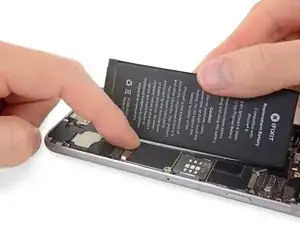
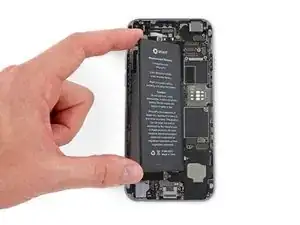
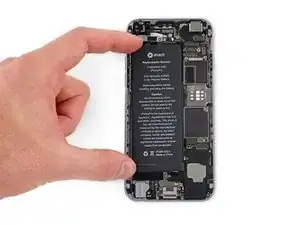
Positioniere, ohne den Akku abzulegen, den Akkuverbinder so in das iPhone, dass er auf seinem Anschluss auf dem Logic Board passt.
-
Um dein iPhone wieder zusammenzusetzen, musst du zu der Anleitung, mit deren Hilfe du den Akku entfernt hast, zurückkehren und die dortigen Schritten in umgekehrter Reihenfolge durchführen.
Entsorge deinen alten Akku fachgerecht.
68 Kommentare
I had to read these directions thoroughly three times before proceeding as I didn't want to screw it up on the adhesive. Went slow and it worked just fine
I would say jus watch out as you go from step 4 to step 5 - the white adhesive can become slightly detached from the backing as you push it onto the edge of the battery and then around to the back side. Extreme care here! Very good guide and equipment. Galaxy class!
All was good, aside from the adhesive bunched up when I removed the blue backing and it started to separate from the pink backing. I had to just gingerly make sure it was all straight and kept steady like a heart surgeon until I had it smoothed down as best as possible. It all went well, but I was worried I'd end up with a big stuck ball of white adhesive in the middle of the battery plate, making it all uneven and stupid looking.
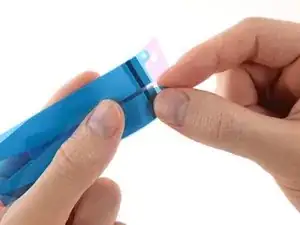
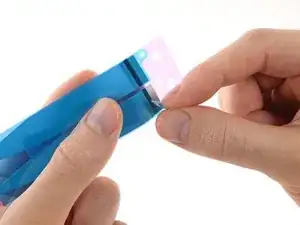
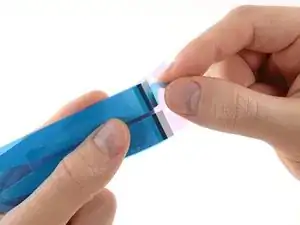



It’s 2018 but still providing this same type of horrible adhesive strips that won’t let go of the blue backing like Jerad mentioned.
Guess I don’t have your skills guys and haven’t tried the one in the picture above but this really isn’t working and I don’t think changing the instructions will help removing the blue backing. I achieved nothing with mine… The rest is perfect.
Jou -
I just had the same experience. The blue backing would not separate from the adhesive.
I tried a new tactic: Remove the ping backing and apply to the case, and then remove the blue backing. No go. It stuck to the blue backing more than it did to the case.
I should have just left the remains of the old strips in place. Instead, I just installed the battery without the adhesive. I hope that’s good enough.
bester -
Effectivement j’ai connu la même expérience, le support bleu n’a pas voulu s’en détacher j’ai donc mis un adhésif double face sur deux petit points afin de maintenir la batterie et évite qu’elle bouge. C’est une étape qui m’a bien pourri le cession d’en remplacement de la batterie de l’iphone 5S. Je pensais avoir des difficultés sur autre chose mais certainement pas sur des adhésifs de m……e!
bekman -
I had the exact same problem, the adhesive wouldn’t release from the blue backing. I spent more time trying to get the adhesive off than rest of the steps combined. I ended up utilizing 3M double sided tape, which worked fine. There is obviously a problem with the adhesive and IFIXIT should correct the issue.
Dan Russow -
I’m in the same boat. Why iFixit uses this blue film the adhesive tends to stick to is beyond me. It’s impossible to remove, I tried the various techniques like highlighted above to no avail.
Florent Pillet -
To reiterate Kadan’s comments further down: If you run into issues with your adhesive strips not coming off the backing properly, or accidentally getting ruined in the process, please reach out to the Support team via help.ifixit.com. There are far too many guides to monitor to proactively seek customers who are encountering issues, so it’s best that you reach out to us so that we can assist you in a quick fashion. Thanks again for your comments, and we look forward to helping! —I think it comes down to a few defective strips getting into the supply chain and unfortunately there’s no way to test them before we ship them out. It’s a very small number as most customers are not having this issue, but I realize that’s not much consolation if you’re one of the few. Reach out to us and we’ll get it sorted, with apologies for the trouble. In the meantime, a little double-sided tape should hold onto your battery just fine until the replacement strips arrive.
Jeff Suovanen -
I think that there is a better way to align the strips. I suggest NOT removing ANY of the protective film(s) from the adhesives at first. First, lay the strips on the side of the battery that will adhere to the case, WITH THE PROTECTIVE STRIPS STILL ON. Make sure the right side of the strips is facing the battery, and move the strips around until they are correctly aligned right to left and up to down, and until the little tabs that go around the other side of the battery are the right length. At this point, use clear tape to hold the strips in place on the battery. NOW, once the strips are aligned, remove the small protective plastic strips as described in Step 1, and adhere them to the battery. Then, remove the clear tape you put on the strips to hold them in place on the battery, and continue with the tutorial. If I remove the small protective plastic strips first and try to put the small tabs on one side so that the long strips are aligned on the other side, I just can’t get it right.
Tom -
I found the instructions at https://www.youtube.com/watch?v=CrTDzkF6... to be the best for putting these strips back on. Worked perfectly for me.
alanderson -
I had a little trouble with these tabs, but found coming at them from the other end was better. There was a little corner that hung over the edge that I was able to grab onto, and then could pull counter to the strip. I didn’t have any other trouble the rest of the way!
Kevin Rollins -
Looks like iFixit has fixed this issue by shipping the replacement battery with strips already attached. In this case, skip to step 7.
lkollar -
I would start with a preliminary test fit of the battery to be familiar with how the battery needs to exactly be placed before applying the adhesive strips.
Lou Fazio -