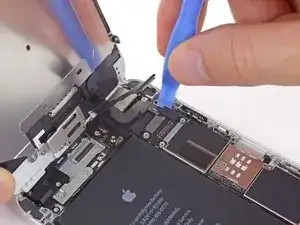
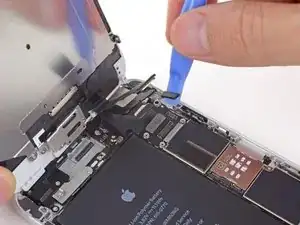
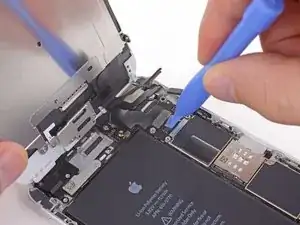
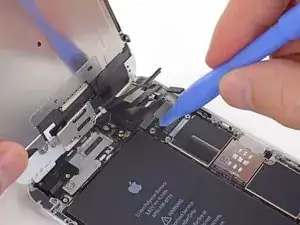
Einleitung

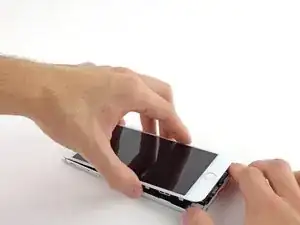
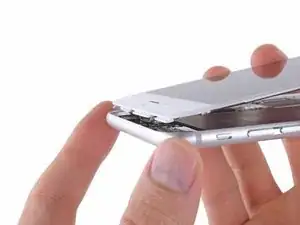
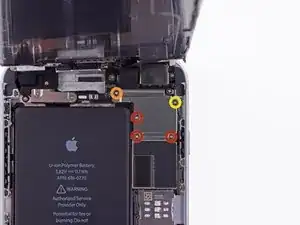
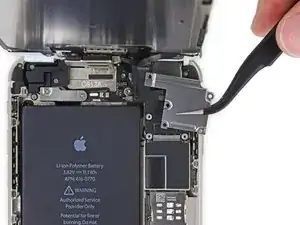
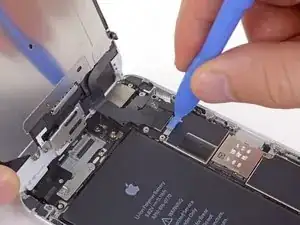
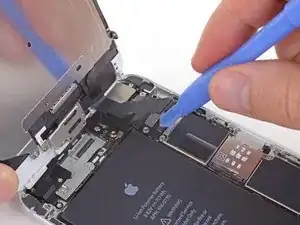
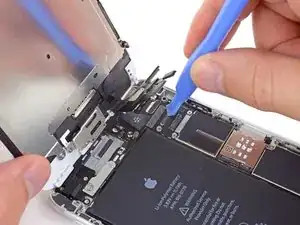
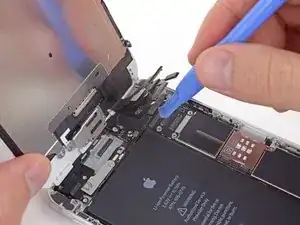
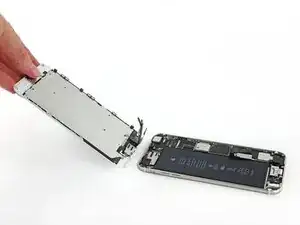
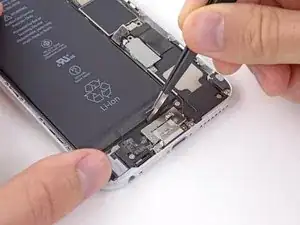
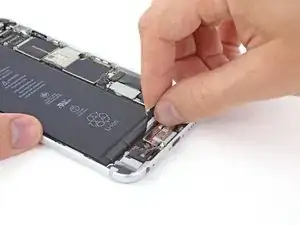
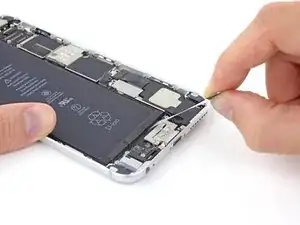
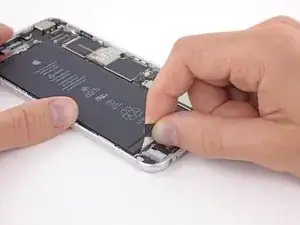
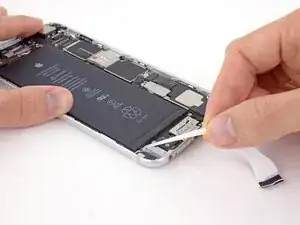
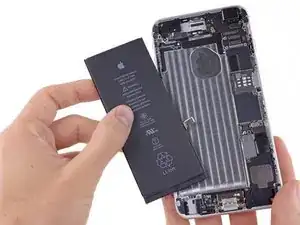
In dieser Anleitung zeigen wir dir, wie du dein iPhone 6 Plus mit einem neuen Akku reparieren kannst. Wenn dein Akku aufgebläht ist, musst du entsprechende Vorsichtsmaßnahmen treffen.

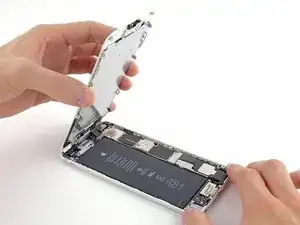
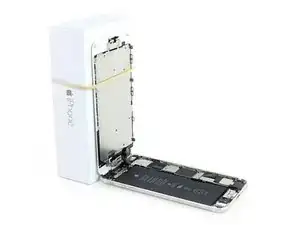
In dieser Anleitung wird gezeigt, wie die Front Panel Einheit ausgebaut wird, um Schäden an den Displaykabeln zu vermeiden. Wenn du das Gefühl hast, das Display vorsichtig abstützen zu können, während du den Akku aus dem Gehäuse entfernst, lasse die entsprechenden Schritte aus und mache direkt mit den Schritten zum Ausbau des Akkus weiter.

Für eine optimale Leistung sollte der neu eingebaute Akku nach Abschluss der Reparatur kalibriert werden: Lade ihn auf 100% auf, und lasse ihn mindesten zwei weitere Stunden laden. Benutze dann dein iPhone bis es sich aufgrund eines leeren Akkus ausschaltet. Lade den Akku dann erneut ohne Unterbrechung auf 100% auf.

Außerdem kannst du dieser Anleitung folgen, um die Abdeckung des Akkuanschlusses auszutauschen.

  1. USCeHYChW5fqBuWf
    • Entlade dein iPhone auf unter 25%, bevor du es demontierst. Eine geladene Lithium-Ionen-Batterie kann Feuer fangen und/oder explodieren, wenn man sie aus Versehen ansticht.

    • Schalte dein iPhone ab, bevor du mit der Demontage beginnst.

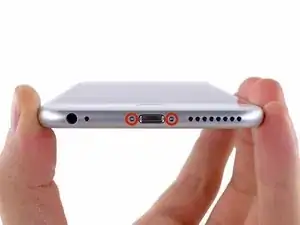
    • Entferne die beiden 3,6 mm P2 Pentalobe Schrauben neben dem Lightning Connector.

    Pentalobe P2

    Enea Del Lama -

    I prefer to remove the SIM card as the very first step since it's safer to do so while the phone is fully assembled.

    estebanfallasf -

    I stripped one of the two screws - at a dead stop.

    Margaret Patterson -

    Before you even start: get the iOpener or hairdryer out. You’ll need it

    GPZ -

    If a lightning connector won’t provide a charge or needs to be wiggled carefully to provide a charge, power off the device, then try using precision tweezers to scrape the innermost wall of the lightning jack in a pinching motion to check for lint buildup. Pocket lint or other debris can accumulate inside the jack, compacting each time a cable is inserted. This can prevent a lightning cable from seating fully. Clearing the lint may restore functionality without replacing the part.

    Andrew Dolan -

    A few hints:

    * heating up the phone works great. I used a heating pad that you put in the microwave to heat sports injuries.

    * also, I made a sheet to help you keep track of the screws as you remove them. Print out the page, then place double sided tape below each color-coded listing of screws, and stick the screws to the tape as you disassemble. This helps prevent losing the screws and keeps track of what screws are what for easier reassembly. https://drive.google.com/file/d/1pLSvKvB...

    Paul Faulstich -

    Additional hints, for anyone who needs them:

    * stick the screws to the tape in the same positions as they are shown in the guide. This will make it easier to identify them during reassembly.

    * if the screws get mixed together, the ‘mm’ (millimetre, millimeter) measurements given in the guide can be used to identify them. Compare the lengths of the threaded shafts to each other to determine which screw is which.

    Friendly Advice -

  2. oSSfrNNsV2H2nZYu
    oSSfrNNsV2H2nZYu
    F5RorY6nXR6cGBXJ
    JywJIcyaWjNZMVMN
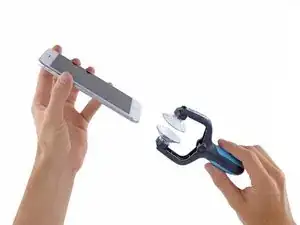
    • Die nächsten drei Schritte zeigen die Benutzung des iSclack, ein gutes Werkzeug um das iPhone 6 sicher zu öffnen, welches wir allen empfehlen, die mehr als eine Reparatur durchführen. Wenn du den iSclack nicht benutzt, überspringe die nächsten beiden Schritte.

    • Wenn der Abstandshalter aus Plastik noch in der Mitte des iSclack ist, entferne diesen jetzt - er ist nicht benötigt für größere Smartphones wie das iPhone 6.

    • Schließe den Griff des iSclack, um die Saugnapf-Zange zu öffnen.

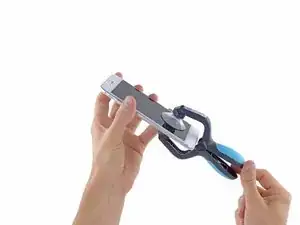
    • Platziere das untere Ende deines iPhone zwischen den Saugnäpfen.

    • Positioniere den oberen Saugnapf direkt über (aber nicht auf) dem Home Button und drücke ihn gegen das Display.

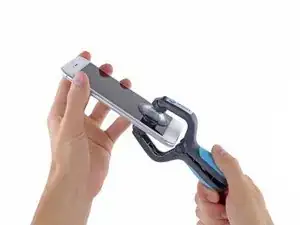
    • Öffne den Griff um die Zange zu schließen. Platziere die Saugnäpfe mittig und drücke Sie kräftig gegen die Ober- und Unterseite des iPhones.

    • Wenn das Display stark gesplittert ist, haftet der Saugheber möglicherweise besser, wenn du eine Lage von durchsichtigem Paketband aufklebst. Zu diesem Zweck sind dem iSclack zwei Stücke Klebeband beigelegt.

  3. Mwe2iWHCSNxgkVrX
    Mwe2iWHCSNxgkVrX
    bZfCTtEjrgKlHeVM
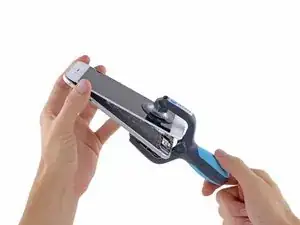
    • Halte dein iPhone gut fest und schließe den Griff des iSclacks, um die Zange zu öffnen. Die Saugnäpfe heben dabei die Display Einheit von der Rückseite des Geräts.

    • Das iSclack Öffnungswerkzeug wurde entwickelt, um dein iPhone genau so weit zu öffnen, dass die Teile getrennt werden können, aber keine Kabel beschädigt werden.

    • Löse die Saugnäpfe von deinem iPhone.

    • Überspringe die nächsten drei Schritte und fahre fort mit Schritt 7.

    It's very difficult if you want to remove a cracked screen. The suction cup and Islack won't work. Does anybody know a better way?

    Herbert -

    I use Scotch Tape, shipping tape. Put a couple of layers over the crack screen. That seals it so you can use the suction cup to remove the front of phone.

    Michael Wallace -

    I used the plastic pry took and the spudger to open it up. I place the pry tool dead center below the home button and was able to put some pressure around the seam and the top popped up enough for me to get the spudger in there to hold it open and then work my way around with the plastic pry tool.

    johnoconna -

    Apply clear packaging tape to screen. Then suction cup to that.

    Tracey -

    Use clear nontextured tape place that over the phone screen. Refer to any guide that addresses replacing a shattered screen

    Abigail Cherry -

    I know it's tough with cracked glass. You just need enough to get in a plstic pry tool or guitar pick. Then you can pry it apart. Just be patient, I cannot stress that enough; the electronics are very, very small and fragile.

    Mike -

  4. kyqQkZwqWmMDtNVl
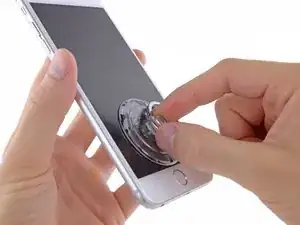
    • Wenn du keinen iSclack hast, benutze einen einzelnen Saugheber, um die Display-Einheit anzuheben:

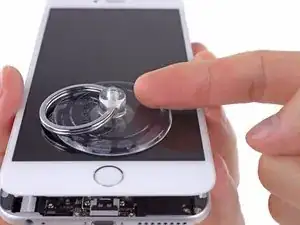
    • Drücke einen Saugheber auf das Display, direkt über (aber nicht auf) den Home Button.

    • Drücke den Saugheber gut auf der Scheibe fest, damit er sicher haften bleibt.

    • Wenn die Scheibe stark gesplittert ist, haftet der Saugheber möglicherweise nicht gut. Klebe eine Lage von durchsichtigem Paketband darüber, damit er besser festhält. Du kannst auch anstelle eines Saughebers sehr starkes Klebeband verwenden. Eine weitere Möglichkeit ist, den Saugheber mit Sekundenkleber zu befestigen.

    Avec la ventouse, l’ouverture est brutale, tout s’est déclipsé d’un seul coup. Faire attention.

    Paul Briffaut -

    English Please!

    tom mozeleski -

    With the sucker, the opening is brutal, everything was cleared at once. Pay attention. (Paul’s comment translated by Google)

    Steve Schlotter -

    May need to burp the sticker before it sticks. Need to let the air out. Once Idid that, no problem. Except it was still hard to get the cover to start up.

    Patricia Tucker -

    Don’t waste your time with the suction cup - it doesn’t work! insert the blade of a box cutter just below the lower screen edge below the home button and gently pry just enough to start cracking the seal.

    Stephen Smith -

  5. bPBFLb3Vf5xeFd1k
    • Ziehe an dem Saugnapf während du das iPhone mit der anderen Hand festhältst, um die Display Einheit etwas von der Rückseite anzuheben.

    • Nimm dir Zeit und wende gleichbleibend feste Kraft an. Die Display Einheit sitzt sehr viel passgenauer im Gerät als viele andere Teile.

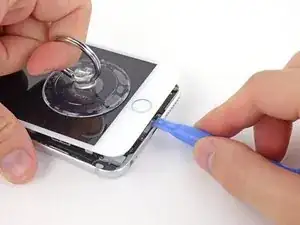
    • Benutze ein Plastik Opening Tool, um vorsichtig die Rückseite nach unten zu drücken, weg von der Display Einheit, während du das Display weiter mit dem Saugnapf nach oben ziehst.

    • Mehrere Clips befestigen die Display Einheit im Gehäuse, weshalb du vielleicht den Saugnapf und ein Plastik Opening Tool brauchst, um die Display Einheit von der Rückseite zu lösen.

    Be extra careful here. If you don’t take your time, your front panel may jerk back on you, causing you to overextend and break the front camera/mic flex cable; happened to me. Slowly peel back the front panel, opening it no more than 90º.

    Thomas -

    watch out for the left side of the phone the adhesive bunches up around the inner clips, i didn’t realize it and the upper left of my screen cracked pretty bad. But this guide is awesome follow every direction to the letter

    Aaron Fitzpatrick -

    Note: this comment is written for the iPhone 6 Plus, but may also apply to other models of iPhone.

    Disassembly:

    The clips in the rear case attach to small slotted shapes under the edges of the display assembly, and these attachment points alternate from one side to the other. Moving from bottom to top, gently pulling the rear case away at these points will help to separate the two halves without using too much force.

    Reassembly:

    Ensure that the plastic clips along the top edge of the front panel (shown in step 8) are fitted properly inside the rear case, then gently press the display assembly into the rear case at these points, moving from top to bottom. There may be a small click sound as the clips in the rear case engage with the slots on the display assembly, and the rear case should fit flush with the edges of the display assembly.

    Friendly Advice -

    This was challenging. For me, the suction cup could only create a tiny bit of motion and at first, no actual gap at all. You might have to pull the suction cup away from the base a few times just to loosen things up a tiny bit. Eventually, I got my fingernail in, and then after a few minutes got the plastic tool in.

    Also, use the plastic tool to gently pry along the sides of the phone once there’s light there. I was afraid of using too much leverage and breaking the screen as per the other comments, but starting at the bottom and then going around the sides slowly worked for me.

    FixingMyiPhone -

  6. YIsYQlG2dFCHb1At
    YIsYQlG2dFCHb1At
    YipiLfXkXgKNDKUN
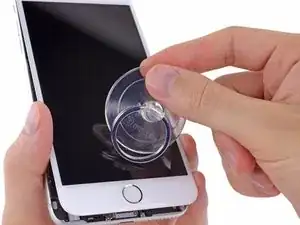
    • Ziehe an der Plastiknoppe, um das Vakuum des Saugnapfes zu lösen.

    • Entferne den Saugnapf von der Display Einheit.

    There is an adhesive strip all along the edge between the top and bottom of the phone. Is that just adhesive or is it wire of some sort?

    Larry Ingerling -

    @lingerling The adhesive strip was introduced on the iPhone 6s and 6s Plus (one model year later than what’s shown on this page). Guides specific to each model can be found here—be sure to use the correct one for your particular phone. And yes, just adhesive, no wires. ;)

    Jeff Suovanen -

  7. Mq2BflEN1psMGQLb
    Mq2BflEN1psMGQLb
    FtVoMTGoEMekSKay
    dcWOsWLQwSlKnQOP
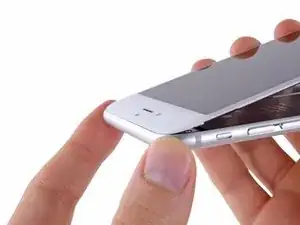
    • Nutze die Spitze des iPhones wie ein Scharnier und nimm das Displayende mit dem Home Button von der Rückseite ab.

    • Öffne das Display bis zu einem 90°-Winkel und lehne es gegen einen festen Gegenstand, um es beim Arbeiten in dieser Position zu halten.

    • Ein Gummiband könnte hilfreich sein, um es in dieser Position zu halten und sicherzustellen, dass die Displaykabel nicht beschädigt werden.

    • Als Trick kannst du eine ungeöffnete Getränkedose als Halterung verwenden.

    Be careful If we leave the screen connected and set it to 90 degrees, the speaker / sensor flex may break. With an opening of 60 degrees it is convenient to completely disconnect the screen. The headset's flex is short, and if we put it at 90º, it can break. Guiding me from the images of iFixit, I have broken two cables.

    Español:

    Cuidado. Si dejamos la pantalla conectada y lo ponemos a 90 grados, el flex del altavoz/sensor puede romperse. Con una abertura de 60 grados es conveniente desconectar enteramente la pantalla. El flex del auricular es corto, y si lo ponemos en 90º , se puede romper. Guiándome de las imágenes de iFixit, se me han roto dos cables.

    txaukos -

    At 60º the display will block access to all the screws and the phone would be practically unserviceable, so I’m having trouble making sense of this comment. The cables on a factory original display are pretty tough and designed with enough slack that a 90º angle is no problem. Same with any decent aftermarket display.

    Jeff Suovanen -

    If you look at the enlarged image, you can see how the flex cable from the camera / speaker is in tension. This is my opinion. Sorry for my bad English

    Si usted se fija en la imagen ampliada, puede ver cómo el flex cable de la cámara/altavoz está en tensión. Esta es mi opinión.

    Perdón por mi mal inglés

    txaukos -

    your English isn’t the issue, it’s the proposed 60 degree opening space that doesn’t allow for the removal of the screws of the mounting plate where the connectors connect to the main pcb…

    if can make a recommendation here; it helps if the can is full and not refrigerated, the weight helps in keeping the phone where it should stay without adding additional tension to the ‘flex’ ribbon cable. it’s called flex for a reason people, if your breaking these the phones already been overheated too much, the cables become brittle and should also be replaced. i replaced my battery without disconnecting the screen, at 90 degrees with a rubber band around an empty beer can. pierced the orig. battery and caused sparks. albeit, i wasn’t in a hurry and it took me a good 30+ minutes, removal of the battery and stickers is by far the most challenging, especially when NOT disconnecting the screen…

    it’s not a race, take your time. move slowly but precisely with forethought and persistent force…

    circuitbender 477 -

    Werkt dit ook voor iPhone 7(plus)?

    Christina Pegtel -

    Werkt dit hetzelfde voor iPhone 7 (plus)?

    Christina Pegtel -

  8. ta6UXCeMXDwLJgff
    ta6UXCeMXDwLJgff
    upsHlSBJpnH1YuWb
    • Mehrere Clips am oberen Rand der Display Einheit bilden fast ein Scharnier, durch das das iPhone wie ein Buch aufgeklappt werden kann.

    • Achte während der Remontage darauf, die Clips direkt unter dem oberen Rand der Rückseite zu befestigen. Dann schiebe die Display Einheit nach oben, bis der obere Rand bündig mit dem der Rückseite ist.

    I would recommend protecting the screen once the display is free and the suction cup has been removed. This will help avoid any possibility of accidental scratching of the display crystal while the remaining steps are being performed. I used an inexpensive screen protector then removed it after reassembling and testing are complete.

    anthonyspampinato -

  9. LJRiWB63gTcRLjuo
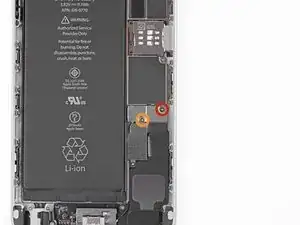
    • Entferne die folgenden Kreuzschlitz-Schrauben von der Abdeckung des Akkuanschlusses:

    • Eine 2,3 mm #00 Kreuzschlitz-Schraube

    • Eine 3,1 mm #00 Kreuzschlitz-Schraube

    for the iPhone 6 Plus, all screws were Phillips #000

    Michael Adams -

    I had difficulty removing the 3.1mm (iPhone 6 Plus / Phillips #000); had to give it significant downward pressure to get it started.

    Allen Matheson -

    stripped the 2.3mm screw attempting to remove, had to use excessive force to successfully remove

    Matthew Gao -

    The Phillips bits provided in the kit would not engage the Phillips heads enough to loosen them. Luckily I had my own small screwdriver set that worked like a charm.

    David Davis -

    Same issue. Could not remove the screw. Dead in the water.

    Tiffany -

    Agree with above comments regarding the supplied Phillips bit. It is not the correct size.

    Use a Phillips #000.

    bobgottner -

    Phillips #000 is what’s included in the kit. As others mentioned above, firm downward pressure is key. The phone is not that delicate; just press hard and crank it.

    Jeff Suovanen -

    Is this step necessary ?\

    Asianay -

    @asianay0129 Yes, disconnecting the battery is necessary. You can sometimes get away with skipping it, at the risk of destroying something important and potentially bricking your phone. Not a wise gamble for the sake of skipping two screws.

    Jeff Suovanen -

  10. LJPr2uMXVAFoskqs
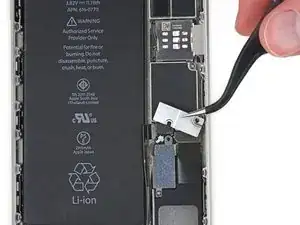
    • Entferne die Akkuverbindungsklemme aus Metall von dem iPhone.

    Was not able to remove the battery connector bracket as one of the cable connectors was glued/stuck to the underside. Instead moved the bracket out of the way to disconnect the battery. Care should be taken not to over bend/stretch the ribbon cable.

    dwtan -

    That may be just the foam connector adhering to the bracket. If you pull up gently and twist slightly it should separate.

    Evan Noronha -

    It was the foam connector, and it did twist free with a gentle pull

    Al Taylor -

  11. ZSMGcLEnPMdHYkKr
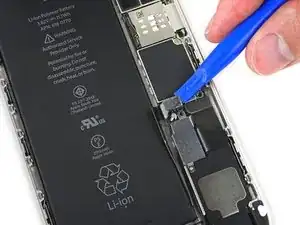
    • Heble den Akkustecker vorsichtig aus seinem Anschluss auf dem Logic Board. Das kannst du entweder mit einem sauberen Fingernagel oder mit einem Öffnungswerkzeug aus Kunststoff machen.

    • Achte darauf, dass du nur am Akkustecker hebelst und nicht an der Fassung auf dem Logic Board. Wenn du an der Fassung hebelst, kann der Anschluss brechen.

    you may consider placing a thin non-conductive item between the connector and the socket like a bit of rubber band to prevent any power flowing during this procedure

    Michael Adams -

    It was too close to other parts to pry up with either end of plastic tool. Finally used 1 tine of tweezer to lift edge. Came free easily

    Al Taylor -

    J’ai pris une loupe pour bien observer l’endroit où placer l’outil.

    Paul Briffaut -

    Magnification is key for many tasks and this is certainly one.

    Kenneth Gilbert -

    I couldn’t use the iFixit blue opening tool to pry that battery connector. I used the top of the black spudger near the hole where the 3.1mm screw was in step 9-10 to easily pry it open!

    Alyssa Sayuki -

    The blue plastic board breaker can easily cause damage here. Professionals would recommend using the human fingernail as the ideal tool for this job.

    Jessa Jones -

  12. U3B3TTmJCH2tYSMQ
    • Entferne die folgenden fünf Kreuzschlitz-Schrauben, mit denen die Kabelabdeckung der Display Einheit befestigt ist:

    • Drei 1,2 mm Schrauben

    • Eine 1,5 mm Schraube

    • Eine 2,9 mm Schraube

    • Versuche nicht, längere Schrauben in die rot markierten Schraubenlöcher einzuführen. Andernfalls kann es zu irreparablen Schäden am Logic Board kommen.

    There's an other panel with one screw in the middle.........

    Herbert -

    Sounds like you have an iPhone 6s Plus, rather than a 6 Plus. Be sure to use the correct guide! And make sure you’ve ordered the correct part, as they’re not cross-compatible.

    Jeff Suovanen -

    I _love_ the color coding of screws. I know this is a little OCD, but it would be incredibly useful if there were an 8.5 X 11 you could print with indicated homes for where to drop items from each step of disassembly. That is, in the box for step 9, little colored circles for where to place each screw type. As long as you don't jostle the paper, it would make it a lot easier to know exactly where you are in reassembly.

    cscarlson47shop -

    I have done the exact same thing. Created a sheet where each screw goes.

    Chris Murphy -

    I used the 000 bit from the ifixit 54 piece kit.

    hhandh -

    Actually you don’t need to do steps 12 to 18 if you attach the display panel to the iPhone box as shown in step 7 and handle your iPhone with care during the replacement. I didn’t disconnect the display panel mainly because the more you work on the interior of your phone the higher is the chance you break something.

    Dany Castillo -

    Since this guide is for DISPLAY replacement, I don’t see how you can skip the steps for disconnecting and removing the DISPLAY.

    Jim Bateman -

    That's what I was thinking.

    The Wizard -

    I skipped this series of steps too. I was very careful when removing the battery and never had an issue with the screen leaning back against the box that this battery shipped in. I even broke half of the third strip of adhesive but used a plastic card to slide under the battery and it slowly lifted out without applying heat.

    mark -

    I'm having trouble with one screw not wanting to come out. Any suggestions to keep from stripping the head and getting it?

    Patric -

    which screws are which sizes cause i ordered new ones and cant figure it out

    MONsterHEIT -

    I also did not see the need to remove the display assembly for this repair. However I did place a can of corn against the vertically positioned display and then secured the display to the can with a rubber band.

    whiteshephard -

    I recommend removing the display assembly, I didn’t and somehow damaged the home button cable. At least remove the cover to ease the tension on the cables.

    Steve Schlotter -

    I played around with different screwdrivers to get certain screws out. I made sure I wasn’t applying heavy pressure so I wouldn’t strip the head. Apple is crazy for doing this to us lol.

    Anyways invest in a magnetized mat to organize your screws. It was really difficult to keep things organized and still, especially with these tiny screws…

    Jeffrey Robinos -

    what happens if i forgot to put the ribbon cable shield back on? the phone is now working but i forgot to put the shield back on and i am missing 2 screws. can i leave the shield off?

    Fred ticoman. -

    @ticoman12 It’ll work without the shield, but the connectors may pop out unexpectedly.

    Jeff Suovanen -

    Just be really careful remembering which screw is which. I drew a quick sketch of the bracket, then put the screws in the relevant places. There’s no way I would have been able to figure them out otherwise - my eyes can’t see the difference between a 1.2 and 1.5mm screw!

    Paul Johnson -

    The most fiddly part of the job.

    Much easier if you put the screwdriver head on the screw and then insert it into the opening. The slight magnetism will hold it in place. Don’t fully tighten a screw until all the screws are in place. Much like installing lug nuts on a car.

    GPZ -

    I also skipped steps 12-18 as Danny had suggested. It made this repair quite easy, so thank you and others for suggesting this. I was also very careful to allow the battery to discharge before starting the process.

    Bruce Platt -

    I question whether Steps 12-18 (separating the display from the case) is actually necessary? The battery can be removed/replaced with the display connected (but standing upright, as displayed in Step 7.

    Leaving the display attached obviates the most difficult steps (re-connecting the various control ribbons — 3/4 of ‘em!

    I followed this manual completely and the repair was successful. But if I had this to do over, I’d leave the display connected.

    Dana Smith -

    I skipped the steps 12-18 as well and thank goodness I did so I won’t have to worry about issues with any of the cables.

    my panel is different from what is pictured anyway ‘cause I have one screw in the middle like what Herbert said on the first comment.

    Maria Filamor-Robinson -

    I realized too late just how handy the magnetic mat is that they have in their shop. So I organized the screws with a piece of clear packing tape. On the smooth side, use a sharpie to draw spacious circles with “R” “O” and “Y” inside each circle to represent the color coded screws and then use the sticky side to keep the screws in place. I found that using the tweezers to take them off the screwdriver helps you stick them head first to the tape better.

    Selena Castillo -

  13. oeZLN21DdDdbvjRR
    • Entferne die Kabelabdeckung der Display Einheit vom Logic Board.

  14. OjcHpgixN21XNEyj
    OjcHpgixN21XNEyj
    A3ZI2IVLXNiGbXmP
    • Passe bei den nächsten vier Schritten auf, dass du nur die Verbindungen der Kabel löst, und nicht die Anschlüsse auf dem Logic Board.

    • Halte die Display Einheit immer noch im 90°-Winkel, um die Frontkamera und das Sensorkabel zu lösen. Dazu kannst du deinen Fingernagel nutzen oder ein Öffnungswerkzeug aus Kunststoff.

    Why does the screen need to come off?

    Sterling Coffey (N0SSC) -

    Because the cables are delicate, and following steps are easier if phone halves are not flopping around together, especially for amateurs.

    Matthew Goheen -

    I don't know if anyone will see this but here it goes: for the life of me I can't get the front-facing camera and earpiece speaker connector to seat. Everything else went back together fine but this one connector will not go in. Sometimes it seems like it's in even though it doesn't really pop in and it'll kinda sit there for a sec and then it pops out.

    Any insight would be greatly appreciated, thank you

    Droopy Caledonia -

    Try starting at one end instead of in the middle. It's to easy to bend a connector and this way, I can get a safe start and go from there.

    Rongwey -

  15. 16RAXK24KKO3nXDB
    16RAXK24KKO3nXDB
    J1NHr5jAvnoVLIak
    • Trenne den Anschluss vom Home Button Kabel.

  16. RPMd1FAQrkS6RYAC
    RPMd1FAQrkS6RYAC
    NuWrHmArFoiewC5H
    • Vergewissere dich, dass der Akku abgeklemmt ist, bevor du das Kabel in diesem Schritt trennst oder wieder anschließt.

    • Nutze ein Öffnungswerkzeug aus Kunststoff, um das Touchscreen-Kabel zu lösen.

    • Beim Wiederzusammenbau kann sich das Displaykabel vom Anschluss lösen, dann würdest du entweder einen ganz schwarzen Bildschirm sehen oder weiße Linien im Display. In dem Fall kannst du dann einfach dieses Kabel wieder neu anschließen und dein iPhone zurücksetzen. Zurücksetzen geht am einfachsten indem du den Akkuanschluss trennst und dann wieder anschließt.

    The piece of advice about power cycling the phone by disconnecting and reconnecting the battery proved crucial to the success of my repair (camera and lens replacement). At first when charging the phone after closing it, I got a dark, blank screen with an intermittent buzzing noise. After re-opening the phone and making sure all cables had been properly reconnected, I ignored the advice to power cycle the phone. Still all I got was a dark, blank screen (and intermittent buzzing if charging t). Then I opened it a third time (leaving the screen connected and attached at a 90 degree angle) and I only disconnected and reconnected the battery. Voila! When I closed the phone and powered it up, I got the screen to light up!

    Gianni -

    how did you disconnect and reconnect the battery?

    Teresa Trevino -

    If you’ve been following the guide, you already disconnected it in this step. To reconnect it, just line up the connector and press it into place.

    Jeff Suovanen -

    After replacing the battery, the phone seems dead. I thought it just needed recharging so I left it charging all night. Still dead in the morning. Now I think it might be because the display data cable is off, and I should open the phone and check it. But the battery might be on full power in that case, and they don’t advice to open the phone when battery if full. What can I do?

    Ila Awasthi -

  17. hlwtXUrvwWbuNevM
    hlwtXUrvwWbuNevM
    QcvyhaiVdpcGaaK4
    • Zum Schluss musst du nur noch den Anschluss des Touchscreen-Kabels lösen.

    • Achte beim Wiederanschluss des Kabels darauf, nicht in der Mitte des Steckers zu drücken. Drücke erst an einem und dann am anderen Ende des Steckers. Wenn du in der Mitte drückst, kannst du den Anschluss und das Kabel des Touch Panels beschädigen.

    some images and guidance regarding reassembly would be helpful. You don't need to use the spudger to get them back on: fingers are better because there's a really subtle click you feel when you get them seated properly.

    cscarlson47shop -

    When you're reassembling, a note that this is the step where you should test for proper screen function would be really useful. First time I reassembled, I didn't seat something properly, got all the screws back together and then realized the screen wasn't functioning properly. Had to disassemble back down to step 14 and then re-reassemble.

    cscarlson47shop -

    I am having this issues right now! I have unplugged and plugged in these cables at least 20 times and each time I get white lines. I finally have it to where there are only 4 white lines and I am almost willing to live with it. Any suggestions?

    mattmay002 -

    Clean the screen connectors incase they are not making a clean connection

    Karen Jones -

    I'm having nightmares with the digitizer connector. Simply can't get it to work unless I'm applying some pressure on the connectors. Everything seems almost microscopically clean. Any suggestions friends?

    Henry A -

    could it be the replacement screen? test with your old screen and see if you have the same problem.

    Charles -

    To ++mattmay002++  Did you power cycle the phone? Check out the comments on the previous step for a how to.

    Robert Liles -

    I had issues with it too. When connecting this cable, make sure to rock finger side to side after connecting. It’s a wide connector so try to listen for 2 clicks on this one connector. That’s how I fixed mine

    Albert Einstein -

    Re-attaching this cable is the only tricky part to replacing the battery on my 6+. It had a bow on the middle that I had to flatten out before pressing the connector on with finger first on one edge and then on the other. I had white tire tracks on the screen and no touch screen until I connected it correctly. The front has to rest in just the right place on the back while attaching this thing so the cables aren’t strained the front doesn’t fall down. Small fingers would be a plus at this step.

    richard -

    Reseating these connectors on reassembly is definitely the most difficult part of this repair. It took me several attempts before the lowermost connector would seat properly and I did accidentally bend it slightly in the process. Fortunately I was able to get it straight again and get it to click in. The other three went in fine though and no lasting damage seems to have been done.

    Andy Gibbons -

    Another thing - These cables can become overlapped in the wrong way and make you think they are in a different order than they should be. Eg. it’s easy to mix up the ones from step 15 and 17. You can actually unravel the cables and re-layer them on top of each other in any order, so remember this! They look like they’re one solid mass but they’re not.

    domarius -

    I never removed the last digitizer connctor. I removed the first three connectors, left the screen propped at 90 deg tied to a box and removed the battery, there is minimal movement. In fact when I reattached the connectors, only the first and maybe second connector feels taut, so it’s necessary to only remove the first connector if you can be gentle with it. Less headache. And my guess why so many people had issues is that micro dust gets into the connectors and cause connection loss. You be surprised how little dust can cause havoc.

    darrcc -

    And forgot one thing, keep a can of air duster woth you to remove as must dust as you can see. A camera air blower will also do nice.

    darrcc -

    I haven’t removed my screen in past battery replacements, I found it easier. However, this time I followed the instructions because my old battery was very stuck, and I needed the screen gone to get the battery out…

    When I replaced the screen, at first it wouldn’t even boot/start up. (Yes, I inserted my own testing step, as someone here suggested, before final reassembly).

    The screen would just show a fuzzy image, and the board that all the cables attach to would heat up, then it would turn itself off. I tried reconnecting them carefully 3 times, and even made sure to get a little “click”, all to no avail.

    The final try, I used my fingernail to really press down on the back side of the digitizer cable. I heard more clicking, though I thought I might be tearing the cable too. With nothing left to lose, I continued across the back, and heard several more clicking/tearing sounds.

    This worked, and it booted after that. It still had white lines, but those faded away overnight.

    Morgan Giddings -

    About the digitizer connector: its flat cable is so short that the when I attempted to seat the next connector, its flat cable pressed on the digitizer cable, which can pull on the connector and dislodge it. That happened several times for me before success.

    Robert Bernard 27 Nov 19

    Robert H Bernard -

    Nous n’apercevons pas bien les nappes et l’ordre dans lesquelles elles doivent être replacer

    Patrick AZOULAY -

  18. 3gOJDeXwSv2IQKrW
    • Nimm die Display Einheit von der Rückseite ab.

    Never remove the screen without disconnecting the battery. It's possible the back light can be blown and that's a even more difficult repair. Always, ALWAYS, disconnect battery before repairing items. (Unless it's not possible.)

    Marvin Ballard -

    How do you disconnect the battery from the screen?

    Shamil Bhatti -

    The Step 11 disconnects the battery :)

    jeffxtechs -

    I think you mean Step 8 :)

    Jeff Suovanen -

    How do you disconnect the battery

    I tried it once and

    Brian -

    And what? I tried it once and here’s a million dollars?

    Oh I get it… they got him! :(

    https://www.youtube.com/watch?v=UlznqpBg...

    domarius -

    When disassembling the iphone at this point note the cables, and there placement/orientation.

    GERARD SZAREK -

    Be really careful with the step after this. Do not commence until you have read all the comments. You need to get a good hold of the plastic strips preferably before they double over on themselves. You have to avoid puncturing the battery at all costs. Slowness and caution here will save you a lot of long term pain.

    Laura Houghton -

  19. 2ZUdPaufvZZNPAOO
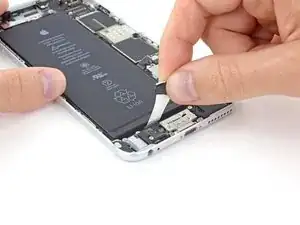
    • Ziehe den ersten Akku-Klebestreifen, ausgehend von der unteren rechten Ecke des Akkus, nach unten weg.

    • Benutze deine Finger oder eine stumpfe Pinzette und sei extra vorsichtig wenn du in der Nähe des Akkus arbeitest – einen Li-Ionen Akku aufzustechen kann gefährliche Chemikalien freisetzen und einen Brand verursachen.

    Ça été pour moi la partie la plus difficile du démontage de l’iPhone, j’ai cassé les 2 bandes parce que je ne me suis pas bien appliqué pour les décoller avec la pince. Pour m’en sortir,. j’ai tordu la batterie avec les outils de manière à faire apparaître les bandes adhésives pour les enlever sans problème.

    Paul Briffaut -

    Translation from Google:

    It was for me the most difficult part of the disassembly of the iPhone, I broke the two bands because I did not apply well to take off with the clamp. To get out of it ,. I twisted the battery with the tools so that the adhesive strips appeared to remove them without any problem.

    Ken -

    Slowly roll the pulled-out adhesive onto itself as you progress, this makes it easier to gauge how much stretch you need to exert on the remaining adhesive, as well as to gain enough grip to hold the adhesive properly. I also nearly tore off the middle one, it’s not due to my rough but because the battery’s black tape (at the area where these adhesive tabs are) caught onto the white adhesive, this must be the reason why most people’s tore off. Mine nearly tore off, so i slow rolled the pulled-out adhesive to catch back the adhesive, and then it’s roll and pull as per normal. With that I took equal precaution for the last one on the left, and it also was caught by the black tape, but since i know it this time, i slowly pulled it free of the black tape first before continuing the roll snd pull. 100% works. Trust me. My battery is slightly warm as i deliberately let it run for a while before i started the disassembly. I doubt it contributes much to the removal but no harm.

    darrcc -

  20. xkbFZF32KVyZ1eaY
    xkbFZF32KVyZ1eaY
    LvbN2XAYHniL1hxc
    • Versuche dabei die Streifen möglichst glatt und knitterfrei zu halten. Verknitterte Streifen verkleben leicht und können reißen, anstatt sauber herauszukommen.

    • Ziehe einen Akku-Klebestreifen ganz langsam weg vom Akku zum unterem Rand des iPhones hin.

    • Der Streifen sollte sich erst dehnen, bevor du fester daran ziehst. Wenn du merkst, dass er sich nicht mehr dehnt, dann lasse nach, sonst reißt er.

    • Ziehe in einem möglichst flachen Winkel, ohne dass der Streifen an einem der Bauteile im unteren Bereich des Smartphones hängen bleibt.

    • Drücke beim Herausziehen des Streifens nicht auf den Akku.

    • Der Streifen wird sich auf ein Vielfaches seiner ursprünglichen Länge ausdehnen. Ziehe ihn langsam solange heraus, bis er sich loslöst und unter dem Akku herausrutscht.

    • Wenn die Zuglasche am Akku beim Ausbau reißt, dann fasse mit den Fingern oder einer stumpfen Pinzette am Reststück an und ziehe weiter heraus.

    • Wenn ein Klebestreifen unter dem Akku reißt und nicht mehr erreicht werden kann, entferne so viel du kannst und mache folgendermaßen weiter.

    I found this much easier than when I did it on a 5S. Not sure if the adhesive strips are different, but I also left the phone on a radiator for a few minutes to help warm the glue. All three then pulled straight out of the phone in one go.

    James -

    I set my phone on a microfiber cloth on a plate that I had warmed (warm to the touch and that I could hold with my bare hands) in the microwave prior to this step. All 3 strips came off from the bottom and without any trouble.

    armitagd -

    Excellent tip, thanks.

    vanshdx10 -

    absolutely impossible unless you heat it. Thank You armitagd, that did the trick.

    chris -

    All three of mine tore off immediately, I had warmed the phone up too. A bit of a struggle with the tweezers and card method, the battery bent and leaked. Came out okay.

    John Blanchard -

    I recommend preheating the case before trying to remove each adhesive tape. Also, try wrapping the tape around a pencil as you pull and stretch the tape. I think that such gives a more even pull across the tape than by using one’s fingers.

    GPZ -

    I even didn’t find an adhesive in my phone, I had to use hairdryer to heat the battery, then remove it gently using the blue plastic and couple of plastic cards

    Mohammed Jitarayah -

    I can’t stress enough how important it is to preheat the case as others have mentioned. GPZ’s recommendation using a pencil is also pure gold - get enough initial purchase on the adhesive strip so that you can pull it taut and then place your pencil. From there, roll and tag alternately, keeping tension on it so that the adhesive doesn’t wrinkle in the process of removal.

    Jesse Espe -

    Heating probably works but I slowly pulled out an inch or so and then started rolling it onto my screwdriver. Then I slowly rolled the screwdriver which gave me a good grip and I could go slowly. Took more than 5 min but it got easier and easier. Believe me, getting the battery out using the alternative is very hard, and dangerously easy to penetrate the battery and start a small flame thrower (voice of experience).

    Thomas Hayes -

  21. iXjapOwnEaynoaeL
    iXjapOwnEaynoaeL
    EriithwI6CnyIfGE
    • Ziehe den zweiten Akku-Klebestreifen an der anderen Seite des Akkus zurück.

    • Ziehe wieder vorsichtig und langsam am Streifen, er wird sich dehnen, bis er zwischen dem Akku und der Rückseite herauskommt.

    • Mache solange weiter, bis der Streifen sich komplett vom Akku löst. Wenn er reißt, dann versuche das Reststück zu fassen und weiterzuziehen, oder fahre mit den folgenden Schritten fort

    This strip broke almost immediately with the first pull. I changed the battery on two iPhone 6 Plus’s. Impossible for me to retrieve broken ends. I moved on to the middle strip with no issue. I then used the blue opening tool to pry the battery up along the lower right edge of the battery (BE CAREFUL!). Once the battery is leveraged up enough to put the tip of the tweezers on the broken strip, grab a piece of the strip and pull it to a point where the removal process can continue as prescribed.

    whiteshephard -

    Pulling the strip around the corner did not work for me - it broke. I then pulled the middle strip straight out with no issues and the remaining left strip also straight without no problem. I don’t recommend pulling the side strips around the corner of the battery

    Swenja -

  22. s5l3lhbWXFeQKOnL
    s5l3lhbWXFeQKOnL
    FtGlvTw6TeLcxQFw
    bb2ICvmSOEDDWCDh
    • Löse die letzte Zuglasche von der Unterkante des Akkus ab. Ziehe dann die Zuglasche behutsam nach oben vom Akku weg, so dass der Klebestreifen langsam zwischen Akku und Rückgehäude herauskommt.

    • Lege beim Herausziehen des letzten Streifens die Hand über den Akku, damit der Akku nicht herausgeschleudert werden kann.

    • Ziehe so lange, bis du den Streifen komplett aus dem iPhone entfernen kannst.

    • Wenn du alle drei Klebestreifen erfolgreich entfernt hast, fahre mit Schritt 24 fort. Falls einer der Streifen gerissen ist und Reste unter dem Akku kleben, gib einige Tropfen von hochkonzentriertem Isopropylalkohol (mehr als 90%ig) an der Stelle, wo der Klebestreifen gerissen ist, unter die Kante des Akkus.

    • Lasse den Alkohol etwa eine Minute lang wirken, damit der Klebestreifen geschwächt wird. Hebe dann den Akku mit dem flachen Ende des Spudgers vorsichtig hoch.

    • Versuche nicht, den Akku mit Gewalt herauszuhebeln. Tröpfle mehr Alkohol hinein, falls das nötig ist, um den Kleber zu schwächen. Verforme niemals den Akku und stich ihn nicht an.

    • Heble nicht gegen das Logic Board, du könntest sonst das iPhone dauerhaft beschädigen. Heble nicht im Bereich zwischen der oberen Kante des Akkus und dem Lautstärkeregler (-) ein, sonst riskierst du, das Kabel zu den Lautstärketasten zu beschädigen, das direkt unter dem Akku in das Rückgehäuse geklebt ist.

    • Im folgenden Schritt werden noch Alternativmethoden zum Ablösen des Akkus gezeigt.

    I don’t know why the instructions didn’t mention this, but I pulled it to the left and back, like the previous strip, rather than straight back, to avoid snapping.

    domarius -

    Pull the adhesive strips at a 45° angle up away from the back or the strip will catch on the bottom board and will tear and break. If it starts to tear, , see if you can grab a spot after the ear and keep pulling. These things are super thin and fragile. Go sloooow when you pull the strips. You are going to pull them a long way, so be patient.

    Ok, so you broke one. Or two. Or all three. Forget the alcohol. Lay your phone face down on a towel and heat it with a hair dryer for two minutes. Flip it over carefully as it will be hot. Insert a plastic spudger under the bottom edge and carefully push/slide it under the battery toward to top of the phone along the strip(s) that are still stuck. DO NOT PRY. You may have to heat it again if it gets hard to push. BE CAREFUL. The battery will bend a bit, but don’t bend it excessively or poke it as it can catch fire when exposed to air. Eventually the battery will pop free. Remove the stuck adhesive and wipe it a bit with alcohol and let it dry.

    Sheldon Carpenter -

  23. WDMV6KXB5ByPaY5E
    • Wenn der Akku immer noch festklebt, dann kannst du einen heißen iOpener oder einen Haartrockner benutzen, um damit die Gehäuserückseite direkt hinter dem Akku zu erwärmen. Sie sollte so heiß sein, dass du sie kaum anfassen kannst.

    • Hebe den Akku dann vorsichtig mit einem Öffnungswerkzeug aus Kunststoff hoch.

    • Wenn das iPhone zu heiß, wird kann sich der Akku entzünden.

    • Alternativ kannst du auch ein Stück Zahnseide benutzen, um den Akku von der Gehäuserückseite zu lösen. Eine stabilere Alternative ist eine Gitarrensaite, zum Beispiel eine 0,009 E Saite aus einem 12er Set.

    • Fädle die Zahnseide oder die Gitarrensaite unter ein Ende des Akkus und ziehe sie dann wie ein Säge hin und her, um den Kleber zu lösen.

    Hat leider alles nicht geklappt! Musste mit einer Karte und einer Seite sehr lange fummeln und da sich die Folie vom Akku zu sehr mit dem gehäuse verbunden hat. Dadurch hat sie sich gelöst und durch das erwärmen leider auch nicht wirklich besser.

    Jess Sass -

    Translation from Google:

    Unfortunately, everything did not work out! Had to fumble with a card and a page for a long time and because the film from the battery has too much connected to the housing. As a result, she has solved and by warming unfortunately not really better.

    Ken -

    This step was very difficult as the adhesive strips snapped on me and I had to use a card to make the strips come out by siding the plastic card on the strips as thought I was trying to cut a very thin slice of cheese. (NOTE: DO NOT USE ANYTHING METAL when attempting this method) I actually tried using a metal spudger while trying to remove the adhesive strips and punctured the old battery slightly enough to cause smoke.

    Bryan -

    iBreak-it: caught the wifi antenna connector when using a guitar string to work the extremely stubborn battery adhesive strips off. Now I need a new wifi antenna. What next?

    Dale Williams -

    Lay your phone face down on a towel and heat it with a hair dryer for two minutes. Flip it over carefully as it will be hot. Insert a plastic spudger under the bottom edge and carefully push/slide it under the battery toward to top of the phone along the strip(s) that are still stuck. DO NOT PRY. You may have to heat it again if it gets hard to push. BE CAREFUL. The battery will bend a bit, but don’t bend it excessively or poke it as it can catch fire when exposed to air. Eventually the battery will pop free. Remove the stuck adhesive and wipe it a bit with alcohol and let it dry.

    Sheldon Carpenter -

  24. JMaZonjUUpwmD1nf
    • Nimm den Akku aus dem iPhone.

    • Sollte dein Ersatzakku in einer Plastikhülle geliefert werden, entferne zuerst die Plastikhülle vom Akku, indem du die Hülle vom Flachbandkabel abziehst, und setze erst dann den Akku ein.

    • Wenn noch Reste vom Alkohol im Smartphone verblieben sind, dann wische sie sorgfältig weg oder lasse das Gehäuse gut austrocknen.

    • Stecke vor dem Festkleben des neuen Akkus den Akkustecker vorläufig in den Anschluss auf dem Logic Board ein. Dadurch nimmt der Akku die richtige Position in seiner Vertiefung ein.

    • Klebe den Akku fest, löse den Stecker wieder ab und fahre mit dem Zusammenbau fort.

    • Wenn an deinem neuen Akku noch keine Klebestreifen dran sind, dann folge dieser Anleitung, um die Klebestreifen korrekt anzubringen.

    • Führe nach dem Austausch einen Hard Reset durch. Dies verhindert einige Probleme und vereinfacht die möglicherweise dennoch anfallende Fehlersuche.

    Once again, ifixit comes through! I bought the battery and the repair kit and the new battery installed and charging. My only hitch was that the three adhesive strips all broke when I pulled on them. I had to heat the bottom of the phone to separate the battery. It was a small moment of panic, but it just required a bit more patience. Thanks for all you do!

    jamesg -

    Awesome procedure! Thanks. iPhone 6plus working great. Make sure you have quality tools. Thanks again.

    Leo Lambert -

    Everything went well enough but, I replaced the battery last month and after a while the phone started going into an on-off cycle. It only happens intermittently. At first it would do it only once and stop. Now it does it, still intermittently, but when it happens it keeps cycling on and off. It even does it when it’s charging. If I let it sit, while charging, after several hours it stops doing it again.

    Larry Ingerling -

    The battery kit didn’t come with adhesives. It seems that I’m not the only one to mention it .

    Nat Turner -

    Hi there! The battery kit does come with replacement adhesive along with all the tools needed to complete the repair. The part-only battery does not include adhesive, it needs to be purchased separately!

    Sam Goldheart -

    Almost blew up the battery with alot of holes, im traumatized. In the end i did by force and trew it 10 meters away while i were outside.

    Milan -

    i turned on my phone and the screen is all stripes :(

    Emily M. Curran -

    Sounds like either the display cable isn't properly connected or it’s been damaged. If all else fails, send it to a professional.

    Rongwey -

    The Ifixit battery comes with new adhesive strips already attached to the battery. Suggest that it’s best to leave the protective acetate over the strips until AFTER the new battery is re-connected and the connector cover is reinstalled (2 screws). Then its easy to remove the acetate cover from the adhesive strips and locate the battery.

    If the battery is stuck in (with the adhesive strips BEFORE the connector is correctly installed it is impossible to adjust the position of the battery to align the connector.

    Dana Smith -

    My screen doesn’t even show up anything when charging but it makes the sound thought.

    Osvaldo G -

Abschluss

Vergleiche das neue Ersatzteil mit dem Originalteil - du musst vielleicht fehlende Teile übertragen oder die Schutzfolien vom Neuteil abziehen, bevor du es einbauen kannst.

Um dein Gerät wieder zusammenzusetzen, befolge die Anleitung in umgekehrter Reihenfolge.

Entsorge deinen Elektromüll fachgerecht.

Die Reparatur verlief nicht wie geplant? Auf unserem Forum findest du Hilfe bei der Fehlerbehebung.
Walter Galan

685541 Reputation

121 Kommentare

good instructions, i did the battery replacement successfully with a battery from Flashtechllc.

William -

very good instructions, i did the battery replacement!

kmsit -

Excellent instructions, finally i did it myself, THANK YOU VERY MUCH

exganza -

As always your guides are great. Replaced battery using iFixit tools and had a very painless experience.

jdlake -

Battery replacement was successful. Messed up with screen connection. Now I'll have to bring it to Apple for adjusting the screen thing...

guodonghu -

Awesome directions and battery replacement. I feel like I have a new phone. Maybe I won't upgrade to a 7 Plus.

John Karpinski -

Excellent job! The instructions were very detailed and illustrated. Very helpful to anybody new to iPhone 6.

Sadot Rioslugo -

did it exactly and my phone doesn't come back on.

Dennis Schall -

Nearly had a heart attack. Got the battery out out back everything together and my screen had lines in it and only half the screen worked. Eventually did some research and made sure that the cables for the screen were pushed in properly and it worked. Not a bad guide but just have to be careful with reattaching the screen. Everything else is easy especially if you don't mess up the adhesive strips.

ieswk -

great guide! was able to replace the batteries on my phone :) feels great! my only hitch was i tore the adhesive strips when taking them out but i managed to get the battery out with a combination of hairdryer to warm up the back of phone and using plastic cards and spudger thing to slowly pull it out. if i did it again i would probably use the hair dryer anyway to warm it up for like 20secs at a time and pull the tabs with even pressure (not too hard) and just be patient as it slowly peels off :)

thuaners -

Great guide. The phone I was working on was a refurb unit supplied by AT&T and the adhesive on the battery was more like glue. No tabs. Took heat, the card, and patience to get it out.

Larry Herrmann -

I have a question, My battery drains quickly for my IPhone 6s plus, and I want to buy a battery. does it make a difference? Will it last longer?

Albert -

Yes. Replacing the battery should fix this issue. If you have a iPhone 6s, you should follow this guide: iPhone 6s Akku tauschen

Evan Noronha -

Use the "Battery Life" app on the App Store to check battery health (current capacity, cycles etc). A new battery will make a difference. Disclaimer: not affiliated with app, just user.

Sarantos K -

Had a weird screen problem with just lines upon first re-assembly.

After several attempts the bottom most screen connector wasn't fully snapped into place.

Works great now.

fguyinc -

Terrific instructions and photos! Guides like this make doing the repairs so much easier. Thank you.

Paul McAllister -

Excellent instructions. Successful replacement !!!!

Pablo -

Thanks for the great instructions! It's a kind of nerve-wracking repair given how small the screws are and how fragile all the connectors seem to be, but everything went smoothly. Woo!

Seppo Helava -

Hey iFixit got my kit today and it went pretty easy. I did notice in the step by step when you follow the instructions using the iSclack if you click the "Skip to step 7" link it takes you to step 7 in the display replacement instructions. I noticed it pretty quickly when it started to have me remove the home button, but I could see it causing someone some trouble.

Other than that it went great.

yoodie2 -

Thanks for the tip! That step was being used in multiple guides, so the links got a little jumbled. I deleted the links to avoid confusion. Cheers!

Jeff Suovanen -

Only one glue strip came off the way it should have. It was a pain trying to get the old battery out, but I finally got it following the on here on ifixit.com. I also lost my grip on the screen shooing my cat away and screwed up the front facing camera/earpiece cable. I have a new one on order but should be fairly easy to replace. Great instructions, but smaller hands would be a plus when working on these. Smallest screws I have ever seen. Don't let my comments discourage you from attempting to fix your own phone. These are great instructions and the parts they sell here seem to be first rate.

Mark Weir -

Awesome instructions, thanks! The adhesive strips are super tricky. I got 2 out of the 3, and had to use a hairdryer + plastic card for the third. I found it was easiest to keep the hairdryer blowing on it from the rear while I broke up the adhesive with a plastic card. At any rate, thanks for the help!

Sean McRoskey -

I have a question. My iPhone 6+ doesn't like the cold. It can be 100% charged and in 10 minutes of no use it shuts off due to low battery. If I keep it warm it lasts for a while. Is this a battery issue?

Kelly McLaughlin -

Does the low battery appear during normal temperatures? If it does, then its the battery. If not, then it might be something else. You can try going to the apple store and do the genius bar appointment saying my batteries been acting weird. It doesn't matter if your under warranty or not, they'll say whats wrong and ask if you want to pay their overpriced fix but say no thank you and follow from what they say.

kosho123 -

Thanks I will go try that.

Kelly McLaughlin -

I recently got a replacement battery from ifixit and followed every step and now in the settings theres a pop-up saying that i have to service my battery. The new battery barely let alone lasts more than two hours even after fully charged. Can someone please help me out.

Kinley tsheten -

thank you very much

buzzbe -

Got the kit, 1hr and the iphone is back to new. I followed the advice of other reviewers about being careful to clip everything correctly and I managed to do it right at the first shot. A battery app said the capacity was down to 12% with the old one and now confirms I'm back to 100% efficiency. Great site!!!

gsz_83 -

i used the pointy black plastic stick in a rolling motion, to start pulling the adhesive strips...there is just a little bit of tacky there at the end that the point, if held almost parallel to the iphone and given a little twist to get it onto that tip. about to do the reassembly now...

richard -

success!!!

1 dropped screw that was found...""phew"".

i went ahead and removed the speaker, as i wanted to clean the 'grill'...i used alcohol and blew it out from the inside. got it nice and clean...no telling what THAT 'gunk' was...food grease i suspect(bought second hand...;)

now i have super sound coming from my iphone!!

richard -

Thanks, a lot!!!

John Doe -

THE BEST CUSTOMER SERVICE I EVER HAD!!!. I order my kit and got it in the next two days. When I got the kit I had everything I needed so I started to open my phone, but when I got to my Ph000 tool it was not undoing the screw. When I ask my brother to help he seen that the screw was striped. So I called Ifixit customer support and they answered on the second ring. The rep I was speaking with was so caring and listen to every word I said. He ask me for my order number and in 3mins he let me shipped out me another Philps screw driver.

Essence taylor -

Very clear guide by you guys. Like others, the adhesive tore before I could remove it from beneath the battery. I heated the phone a bit over the stove for a few seconds at a time and used the spudger along with the plastic opening tool to remove the battery. Using those two took quite a bit though because the adhesive was quite stubborn. The battery did get bent up a bit, which worried me at first, but it didn't break. As long as you're careful not to damage the ribbon cables and parts around the battery, then you should be good. Also, when placing the new battery in, make sure the battery cable is lined up with its connector because once you've placed that battery, it will be a pain to move it.

brandon julmisse -

After the battery replacement the battery won't charge more than 9%? Anyone knows what it could mean? Did the restart with the two buttons.

jonjohansson88 -

Hi, please I need your help my phone was draining so fast like 40% in the night even on airplane mode, so i changed the battery and it's still doing the same thing! I don't understand! Please help

Aderick -

Great instructions. Needs a better screwdriver. Suggest ifixit charge more for kit and include two adhesive strips in case one is harmed. Had I not owned a jeweler's screwdriver, I would have had big problems

Charlotte Crawford -

Very simple and straight forward replacement. I lost the tab for the left adhesive but with some pliers i was able to get it.

Dennis Burgos -

The guide was very well-written. The installation of the new adhesive strips was not addressed in the guide, but using some common sense it wasn’t any trouble. Thank you for a great experience and an easy replacement of a 3-year old battery that wasn’t holding a charge very well.

Neil Howell -

There’s a link to installing the adhesive strips in Step 28 ;)

Axel -

i suceed !!

a bit difficult to take out the battery because it is VERY sticky !

but now i have a totally new iphone 6 plus , for 30 euros !!

nice

juleshuet -

thank you for your tutorial, succed , the challange is not to sneeze and to put back tiny screw , LOL

arpangestu -

GAH! followed all the steps… and powering on, all i get is stuck in an apple logo loop!

craig rousseau -

looks like a faulty battery… phew... got a replacement battery from ifixit and installed with no issues... booted up and ran fine with a normal drain during use before calibrating.

craig rousseau -

Running into the same issue as well

Michael Erwin -

Great Instructions and kit, only issue i had was the phillips in the kit wasn’t of the highest quality and barley fit into the screws but I was still able to do the whole replacement. Also would have been nice if you showed how to attach the adhesive strips, not really hard but was surprised that step was missing. The Videos were a great help too!

Thanks iFixit!

yaleeast -

Everything went well, except now my iphone’s wifi does not work. What do i do????

Juan Perez -

Used the iFixit kit and battery and did the replacement on my iPhone 6+ - only issue was that one of the 1.3mm screws went flying off to an unknown destination. Reassembled without the screw and everything looks good regardless.

David Kerwood -

Replacement to the ifixit 6+ battery arrived in 2 days from iFixit!!! Thank you Augie F @augiefash

Michael Erwin -

Excellent instructions; followed for iPhone 6 Plus and it’s working great now. Thanks!

Allen Matheson -

My iPhone 6 plus battery just went dead one day and the only way to get it to work was to warm up my phone, but once it started to cool off the battery went from 100% to 0% in about 30 seconds. Needed a replacement fast, so took it to Apple Store and they wouldn’t do it because my phone was bent, too much risk to replace battery, “It might explode!”. They said they could sell me a refurb’d iPhone for $329. No thanks! Ordered battery online for $20 and followed these excellent instructions and “Bam”, iPhone is just like new. Of course, with a little bend in it. If you have a magnetic tray handy or even a magnet of some sort, I would set it off to the side and use it to hold the screws. Thanks again for the excellent instructions.

Todd Mackey -

Excellent instructions. However the strips ripped immediately on me and I was being super super careful. I found that heating the back with a hair dryer allowed me to remove the battery using a credit card relatively easily.

The strips to replace the battery, YOU MUST make sure the battery cable barely has any slack or it will bunch up and not close the iphone properly. I wound up having to sacrifice basically an adhesive strip and a half. No big deal. Phone is 4 years old and will be replaced shortly anyway.

THANKS IFIXIT!

christopherlainmorini -

I received not one but two batteries opened and missing items? both batteries were missing adhesive tabs and a set of pentalobe screws. The batteries had obvious tell tale signs of being installed. Im guessing the prior purchaser had buyers remorse once Apple’s announced discounted battery replacement program for $29 for iPhones throttled by aging batteries? Ifixit is most likely feeling the Apple’s backlash. I heard that ifixit has reduced its DIY battery install kits to $29 or less to match Apple's price? Id like a refund or a price reduction because I got screwed.....The Ifixit batteries are installed I lost out on apples replacement program and warranty....the only good news: I don’t have to go to the apple store for this replacement batterypalooza free for all event?

kevin willett -

Hi Kevin,

Sorry to hear of your purchasing experience. We’d like to assist! To avoid revealing personal information here on the guide page, please reach out to our Support team via help.ifixit.com so they can get you all squared away.

Thanks!

Kadan Sharpe -

Excellent instructions. I just changed out my battery with only one hiccup and everything works just fine! Thanks!

Troy Wilson -

Ed (Ted?): Thanks so much for sharing! Glad to hear everything worked out.

Jeff Suovanen -

These instructions are very good, but there are only a couple of things I would add:

1) The adhesive strips take more force to pull out than I had thought

and

2) When re-attaching all of the connectors, make sure you really snap them back in. I made myself nervous when my phone didn’t turn on when I had finished assembling, but I just hadn’t pushed the battery connector down enough for it to snap into place.

Another excellent repair guide!

Alex Kreitz -

I did it! Even though one of the screws flipped off as I was replacing it and it took me 20 minutes to find the teeny thing.Thanks to iFixit for the great instructions, very clear and easy to follow.

Paula Eshelby -

instructions were impeccable. thank you. after reviewing the info a few times it was clear i could remove the battery without messing with the front panel assembly or their attachment cables, as noted only in the second paragraph before the instructions begin above and as instructed in the iphone 6 battery replacement video. It took me only 10 minutes after i knew what i was doing. Note: my phone was EXPANDING because of a ‘used’ battery and the store would not simply sell me a new 30 dollar battery but tried to get me to exchange my phone for a refurbished one for 400 dollars. Using ifixit was a godsend. After hearing so many of you above had problems with disconnecting and reconnecting the display panel assembly and cables i just skipped that step as noted in the second introductory paragraph, and was very grateful. re the adhesive: if u have had experience using/removing ‘command’ brand adhesive with hooks etc, the battery adhesive removal was quite simple even with my ‘expanding’ battery.

tlcshift -

Be careful when you get the phone opened that you don’t stress the ribbon connectors at the top— I tore one of the ribbons and had to replace the whole front of the phone. Live and learn.

George Griswold -

I went slow, watched the video and followed the step by step directions. Everything came out fine the first time around, despite having gotten snagged with the adhesive strips during the battery removal phase! Thanks! Am hoping to get more than a couple hours with my phone now between charges!!

LAWRENCEDULAC -

Beschreibung ist sehr gut und ich konnte ihnen auch gut folgen. Das Schwierigste war die Klebestreifen zu entfernen. Hier muß man wirklich sehr vorsichtig agieren. Mir ist es passiert, daß ein äußerer Streifen gleich zu Beginn gerissen ist. Die Methode mit dem Heizen habe ich nicht versucht, sondern die mit der Zahnseide - nicht ganz so einfach. Nach ein paar Zentimetern konnte ich die Batterie vorsichtig anheben und das Ende des Klebestreifens wieder greifen und herausziehen. Den Link zum Anbringen der neuen Klebestreifen habe ich übersehen, konnte sie aber dennoch gut anbringen.

TMWDEI -

Excellent guide. It only took me 20 minutes to replace the battery in my iPhone 6 Plus. Making this comment from my phone too in an effort to start calibrating the battery.

Thanks iFixIt, you guys are my favorite.

Ryan R. Smith -

Thanks for the instructions! Strips were the only issue. Difficult to pry off. Was able to complete successfully in about 45 minutes! First time replacing a phone battery!

CBird

Colleen Bird -

Wow - amazing! It was a little daunting with the tiny screws. And I agree with the others, the adhesive strips seemed like a deal breaker, but everything went smoothly. iPhone 6+ clock speed on CPU Dasher X before battery replacement 600 mhz - immediately after battery replacement - 1400 mhz! Thanks iFixit!!!!

Phil Weinstein -

Installed my battery with no problems in November 2017. It’s February 2018 and I’ve noticed a very rapid decline in my battery life (currently 31% wear level). It’s only been 3 months with the new battery, I don’t believe this is normal. Anyone else having this problem?

Virak Riem -

@virakr Doesn’t sound right. If you got your battery from iFixit it’s under warranty for one year, so you might want to contact customer service and see if they’ll ship you a new one.

Jeff Suovanen -

Contacted support and after some troubleshooting, it was determined to be a faulty battery. They sent me a replacement kit immediately.

Virak Riem -

Adhesive strips should have been included with battery replacement kit. I realized I needed new strips only after I removed the old battery and installed new one. I am ordering one now, but, meanwhile, I’ll have to be extra careful with my iPhone, as the battery inside is moving freely. Unfortunately, I am going to buy strips elsewhere: iFixit wants $5 shipping for $3.99 strips.

eHippo -

@ehippo The kit includes replacement strips. If you chose the “battery / part only” option, well, it is what it says. BTW you can use some ordinary double-sided tape to keep the battery from moving until you get new adhesive installed.

Jeff Suovanen -

Just excellent!! I was so much easier than I thought. I feel so empowered!

Johanna Arias -

Awesome job Johanna ! :)

Kelsea Weber -

I successfully replaced the battery myself. My first iPhone developed the touchscreen disease problem about 2 years after I purchased it. Apple is criminal for not recalling the iPhone 6 and 6 Plus and offering a voucher or replacement with a better-constructed model. I then went through five more iPhone 6 Pluses trying to get one that works, four of those within the warranty period. Three times Apple sent me a refurbished replacement iPhone 6 Plus that had touchscreen disease right out of the box! I got my last one after the warranty expired by threatening to get an Android. The last one got the disease after about one year. I researched the problem and discovered that one or two chips needed to be replaced. The cost and time element was prohibitive. Then the only person for over 100 miles in all directions capable of microsoldering replaced my iPhone 6 Plus’s Meson chip and the problem was finally gone. Then the new chip must have used battery power faster since the battery quickly deteriorated.

sschafersman -

I replaced the battery but the phone wont turn on anymore and more moreover when I start charging I observed that the top of my phone near the front camera seems to be getting really warm. I was worried so I have disconnected the battery for now. I am guessing this is due to the loosely connected display / front camera cables. I will give it an other try today.

Hithesh Krishnamurthy -

Awesome guide.  Was able to replace battery in about 20 minutes with no issues at all.  Easier than I thought it would be

Brian Thompson -

Thanks a million for the guide Walter. I read through the guide a few times, looking at what other folks had issues with and when I was comfortable, I started. I liked the suggestion of using a full can of soda. I had a spare V1 Amazon Echo in my office and since those suckers are REALLY heavy, things never moved around a lot. I ordered the tool & parts kit from iFixIt and what can I say; no drama at all with getting that battery changed. In fact, it was much easier than I had expected. The only things that really gave me a bit of a challenge was the size of those iddy biddy little screws and my inability to see them without magnification and also the re-connection of the iddy biddy little cable connectors. A light touch, a good light, a little patience and you’re set! Again, thanks a million for the guide. Pete in Seattle.

Peter Haigh -

For some reason, the 3 strips under the battery literally dissolved when i tried to pull them from underneath the battery. then i noticed that the black casing around the battery was wearing away every time i barely touched it. now i’m too scared to continue because i don’t want the battery to get damaged and explode.

DPA6863 -

When I tried to pull my 3 battery strips, they snapped. ( USE HEAT ) on the phone back to make it easier to pull…

In your case , and mine, I had to find a tutorial how to remove the logic board. The reason was, I didn’t want to pry or push in a old credit card to try to pry up the battery.

After removing the main logic board ( motherboard) I was then able to go in from that direction to pry up the battery just enough to see the strips. Then I got a hair dryer and let it sit heating the bottom up for about 1 1/2 minutes. Then I was able to use the tweezers to grab the strips one at a time.

The old battery bent somewhat and after removing it, was worm. I flattened it on my desk and after about 1 hr it went cold again. The worst that will happen if you need to pry it out, it will get hot.

Anyname -

This is my second iPhone battery replacement. By far the 6 Plus is more challenging than the 4s. One note; be extremely careful when replacing the battery with new adhesive. If you’re too high or too low in the case, the connector will NOT line up. I suggest holding the battery at an angle and popping the battery connector on first. Sounds harder, but if you don’t get it right, you will be starting over. Other than that one thing, the instructions are spot on.

spung1 -

excellent instructions! I had a little trouble with the adhesive, but with a little patience I managed to get the battery loose.

Bill Lawrence -

My iPhone 6+ is draining battery power from 100% to 12% overnight. Do I need a new battery thanks Richard

tassierick -

Instructions are clear, but your guys’ repair kit needs some serious attention. One of my jobs is PCB rework, and my hobby is microsoldering, so I have all the tools I need. I got the kit to review it, and am marginally impressed. These are the main problems I saw: PH000 bit isn’t sharp enough for the Philips screws, the pentalobe bit is borderline too large as well, and these tweezers are a joke. They are a joke, right? I mean, a $5 pair from Techni-Tool would’ve made this kit so much better. These things are so wonky they can’t even pick up a grain of rice lol. Also, they are not ESD safe. They were until they were coated, however.

I do like that you can store the bits inside the handle, but this wasn’t a feature that was advertised. You could make this more obvious; your customers would appreciate it.

Over all, this kit may cause headaches for some people unless these problems are addressed.

anoxan .. -

Anally retentive pr!ck.

That sums it up!

This kit was perfect for what it is needed for. No stripped bits, included battery strips, included screen screws.

For how much??

Jessa Jones from iPad Rehab and Louis Rossmann working with iFixit for the Right To Repair.

I buy a battery kit for my 6+ and it worked. All tools did exactly what they were supposed to do. I even have iFixit tools so to have extras was nice.

Now then this is Feb 2019 when I bought it, although Fry’s might have old stock /shrug (they were out of stock a week ago now in stock so /shrug).

As far as the bits , screwdriver, and tweezers… I can’t even complain!

The only thing I can complain about is your lack of support for the ‘Right To Repair’ with your snoot.

I think iFixit has done a fantastic job giving a kit that includes tools and parts and well packaged for a great price.

Shut the front door.

PS, I would love to know your name on Louis’s streams.. IF you visit them.

Anyname -

Very good instructions. The battery replacement went surprisingly smooth. Thanks!

sudeep biswas -

Everything went very well! Thank you. My phone is back to working in top order.

Michael Thomas -

First attempt at this and I got it thank you! Although the battery adhesive did break I was able to use a blow dryer and an old credit card to remove the adhesive.

Sun Yang -

Success! Within an hour of receiving the kit, my 12 year old daughter and I had the old swollen battery replaced and the phone up and running. No problems separating the display or with the adhesive strips. Do not be deterred by the comments of those who experienced difficulty with the adhesive strips. Follow the guide carefully as it is all in there. And use some method of heating the adhesive. We used the exterior flat surface of our waffle iron, heating it up then unplugging it, and placed the phone on a mouse pad on the waffle iron for a minute. Once warmed the adhesive was easily removed. Thank you ifixit.

Craig Becker -

how come my home button doesn’t work any more? is there a fix?

Robert -

Read through the whole guide first before starting the battery replacement. Had i done that i would have read about the dental floss and the battery would probably have come loose much easier. The adhesive made it very hard to remove and old battery ended up U shaped, and of course the adhesive breaks off, i guess for most people? But successful replacement in the end.

Jon Smith -

Thank you for the wonderful guide. This was my first attempt at repairing something as small and intricate as an iPhone. I was able to complete the replacement of the battery without any issues. I now basically have a brand new iPhone 6 plus, and a phone that will last me for quite a while longer.

John Johnson -

I successfully replaced battery of my old iPhone 6 plus, following this guide step by step without any issues, thankful for iFixit community. My second project is to replace screen face of my daughter iPad 2 this evening, I work very well with tools and following guidance, even though I am taking electronic course for certification to open a store for electronic repairs soon!

Zacharia Odio -

Well that went extremely well. Aside from getting the tiny screws back in, which are a pain to get aligned on the screwdriver, it was really straightforward.

First time I’ve attempted a repair on an iDevice, and this guide made it simple. Nice one!

Paul Johnson -

There was no mention of replacing the case gasket? Should it be replaced or does it matter?

Crackerjack -

These instructions are for the iPhone 6 Plus. If your phone has a gasket between the screen and case, that’d be a 6s Plus. Instructions for replacing the gasket are here.

Jeff Suovanen -

Thank you for the great instructions! Everything came out just fine. Also, I’m glad that I had the proper tools that were provided from iFixit.

Michael Thomas -

I replaced the battery in my iPhone. It starts fine but some of the keys on the keyboard don’t work and when I go to type a text the keyboard won’t come up at all. I will try taking it apart tomorrow to see if anything looks wrong. It doesn’t seem to be able to move to the next screen. Any ideas?

larobin -

Hervorragend bebilderte und erklärte Anleitung. Mache sowas zum ersten Mal und habe meinen Akku problemlos gegen einen neuen ersetzt, obwohl mir beim Ausbau ein Klebestreifen abgerissen ist.
Lob für und Dank an die Autoren und Übersetzer!

Stephan Wulfhorst -

I was able to combine this with a charging port replacement successfully! Great instructions.

Michael -

I bought my iPhone 6+ when it was launched in 2014, and the battery life today (5.5 years later) is terrible.

Searching the internet brought me to iFixit, and I loved this tutorial / guide. Bought the kit, replaced the battery, and life is good!

Thank you,

Jay

Jay Messerly -

Ok, What about installation? New battery has some kind of pink wrapped plastic.?? and the blue gasket thing. I have no Idea but no reinstallation guide. The blue pry tool has sharp ends on both side. Digs into your palm.
frankhue99 -

best place to get battery from im in the uk

Eyrezy Tunes -

well i have to say , it was very easy and only took 15 min to replace the battery. the apple store wanted $100 to do this and i did it for $37.

saved a lot of money by doing it my self. Phone (apple 6 plus) works like a new one now.

Vincent Benningfield -

Just finished this project on my mother’s iPhone 6+ using the ifixit replacement battery with the ifixit Pro Tool Kit and iOpener. Excellent and easy guide, word for word, with the video to help out. I loved that this model phone didn’t need the screen adhesive like I’ve seen on other phones such as the LG G6. The hardest and most time consuming part was getting getting the dead battery out…. I tried the floss trick….

Keep up the good work! Thanks!

Aaron Dimatulac -

I was on the final step, replacing the battery. I slowly peeled back the plastic sheet covering the adhesive and bubbles formed in the adhesive as I SLOWLY peeled. When I got to he tapered end of the adhesive, the ends stretched out and and bunched up in a wad when they finally let go of the plastic. I tried (as carefully as I could) using a small and sharp pair of scissors to cut off the bunched sections of the adhesive, saw a spark from the new battery (I must have scratched it, though I don’t see how) and now the new battery is sitting outside in an old crockpot awaiting disposal.

Birch Johnson -

I bought this IF268-002-7 battery replacement kit , for my I Phone 6 @ a great price . The kit came with everything required battery and tool kit and then came online to this site for replacement instructions . Having never done this before , it took me a couple of hours and all went well. My hint to anyone following the instructions , take a soft paper towel and lay it out and draw a basic diagram box from where each screw came from . The reason for this is because there are different length screws and it makes it so much easier upon assembly !

prattalex60 -

How can I know if your battery is bad or my phone is? It’s acting worse than my old battery that would last only two hours if left unchecked.

jeff harkins -

I prefer if you can add instructions on how to use the adhesive that came with the battery, and the installation steps. I had a problem in using the adhesive, and I stick it on the other direction, but still the battery is stable I think.

Mohammed Jitarayah -

Not all that easy to reinsert the screws. Takes a little patience and using the tweezers to line them up with the magnetic screwdriver. Then finding the hole they go into. But all eventually worked and the phone even works.

Patricia Tucker -

Super Anleitung, vielen Dank!

Mit freundlichen Grüssen

Joël Salvisberg -

Super glad to find ifixit.com! Battery and tool kit arrived quickly and was packaged very cool as well. Also, the support via video and by written step-by-step instructions was spot on. One small note. It seems obvious, however when installing the new battery, make sure you position it so that the connector tab aligns properly with the connection point. Therefore, the connector won’t be “stressed” from being to far forward or to far back of the connection point. I didn’t measure it, but there was about 1/8” above and below the battery that may have presented a problem if the battery wasn’t “centered”. Remember, those adhesive strips don’t like to allow second chances! I hope this is helpful. Cheers!

Jeff Weber -

Seems like a lot of people are having trouble with the adhesive strips when removing the old battery, I did as well, albeit just a bit. The trick is not to allow the strip to twist once you beging pulling (easier said than done, right?) Just begin pulling slow and steady at a low upwards angle 20° or so. Ideally, you will have a flat piece of adhesive about 2”-3” long. At this point you can slowly relieve tension and grab closer to the battery and continue the pull until the adhesive pulls out from beneath the battery. Again, they key is a flat, slow steady pull. If it starts getting too thin, slowly release tension, “choke up” on the strip and continue your slow gentle upward angled pull. If any of the pulls results in the adhesive breaking off under the battery, it’s not the end of the world, but it will take a little extra time and patience. Just follow the link provided in the written text and don’t panic . Slow and steady is the key! ✌
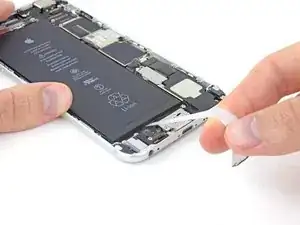

Jeff Weber -

Tutorial was great. Replaced the old swollen battery without incident. Question, anyone have the home button fail after replacing the battery? It may have been damaged beforehand. Thank you

Byron Monts -

I watched two videos on battery replacement on your site. Both iPhone 6, both presented by the same woman. Both only cover disassembly. Both mention a reassembly video. No link to reassembly on either page. You should put the link to reassembly on the disassembly page.

William Vojtech -

The operation went smoothly. Just waiting on it to condition 10/10.

Phillip Gardner -

i Broke it :((

Joe K -

I am so amazed how ifixit have come up with so simple to follow instructions, actually I just followed the pictures without reading the instructions.... this is so simple.. it took me 45 minutes from start to finish... actually the hardest part is the removal of the battery sticker.

ayos -

It's standard I know but I wouldn't have succeeded without the magnetic screwdriver so thanks for that! I probably broke the rules by using hand sanitiser to unstick the strip that broke, probably too much water in it, but it worked and I was really really careful removing excess gel and drying with corners of tissue afterwards.

The phone is mainly just for calls and messaging so it's been brilliant being able to now trust the battery and it has good standby.

Thanks so much!

Jim -

That was great! I’ve replaced an iPhone battery once before using a kit from a big internet retailer and it really kind of sucked. The IFIXIT tools are high quality and the instructions were perfect. The process was actually fun! I highly recommend.

David Obuck -

thay pln xong may treo

Nguyentrongnghialk Nguyên -

When replacing the battery, iFixit battery (replacement) will need to be charged after install before powering up phone, correct?

Ed Williams -

膨らんだバッテリーを外すためにこのページを参考にしました。うまくいきました。

難しかったのはバッテリー接着ストリップをはがす作業です。とにかくすぐに切れてしまいます。

ですが、切れないようにするコツがわかりました。リボンを広げたまま引っ張るのではなく左右によじって紐のようにしてから引っ張ることです。こうすることで強度が増します。すぐに切れた最初のテープも奥から引っ張り出してひも状にして引っ張ったら完全に外すことができました。左右の2本のテープは途中から横から引っ張りたくなりますが、真下に引っ張らないとうまく剥がれてきません。

作業はうまくいきましたが、残念ながらiPhone6plus をバッテリー無しで使用することはできませんでした。

nullpage -