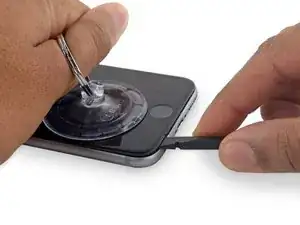
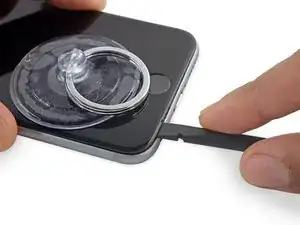
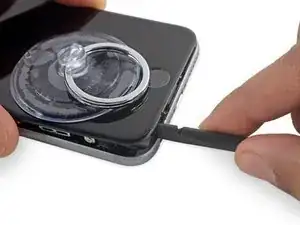
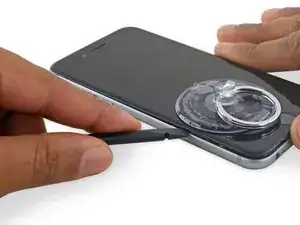
Einleitung

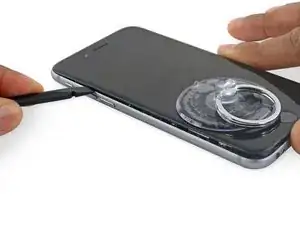
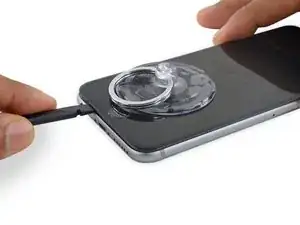
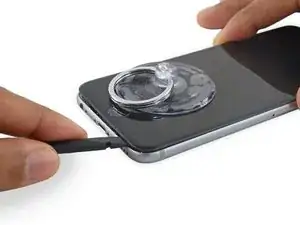
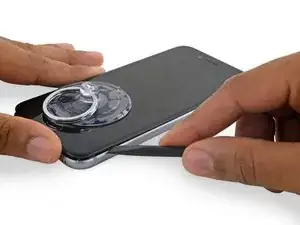
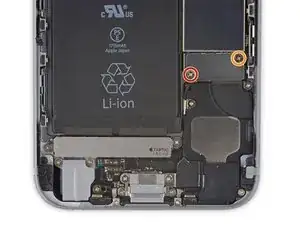
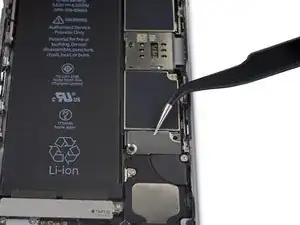
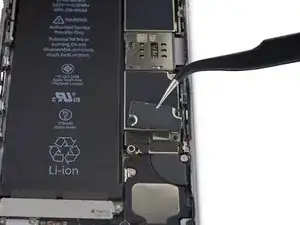
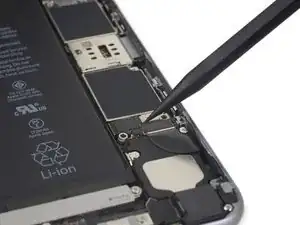
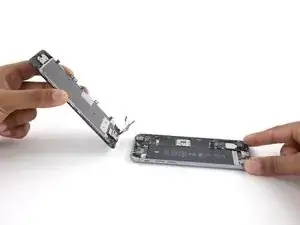
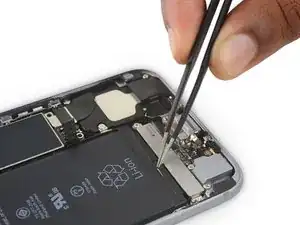
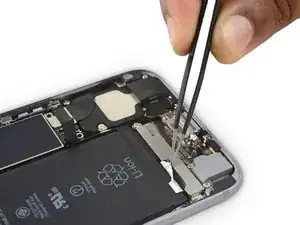
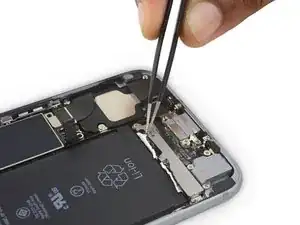
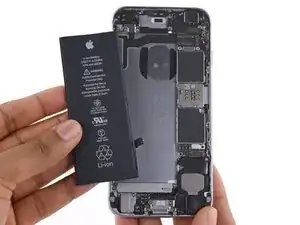
Folge dieser Anleitung, um deinem iPhone 6s mit [productIF314-011|einem neuen Akku|new_window=true] neues Leben einzuhauchen. Wenn dein Akku aufgebläht ist, musst du entsprechende Vorsichtsmaßnahmen treffen.

Diese Anleitung beinhaltet den Ausbau der Displayeinheit, um zu vermeiden, dass die Displaykabel beschädigt werden. Wenn du meinst, dass du das Display vorsichtig abstützen kannst, während du den Akku aus dem iPhone herauslöst, kannst du die Schritte zum Ausbau des Displays überspringen, und gleich mit dem Ausbau des Akkus weitermachen.

Für eine optimale Leistung sollte der neu eingebaute Akku nach Abschluss der Reparatur kalibriert werden: Lade ihn auf 100% auf, und lasse ihn mindesten zwei weitere Stunden laden. Benutze dann dein iPhone bis es sich aufgrund eines leeren Akkus ausschaltet. Lade den Akku dann erneut ohne Unterbrechung auf 100% auf.

Diese Anleitung kann auch genutzt werden, um die Halterung des Akkuanschlusses auszutauschen.

  1. JATCLqMKWMWEOJKD
    • Bevor du mit dem Ausbau beginnst, entlade den Akku auf unter 25%. Ein geladener Lithium-Ionen Akku kann Feuer fangen oder explodieren, wenn er aus Versehen beschädigt wird.

    • Schalte das iPhone aus, bevor du mit der Demontage beginnst.

    • Entferne die beiden 3,4 mm P2 Pentalobe Schrauben an der Unterseite des iPhones links und rechts vom Lightning-Anschluss.

    Hi, just got the repair kit that came with IPhone 6S battery. I felt that there’s no explanation on which tool to use to remove the two 3.4mm P2 Pentalobe screws. It’s not helpful just to say “Remove the two 3.4 mm P2 Pentalobe screws on the bottom edge of the iPhone, next to the Lightning connector. “. It’s more important to explain how and what tool to use. The repair tool kit tools were not marked at all and it’s not right to assume that people know which tool or part to use. Please kindly address this issue. Thanks. Janet

    Janet Monaghen -

    @beingchen For the P2 pentalobe screws you should use the driver bit marked P2. Might be a little hard to see but it’s there, etched into the side of the bit.

    Jeff Suovanen -

    It’s very clear which tool you need. As it says these are “3.4 mm P2 Pentalobe screws” - so you need a 3.4 mm P2 Pentalobe screwdriver…

    alexanderbrix1987 -

    Just a P2 driver—3.4 mm is the length of the screw.

    Jeff Suovanen -

    If you can’t identify which screwdriver in the kit to use, you probably shouldn’t be working on your phone. Just sayin’

    Keith Hockenbeck -

    Is it ok to replace the battery if the phone screen is broken?

    Reem -

    Of course! As long as the screen and battery are disconnected from the motherboard, you can replace anything!

    Charles Bejarano -

    is it possible to change my battery on my iphone 6s and use a battery that has been already used in another 6s

    morgan durnford -

    Yeah it would work, but if the battery heath on the 2nd battery is bad, just get a new one.

    Charles Bejarano -

    @moe6802 Removing the battery can damage it, and it shouldn’t be used afterward. It may seem fine, but even minor battery damage can lead to a fire hazard. Not worth it for such a cheap part. If you need a battery, just get a new one.

    Jeff Suovanen -

    How do you discharge a battery? Do you just let the battery drain or is there something less time consuming that you can do?

    Matthew Petts -

    There is no easy way to discharge the battery in “less time”. Perhaps the fastest way is to play a visually-complex modern game or otherwise make your phone do a lot of work.

    Lance J -

    So my phone screen is completely black causing me to see nothing that is on my screen. And the battery is above 25%, near 100%. What do I do??

    Jessica I -

    you should post a question on the answers forum

    Seizure Salad -

    you should post a question on the answers forum

    Seizure Salad -

    I can’t the screws with the P2, seems that the screws are stuck, what can i do?

    Alberto Jabiles -

    My kit came with 3 screws. Are those to replace these 2 P2 screws? And what’s the third one for?

    Daniel Morse -

    If it came with 3 screws, then it’s an extra one just in case if a replacement screw gets lost.

    Charles Bejarano -

    My display is cracked/broken and not functioning. The slide bar doesn’t work. How do I shut down my phone?

    Timothy Huss -

    i have replaced several ipod batteries and laptop work, but these screws seem to loose but do not come out. how am i to remove them.shake the iphone?it seems the ioen is not in my kit, is that how to remove them?

    this seems idiotic but i remember some other system magnets that firt make your screws easier to keep, but this might be changed….any video? this seems 1st step blues!!!!

    makinfilms -

    never ind ishook it… is that in the guide?….iopener is not in the kit……never was before is this an upsell? do i skip it? i dont have it

    makinfilms -

    My screws aren’t coming out either. I’ve loosened them, but they aren’t coming out. I’ve shaken the phone, given it some slight bangs…nothing.

    Jesse Fisher -

    The following info is not given until step 21 in the instructions, and probably too late at that.

    DO NOT disconnect or reconnect any of the cables in this device until the battery itself has been disconnected!

    Don’t skip that step, intending to do it at the end, as you may damage the phone.

    ffissk -

    2 thoughts:

    1) Really? Steps 14-17 are about disconnecting the battery first, and step 17 notes “so it doesn’t get reconnected while you work.” How’d you get to step 21 and miss 14-17?

    2) These pages are user-editable. (Probably (hopefully) “curated” by iFixit staff.) You should add a warning to step 17 (or step 24).

    Bass Clef -

    NOW THAT YOU’VE REMOVED 2 SCREWS, and

    BEFORE YOU SNEEZE them into oblivion, or under the refrigerator (which is the same in many houses)

    MAY I suggest:

    1) Obtain:

    — a piece of paper, such as normal printer paper (not too much writing on one side)

    — a piece of tape, not too sticky, like masking tape (duct tape would be bad)

    ——— 1-1.5 inches (2.5-4 cm) wide

    ——— 6-8 inches (15-20 cm) long

    — a pencil (or pen)

    2) Put the paper on the side of your work area

    3) Lay the tape, sticky side up, on the paper

    4) Fold each end of the tape (~1 inch/2.5cm) back under itself, so the folded part faces the paper. Press the folded-back tape onto the paper

    You now have Sneeze & Wind Insurance for your tiny bits!

    5) Put the 2 pentalobes end down on the top end of the tape, next to each other. Push them a little onto the tape so they stick

    6) Use your pencil to note on the paper next to the screws: “1. Pentalobes”

    Now you may proceed with dissassembly, without worrying about telling the 1.5mm from the 1.6mm screws.

    or about sneezing!

    Bass Clef -

    My phone has a bad battery and a bad connector and I wasn’t able to get all of my photos before it died. Is there any chance I won’t lose them when I replace the battery? Or, is there any way to charge a 6s battery with a bad connector?

    Liz R -

    There is a great chance that photos, which are stored to flash memory, which is solid state memory, which is not affected when power is lost, will be there, right where you left them, once you restore power to your device. You could install a partially charged battery into your phone and then retrieve the important things, like your photos, if you don’t intend to continue using the phone. Else look at replacing the lightning connector assembly. Here: iPhone 6s Lightning Connector Einheit austauschen

    TimD -

    The P2 is not getting the screws loose at all. I have tried this several times and no budge on my iPhone 6s.

    Cassandra Vigil -

    To avoid to be screwed by lost or mixed screws:

    - Use magnetic pad, wipeable

    - Write the ifixit- steps next to the screws (maybe even with their sizes) and other bits removed

    with a non-permanent marker

    - When finished, simply wipe the pad, and it’s ready for the next repair

    Hope that helps.

    Ulrich Janßen -

    I found a pentalobe 1 driver to work much better.

    joelkevinjones -

    The suction cup didn’t hold at all. I tried Windex and then hospital grade alcohol, but nothing worked. Finally had to use two exacto knife blades to begin lifting the screen. As soon as I got a little gap, used the spudger tool the rest of the way, The small philips driver didn’t fit the screws exactly, but with a little effort they came out. My battery adhesive strips snapped immediately and I had to remove the original battery the “hard way”. The kit came with replacement display adhesive but no explanation how to use it. I got some on - so better than nothing. Overall I’m happy with the results, and the new battery is charging now.

    Daniel Wolf -

    First step problem? Couldn’t get the screws out. I checked my other iPhone and realized the screws were missing!Just started prying it apart.

    Hoyt Smith -

    I went through the whole procedure, replaced the battery and got the screen back on. Then the 2 pentalope screws would not go into their sockets. They sink in all the way and spin, but it appears there are no threads to grab. The screen seems to be in position since I can insert a plug into the headphone jack without trouble. Did anyone else have this problem. Using the phone now with no screws. Yikes.

    Walter Plante -

    Hi Walter, in case you’re still dealing with this or anyone else has the same problem, check that the screw bosses on the bottom of the screen are straight and line up with the screw holes on the case. They should be at a 90° angle to the screen, but they’re easy to accidentally bend and could’ve gotten flattened against the screen.

    Adam O'Camb -

    I recommend a loop of tape attached to the table, and placing the screws on the tape in the order they were taken out. identifying the screws to put back is a simple matter of going the other way back up the tape.

    David Taylor -

    Did the repair for the second time, each time faster and easier. This steps by step is amazing and crystal clear no mistake possible.

    Jean-Gabriel Duquesnoy -

  2. mVwKmKcVbplDkJAo
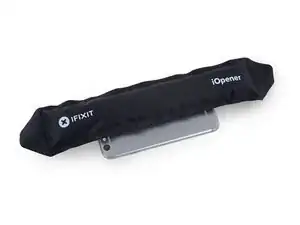
    • Optional kannst du die Unterkante des iPhones mit einem iOpener oder einem Haartrockner für etwa eine Minute leicht erwärmen.

    • Wärme macht den Klebstoff weicher, mit dem das Display befestigt ist und erleichtert so das Öffnen.

    What about specifying the hot air temperature?

    Nicola Centrone -

    The glue softens pretty easily, so the exact temperature isn’t critical. Get it slightly too hot to touch. If you have trouble, heat it a little more and try again.

    Jeff Suovanen -

    What temperature on the screen separator lcd machine and for how long?

    Manraj Gulati -

    This is the first time I opened my 6s since it was purchased new four years ago. Even without heat, constant and firm works enough to be able to squeeze the flat edge of the spudger. From that point and without any additional pulling from the suction, twist the spudger gently to “walk” it open on both sides.

    Family Juinio -

    I used a hand towel folded in half and a clothes iron on the cotton setting (med-high heat, no steam). Placing the doubled towel between the phone and the iron, I would set the iron down for about 20 seconds (my iron has a timer that beeps when left horizontal for too long). Lift the iron, check the temperature (aiming for just too hot to touch), reposition as needed, repeat. It took me a while, but that’s because I took my time not knowing how fast this would heat. All-in-all, about 2 minutes to reach the right temperature to loosen the adhesive (it IS tenacious).

    Sarah Wruck -

    Holy. Redii eirhejbrd

    Andy Carson -

    just been given a 6s to repair, for this stage would a hot water bottle work ??

    Steven James -

    I used a hot-water bottle to keep the iPhone warm while prying patiently, though the moving surface added to the challenge.

    Before that, I put the iPhone - screen facing down - to warm on the coffee cup heater (45°C) of an espresso coffee machine. Half an hour seemed more than enough.

    A hot-water bottle filled with water at 60°C would do the job I think.

    Later repeated the same heating before removing the adhesive strips under the battery (allowed me to extract each strip successfully, rolling it on the body of the spudger).

    And also before putting the new display assembly adhesive under heavy book weight.

    Aubin -

    I heated a stone pestle in the air fryer, wrapped in a cloth.

    Ark -

    I didn’t have any of the heating tools listed here so I improvised:

    To soften the glue I heated water in a pan (not boiling but quite hot).

    I put the phone in a thick plastic bag in the water for about 20 - 30 seconds. (I checked the bag was properly watertight first by dipping it in water – minus the phone). Maybe I was lucky but the screen came away easily doing it this way.

    Henrik Dahle -

    Clean the glass screen first with eye glass cleaner wipes (alcohol). Hair dryer on hot with low air speed works excellent. Aim the heat at 45 degrees (phone face up) and move around the perimeter for about 1 minute. The edges should be hot enough to barely touch without burning your figures. This seems to get the glue hot enough at the edges for easy removal. Warm the glass face a bit and also warm the suction cup, this makes the suction a lot better and the suction cup won’t come off like it will if the face and suction cup are cold. Later when removing the battery, heat the bottom with the hair dryer for about 30 seconds and the top of the bottom of the battery where the 2 tabs are for the tape behind the battery. This makes for simple removal of the battery tape under it.

    Keith Paget -

    Here’s what I did to open my iPhone (I had it open in under 1 minute): 1) I has one of those rice/barley filled eye masks that you heat up in a microwave. I heated it for 1 min and then placed my phone face down onto it for 1-2 min. 2) I placed the suction cup onto the left lower corner and the “tweezers” into the headphone jack. Pull upwards with the suction cup and hold the phone’s body down in place with the tweezers. 3) a gap will open. Slide the edge of a razor blade into the gap (not too deep) 4) insert the plastic triangular guitar pick tool into the gap next to the razor blade. Slide sideways with the triangular tool to make the gap large enough to insert the spudger. 5) insert the edge of the spudger tool (curve down) into the, now widened, gap. 6) slide the spudger tool along the edges of the iPhone. Opened!

    jennismith2 -

  3. LtuRrFCWgKIDSXQE
    • Beim Öffnen des Displays des 6s wird ein dünner Klebestreifen durchtrennt, der einmal um das Gehäuse verläuft. Wenn du den Klebestreifen lieber ersetzt, halte jetzt einen Satz neuer Klebestreifen bereit. Es ist möglich, die Reparatur ohne Ersetzen des Klebers zu beenden, und wahrscheinlich merkst du keinen Unterschied in der Funktionalität.

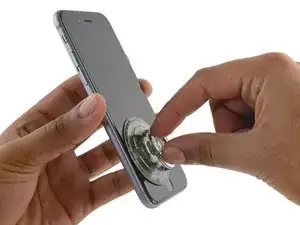
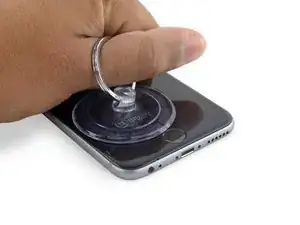
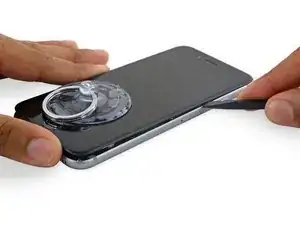
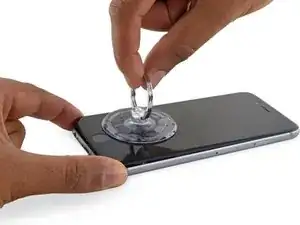
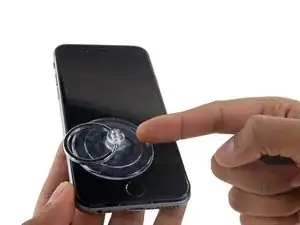
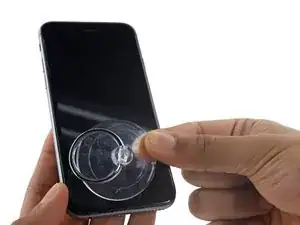
    • Bringe einen Saugheber an der unteren linken Ecke der Display-Einheit an.

    • Achte darauf, den Saugheber nicht auf den Home Buttons zu setzen.

    • Wenn dein Display stark gesplittert ist, dann haftet der Saugheber vielleicht besser, wenn du das Display-Glas mit durchsichtigem Paketband abklebst. Du kannst anstelle des Saughebers auch sehr starkes Klebeband (Panzer-Tape) benutzen. Wenn das alles nicht hilft, dann klebe den Saugheber mit Sekundenkleber an dem zerbrochenen Display fest.

    Hello, I was wondering if there was a guide of how to replace the adhesive strips, thank you

    Pablo Reyes -

    The suction cup will not work if you have a shattered screen. I put a tip of an exacto knife between the glass and side frame above the power connector, carefully pried up then used the spluger to pry the rest of the way up.

    johnmurphyjr -

    Tape will work as well in order to create a smooth surface

    Nick Stine -

    Even tape didn’t work on my first shattered screen 6S disassembly. Had to reset to the exacto/thin blade technique.

    Peter Bovey -

    For me, it seemed like I only had one shot at the suction cup. It stuck on firmly the first time, but I noticed in the instructions that it was placed more on the side. I detached my suction cup and repositioned it and now it doesn’t stay (sucked) on. Hmmm.

    Frank Terence -

    Can you use the iSclack opener to open the iPhone 6s?

    Joe Koffee -

    The iSclack is helpful, although you have to use it a bit differently than you would on, say, a 5s or 6. The iSclack alone isn’t strong enough to pop the display open, because of all the adhesive around the perimeter of the 6s display. But you can use it to lift the display just enough to get a tool in there and start cutting the adhesive. Basically, the iSclack does the same job as the suction cup shown here, with maybe a bit less fuss.

    Jeff Suovanen -

    My screen was SUPER shattered… the hair dryer did the trick. Patience it definitely the key… I tried putting tape over the glass but the suction cup wouldn’t stick to it at all but it stuck to the broken glass for a few seconds. I taped it up when I was finally able to move onto the next steps to keep the glass from getting everywhere then peeled it off for Step 10.

    Mandy Ng -

    Hi, it looks like, from reading the comments, that separating the display assembly from the phone is a tricky step.

    Would the piece of equipment, in the link below, be any use at this stage? Seems it could be used for all makes and models.

    Any info would be appreciated.

    https://youtu.be/8it4o9tx8tQ

    Michael -

    I have a screen protector on my phone. I was wondering if it was going to be problem for the suction cup.

    jeffreyleung2002 -

    I can only suggest to use a hair dryer to loosen up the adhesive underneath the display. Mine was stuck so hard it wouldn't barely move. After warming ist up I could softly pull ist up with way less power

    olonetzky -

    A question, has anyone had success removing a cracked (not shattered) screen? My phone has a single diagonal crack from the top right corner down to the left side. Will the suction cup still work?

    goblazers -

    The suction cup material was very stiff and wouldn’t adhere well even after thoroughly cleaning the screen. Applying heat from a hair dryer helped with that, too.

    Karleen Smith -

    A packing tape handle worked well for me instead of the suction cup. I folded a piece of packing tape in half leaving two ends to stick to the part of the screen indicated for the suction cup placement and used the center fold as a handle.

    Diana Riddle -

    I found that a 3rd hand helped here. Lots of heat and as others say, a strong, steady pull, but you are only creating a gap to get the spludger in, not ripping the screen away from the body. Once I created the teeny gap I had someone else get the spludger in to hold it open while I shifted my grip.

    Steve -

    I’ll throw in here for other noobs as someone who just read ALL the comments and had things go pretty well without a hitch.

    Adhesive here goes ALL the way around edge. I think think many people’s frustration comes from in adequate heating and/or only heating the inferior edge area. I went with 5 min of a rice/shoulder thingy, (uniform rectangle folded in half on a plate, 3 min in the microwave) Plate side was hot potato hot and stayed so.

    Other inference and comment curating:

    a. Use pointy spudger end inserted slightly into headphone jack to hold down phone while pulling up;

    b. 2mm lift MAX the insert something to hold while you bring the flat end of the spudger around (I just used the flesh of my finger;

    c. Twist spudger ONLY zero -20 degrees when inserted;

    d. Avoid spudgering above or between the pentab screw holes.

    e. Avoid sticking the spudger in more than 2 mm as you slide up the left and right edges. If you catch, back it out a bit until you can keep sliding.

    Aaron -

    Also all props to Ifixit for addressing many issues with earlier versions of this and their replacement kit! A lot of complaints are clearly obsolete now.

    And if this your first time block out an afternoon and be glad if it only takes 20-30 minutes. Rushing causes breakage more often than not.

    Aaron -

    I’m in a third world country without access to a hairdryer. Is there anyway else to loosen the adhesive?

    Dylan -

  4. UYamh1NRDiavS45O
    UYamh1NRDiavS45O
    QA6gV5PButgq4dsF
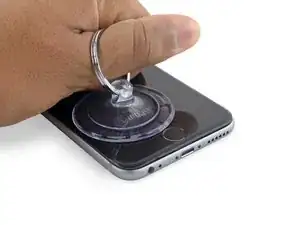
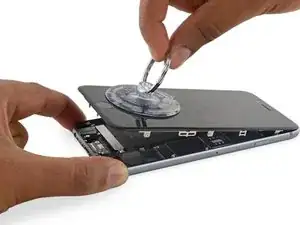
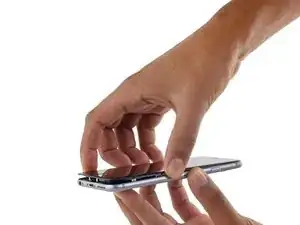
    • Halte das iPhone mit einer Hand fest und ziehe am Saugheber, um das Front Panel vom Rückgehäuse zu trennen.

    • Nimm dir Zeit und wende feste, konstante Kraft an. Die Display-Einheit sitzt, im Vergleich zu anderen Geräten, sehr fest.

    • Wenn du zu stark ziehst, könnte die Display-Einheit beschädigt werden. Übe gerade so viel Druck aus, dass ein kleiner Spalt zwischen der Display-Einheit und dem Rückgehäuse entsteht.

    • Wenn es immer noch zu schwer geht, dann erhitze die Vorderseite des iPhones mit einem iOpener, einem Haartrockner oder einer Heißluftpistole, bis du sie kaum noch anfassen kannst. Dadurch wird der Klebstoff, mit dem die Kanten des Displays befestigt sind, weicher.

    No, really. Do this on a table and use less strength than you think. If you open the display the whole way at this step you can easily rip the home button connections and one of several display connections at the top. <— too much experience... :(

    chuymatt -

    Wow, that was tough. Patience, patience, patience. Did not use the iOpener, just firm and consistent pulling with the phone on a flat surface. When the suction cup comes off... clean the display surface and go back at it. I did use the pointed end of a spudger inserted into the headphone jack to hold down the bottom case whilst I pulled on the suction cup. Once there was sufficient room (see next step) you can just get the spudger (flat end) to slide in slightly.

    plisi -

    If you're lifting up on the glass, how are you supposed to hold the rest of the phone down? Is it by holding the camera end down with the side of your hand and rotating your hand, or using your other hand (not pictured) on the edges (seems very difficult), or using a spudger in a jack?

    Bryan -

    I got a fingernail on the metal edge and that did the trick.

    David Heinbach -

    On the 6s, which has an annoying black adhesive strip holding the display assembly on, I use the iSclack to loosen a very small area near the home button then insert a thin spudger and gently twist it a bit to release the adhesive. Do this around the bottom and both sides of the phone to release the screen. I usually have to break some of the adhesive strands when the opening is big enough.

    scentaur -

    My spudgers just too thick for initial insertion. In the end, fingernail on my thumb got me started, and I was able to get plastic picks in there to work it. The microwavable iOpener gel strip really helped.

    Heidi Moser -

    Thanks plisi, your comments are helpful. I had to apply pressure several different times. Didnt realize until about the seventh time applying pressure that what I was doing was slowly loosening the adhesive. Patience is truly the key with this step. You may not think you're progressing but it's slowly prying away.

    amylofton -

    What happens if the cup won't even stick to the display because it is cracked and it will not hold air near the bottom of the phone?

    Jaredrett -

    hey everyone, i just did my first iphone 6S display...after many 5, 5c, and 5s iphones...just keep trying and carefully insert the spunger where they said...right around the headphone jack. The black adhesive makes it very tough to get it off unless you work at one corner. Be careful...but you can do it! ;-)

    David Althaus -

    Use a razor, and go along the outside of the phone carevilly using the razor as a spudger. it will efficiently cut and weaken the adhesive while spudging the screen away from the frame. only takes 15 mins.... Use a workbench razor, not a flimsy one. If possible, use one where one side of the razor has a gaurd on it for better grip. Take it slow and try not to scratch the frame. Lots of pressure and patience is key!!!

    Goodluck!!

    -J

    Jaredrett -

    The first time you pull it apart there's black glue tape that you'll have to compete with to get it open. Be careful

    Jeff -

    Use a hairdryer about 2-3 inches from the phone on high heat for about a minute, moving the dryer the entire time. The phone opened for me in less than a minute after trying for several minutes without heating up the phone.

    Todd Leach -

    Careful ..delicate work. I also used a hot hair dryer around the perimeter for just a couple minutes to help loosen the adhesive bond. I then used my sadly short finger nail to help loosen the edge. I placed dental floss under the corner & carefully lifted the display very very slowly. This worked within about 3 minutes. As mentioned earlier the adhesive used in the iPhone 6s is very strong but this routine worked like a charm & was quick!

    Mary Blocher -

    Much easier to do using the Spudger that is provided in the Pro Tool Kit. It has a thinner fin type head. The Spudger provided in this repair kit is definitely too thick and makes it far more difficult.

    Tyler Brady -

    The spudger is too thick and the glue is too strong. Pulling up broke the glass below the power button. Now I am out $200 for a repair, plus a battery. Bummer. I am VERY good at repairing things. The adhesive on this is very very strong. The pentalobe tip that they send with the kits not milled well and I had to take a file and flatten the tip to get it to work - it is not finished well at all. I used the kit for the iPhone 6 for my Mom and had no problem. I am 51 and have been fixing things since I was very young.

    greghabiby -

    Well, I shattered my screen trying to do this. So now I need a battery and screen repair. Not happy.

    Carolann Parran -

    Me too! Be gentle!

    Matthew Simoenau -

    Me as well, I went very slowly, was working the spudger around the edge and then it shattered. Just going to buy a replacement phone and I was replacing the battery to gift this to my sister as a hand-me-down and now it’s not worth it. Perhaps I can sell the kit second hand…

    kpederso -

    Removing the display was the hardest part of the whole job. The adhesive is very strong, but just be patient. What I ended up doing was to use the suction cup, the flat end of the spudger, and an iFixit opening tool. I used the suction cup on the screen as directed. Then I placed the flat end of the spudger just a bit into the charging port and held down the phone body by the spudger on my work mat. I pulled up on the suction cup, pushed down on the spudger, and inserted the thin iFixit opening tool in the small seperation. I took my time and worked my way around all of the edges. After that it was really easy. I was able to reuse the adhesive, and my new battery install went just as planned.

    Eric Olson -

    Use a hair dryer as per the suggestions and this will definitely make the job easier and reducing the risk of breaking the display . Keep a steady pull of the display, don’t rush and it will start to show the small separation gap. An issue is that it will go back in place if you stop pulling before you can use the spudger tool. The suction tool that came with my repair kit did not have a ring on it as per the guide picture. It has a blue handle that is open on the side. I sat at my kitchen desk and opened a drawer. I hooked the open edge of the suction handle around the drawer side edge which me a third hand. I held the phone with one hand and pulled it away from the desk drawer. Once the separation started I could use my other hand with the flat edge of the spudger to complete the separation. Hope this helps.

    emaneht -

    Hair dryer - 1 minute until it’s hot like a fresh mug of coffee. Then as soon as you see the smallest gap, insert a razor blade above the phones jack, I needed to slide it towards the charge port and back. Once it slips in keep it there and use your spudger to enlarge the gap and slide it along the corners.

    Steve Esson -

    Yes, I used the tip of a sharp knife as a pry tool to get me started. Since the screen was cracked anyway I figured I had nothing to lose. It went fine.

    David Heinbach -

    Also tried it with the hair dryer - worked like a charm. 5 Minutes and the phone was open. The whole repair procedure took me about 45 minutes, and was ok. Re-assembling the three display-connectors has been a bit tricky, but with careful movements and taking the time it needs it was not a big problem. New display is very good, phone looks like new :-)

    Christian Woelk -

    My glass was broken and the suction cup wouldn’t hold on the tape. I used a very thin knife an slowly worked between the glass and the phone frame. Please keep in mind that my phone had been run over by a Ford F150, so I really had nothing to lose.

    Michael Cleveland -

    What is unfortunately unclear is just how to 1. apply sufficient force and keeping the phone secure with only one hand, 2. whether this is best done on a table to use its opposing surface to secure the phone.

    The suction cup is a worthless tool because flexes too much to provide a good hold. Mine slipped and popped away three times. -The last time causing a crack in the screen.

    ffissk -

    Glad I read these comments about the screen cracking because I was really trying to force this thing open (with some heat applied already), but it wasn’t budging. Kept applying heat and light force and eventually it started coming apart. The suggestion for placing the pointed end of the spudger in the headphone jack while prying up worked for me and an extra set of hands would have been ideal.

    In the end, with the spudger in the headphone jack, placed a guitar pick in between the screen and the backing and slid it along the bottom left. Left the tip of the guitar pick in to hold the gap and then was able to use the spudger to complete the process as shown.

    Nicholas Anchor -

    Beware! I cracked the screen. Used iOpener, iFixit spudger etc. I managed to get the spudger into the gap by the headset socket and worked my way up the left, when I came to do the right the screen was cracked. I was taking it slow and steady but clearly that wasn’t enough. Be VERY careful.

    James -

    Heat is essential, and take it very slowly. Also take seriously the instruction to open just enough to get the spudger in there—then do the real work with that. The suction is just to get started. I had my son insert the spudger as soon as there was any gap at all, then worked it according to the guide.

    I did this on a card table with a vinyl surface so I could lay the phone down. Then I held the metal frame on both sides while pulling the suction cup—my son having the spudger at the ready. Definitely be patient! I had to restart several times when the suction cup popped off and I accidentally reengaged the clips pressing it back on.

    Matt Burleson -

    I didn’t have any of the heating tools listed here so I improvised:

    To soften the glue I heated water in a pan (not boiling but quite hot).

    I put the phone in a thick plastic bag in the water for about 20 - 30 seconds. (I checked the bag was properly watertight first by dipping it in water – minus the phone). Maybe I was lucky but the screen came away easily doing it this way.

    Henrik Dahle -

    I did the hair dryer three or four times and applied all of the pressure i could on the suction cup and it just wouldn’t budge. My phone is old and i had a waterproof case on it for a long time that really pressed down on the glass so it would seal. I think having that on for three or more years really sealed the glass!!!! Didn’t want to break it so will live with my battery as is…..it last most of the day and i am usually around a car charger or home. Just thought i would add a comment that said man i gave it my best shot and opted not to do it. I really liked the kit though and the tool will come in pretty handy to repair other small things.

    David Petr -

    This was waaaaay the hardest bit for me. Took ages Almost gave up. Allow AT LEAST twenty minutes. Endless patience pulling, then resting for a bit then pulling again. S.T.E.A.D.Y Keep at it long after your inner voice is saying ‘why did you think you could do this. You have never mended anything in your life.’ Then you see the gap and like a steady bomb disposal expert you quietly winkle it apart.

    Cindy Clarke -

    Used heat from a hairdryer, gentle pulling to lift the glass at the position above the headphone jack one to 2 millimetres with the suction cup, then put my thumbnail in the gap and pulled up gently a bit more to fit the spudger, and mainly slid the spudger as indicated around the glass, bottom first, and then sides to within about a centimetre of the top at most, to release the display. I found very little prying is needed. Once a gap of about a millimetre or 2 is created, that is enough to release the display from the adhesive.

    Nando -

    Run a little isopropanol along the seam at the bottom end (I had no syringe, so I dipped the handle end of a spoon in and ran that along). Leave a couple of minutes, then warm with a hair drier. It will pop right off with the suction cup.

    robthebrew -

    It was so much easier after I removed the two screws from step one… LOL! With heat, the screen should come up quite easily. You definitely don’t want to pull too hard. I introduced a small illumination artifact into the screen where the suction cup was attached. I’m not sure whether this was due to the suction cup or excessive heat. I was using a heat gun and trying to warm the screen evenly so it wouldn’t crack. But the temp might have been too high. Next time I’ll just heat the metal around the edges.

    len -

    don’t forget the screws like my stupid self did!!!

    trevorsklar -

    After 45 minutes of using a hair dryer the entire time while suction cupping it some 50 times (kept popping off), I finally was able to create the gap needed to remove the display. I found steady pulling of the suction cup was useless. I had to quickly pull,release,pull,release,repeat and this nudged the tape apart, which had the constancy of dried superglue. Not easy, but this phone was 7 years old,....

    skypilota72 -

    Got this done in about 2 minutes!! I used a space with that had a fan function. Held up my phone to it for a few minutes, also heated up the suction cup. I didn't have extra help, so the whole "pull suction cup with left hand, hold down phone by headphone jack with right hand, and insert pick with ??? hand" wasn't going to work. I was able to hold the phone down while also pulling up on the suction cup all with my left hand (almost like i was peeling the screen up). Stuck a plastic Opening Pick in the small opening, then slid in the flat end of a spudger. I could not rotate the spudger like in the photo (photo 2 of step 6), the screen was stuck on too tight, so I just started sliding the thin end of the spudger around. I held the phone up in front of the heater during this. I also used the pick to cut adhesive along the way.

    Kelly Archer -

  5. rPIMYZHbibAOYHdc
    rPIMYZHbibAOYHdc
    5EBC41yWprchTGbs
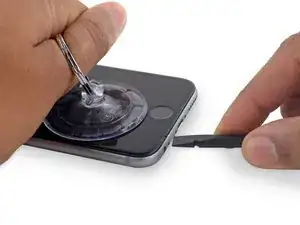
    • An der Unterseite des Displays, direkt über der Kopfhörerbuchse, befindet sich eine Kerbe. Das ist die sicherste Stelle, um mit dem Aufhebeln des iPhones zu beginnen.

    • Platziere die flache Seite des Spudgers in den Spalt zwischen Display und dem hinteren Gehäuse, direkt über dem Kopfhöreranschluss.

    WARNING: easy to stretch/ruin the adhesive

    As you proceed, know that you must keep ALL of the adhesive stuck to the phone. If any stays stuck to display, it can become permanently stretched as you are prying and lifting. Then you’ll need to buy the replacement adhesive, once it’s back in stock!

    Jason -

    If you’re opening the phone at all, you’re compromising the adhesive. There is absolutely no way to somehow open it perfectly so you can re-use it. Fortunately, it’s cheap and fairly easy to replace—and not even that critical on the 6s series anyway, since it’s not doing any real waterproofing.

    Jeff Suovanen -

    I had a badly cracked screen. Packing tape helped the suction cup stick. Heating the phone helped soften the adhesive, and in the end I pried the screen up at the headphone jack with a sharp pointy knife. That helped me get the spudger underneath. Not recommended if the screen is ok, like for a battery replacement, but mine was cracked so I figured I had nothing to lose. Great guide.

    David Heinbach -

    There are two relatively delicate brackets that the two P2 Pentalobe screws screw into. They can be easily bent during this prying open process. I ruined one on my phone and I’m hoping the phone will function with just one bracket.

    dougdalglish -

    +1 on the pointy knife to get the screen pried up. I couldn’t get the suction cup or tape to adhere well enough due to the glass being so shattered. I heated it for quite a while with the hair dryer on high, got a very sharp knife tip under the glass where the “notch” is, and used that to pry upward while another person slid the end of the spudger into the gap I was holding open with the knife. This one step was basically a three-handed job.

    johnjustinirvine -

    Do not insert the spudger at any time directly beneath the home button because it will crack the screen at the point.

    daniel vellone -

    +1 to never trying to lift the screen from directly beneath the home button.

    Romke -

  6. 4ILEXRusvNsRyHle
    4ILEXRusvNsRyHle
    ZCr4FobpXTMhhY1E
    • Drehe den Spudger in eine hochkante Position, um den Spalt zwischen Display-Einheit und dem Rest des iPhones zu vergrößern.

    No need to turn the spudger full 90°. Just turn it a little.

    Martin Born -

    should have a warning to be very gentle when doing this as the screen is glass - i shattered my screen following this guide

    Martin McAnespie -

    Do not twist spudger! Broke my screen. Thanks, iBrokeIt.

    Trevor Snow -

    As others have said, do not twist the spudger. To release the display, you only need to create a gap of a few millimetres. Better to slide the spudger as directed to release the adhesive, bottom left and right.

    Nando -

  7. VOdCwqsQCGqnPWej
    VOdCwqsQCGqnPWej
    VE3WcIEOoas1UGDV
    • Füge das flache Ende auf der linken Seite des iPhones ein, zwischen Display-Einheit und Rückgehäuse.

    • Fahre mit dem Spudger auf der linken Seite in Richtung obere Hälfte des iPhones, um den Kleber zu trennen und die Klammern zu lösen.

    I’ve found it very easy to open the phone with one of the blue opening picks.

    Just slide it along the left and right side of the display.

    Martin Born -

    Excellent idea. No matter which tool you use take your time so not to damage the display assembly further. Even a cracked screen is a great test tool or spare to use while doing other repairs when it still comes on.

    Bryan Solo -

    Do not go into the top left corner too far your screen will crack i learned the hard way

    Kevin -

    Your phone died

    Ipod Touchh0 -

    ok but where js the oart about puttung ut back together? mine diesnt snapinto place,……

    makinfilms -

    Use two spudgers.

    One placed in the original breech position to be used as a wedge.

    The other to get worked around the unit.

    These spudgers are going to get destroyed in the process and will not likely be great for another repair.

    ffissk -

  8. PrYCNWaPE232iSWU
    PrYCNWaPE232iSWU
    gWoFF2NNCNrSLqFJ
    • Entferne den Spudger und füge ihn erneut im unteren Teil des Gerätes ein, genau dort wo du mit dem Öffnen begonnen hast.

    • Fahre mit dem Spudger in Richtung rechte untere Ecke des iPhones.

  9. ZQHs5IDcYElVbat6
    ZQHs5IDcYElVbat6
    Xg6Iu3yX1XjO4UiN
    • Fahre mit dem Spudger weiter die rechte Seite hoch, löse dadurch den Kleber und die noch festsitzenden Klammern.

    This is some important step here I reckon. I didn’t release the clips individually and gradually, so when I pulled, the two halves of the phone separated quite suddenly and the cables ripped in half. Had to order a screen.

    Neil Bass -

    How do I release the clips individually? Is there a good explanation?

    Dan Schwartz -

    i personally use a utility knife and it helps separate the metal bracket that's on the screen from the phone housing

    Andre G. Bashore -

  10. PQVDqVrmZjEyXiRA
    PQVDqVrmZjEyXiRA
    MAPg3UrKPBx2YTxe
    • Nutze den Saugnapf, um das Display zu öffnen, dadurch sollte auch der letzte festsitzende Kleber entfernt werden.

    • Öffne das Display nicht weiter als 90°, da es immer noch durch drei Kabel mit dem Telefon verbunden ist.

    Prop it up on something

    Nick Stine -

    an old iPhone box and a rubber band lightly around the display works great to hold it at 90

    Christa -

    You could use a clock weight with 2 socks wrapped around it and an elastic band to keep the screen at a 90 degree angle.

    AudiRo808 -

  11. BeCr2QfjOsKYedGg
    BeCr2QfjOsKYedGg
    XfGaCXcSuLUBRd4R
    • Ziehe an der Kunststoff-Noppe, um die Vakuumversiegelung am Saugnapf zu lösen. Entferne dann den Saugnapf von der Displayeinheit.

    Pulling up on the “nub” is a futile waste of time.

    ffissk -

  12. lhyFVdXNmHJuvCNC
    lhyFVdXNmHJuvCNC
    RQOYQlb6PVVZfRY2
    rpvcWrYwKQvcyJI2
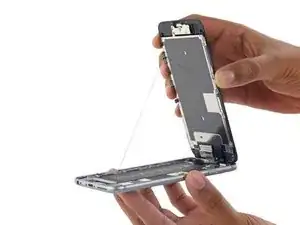
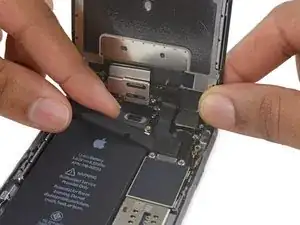
    • Öffne das iPhone, indem du das Home Button-Ende des Front Panels vom hinteren Gehäuse wegklappst und dabei die Oberkante des Mobiltelefons als Scharnier verwendest.

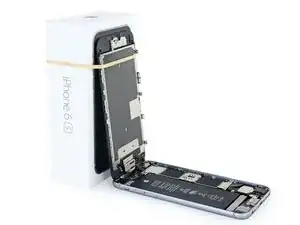
    • Öffne das Display um ca. 90 Grad und lehne es gegen etwas, damit es abgestützt ist, während du am Gerät arbeitest.

    • Befestige das Display mit einem Gummiband, während du arbeitest. Das verhindert ein ungewolltes Dehnen der Displaykabel.

    • Zur Not hilft eine ungeöffnete Getränkedose.

    Smart idea :)

    x226 -

    on the third picture, the screen is opened more than 90 degrees.

    Mirza Zohaib -

    It said about 90 degrees

    Nick Stine -

    Actually it literally says, “Don't open the display more than 90º, as it is still connected at the top by three cables that may break if stretched.”

    David -

    In the second picture I was originally wondering what that diagonal piece of material was. Now that I've done a repair I can say that it's the sticky adhesive around the edge of the phone lifting up with the screen.

    jonl -

    Be careful when separating the halves not to pull off the black tape on the back of the screen half. Mine was stuck to the two halves and I thought it was double sided tape to holding the halves together. It was shredded in separating the 2 halves. It turns out it covers up some kindof of silver paste (purpose unknown) on the back of the screen so I cut a put a piece of plastic film to match it and taped it in place. We’ll see what happens…

    Jamey Gerlaugh -

    can of soup and rubber band did the trick.

    Big Al -

    this is bs as they do not tell you reverse how to snap the fuker back on…..putting it in back on!,!!! the guy asks for points for writing thus? why not make a video you dirk….and how to put it back on….what about the other adhesive?..? you moron it says mothing…anyone else have a link? oi could barely put the screws back in..

    takimg the fuker apart is easy….putting the $@$* together again? humpty dumpty!”!!!

    makinfilms -

    When replacing the screen, make sure to get the top (camera side) lip in first, then work downward along the sides, getting the edge with the home button in last.

    johnjustinirvine -

    i normally use the long pick as a prop like that on a vehicle

    Andre G. Bashore -

    It should be noted that to camera end of the screen body needs to hook under the edge of the body…..the hooks of the screen frame need to be under the rim of the main body and snugged toward the camera end to easily close the cover and have it properly clip. These hooks are not really a proper hinge but clasps that need to be under the rim of the main phone frame/edge!! This way the screen easily will return to its closed state nicely gently snapping into place!!

    BRIAN Lee -

    EVERYONE read this comment. It is KEY.

    Also reverse order for getting screen clipped back in means pressing along the right side top to bottom corner. Then the left. Between that and this comment sandwiches back in like a cinch.

    Aaron -

    I used a full beer can and 2 elastic bands to hold the face at 90 degrees. One elastic at the top and one at the bottom keeps the face still at 90 degrees. This allows you to work on the phone easily. I did not remove the face totally to redo the perimeter glue as I have never dropped my phone in the water over the “long” time I have had it.

    Keith Paget -

    On reassembly, notice that the top does not snap in. There are hooks that must be engaged before levering the halves back together

    Brian Bygland -

  13. UCFVo6ViPYHOBoSr
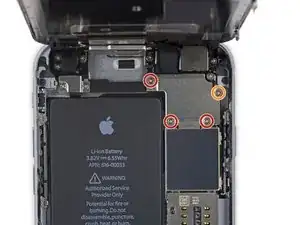
    • Entferne die beiden Kreuzschlitzschrauben von der Kabelabdeckung des Akkuanschlusses. Sie haben folgende Längen:

    • Eine 2,9 mm Schraube

    • Eine 2,2 mm Schraube

    • Achte bei der gesamten Reparatur darauf, dass deine Schrauben geordnet bleiben und sorge dafür, dass sie wieder genau an ihren ursprünglichen Platz zurück kommen, damit dein Smartphone nicht beschädigt wird

    In order to put the correct screw back where you took it out mark the head surface and a small dot beside the hole with a pen. Use coloured pens if you want the exact location for each screw/hole. This goes for steps 17, (23) and 29 too.

    lionno1 -

    Please! Please! Please! Invest in a Magnetic Project Mat or its equivalent from fixit. It will assist you with completing your repair.

    Ian Baldwin -

    I just taped down a 8.5 x 11 white piece of paper on my desk and drew a rough image of it, then ‘taped’ the screw I removed to the “image” on paper. It worked just fine. (My first time ever opening an iphone, so give it a shot!)

    italianchick99 -

    If you missed it from the beginning (like I did) it’s the #000 Philips for all screws except the Pentalobes.

    Max Cox -

    if you get a plastic ice cube tray, and a fine marker pen, text the sizes on each cube compartment as you follow the guide, also stops the screws getting lost

    Brendan Cranny -

    used sheet of A4 paper and bluetak - stick screw in bluetak, write location & size on paper

    Kev Salmon -

    mine is missing a screw!!! this is bs! this was mynmithers ohone nonone ooened it….one screw only…im liesed offf

    makinfilms -

    For some odd reason the screw “One 2.2 mm screw “ orange circled seems to be stuck and can not be unscrewed.

    Ahitagni Mandal -

    that could be because of the threaded part might have been broken (i've run into that a few times) never fun but pretty easy to work around it if needed

    Andre G. Bashore -

    Take a picture of the opened phone. Print it out. Put double sided clear tape over the picture of each screw. Stick the screws to the tape on the picture where they belong.

    Jeffrey Smith -

    Rounded corner, both here and Display cover, takes the Longest screw.

    David.

    David -

    For removing screws, I used a piece of paper and sketched the screw locations and screw sizes in the appropriate pattern for each step I was working on removing screws. I folded clear packing tape in a loop so some sticky area was on top for each screw so they did not fly away when the hair dryer was on or in case I knocked the paper while working beside it. This kept all the screws in an easy pattern with descriptions for later install. Worked slick.

    Keith Paget -

    Ordered a replacement kit, opened my Iphone 6S, got to this step... surprise, my OEM battery connector is at the TOP ! I am stuck, what now?

    Michel Lavallee -

  14. Tkg3BNWC4uLteBVu
    Tkg3BNWC4uLteBVu
    OCYCpUjUcUb4fpD5
    • Entferne die Kabelabdeckung des Akkuanschlusses.

    Little bit of adhesive holds this down- you do have to use the tiniest bit of force.

    Edward Coe -

    Pay careful attention to the orientation of this plate so that when it comes to re-installation you put it back the correct way. Sounds obvious but I’ve found it inverted in one customer’s phone, which led symptoms of charging failures and repeated spontaneous restarts.

    Jonathan Bradley -

    that's something i've never heard happening before wow

    Andre G. Bashore -

    The replacement battery’s connector is just slightly thicker vs the original. When I put the screen back on (also a replacement part from Ifixit) I get a blue shadow because the battery connector is putting pressure on the screen.

    steven pruchniewski -

  15. aFOebibjGPDG3kKj
    aFOebibjGPDG3kKj
    bmSuTNCd2VYuDBgj
    JUQVpTsWOMexRdXU
    • Heble den Akkustecker mit dem spitzen Ende eines Spudgers vorsichtig von seinem Anschluss auf dem Logic Board.

    Be sure not to skip this step. It is crucial. I have had many repairs where the screen will not light up after the repair if the battery had not been disconnected and reconnected.

    Andrew spoelstra -

    Thanks for the tip, Andrew.

    William Turner -

    It should also be mentioned, DO NOT USE A METAL SPUDGER. You could short the battery to other nearby metal parts. I've done that, the battery clip arced to the metal cover on some of the logic board chips, and my phone wouldn't power back on for 3 days. They should put a caution caption on this step. I've had this happen on a 5S as well.

    Frank -

    Thanks for the tip, Frank.

    William Turner -

    SERIOUS WARNING!: During *reassembly*, you should NOT reconnect the battery connector until the VERY LAST step (upon reassembly!), as many people, including myself, apparently have smoked (burned, destroyed) the main Logic board. This happens when you reconnect the LCD/digitizer assembly FPC cable. ifixit should modify this instruction to be very explicit about this!

    enoughstatic -

    It sounds like several people, including myself, had trouble charging the new replacement battery past about 10%. This ended up being due to the new battery not having a non-conductive insulator. The way to solve this is by adding a small piece of electrical tape to cover the battery connector before screwing in the battery connector bracket over it. You may want to do this on the first go-around.

    If you do experience that problem, I found the answer here and it worked perfectly: iPhone battery not charging after DIY battery replacement. Why?

    Heather Pastushok -

    Thanks to Heather Pastushok (and Behrang Mohajer at “iPhone battery not charging . . .) for this important detail. My iFixit battery came with a thin layer of black foam insulation on the top surface of the battery connector, but even gentle pressure from a blunt plastic tool (pushing the connector in place) scraped an exposed spot. A carefully trimmed piece of black electrician's tape provided peace of mind. The iPhone 6s is good as new with the battery now at 100%!

    Robert Dering -

    To reduce risk of battery arcing , as soon as the old battery connector was detached, I wrapped it with insulation from connection all the way to the battery body. Did the same with the new battery to eliminate concerns about shorts while checking fit position to assure the connector would match up with the receiver. Only removed the insulation after all other connections had been restored, so plugging in the battery was the last step before closing the case.

    Robert Dering -

  16. EmMxeVeeFdYTQXiE
    EmMxeVeeFdYTQXiE
    URwJFPnPqkwAgWJ3
    • Drücke den Akkustecker vom Logic Board weg, so dass es während der Reparatur nicht zu einer unbeabsichtigten Verbindung mit dem Anschluss kommt.

    If you remove the grey bar with the word “TAPTIC” next, removal of the battery adhesive is much easier. It can be pulled straighter back with less chance of tearing. Here’s an image with the securing screws identified.

    If you securely anchor the screen to a can of soup, it is not necessary complete step 16 Front Panel Assembly. I was able to remove the two bottom (1.2 mm) screws and the 2.8 mm screw, but could not get the upper (1.2 mm) screw. I was able to remove the old battery with the Front Panel Assembly left in place.

    Edward Dziuk -

    Amazing tip Edward, I followed your tip exactly and agree to definitely remove the “TAPTIC”

    italianchick99 -

    Hi what it is called black cover between battery connector and sim card tray? Thanks

    Rajendra -

    How in the world does one reapply the edge adhesive without making a mess?

    gary -

    I misread the directions and pulled off the whole large sheet first. I was able to align the bottom of the smaller sheet into the edge of the phone and get the adhesive into the right area. It was a little tricky but once it dropped down it was in the right place. I would have liked an indication of which was top and which was the bottom of the adhesive. The corners seemed slightly different and I aligned the bottom ones carefully.

    Diana Riddle -

    the new battery from ifixit came with a dented connector and wont connect to the logic board. What do I do?

    Adam Frederick -

    are you suuuuuure you didn’t dent the connector? i know if i had received a battery with a dented connector, i’d immediately contact the seller so you probably dented it yourself and now you’re trying to trick all us but we’re on to you.

    unibody deluxe -

  17. X3YWxpBc3PiXXvuS
    • Entferne die folgenden vier Kreuzschlitz Schrauben, die die Kabelhalterung befestigen:

    • Drei 1,2 mm Schrauben

    • Eine 2,8 mm Schraube

    Thank you for this great guide!

    I was able to skip removing the display assembly and logic board steps and lay the speaker upside down on the bottom edge of the logic board without putting undue pressure on the antenna cable making this a much easier and quicker repair for me. If you choose to leave the display assembly connected, I recommend using a rubber band to hold it to a box of similar size at a 90 degree angle to prevent damage and stress to the attached cables.

    So, the steps I skipped were Steps 16 through 34 and Steps 37 through 45.

    scentaur -

    You need to remove the screen completely if you want to replace the adhesive gasket around the outer phone edge.

    Glen Paetz -

    The 1.2mm screw in the top left corner is refusing to come out, any help?

    Harry Allinson -

    I’m also having this issue now, what did you do to get the screw out?

    Belmin Husanovic -

    Sounds common but no solution? I keep working at it but no luck. Anyone find a way in the last few years?

    Kurt Mickelson -

    There’s no trick… Make sure you’ve got the right driver, press down HARD, and crank it. If it’s stripping, check your driver and consider moving up one size. Resources: Screwdriver Best Practices & How to Remove a Stripped Screw - Good luck!

    Jeff Suovanen -

    Bullshit theres no trick, use a small magnet, or whatever size u have,

    mxcombust -

    why does the battery fix kit not include the #00 bit needed to unscrew all 3 1.2mm screws?!?! !#^&@@ off.

    robertdjclark -

    Either a #00 or a #000 bit should work fine here. Some #0 bits will also work if the point is fine enough. Same goes for a lot of JIS bits. As long as it doesn't strip or slip, you're good.

    Jeff Suovanen -

    My kit's screwdriver failed about the time I got to the last few steps in this tutorial. I had a cheap precision set with a #000 bit but that refused to seat in the screws. I went to Home Depot, bought a lifetime guarantee Husky precision set with #0000 through #0 bits and that worked beautifully on every screw.

    David Shaddock -

    The screwdriver in my kit doesn't remove the bottom two screws! any reason why?

    anujfolsom -

    I actually followed all the guide but isn’t the front panel disassembly skippable? And if so what are the benefits of removing it? Cause i had quite a hard time putting back in the connectors of the 3 flex cables.

    GiovanniB -

    You need to remove the screen completely if you want to replace the adhesive gasket around the phone’s outer edge.

    Glen Paetz -

    I have the 6s from Dubai. the top left screw is different with the rest. I am stuck on this screw. i am clue less why this top left + screw.

    Anyone have the same issue?

    Evander Lorenz -

    A precision screwdriver set is a wise investment for doing any of this work. I got a set from iFixit that is very well machined. Don’t expect the cheap drivers with kits to last more than one disassembly-assembly, if that! Also don’t keep mangled bits or drivers…throw them out!!!

    Peter Bovey -

    what crews  should I use in this step PH000. OR Y000 OR P2 Plz help me

    mshary alzhrany -

    The kit provided with the replacement Battery of iPhone 6s does not include the right bits to remove the three 1,2mm screws! I had to remove it without removing the display.

    Matthias Wagner -

    I too experienced a problem with the size of the screwdriver here (supplied in the iFixit kit.) My phone also had a 5th screw right in the center of the plate - another 1.2mm. I removed and replace it without problems.

    Scott Young -

    @scottvyoung Sounds like you’re working on an iPhone 6. These instructions are for the 6s.

    Jeff Suovanen -

    Screws are very small and very difficult to put back in!! Lost 2-3 screws

    Put phone back together and of course doesnt work Waste of Money!

    Thomas Kintigh -

    I purchased a “screw set” for an i-Phone 5 and have slowly been cannibalizing it whenever I lose a screw. It has been invaluable and the set includes enough screws that I have been able to cover all that have been dropped and lost for 3 i-Phones now. Using a magnetic mat has also limited my screw loss considerably! All of these items were purchased through IFIXIT at very reasonable cost. Thank you IFIXIT!

    Peter Bovey -

    The ifixit kit supplied screwdriver for the display cable bracket did NOT fit. (disappointing) So, I used scentar’s (comment above) method of a large rubber band wrapped around a book weighted kit box to hold it at 90 degrees. Leaving the screen attached and then removing and replacing the battery.

    laffinbuz -

    I had a problem reassembling the iPhone, my touchId wasn’t working any more even if the home button was working correctly. I don’t know why but loosening these 4 screw a bit made it work again. If I tight them again it doesn’t work. Maybe this can help someone.

    Alex Mufatti -

    @alexmufatti I had the same exact issue and luckily came across the same solution by trial and error. However a few weeks later Touch ID suddenly stopped working again and I think it’s the same issue. I was hoping somebody came across a more permanent solution.

    Michel Chemas -

    I was nervous not following this guide step-by-step, but as others mentioned I did not have the correct ‘bit’ size to remove the 3 screws circled in ‘red’ in the above diagram. I skipped steps 17, 18, 19 BUT used the ‘tip’ in step 11 to prop the front screen without removing the front display completely and I was still able to replace battery.

    italianchick99 -

    how to measure the screw? from the head or from under the head?

    Balieltello -

    Measurements in the guide are for the entire length of the screw, including the head, as measured with an ordinary digital caliper.

    Jeff Suovanen -

    I was unable to remove the display cable bracket. Therefore I was unable to remove the display, which meant I couldn’t replace the screen seal. ☹️ The small Phillips bit seemed too pointed so it couldn’t get into the screw deep enough to grip. The second Phillips bit was too big. It makes me wonder if I got the correct tool kit with my battery replacement kit.

    Mark Morris -

    The display does not have to be removed! If you secure it in place with a rubber band as advised (actually one at the top and one at the bottom works best - stops the bottom half of the phone sliding towards you) , it will quite happily sit there while the battery is replaced. It’s definitely better not to have to remove and reconnect those display connectors!

    J-P jpfromadelaide -

    I’ve done this with an iPhone 5 and an iPhone 6S. I did not remove the display either time; I was afraid of damaging something unnecessarily. It’s definitely not necessary to remove it! I had an extra set of hands and eyes to help me be careful, but if you get the battery adhesive strips off cleanly, it’s easy to leave the display on.

    Matt Burleson -

    I skipped 17 to 22 as I was not redoing the perimeter glue. Worked well for me, except the phone will not be water proof.

    Keith Paget -

    no need to remove the display. I did not even secure it..just did the replacement carefully. All worked out well. Also unless you are planning on submerging the phone in the water replace the perimeter glue. Otherwise it works just fine with out it.

    Igor Kapitanker -

    Perfect. I followed the instructions and it worked to a "T". For the critics who don't know, the screwdriver handle is magnetized and will hold the tiny screws in place while you remove or insert them. After the battery replacement the phone seems to be going through some type of setup. I'll wait and see what happens after its charged to 100%.

    Bob Harris -

    The "Three 1.2 mm screws" seem to be particularly fragile either that or the PH00 and the PH000 are the incorrect drivers - this part of the guide should be clearer on what driver should be used as every time I touch these screws I seem to strip them 😩

    Hope this helps

    Regards

    Lewis Dexter Litanzios -

    IMHO this is not neccessary.

    A Guy Called Guy -

    I took A Guy Called Guy's advice and skipped this entire Front Assembly Step and went straight to Step 23.

    Kelly Archer -

  18. Q6DLMHNJxFZSLvIV
    Q6DLMHNJxFZSLvIV
    dW3Skxs2Qsklb1cU
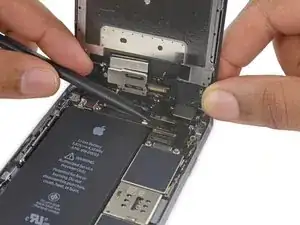
    • Entferne die Abdeckung der Displaykabel.

    What can I do if one of the screws get stripped?

    Zoe Shadzad -

    Mine has an additional 1.2 mm in the center of the cable bracket.

    Romke -

    IMHO this is not neccessary.

    A Guy Called Guy -

  19. DFrxB3OWDCFJlMuW
    DFrxB3OWDCFJlMuW
    efDnQ5L4xFYarO2k
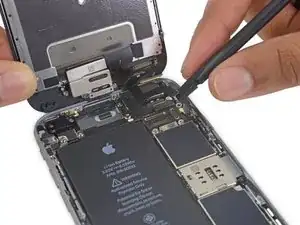
    • Löse mit dem Spudger oder einem Fingernagel den Stecker des Frontkamerakabels von seinem Anschluss vom Logic Board, indem du es gerade nach oben hebelst.

    Note carefully the order that they are removed.  My new display had them in the WRONG order and I spent about 2 minutes trying to figure out what was wrong until I compared the new screen with the old screen and saw that they were in wrong sequence.  Fortunately they were relatively easy to fold out of the way and put them in the right order.  After that they popped right into place.  The new cables don’t have the “fold” yet so display had to be held at 90 degrees until all three were installed and the cover reattached.

    David Rogers -

    I pop up these screen connectors using my fingernail. After doing a lot of repairs, this is the easiest and fastest way to get them loose.

    Kenneth Hilstan -

    pad under earspeaker is lost, where to buy?

    Balieltello -

    For me, both the camera flex cable and the digitizer cable from step 20 came out together. Made me wonder in step 20 where was the cable I needed to release :-)

    Jean-François Schmitz -

    Are there any tips for plugging the connectors back in, besides don’t push on the center of the digitizer? It felt like I could really mess up the pins if they weren’t aligned correctly and I tried to push them in too firmly.

    Diana Riddle -

    IMHO this is not neccessary.

    A Guy Called Guy -

  20. 2C6YWNRbN1xEP6AN
    2C6YWNRbN1xEP6AN
    C3JebmxAcjefVgvo
    • Löse den Stecker des Digitizerkabels vom Logic Board, indem du es gerade nach oben hebelst.

    • Wenn du das Kabel wieder verbindest drücke nicht in der Mitte des Steckers. Drücke erst an einem Ende, dann am gegenüberliegenden. Beim Drücken in der Mitte des Kabels kann der Stecker verbiegen und beschädigt werden.

    I can't seem to get the digitizer cable to snap back into place. Any suggestions?

    gbmazur -

    Yes--if you, like me, could not get the digitizer connector to seat, you've probably got confused on the reassembly order. I had to remove the EMI shield (seven screws), and reinstall it ON TOP of the big flap tongue that comes with the new digitizer, rearranging the order of the connector tails. Note that one of the connectors is a bit shorter than the other, and one of the receptacles on the iPhone is shorter as well. Make sure you're laying down the tails and connectors in the right order when you reassemble! The display data cable--sideways to the others, toward the outer edge, goes first. Then the longer connector, and finally the shorter one. When they're seated, they're seated, and you'll be sure of it.

    David Shaddock -

    Patience. I had trouble but after some time got it back in. Didn’t have to rearrange anything like above ^. Maybe the design was changed.

    Cbirdsey -

    I have no audio through the earpiece after completing the process. I have removed and reseated all cables several times. What’s wrong?

    Tobin Antpusat -

    Same problem…. any suggestions?

    Antonio Sacchet -

    My touch id does not work anymore after battery replacement. Can it be that its due to badly connected digitizer cable to connector? Everything else seems to work perfectly. Thanks

    cyp -

    I can get one end of the thing to fit in to place, and then when I move over to push the other side down, the first side pops back out.

    Samuel Martin -

    I've got the reassembly order backwards and installed the battery first, and the digitizet seccond. I think I fried something, because smoke came out of the socket. Can anyone tell me what needs to be replaced?

    Christiaan Erkelens -

    IMHO this is not neccessary.

    A Guy Called Guy -

  21. ouGNonyQp2fylirv
    ouGNonyQp2fylirv
    gFMNQTROC11nAGmb
    • Der Akku muss abgetrennt sein, bevor du das Kabel in diesem Schritt ablöst oder wieder verbindest

    • Löse den Stecker des Displaydatenkabels aus seinem Anschluss auf dem Logic Board, indem du es gerade nach oben hebelst.

    I notice there are 3 flex cables, does this disassembly guide apply to the verizon version of iPhone 6s? I don't want to order the wrong digitizer screen for my new and improved iPhone that i somehow managed to crack the screen on.

    Bailey Duncan -

    There are four cables to disconnect here to complete this process, at least on my phone. The replacement screen also had 4, so no problem.

    Scott Young -

    My replacement screen had only two connectors while the old screen had 3. I sent it back for replacement. Not sure what went wrong here, because everything else fit perfectly. So what model could this replacement screen have been intended for?

    Martijn Vos -

    I am having a hard time reattaching the LCD cable. Is it possible I bent the connectors? Or possibly the gaskets around it are interfering? I’d like to just pull all of that waterproofing gasket off! >:(

    Amanda Cooper (Doula) -

    Did you end up going this? My screen is black so I'm trying to figure out what i did

    Alex Tanner -

    I neglected to detach the battery before taking this step and upon reassembly I have no display. What might be my next step to repair.

    Dennis Gagomiros -

    You can try reseating the cables, but the likely answer is that your logic board’s backlight circuit is blown. If you power on your phone and you can see an image on the display by shining a bright light on it, your backlight circuit is toast. This is a common repair and very fixable, but requires microsoldering equipment and expertise. It’s not a DIY.

    Jeff Suovanen -

    I made the same mistake and I'm wondering if you got a fix for it? Is the damage done on the screen assembly or phone itself?

    goesprotocall -

    My screen replacement only comes with two flex cables but all of the videos are showing three. It is not working to connect the flex cables to the connectors

    cellabella1 -

    The third flex cable would be for the front-facing camera, sensors, etc. If you bought a display that doesn’t include those components, you’ll need to transfer them to your new display first, and then you’ll be able to install it and plug everything in. The instructions are over here. Good luck!

    Jeff Suovanen -

    The important warning about making sure that the battery is disconnected may be more beneficial at the BEGINNING of these instructions.

    ffissk -

    I mean if you follow the guide it literally says to disconnect it first. Step 15

    Nick -

    There are four cables to disconnect here to complete this process. My replacement only got 3, what should i do?

    Vincent Ladida -

    IMHO this is not neccessary.

    A Guy Called Guy -

  22. U2JJTtEXgAuBqOlJ

    If you're replacing the adhesive, be sure to check the two tabs on the display that receive the pentalobe screws before setting the display on the new adhesive. The tabs on my display were bent inward slightly—just out of reach of the pentalobe screws. I didn't bend these out before setting the display and was forced to re-open the display to adjust them, ruining my carefully placed adhesive.

    cdinger -

    There is no need to remove camera or the logic board if all you want to do is replace the lightning assembly. Leaving things in place will save you a number of steps. Proceed directly to Step 35 and save yourself all this work.

    Ira Goldman -

    Also read comments on step 37 as others have also pointed out that there is no need to pull logic board and you can skip those steps mentioned.

    Ira Goldman -

    Unless you are replacing the speaker you can skip to step 34 as there is no need to remove the logic board.

    Bryan Solo -

    My replacement display was not functional, but I didn’t test it until after my adhesive was already applied. Might be worth double-checking the replacement screen works before applying the adhesive at all. (though I’m glad I tried it before closing it up!)

    Ben -

    When reconnecting to the logic board, reverse the order, so display first, then digitizer and finally camera. The front pannel slides into small edge of the backchannel. So start at the top when you put front and back together.

    Joep Willemsen -

    be sure battery is disconnected before reassembling the display —in case you reconnected it to position battery

    Christa -

    If reapplying adhesive, I would strongly recommend that you wait until you are reassembling the phone. Otherwise, trust me, it gets really sticky and limits your mobility around the phone. I had it all over my fingers by the time I finally got the old battery out and the new one in.

    Justin Tilghman -

    Removing the battery was a challenge as the old adhesive snapped before it came out so I had to use a hair dryer to warm the adhesive before slowly peeling the battery off. I still manage to puncture the batter and nearly had a fire. When inserting the new battery I didn’t leave enough room for the connector to fit beside it so I had to pull it off, plug the connector into its port, then insert the battery. I think the instructions should warn you to leave enough room for the connector to tuck in beside it.

    The kit came with a new adhesive gasket but I could not find the instructions on how to install it. But after 45 minutes I had it done and my iPhone 6S is back in working order. Don’t forget to ‘hard’ reset the phone on start up, run the new battery all the way down. Otherwise this is a very good value time and money wise.

    Ramon Pabalan -

    I preferred not to use the adhesive edges around the phone, as this makes replacing the battery in future more time consuming. My iPhone works fine without the adhesive.

    Mark Morris -

  23. qVxyURDvBiHTZQBF
    qVxyURDvBiHTZQBF
    buhswPVPTKoLSfwp
    V6EPHX1vsGNHGkjd
    • Benutze die Pinzette, um die zwei schwarzen Klebestreifen am unteren Ende des Akkus zu entfernen.

    • Benutze deine Finger oder eine Pinzette. Sei vorsichtig, wenn du in der Nähe eines Lithium-Ionen Akkus arbeitest. Wenn der Akku beschädigt wird, können gefährliche Chemikalien austreten oder der Akku kann brennen oder explodieren.

    • Optional kannst du in diesem Schritt auch die Taptic Engine entfernen. Dieser Schritt ist sehr einfach und ermöglicht dir einen besseren Zugang zu den Klebestreifen.

    Remove the Taptic Engine. It's just 2 screws and this way you have a way better angle to remove the adhesive strips.

    Derek -

    Read step 23 before performing 24, to understand how important it is not to tear the white adhesive bits, and how to pull it gently.

    Manu -

    I agree with removing the Taptic Engine first, before pulling on the adhesive strips. It really, really helped. As long as your iPhone6s Taptic Engine looks like the one in the picture ( wide, and almost width of the battery. Mine also had black tape over it too, for some reason). This wide Taptic Engine only has the two screws to remove - no power connector cable! ( it uses contact pins on the underside to power the Taptic Engine ).

    Brett -

    Removing Taptic Engine is defenitly a recommendation, easy to do, and prevents damage to it during strip removal. Placing the phone 5 minutes in front of blowing laptop heatsink makes it also easier.

    Joep Willemsen -

    Laptop Heatsink for warming the adhesive - you are my man :)

    Linus Grüne -

    that's definitely a new one to me

    Andre G. Bashore -

    By not removing the Taptic Engine, you would be making the next step twice as hard as it needs to be. This should be a mandatory step!

    Ronnie -

    The strip edges were not visible/ accessible on my phone. In hindsight, Taptic Engine removal should have been required.

    pwesthelle -

    Even with a four-year-old 6s, the battery adhesive came off cleanly. Keeping it at a shallow angle as possible, greatly helped by removing the Taptic engine, makes it very easy to remove the adhesives without really much effort. Do it one at a time, however; I’ve seen videos, one by iFixIt, in which more than one were pulled out simultaneously, which resulted in two of the strips breaking off.

    Family Juinio -

    hey my battery burst into flames what do i do?

    Logan Breaux -

    Pee on it and then throw it in the garbage.

    Joe in PA -

    I failed this final boss battle. My strips broke; even with heating. A pro tip was to use an E string from a guitar. Since we’re on virus lockdown I didn’t want to sacrifice a guitar string. I used 25# monofilament fishing line and a 2# dumbbell and slowly wound the line around the dumbbell. FYI, After reading these comments, I should have removed the haptic, but didn’t.

    jon souw -

    removed the haptic engine but still the strips broke.

    Ahitagni Mandal -

    It is not safe but if you are in my situation ….try a sludger to lift the battery just a bit and use a tweezer to pull out the end of the tape from under the battery and then pull it with finger

    Ahitagni Mandal -

    My battery only has one long black strip across the battery instead of two - what do I do?

    Edcaba -

    My iPhone doesn’t have strips that come out and attack to the bottom of the battery like these do. If it has any, they’re entirely under the battery. I bought it second hand in China so I’m guessing whoever did the last replacement did it differently. Does anyone know what I can do?

    Sean Cunnion -

    Remove the haptic engine! It’s the easiest part of the repair and gives much easier access to the adhesive.

    One of my strips came out cleanly and the other broke. I very carefully worked the edge of the battery up (with the spudger) until I could see the broken strip, then grabbed it and pulled again. It broke again—several frustrating times—until I finally got a good hold on it and it gloriously pulled free. Keep at it this way; it’s much easier than working a card under the battery, which could easily damage the display clips.

    Matt Burleson -

    Which edge of the battery did you lift? The end or the side?

    Sean Cunnion -

    1. I am going throw in the heated rice shoulder pad thingy again here. I didn’t do it with the first one but saved me when my second adhesive snapped. Got the phone almost too hot to touch (but not to hot to hurt the phone).

    2. Parallel pull as much as possible

    3. Pull not much past the end of the phone and then cinch up and go again. Mine easily went 20 cm before freeing.

    4. Umpteenth affirmation of removing the taptic engine as standard step.

    Aaron -

    Definitely remove the Taptic Engine. Gives an easier angle to remove the strips under the battery. Lift the phone bottom about 30 degrees and heat the bottom of the phone with the hair dryer for about 30 seconds. Then heat the tabs on the face of the battery for about 20 seconds to soften them. Pull back the first tab with the tweezers to loosen all you can, and pull with a full width hold using the tweezers until you get about 2 inches of tape loose. A slight side to side motion helps to dislodge the tape. Wind the tape around a pen or pencil and keep pulling slowly to not rip the tape and wind as you go. A gentle side to side motion works well to start with, then just keep pulling straight back. You want the tape flat and wide. When the tape starts to narrow you are almost done. Seems like you have wound about 12” - 16” onto the pen. Then do the same for the 2nd strip. Remember to hold the battery in place as you near the end of the 2nd strip as the battery will be loose when you reach the end.

    Keith Paget -

    My strips broke. Used dental floss, those broke several times. Then decided to use some alcohol drops. This and the dental floss saved me.

    I am enjoying now my new battery.

    Thanks IFIXIT for the tools, the spare parts (battery) and the photo steps and explanations. I will continue to enjoy my iPhone 6s for several months.

    Best Regards,

    Tirso Boada - Nov 21

    tirsoboada -

    Removing the taptic engine should be required. It's the only step of the entire phone that takes less than ten seconds and you get a huge benefit of much more working room. It's not even held by anything else besides the screws, so no tiny snap-in connector to mess up. I just successfully pulled off both adhesive strips the first time I ever did this.

    Danny -

    Do yourself a favor and remove the Taptic Engine before!

    A Guy Called Guy -

    I removed the Taptic Engine... and found a loose little screw under it(!). Apparently there since the phone was built. Funny.

    General comment: Heat was the key to getting the phone open. All else went quite well per the instructions.

    Terry Parker -

    I found using a normal eyebrow tweezers were more effective at peeling back the adhesive strips.

    Mark Morris -

  24. vd2CQKLtN6gUXVgj
    vd2CQKLtN6gUXVgj
    54RfNmDNuYfKCBEH
    • Ein Zusammenfalten der Klebestreifen muss verhindert werden, da sie sonst zerreißen, wenn sie wieder auseinander gezogen werden.

    • Eine der Akkuziehlaschen langsam in die untere Richtung des iPhones ziehen und entfernen.

    • Um ein Reißen des Klebestreifens zu vermeiden darauf achten, dass beim Abziehen weder der Akku noch die unteren Bauteile berührt werden.

    • Mit gleichmäßiger Kraft an dem Klebestreifen ziehen, bis sich dieser aus dem hinteren Teil des Gehäuses entfernen lässt. Für optimale Ergebnisse in einem Winkel von 60° oder weniger an dem Streifen ziehen.

    • Der Klebestreifen wird sich auf ein Vielfaches der Originallänge dehnen. Einfach so nah am Akku wie möglich neu ansetzen und weiter ziehen.

    Think of it as pulling off a 3M Command (tm) strip. Slow and steady.

    Thomas Benson -

    Exactly. I thought the YouTube video of the “hard way” was funny and immediately thought of that. A slow, firm, steady pull stretches and removes it. You might have to stop and wind it around your fingers to get closer to the battery again to keep effectively pulling.

    Karleen Smith -

    removing the taptic engine makes this step a lot easier, and give you a better angle to pull the tape.

    kym thomas -

    I agree with removing the Taptic Engine first, before pulling on the adhesive strips. It really, really helped. As long as your iPhone6s Taptic Engine looks like the one in the picture ( wide, and almost width of the battery. Mine also had black tape over it too, for some reason). This wide Taptic Engine only has the two screws to remove - no power connector cable! ( it uses contact pins on the underside to power the Taptic Engine ).

    Brett -

    You may find removing the taptic engine helpful if one adhesive strips breaks as well, you can sometimes get hold of the remaining adhesive to start pulling again with tweezers.

    Dwayn Draper -

    Jeez luckily i stumbled upon you guys saying about removing the taptic engine, was sweating for a minute. after removing the taptic engine i use tweezers to pull a bit out and use my fingers to pull it out. the rest is history :) thanks guys

    Evan Chao -

    Both of my strips broke, I can’t get the battery out.

    Johnson Vue -

    Both of mine broke as well. Make sure that TAPIT thing is out, then use the blue pry bar to pry the old battery up. Pretty soon you’ll be able to reach the tweezers under there and grab a strip. It’s pretty amazing. Once the strip starts pulling away, the whole thing zzzzips out in one piece

    Burgess Allison -

    The absolute most difficult part. The two bands broke so I had to use the spudger and some isopropyl alcohol to pry the old battery up. It was very contorted and possibly leaking when i set it aside. Be very patient on this step!!

    skrolikowski -

    It should be mentioned that these strips run the length of the battery, and that by pulling them, you will be allowing the battery to be removed. Also, don’t bend or break the battery since that may cause it to catch on fire or leak dangerous chemicals.

    Jason Owen -

    As someone who never opened an iphone before, i took the advice and removed Taptic Engine FIRST before the adhesive steps, make your life easier and remove it.

    italianchick99 -

    Removed the Taptic Engine and used the width of the tweezers to grab the white part if the strips. Don’t try removing the black part. My strips came out easy with a little patience and force. These are like the 3M Command strips.

    Russ Christy -

    Explicit directions on how NOT to proceed when both strips remain intact would have been helpful. For example, prying out the battery from the short end is ill advised. Working the long side of the battery below the volume control is safer.

    pwesthelle -

    hi thank u so much u hellpt a lot and it was very helpfull

    Callum Lawless -

    Dropping 2 or 4 drops of isopropyl alcohol on the strips as I pulled made a big difference, highly recommend. It allowed the strips to slide more easily on the end of the battery as I pulled. Removing the haptic was also easy and helpful, thank you!

    Jonathan Flower -

    I think that that the photo below is a bit misleading. Stretching the adhesive tape like that just makes it likely to break. I didn’t use any heat. Just peel the black tape off to expose the white rubbery adhesive then peel that off the battery. Hold both sides between thumb and forefinger and have your pinkie fingers braced on the edge of the phone. Start to gently pull with as little angle as possible and you can feel it start to move. As soon as it has come about 1/2” regrip next to the battery and repeat. As it gradually comes out over a few minutes it becomes easier as there is less tape left under the battery. You can tell when you get near the end as the tape width reduces until it just comes free. Repeat with the second tape and when that comes free the battery is now miraculously sitting in the phone loosely. No damage

    I couldnt believe how easy this was after reading all the comments. Do it slowly with minimal tension and dont overstretch and it will come out. I did not have to disconnect the screen.

    456eec -

    I have always had the battery adhesive break at this step. I’ve done a good 20 iPhone battery replacements. The adhesive always snaps on me, resulting in a lot of wasted time “digging” out the old battery.

    Until today. Today I warmed the adhesive a little bit with a hairdrier, and I removed the Taptic Engine. The strips slipped out like a dream. It’s worth the extra 90 seconds of effort. I’m so happy that I had to comment here.

    Lance J -

    This is the hardest step in replacement. Both my strips broke and had to heat and pry multiple times. Tips: (1) definitely remove the taptic, (2) don’t let it slip from your fingers while pulling, (3) pull very slowly - 1/2” at a time, (4) after 1/2”, while keeping it stretched with one hand, regrip closer to battery with second hand, (5) because it stretches, you will pull it about 8 to 10 inches or more before the full strip pulls out, but pull from as close to old battery as possible.

    Ed Hawkins -

    my iphone 6s doesnt have those 2 strips showing. Any advise?

    Fullpo -

    First time disassembling my 6s and both strips came off without breaking. Not sure if the idea for rolling the strips was in this guide or elsewhere, but I wrapped it around some tweezers for the first strip and then a small pencil (more symmetric) for the second strip…and pulled/rolled both rather slowly (never pulling past bottom of case). During the first go around with the tweezers, the strip started wrapping unevenly and it was pulling one side of the first strip more than the other. The sound the strip was making changed and it started becoming more difficult to remove, so I repositioned to a more symmetric part of the tweezers and it stopped being difficult. For the second strip with the small pencil, kept it slow and I didn’t have any issues. I think keeping equal force across the strip helps it not to tear, but I’m no expert.

    Nicholas Anchor -

    just a random thought here but what about a small drill bit and drill??

    Andre G. Bashore -

    This was my third battery replacement and the first time I successful removed both strips without breaking either of them. One thing I tried, and it seemed to work well, was to wear a thin vinyl glove on my pulling hand. That provided a really solid grip on the strip and I was able to just keep stretching until it popped free.

    Patrick Langvardt -

    If you have used those 3M command strips, and successfully removed them from the wall without wrecking the paint, use the same technique. It’s actually kinda fun once you get the hang of it.

    Steve -

    This is the most difficult part of the entire exercise. On my iphone6s it took 10 mins for the first unbroken strip. The second strip broke and it took about 5 hours. It still wouldn’t come. I came close to emptying out my 10 yard floss and still no luck. The only way I got it out was by feeding the underside of the battery with isopropyl alcohol 70% (I didn’t have the 90% that they recommend in this guide) and let it soak overnight. Voila. The next morning was a charm. It just came right off.

    In hindsight, I would have just soaked it lightly with isopropyl alcohol, let it rest for a couple of hours or overnight and not have to bother with any string tugging, pulling and flossing!

    pradeep bala -

    Heating with a blow dryer on high for one minute per tab worked for me. Yes, by all means, take out the taptic engine. On my second strip, the black tab came off…leaving me with just a hint of white adhesive exposed. All I did then was slowly work the heated white tape with the flat blue spudger tool until I was able to grab hold enough to move out about 1/4” or less. Once an adhesive strip is grasped, walk it out slowly, straight, and horizontal as possible…using two hands…moving the strips out from each thumb and forefinger at a time. It takes a minute or two to slowly walk out one strip in this manner. Getting a good first grab between thumb and forefinger is the hardest part. I used the flat side of the blue spudger to help make that first grab. Once you have it, hold it…don’t start pulling right away. Get your other hand (thumb and forefinger ready) and then begin the “itsy-bitsy-spider” slow walk straight out.

    info -

    The strips want to stick on the adhesive of the black cover for the battery connector cable. I suspect that this is part of what makes them want to break. I removed the cover and used a little heat on the bottom of the phone case and all went smoothly.

    len -

    Yep failed at first attempt to remove the strips. Thank you for suggesting to the remove the Taptic Engine bar piece and use the tweezers nd pull very very slowly. Satisfyingly the strips then came out as intended :)

    JamieMac -

    Took the Taptic engine out and followed 456eec's instructions (above) to a tee. Came out without a hitch.

    Kelly Archer -

  25. F4V2omtcnfpaXFXj
    • Entferne auf die gleiche Art den zweiten Streifen.

    • Halte den Akku fest, während der zweite Klebestreifen entfernt wird. Andernfalls könnte der Streifen den Akku aus dem Gehäuse schleudern, wenn er sich ablöst.

    • Wenn du beide Streifen erfolgreich entfernt hast, springe zu Schritt 24.

    • Falls einer der Streifen gerissen ist und Reste unter dem Akku kleben, gib einige Tropfen von hochkonzentriertem Isopropylalkohol (mehr als 90%ig) an der Stelle, wo der Klebestreifen gerissen ist, unter die Kante des Akkus.

    • Lasse den Alkohol etwa eine Minute lang einwirken, damit der Klebestreifen geschwächt wird. Hebe dann den Akku mit dem flachen Ende des Spudgers vorsichtig hoch.

    • Versuche nicht, den Akku mit Gewalt herauszuhebeln. Tröpfle mehr Alkohol hinein, falls das nötig ist, um den Kleber zu schwächen. Verforme niemals den Akku und stich ihn nicht an.

    • Schiebe den Spudger nicht im Bereich zwischen der oberen Kante des Akkus und dem Lautstärkeregler (-) ein, sonst riskierst du, das Lautstärkekontrollkabel zu beschädigen, das direkt unter dem Akku in das Rückgehäuse geklebt ist. Heble nicht gegen das Logic Board, das könnte das iPhone beschädigen.

    • Im folgenden Schritt wird noch eine Alternativmethode zum Ablösen des Akkus gezeigt.

    If you successfully remove all of the inside adhesive strip and snapped the outside adhesive then an alternative to step 25 is to start the removal from the inside edge of the battery.

    Using the pointy end of the spludger, gently place it between the battery and main board and pry it up along the edge, it will lift easily as there no adhesive on this side.

    As you lift it up you will then see the adhesive and you use the flat edge of sludger to break the adhesive off the phone.

    Work slowly along the entire length of adhesive, back and forth until it comes away easily.

    The battery will bend in the middle along the 2 cells so don't force it without breaking the adhesive as indicated in previous step.

    john racovelli -

    Drag them off along the side of the battery instead, much easier.

    e5frog -

    You don’t need a lot of pressure on the battery while pulling the second strip. Just enough to keep it from popping off. If you’re worried about the battery taking flight, a fingernail along the bottom is enough to keep it in place.

    lkollar -

    This image gives you a wrong understanding on how strong you need / should tie. Please be very patient and regularly shorten the tape length by grabbing it close to the battery again and again... it's a total mess when the tape brakes or snaps back under the battery.

    A Guy Called Guy -

    One of my pieces of tape broke. After trying a few other things, like trying to prey loose the battery (did not look right), the best thing to do was to remove the Taptic device and get the piece of tape using tweezers and then gently pull back the tape.

    Andre van der Ham -

    so i pulled too hard and the tape broke. Does isopropyl 70% also work or do i have to use the 90% ?

    Andrew Heinrich -

  26. JCoeRkOROON3OpqI
    • Wenn du beide Klebestreifen erfolgreich entfernt hast, kannst du mit dem nächsten Schritt fortfahren. Andernfalls musst du den Akku von dem hinteren Gehäuseteil abhebeln.

    • Erwärme einen iOpener und lege ihn auf die Gehäuserückseite direkt über den Akkus. Du kannst du die Hitze auch mit einer Heißluftpistole oder einem Fön erzeugen.

    • Hebel den Akku dann vorsichtig mit einem Öffnungswerkzeug aus Kunststoff heraus.

    • Wenn das iPhone zu heiß wird, kann der Akku in Brand geraten.

    • Alternativ kannst du versuchen, den Akku mit einem Stück Zahnseide vom hinteren Gehäuse zu trennen. Noch besser als Zahnseide ist eine abgewickelte Gitarren-Saite, zum Beispiel eine 0,009 E-Saite aus einem 12-Saiten Set.

    • Fädle die Zahnseide oder die Gitarrensaite hinter die oberen Ecken des Akkus, dann führe die Enden zusammen, wickle sie um ein gefaltetes Tuch und ziehe gleichmäßig.

    You can also just use small screwdrivers to touch the adhesive after it breaks and then start rotating it around to get it to come out

    Geoff Potts -

    BE SUPER CAREFUL. I just broke the volume up/down buttons and mute switch. Look at the photo on Step 26. Underneath the battery there is a tiny black ribbon cable. Doing step 25 wrong will rip that ribbon cable apart. Make sure you insert the card BELOW the volume up/down buttons!!!

    henryhsu -

    Definitely agree with you, that photo is showing the wrong place to insert the card, right over the volume switch and ribbon cable. The card should be inserted as close the bottom of the battery as possible.

    john racovelli -

    Zahnseide ist eine sehr sehr gute Idee, hat einwandfrei funktioniert.

    Dental floss is a very very nice way to remove the battery :)

    maiksicks -

    I recommend removing the Taptic Engine as described in step 23 comments. It was enough to allow me access to the second strip after it ripped.

    knoxma -

    I used a newer model heating pad instead of buying an iOpener - mainly because I had it laying around. I’ve used it successfully on two iphone battery swaps. Newer heating pads are well temperature controlled, and even the hottest setting isn’t that hot.

    Howard Capon -

    For french user : the best option to remove the adhesive if you broke up, is to use an ID card.

    Pour les français : la meilleur option pour décoller l’adhésif si vous l’avez casser a l’étape précédente est d’utiliser une carte d’identité, car assez fine et souple pour ne pas abimer le le téléphone ou la batterie.

    viriisxp -

    Dental floss worked like a charm.

    Jan -

    I had to use dental floss as well, and quite a bit more force than I thought would be necessary…however it did the trick!

    Eliza Zollicoffer -

    After a disastrous experiment at heating up a moist clean cotton dishtowel in the microwave (it didn’t flame, but it smoked), I got wise and used an electric laundry iron on a low setting and another clean dishtowel in between the back of the phone (with the battery facing down) and the iron. Using the spud carefully and an exacto knife, I was able to cut the leftover pieces of the white plastic adhesive and work it out without damaging the battery.

    Peter Brightbill -

    It is physically impossible to use the plastic card as shown, unless the battery has already been loosened by some other method. Is the photo provided to justify the use of an extra tool?

    ffissk -

    My adhesive strip broke. For prying the battery from the rear case, I put a thin flat plastic string under the battery from a corner of it (near the Taptic Engine). Carefully move the string upper and be patient, you will make it.

    anonymous 7644 -

    I tried all the solutions here and none of them worked. For me I was replacing the battery which I had previously replaced, and I think the adhesive was too brittle, and very sticky.

    The solution I found was to use a 30/60° triangle ruler, I could use the top part to latch on to the adhesive and pull it out. I was also able to just push the adhesive back with it. It did cause the battery to bend quite a bit, but in the end it worked!

    Joe Clinton -

    With scissors I cut an expired card down to fit under the battery. I have a microwaveable rice-pack which I heated for one minute, and then set the phone on that to maintain the heat. I slowly eased the card under the battery and backed off, realizing there would be build-up of loosened adhesive around the leading edge of the card. Using a spudger under the card helped me lift the battery out, and the card supported the battery, keeping it straight and safe. The rice-pack kept everything warm while I worked.

    Katherine Williams -

    Exploded in my hand. 3/10, do not recommend

    Donkey Monkey -

    This was the hardest part for me. I had successfully pulled out one of the adhesives, but the second one broke and the remaining part of the strip sprang back to hide itself under the battery. So, I heated the back with my hair dryer and then tried the plastic card and dental floss ideas, neither of which worked. Eventually I was able to use the blue plastic spudger to lift just the very bottom of the battery, enough to allow me to grab that remaining strip of adhesive with the tweezers, and then with my fingers. I carefully pulled on the adhesive strip again and this time it didn’t break; the battery came right out.

    Elizabeth Garcia Dominguez -

    I have found that braided fishing line works great, if you have it, to pull beneath the battery and separate it from the adhesive and case. I use about 12 inches of 10 lb test Fireline® with 1/4-inch steel washers tied to each end for grip.

    Patrick Langvardt -

    What has happened to this step? Photos are missing. People refer to multiple different photos but only a picture of the iopener is associated with this step for me.

    There are a enough ways to pry this out wrong that not only should 26 actually be complete with photos but should be its own separately linked outline.

    My first came out like a dream. My second with same approach tore immediately. This, Step 26, between its useless photo and many dire comments leaves people in my situation somewhat in the dark.

    Please fix this.

    Aaron -

    DON’T bend the battery. Major hazard here that the step and most of its comments can lead to. Again this step really needs flushed out for safety sake.

    NO prying. So many places this can break something on the phone

    For me, when my second strip broke, I duly heated the back of the phone. phone had to cool a bit before I could old on it to work on it.

    Then I slid the spudger length wise under that battery at lowest angle without contacting anything to the homebutton end of the battery. and then just until I can get ahold of the white again.

    If it breaks apply more heat, try to get at the white again and the pull more slowly and evenly and smaller increments between cinching up. If it breaks again, more heat, more slowly, more evenly, smaller increments.

    Aaron -

    Heat the tape areas with a hair dryer. Simple and works well. Only need a minute or two doing the heating.

    Keith Paget -

    I used a thin flexible metal kitchen spatula that fit and worked quite well. Had to work a while on the clumps of tape.

    David Taylor -

    Dental floss is to favor as you do not tend to overbend the battery!

    A Guy Called Guy -

  27. JKYXUV3EDJafLok5
    • Entferne den Akku.

    • Sollte dein Ersatzakku in einer Plastikhülle geliefert worden sein, dann ziehe zuerst die Plastikhülle vom Flachbandkabel weg ab und entferne sie; setze erst dann den Akku ein.

    • Wenn noch Reste vom Alkohol im Smartphone verblieben sind, dann wische sie sorgfältig weg oder lasse das Gehäuse gut austrocknen.

    • Stecke vor dem Festkleben des neuen Akkus den Akkustecker vorläufig in den Anschluss auf dem Logic Board ein. Dadurch nimmt der Akku die richtige Position in seiner Vertiefung ein.

    • Klebe den Akku fest, löse den Stecker wieder ab und fahre mit dem Zusammenbau fort.

    • Wenn an deinem neuen Akku noch keine Klebestreifen dran sind, dann folge dieser Anleitung, um die Klebestreifen zu ersetzen.

    • Führe nach dem Wiederzusammenbau einen erzwungenen Neustart durch. Dies vermeidet einige Probleme und vereinfacht eine möglicherweise trotzdem anfallende Fehlersuche.

    When installing the new battery, before attaching the adhesive, first do a test fit. Note the best position so that the battery connector lands squarely on the phone socket. If you install the battery too high, you may have excess connector cable that you’ll have to creatively fold up and jam beside the battery.

    jonathanstotts -

    I had a similar issue - “test fit” should be part of the base instructions.

    Ed Hawkins -

    ABSOLUTELY TEST FIT!!!!!!….I found that compared to the OEM battery, the the replacement battery connector is a bit longer and doesn’t seat easily in the socket without shifting the replacement battery as far LEFT as possible. I had to remove the replacement battery. It was extremely difficult and the replacement battery was flexed and started bulging so I disposed of it. I put the old one back successfully so waiting for another battery to arrive.

    Joel Nuss -

    I can’t seem to get the connector on the new battery to click into place. I had to work a bit to align, as mentioned here, but it seems to be in the right place now. Just won’t ‘click’ and when I tried to use the cover to hold it, the connection is not stable. Any similar issues?

    Bill B -

    I had the same issue with hard alignment of battery connector and no click. I had to remove the new battery and reposition the factory bend s that one end of the connector was not forced too high (resisting full depression into socket).

    Ed Hawkins -

    For me to achieve factory fit I had to follow a previous poster’s suggestion, which *requires removing the top case* as you will be plugging the battery back in.

    So first plug the battery. Then place the battery (dry fit!) while holding the clip firmly. Once fit is achieved, unplug the battery, continue reassembly in *exact* reverse order and plug the battery back in as the very last step.

    For me this was the only way to replicate the crease/bend that allowed the clip to stay in place.

    Aaron -

    The earlier 6s MUST HAVE the 616-00033. I have had this happen too often. People bring in their 00036 and they do not fit.

    bill -

    Can you please elaborate a bit? Is this a battery number? Neither of these numbers appear on my replacement battery or any of the packaging that came with it. (ifixit’s battery and kit) So, if it is a battery identifier, how do I tell which one I have?

    Aaron -

    Seriously these adhesive strips should have come with the battery!!! I have the dam phone apart on my desk and now have to wait for the adhesive!!

    hlh212 -

    I bought a display assembly kit and a battery. I didn’t realize the adhsive slips are needed but not included with stand alone battery.

    RATS.

    Now I’m phone less till the strips arrive.

    Options for batteries should be

    1) full kit, battery, tools and adhesive strips

    2) battery and adhesive strips or

    3) just battery.

    Or or at least ask, “hey, you want strips with that battery?”

    Patrick Egan -

    I messed up on the adhesive strips and I have to wait for the new ones to come. I assembled it without adhesive and the battery doesn’t seem to move in the housing at all after everything is installed. I’m almost thinking that the adhesive was an over kill?

    Kanchana Samarasekera -

    Three years later now. Not regrets about no adhesive?

    Aaron -

    I ordered the full kit, which came with the strips for under battery, as well as a replacement adhesive for the device’s perimeter. Great guide, installation went very smoothly!

    Both adhesive items should come with directions, for those not as savvy. I didn’t have trouble but it definitely isn’t clear. Instructions really should be included.

    Dan Knight -

    There are detailed instructions linked in the guide for both of those things! Glad you figured it out though. :)

    Jeff Suovanen -

    Hallo!

    Vielen vielen Dank für die Anleitung. Sie hat mir sehr geholfen! Klasse Tutorial!

    Allerdings muss ich sagen, dass mein Display am Rand verklebt war. Dies war hier leider nicht zu erkennen und erschwerte das Öffnen des Displays sehr. Ich habe ein iPhone 6s.

    Aber ansonsten TOP!

    Stefan Wenschuh -

    Thought I did great. Opened it up okay. Battery removed okay. Installed adhesive strips and sealing gasket okay. But then THE INSTRUCTIONS STOP. So I popped the display connectors in and set the display down until it clicked into place. Great job I thought to myself! Then I looked at the counter and saw both connector covers and screws sitting there!!!! So why do the instructions just stop before you tell customers how to reassemble the %#*@ thing. I guess if I start having intermittent display problems, I'll know what the problem is. You only get three stars for this kit.

    delanman -

    As stated in the guide: To reassemble your device, follow the above steps in reverse order. Where needed, you’ll find additional reassembly instructions on each step, marked with a reminder (push-pin) bullet.

    Jeff Suovanen -

    My phone had 6 (six!) screws missing and loose inside the phone! Amazing they didn’t cause any damage. One was next to the battery, easy to replace while the battery was out. I found a few other screws slightly loose. Suggestion — check all the screws!

    Frank Demarest -

    If you don’t have adhesive strips just use normal sellotape and make it go around the battery and fold around the back. (Would like to post a picture of how I’ve done it but can’t here...) Installation is a bit more tricky but at least you won’t have to deal with those horrible adhesive strips that break apart all the time leaving you with a 90% chance to have a battery leak in your phone for your next replacement!

    Simon Villaeys -

    I did this repair and now my home button doesn’t seem to work!!? No response to touch and no access to touch id. Please help! What have i done?

    Brayden courtney -

    Did follow all the instructions (the adhesive strips are a pain !), put everything back together but I forgot to recharge the battery before it went completely dead … and then impossible to recharge the phone !?!

    Umberto Do Cumbuco -

    Tips for new battery: (1) test position before using adhesive, (2) new connector does not clip. I was *very* careful. I’ve done very small scale electronic repairs for years. However, the first two attempts were unsuccessful (had to remove the new adhesive and reposition battery. Didn’t work until I VERY CAREFULLY, repositioned the factory bends so that they did not force one end of connector too high at the socket end nearest the battery. Phone worked after doing this, but now the new battery has no adhesive.

    Ed Hawkins -

    Worked as described in about 30 minutes, (without replacing edge adhesive). Fiddly but took my time and no problems thanks.

    Jeremy Larcombe -

    This is a very nice kit. Decent tools, replacement perimeter sticky for screen and two strips for the battery. One thing about applying the screen sticky is to spend some time carefully removing all the black rubbery sticky, and also clean up any sticky residue left behind ( this is clear sticky that has come off the black part. I used a cotton bud dipped in isopropyl alcohol which did the job. This ensured it all goes back together snugly without any bulges.

    take your time and enjoy

    Shane -

    I found it easy to use the Pointed Spudger end, and ‘Roll’ the Edge sealer along; It ‘Balls’ up comes away cleanly, and does not need any cleaning agent. Also, cut out square hole in the replacement film, to let the Battery cable through, tape the top end, to hold it in place, then peel back about 30mm of the Bottom Edge of the underside film, and Bed it into place; remove the temp. fixing tape; Peel off the under plastic, and carefully set the remaining gasket in place, gradually removing the top film.

    David -

    Ha, ha. How many europeans browse the .com site, see the battery adorned with nice adhesive strips, then jump to the local store site to order, and miss the note telling them that the adhesive strips are not included, and will cost an extra few dollars? Awesome.

    Chris Harvey -

    Take note, the battery needs to be carefully positioned before you let the adhesive strips make contact. If it's not right you won't fit the battery connector in. This should be included in the installation process. A lot of comments on this already, so it is an issue to note when putting the new battery in.

    JMY 60 -

    Definitely test-fit. For me, the replacement battery goes all the way to the left of the compartment, and just a tiny bit (maybe 1mm from the top..

    For completeness, it should tell you to peel off the cover over the adhesive before seating the battery for real, even if it’s obvious. You can squirm the battery a tiny bit after taping it down if necessary.

    lkollar -

    Hello - I successfully replace the battery in iPhone 6S, but once powered up, the display has a vertical line down the left hand side of the screen, and the display is at time jittery. Also seeing like some ghost images of the app buttons? I did not damage the screen by what I can tell. Is there a chance one of the three ribbon connectors at the inside top is not plugged in right? They each felt like they popped in, seated right when reconnected.

    Jay Blackmon -

    After 30 minutes of heating with a hair dryer, prying, heating etc still all I get is one corner lifted. It got so hot I had to use wooden clothespins to hold my phone while I worked. I have no idea how anyone got this adhesive to soften enough to remove the battery. Total waste of time and money at this point. And flat? in your dreams.

    Ann Mueller -

    Yes, test fitting is very important. I laid the old battery in and out several times, looking at it from all sides, then laid the new battery in SLOWLY and deliberately.

    Matt Burleson -

    I did it with a slight twist:

    - 1: “Dry” test fitting (keep protection on adhesive strips)

    - 2: Connect the battery connector to its socket

    Make sure that that the other above described connectors are removed,

    and that the circuit board is not touched by anything else

    to avoid short circuits

    The pricise positioning of the connector is crucial, and the test fitting showed that that was not so easy to do

    after the battery was in place (“dry” still)

    I know the reservations about connecting the battery connector to the circuit board before everything else is finished,

    but I considered it safe with the above measures in place. No guarantee. Comments welcome.

    - 3: Remove the protection from the adhesive strips carefully, with the connector in the socket

    - 4: “Slide” in the battery carefully, with the connector in the socket

    - 5: Remove battery connector from the socket and isolate it to avoid short circuit

    - 6: Continue the re-assembly as described

    Ulrich Janßen -

    I found it easiest to first connect the battery with it in place, and then carefully rotate it up enough to remove the adhesive protectant, and then rotate back into position.

    Leon -

    Any tips on getting the battery to clip in? Trying to do the fit test but can’t get the connector to clip. Old battery clips in fine….

    Megan Hill -

    In my reply to Bill B.

    Aaron -

    Great kit!!! Worked perfectly. They’ve even updated it and added the battery strips pre-installed to batterys back side!!! Nice;)

    Brian Miles -

    Everything worked well except for the suction cup for removing the display: it would not keep a seal while pulling no matter how many times I cleaned both it and the screen. I finally ended up using a larger one designed for removing the glass off of an aluminum iMac—just happened to have a hard drive installation kit from OWC waiting for me to get around to upgrading the desktop. It clicks into place and will *not* come off until you release the handle. Using that, a little heat, and a lot of patience, I was able to remove the display and continue. All of the other tools are top-notch, but the suction cup in the kit I received is of no value at all.

    Erik -

    The instructions for replacing the battery were mostly fine - the most difficult part I found was separating the display from the case using the suction cup, but with perseverance I succeeded.

    The problems started after I powered the 6S with the new battery. My iPhone 6S is running iOS 15.0.1 at the time I write this. I didn’t heed the warning of doing a forced restart and I think that caused a lot of problems performing a battery calibration. The battery status initially said maximum capacity at 100% but then it started to randomly reboot and said the battery needs service. Battery indicator would jump between 5% and 15% and the UI/keyboard was really laggy. I eventually wrangled the 6S in a state where I could consistently charge the battery to 100%+2 hours — watching CoconutBattery show the charging information. I have yet to drain it, but it looks like it’s holding a charge now and it’s taking forever to drain on idle (which is good!).

    So heed the warning, force restart your phone. And bat calib is finnicky

    software developer -

    I would have liked to se the assembly part and the use of the screen glue. Los about 1 hour to close it.

    javier barajas -

    When I first reassembled the phone after changing out the battery, I did do the battery test fit as recommended before securing with adhesive. I completed the rest of the steps to close up the phone and found it would not turn on. I then reopen the phone and re-seated the battery. I then carefully turned on the phone before with the phone open to make sure the battery was properly connected. Once I knew it worked, I turned the phone off and performed the close up steps again. Very pleased with the new battery’s performance.

    James Ridenour -

    If you removed the taptic engine, replace it before this step - you don’t want to find you stuck the battery too low, and left no space for the taptic.

    Paul Evans -

    How do you put the new seal on? No mention of that. I found instructions elsewhere but couldn’t get it to line up exactly. Then the seal I refused to stay on the iPhone. It wouldn’t let go of the card. It got mangled enough that I finally skipped it.

    Brian Bygland -

    I screwed up the glue on the Akku when trying to remove it from the Akku. Unfortunately the tooth floss didn't work out too well for me, because it was ripping constantly, but what worked out greatly for me was actually wrapping ribbon for presents. It is really thin and stable, it does not rip apart and worked out instantly. So that's my tip for those who screwed up that part.

    Other recommendation for those who renewed the seal. First, remove the old seal with one of the tools and remove the dirt. Secondly (before you reassembly the display, that makes it easier),rip off the first protective transport plastic layer and identify the right direction, how the seal needs to be applied (use the handy bottom). Then place the seal starting on the top and use the edges to align the seal, then slowly moving downwards until the seal is placed completely. Third, push the seal a bit with the finger or with a tool to fix it before you remove the other plastic protective layer. Fourth, remove the protective plastic layer.

    Michael -

    A TIP FOR THE CONECTOR DISCONECTING WHILE SEATING THE BATTERY: turn the battery at an angle to connect the battery connecter correctly THEN put light pressure on connector with the flat end of the spudger as you seat the battery into place.

    Mnason Marlatt gaming -

    there dosent seem to be a guide for the correct installation of the screen adhesive.

    Mnason Marlatt gaming -

    "To reassemble your device, follow the above steps in reverse order."

    That statement is a stretch.

    I successfully replaced both my battery and lightening port.

    When disassembling, I put all screws on painters tape in the pattern in the photo. That helped keeping them straight when reassembling.

    Both tasks should have explicit instructions on new part installation and reassembly. A video instead of photos would be even better.

    There are many adhesive strips, pads, etc. that need to attended to and not mentioned in a "reverse order". Reinstallation of connectors, routing antennae cable, lightening assembly cable, etc. need detail.

    Bottom line, my phone works and I'll get another two years out of it.

    Thanks iFixIt.

    Kevin J.

    Kevin Joyce -

    I just did a battery replacement in my wife's iPhone 6S. Everything was fine for a couple of days, I followed the instructions on charging the battery etc but after running it flat & plugging it in to charge again the phone got extremely hot. It displayed a warning showing a red thermometer saying iPhone needs to cool down before you can use it. I unplugged the charger, it had only charged to 9%. Switched the phone off & left it for a couple of hours. Re-started the phone & plugged it back in within minutes the warning came up again. Did an iOS update but still no change. Thinking at this point either the battery is faulty or I've damaged something internally. Was strange as everything worked on the phone until we let the battery go flat. My last throw of the dice was to do a full factory re-set & re-installed the back up & it's been fine for the 5 days since (touch wood)!! Phew!!!

    Peter Brown -

    My tape was not coming out even with a hot blow dryer on the back of the case so i added the drops of alcohol like it said and they started coming out easily.

    Thank you I fixit

    Rowell -

Abschluss

Arbeite die Schritte in umgekehrter Reihenfolge ab, um dein Gerät wieder zusammenzubauen.

Für eine optimale Leistung sollte der neu eingebaute Akku nach Abschluss der Reparatur kalibriert werden: Lade ihn auf 100% auf, und lasse ihn mindesten zwei weitere Stunden laden. Benutze dann dein iPhone bis es sich aufgrund eines leeren Akkus ausschaltet. Lade den Akku dann erneut ohne Unterbrechung auf 100% auf.

Entsorge deinen Elektromüll fachgerecht.

Die Reparatur verlief nicht wie geplant? In unserem Forum findest du Hilfe bei der Fehlerbehebung.

Evan Noronha

Mitglied seit: 06/02/15

219164 Reputation

223 Kommentare

Easy fix. I would recommend getting the adhesive for the screen, as I completely destroyed about half of it when I removed the screen.

cziebell937 -

the adhesive strip under the battery do not use your hand to pull out, use tweezer and a stick roll it up slowly.......

luke foxy -

That's a good idea! But on the other hand it looks a bit funny expanding it to about 1 meter ;-) - especially nice, if the owner is there watching …

Michael Gasperl -

That was actually way better than the original suggestion. If you hold the tweezer a little to the side while you roll up the adhesive, it will come off a little bit easier.

KatSeiko -

I found that instead of trying to pull the adhesive strips straight out, that by shifting the strip side to side as I pulled allowed it to “inch out” and break the bond more on a diagonal and snap out in one piece….

James Brewer -

I simply allowed my old battery to completely deplete before the new install and then used a traditional metal flat head screw driver to carefully pry it up. Worked great.

Jeremy Boles -

So Apple has this great battery replacement program, I put in my S/N and found out my phone was eligible! Great right? Except I live about 290 miles from the nearest Apple Store, and there was an authorized repair shop that was about an hour away. I called them up, found out Apple had a shortfall of inventory and that I'd have to be added to a list as the batteries would come in. A couple weeks later I get a call and find that I'd have to leave my phone there for half a day and the phone would be wiped. Rather than drive an hour so I could leave my phone there half a day I just ordered the repair kit. When it came in I opened up the phone, rather slowly I might add due to the adhesive. I took my time separating the screen and the adhesive snapped back into the frame. If you truly take your time with it and keep consistent force separating the screen with spudgers slowly and gradually you won't ruin the strips. The rest was a cakewalk, screen went back together flawlessly and you can't tell it was opened.
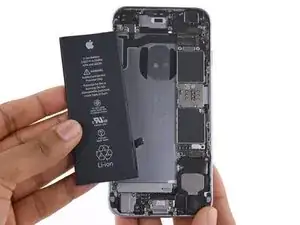
Mike Jacobs -

Nice. Not completely necessary to remove front screen - but be careful if you do it this way...

goodski -

Pardon my inability to understand but several people have said you don’t have to remove the screen to replace the battery.

How is that possible? How else do you get to the battery?

jayrudin -

I think he means disconnnect

davidvandenbossche -

Not that you don’t have to remove the screen, rather you don’t have to FULLY remove it. Taking care not to damage the cables connecting the screen to the phone, you can manage the battery replacement without removing those cables and the screen in it’s entirety.

Andrew -

@jayrudin You do ofc need to open the screen to replace the battery. The step you do not need, but is recommended; is to disconnect the screen completely. The three connector at the top right :)

Ruben Lillebø -

My advice: take out the taptic engine for better pulling out the adhesive. There are only two more screws. It's worth it.

wenago phone service -

Totally agree with this. Removing the adhesive from underneath the battery was definitely the hardest part.

skrolikowski -

I secound this!

Ruben Lillebø -

agreed, it saved me alot of work

Jason Murawski -

Good instructions, however my screen still broke while I was trying to remove it. Off to the Apple Store I guess. Da**it.

rellimnitsuj -

Nice steps , could you please adding assembly steps with suggestion adhesive strip or any suitable glue.

Mohammed -

iFixit sells replacement adhesive strips for both the battery and thes screen.

Andrew -

The battery replacement is very easy but i seem to always break the adhesive tabs and end up having to either fish it out with tweezers or just using a spudger to get the battery out! Great guide!

Gadget Tech - PDX -

I replaced the battery and now when charging it keeps shutting off. The battery connection seemed awkward. Does the battery connector click in?

Edward Marino -

Yes, and you need to re install the plate with the two screws on top of the connector to keep the plug connected.

James Wachala -

I had the same issue. Could not get it to click and using the cover to hold it resulted in the instability to which you refer. Will try again.

Bill B -

0/2 on removing the adhesive strips (two phones that is). With the last one, I just pried (very carefully) off the entire battery using the flat edge tool. 5 min later no problem. Maybe just skip that step and go straight to prying it with the aid of heat (if desired).

Nathan Dunn -

It takes a while to get the hang of it. I've done this procedure on 30~50 iPhones and have about a 75% success rate.

Evan Noronha -

Good instructions, Nice steps, thank you.

Osman Khalil -

So helpful! saved me having to go to a pricey store!

Megan Lane -

I thought that I need to warn the screen for the 6s before opening

mfq1979 -

I put in the new battery but it just flashes the Apple logo for a couple seconds then goes away and this repeats till it dies, I charge it and the same thing happens. I have tried 3 different batteries and I don't know what else to do

Adam ben -

Mine is the same. Did you figure it out?

wurout -

It might be the logicboard

patrik østeggen -

Very easy fix - takes 20 minutes. Just take care when you put the cables back, they can be a bit hard to "snap" into the board. Changed both battery and screen without any issues.

even.tobiesen -

Great guide, the iOpener really helped in separating the glass and the back: the screen adhesive didn't tear apart at all. All of the tools in the repair kit worked well, applied the adhesive strips correctly on the first (and only) try, and best of all, everything went back together with no spare parts or hardware left over! Original battery had actually begun to bulge and swell slightly compared to the new replacement battery. Glad I did the swap when I did!

janus1970 -

Sucesso, tudo conforme a descrição, Obrigado!

ebaniramelo -

When replacing an iPhone 5 battery I noticed the battery connector has a small rectangle that fits into a rectangular Slot . I only noticed this because I looked at the underside of the connector with a magnifying glass. Does the iPhone 6s have a similar or a rectangular slot.?

Also when I replaced the iPhone 5 battery I did not remove the front. I was careful. It definitely saves time. Maybe I’ll also try with my 6s.

donald lepsch -

Why take out the screen when the battery has absolutely nothing to do with it, nothing connected to it at least …

Hector Andrade -

Because there is no stress on the ribbon cables if you remove the screen. You’ll be moving the phone around trying to remove the adhesive, which would introduce the possibility of damaging the ribbon connectors.

Wade -

You have to remove the screen entirely so that you can go around the rim and remove any remaining adhesive around the edge.

ophello -

Great job. I followed the steps and everything worked great. I found on step 16, removing the front panel, my phone had a 5th screw (model A1549) right in the center of the panel. Also suggest fitting to the battery into the case and aligning the plug before placing the tape strips on the battery. the connector on the battery I received was stretched out and the was way too long. i had to put two small folds in the tab(similar to what was on the original battery) which would have been more difficult if it had been taped to the case. thanks again

Art Spong -

Then you had an iPhone 6, not a 6s.

Sam Mencimer -

This and all the guides in ifixit.com have been so easy to do. I have big sausage fingers but I am able to manage the tiny screws and ribbons. I like it when there are sections that you can skip if possible. It saves so much time and unnecessary teardown when doing many items in a day. Thanks again for making it easier for us.

William -

Step 2 doesn’t make apparent what actually happens the adhesive strip when it “separates”. Before the procedure, I interpreted it to mean the strip could be left in place if I was careful. But after performing the procedure, it became clear to me that it’s impossible to not completely destroy the strip!

Some adhesive stays with the back panel, some stays with the front panel, a lot of it stretches out between the two. And it readily adheres to itself! Leaving it will result in thick lumps of the stuff in bad places, and preventing the phone from firmly closing.

This instruction should be edited to explain that the strip must be removed! I did this by stroking the pointed end of the spudger over it repeatedly until it balled up, then rolling this ball along the remnants of the strip to gather every bit. And it should be made clearer that by “not replacing the adhesive,” it means that the phone should be fine without ANY adhesive strip at all.

Steven Nass -

Instructions is good and detailed. Have the battery successfully exchangeable. But take care! The detachment of the display is very sensitive. The upper right-hand corner of the display has jumped during detachment from the display. Too bad, I was very annoyed about it. I was probably a bit too rough. But just happened. Maybe I will change the display later.
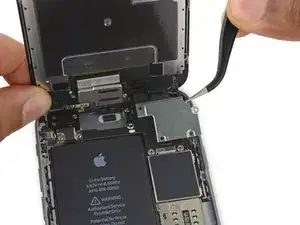
It may be worth using the iSclack. The iSclack I had not. He should work really well and would have prevented what happened to me.

bz_zack -

I agree. I have five times battery change experience. I didn't remove the front panel assembly and my repair done perfectly all.

Takehiro -

after changing battery the frontal camera did not work it gives me black screen why and what i can do?thx

arshlokh -

Try step 19 again and do carefully .

CAUTION: When reconnecting the digitizer cable, do not press the center of the connector. Press one end of the connector, then press the opposite end. Pressing in the center of the connector can bend the component and cause digitizer damage.

Takehiro -

Intermittent or not charging after battery replacement? As others have said, first make sure the battery connector is seated properly. Then make sure that the metal bracket being removed in step 13 is not shorting to the top of the battery connector being disconnected in step 15. Even a tiny bit of metal exposed at the corner of the “battery connector” by accidentally scraping off a bit of the squishy pad on top will lead to unpredictable behavior if it touches the bracket. In my case, the phone would function properly and charge while the case was open on the workbench (ie before finally snapping the display down) but then stopped charging as soon as the case was squeezed tight together for final assembly. I opened it an additional two times before I found a tiny corner of exposed metal on the corner of the battery connector. A generous piece of electrical tape placed between the top of the battery connector and the bottom of the battery connector bracket prevented the short and solved the problem.

richardeburgess -

I have changed both batteries in my two iphone 6s. One functions properly. But the other one has a problem, namely the home button doesn’t function anymore. And I mean the physical button(also touch id doesn’t function properly).

What is the problem with the second phone. I didn’t touch anywhere near the home button.

Bighead -

Everything attached to the display (including the home button) is routed through the cables you disconnected in steps 18-20. You should probably start by re-seating those connectors. If that fails, check the cables, connectors, and sockets for damage and go from there.

Jeff Suovanen -

I followed the instructions and calibrated the new battery but now the phone keeps logging me out when I’m using it for about 1 minute and I need to log in. Is this a software issue and what could have caused it?

Sylvia -

Pardon my inability to understand but several people have said you don’t have to remove the screen to replace the battery.

“Not completely necessary to remove front screen - but be careful if you do it this way...”

“Why take out the screen when the battery has absolutely nothing to do with it, nothing connected to it at least …”

How is that possible? How else do you get to the battery?

jayrudin -

Correct, you have to get the display out of the way to access the battery no matter what. But, you can either open the display and leave it connected to the phone as shown here, or you can go farther and completely disconnect the display cables from the logic board, detach the display, and set it aside while you replace the battery. The first option can save a little time; you just have to use some extra care so as not to damage the display cables.

Jeff Suovanen -

I’ve had trouble with two replacement batteries for my iphone 6s, the connector will not snap into place, so I’ve had to re-install the old

battery with no problem snapping it into place. Anyone else have this problem? Any suggestions?

Linden Holderbein.

Linden Holderbein -

Yes, I’m having the exact same problem. The connector on the new battery just doesn’t seem to fit no matter how much I coax and nudge and push. In an attempt to revert to the original worn out battery I’ve since snapped off the adhesive on the new battery. A visual inspection of the connectors reveals that they aren’t identical.

byron -

Problem identified: I was trying to install and iPhone 6 battery into an iPhone 6s; they aren’t the same connectors.

byron -

I connect new battery terminal first. And two new adhesives put on the case instead of the battery. Finally, Put new battery to correct position on the case and push it.

Takehiro -

If using the display assembly adhesive: Make sure you properly align the display assembly adhesive when putting it on, and really stick it to the metal edges before removing the top cover. That way, if it is properly aligned, you don’t mess it up. Display assembly for this device is not necessary as it did not have water resistance to begin with. The screws and clips do an optimal job of keeping the screen attached to the display.

Erik Johnson -

Great guide and comments. Read the guide twice and then performed the changeout in about 20 minutes. Thank you

Phillip -

It was all pretty simple. I had one side of the battery “command strip” pull out adhesive break 1/4 of the way of pulling it out. Ended up heating it up just a bit to get underneath the battery enough to start twisting it and pulling it out the rest of the way.. I the love then command strip adhesive method! Ended up replacing the screen adhesive too.

jonathan -

I want to get this replacement battery for iphone 6s in Pakistan how??

abdulrehman hamza -

Very carefully followed instructions and while the adhesive removal step isnt quite clear(my old battery bended and crumpled trying to removed and got very, very hot) when I eventually put in place the new battery everything works fine except for listening to a phone call and the forward facing camera. Speaker works and rear camera works but not when I hold the phone to my ear for a call. I have to put a call on speaker to hear anything.

Perhaps I broke a cable in the assembly. I dunno. Not much of a phone when you cant hold it to your ear and make a call.

Albert Dice Man -

Worked flawlessly on two phones, if you are not to clumsy there is no need to remove the display assembly, just prop it up against something and fix it with a rubber band. Removing the adhesive strips from underneath the battery worked 1/4, so keep something ready to heat the thing

Pigeon -

Just finished replacing my battery and the directions are spot on. I did however have difficulty with removing the adhesive. Take it slowly and pull on the strips with a gentle force. I broke mine off and had to go the heating route which took awhile longer. A new adhesive screen gasket and battery adhesive strips came with the battery replacement kit but unlike the new battery adhesive strips I could not find a “how to” on the site for the other adhesive gasket. A link to that would be nice like there was a link to the battery adhesive.

mediayogi -

The adhesive gasket replacement guide you’re looking for is here—it’s linked in Step 21 of this guide. Congrats on a successful repair!

Jeff Suovanen -

After replacing the battery on my Iphone 6 and booting it up, it was at 1%. After charging for 30 mins, it was only at 2%. I removed the charging cable and let the phone die. Tried charging phone again and phone just refreshes white screen with apple logo and then dies (this happens over and over again).

Anyone have the same problem?

Albert Somlith -

@asomlith Could be a defective battery. Try connecting the old battery and test to see if it charges. If that resolves the problem, return/replace the battery you bought. If it doesn’t, it’s possible the logic board was damaged by some wayward prying during the repair. That’s fixable, but will probably require a visit to a specialist (microsoldering/board-level repair expert).

Jeff Suovanen -

Followed the directions… everything went ok, but now that it’s back together my screen has a brighter blotchy area near the top and a slightly dimmer area near the middle. I have a suspicion that I torqued it a little too much trying to get the screen separated from the bottom with the suction cup. Is that possible? If that is, in fact, what I did can I fix it somehow? Thanks in advance!

John Johnson -

You could buy a replacement screen and replace your discolored screen if you’d like.

Andrew -

Just finished up the replacement and it went really well! The screen took a little force to get off and scared me a little but I eventually got it. I also messed up putting on the adhesive strips and only managed to get a small piece on to keep the battery in place. Works like a brand new phone! Thank you ifixit.

Mitchell Distefano -

Hi there,

I have a iPhone 6s. It was always working perfectly well. The only problem was that the battery didn't last as long as it used to, so I replaced battery. Now, it was extremely slow and when I scrolled trough a document or website, it got stuck all the time. Also opening apps took very long. The lower the battery level got, the slower my phone got. Below 20% it was completely unusable.

Anyone have the same problem?

C E -

Could be the new battery is faulty. Where did you get it from? Did you try swapping the old battery back in to see if that resolves the issues?

Jeff Suovanen -

i have this problem too when i change my battery and i dont know what should i do….when my power around 10-12 precent my phone will very slow and i cant use it do u have any idea?

Hamed Jalali -

This has happened with my battery i got from ifixit in December and it has just started not properly working. I have contacted them for a replacement. I would guess it is faulty.

jonathan -

Similar issue with battery conking out; not charging above 20-23%, then shutting down. Did a careful install with the iFixit replacement for my 6s (on video!). Time to field-test using original battery, no?

Joel Baird -

Might sound stupid but should the clear plastic be removed from the new battery before placement?

Rich foupht -

Yes, as stated in the repair procedure above

Andrew -

recently i change my iphone 6s battery but when my power is around 10-12 precent my phone is very slow and i cant use it is it normal our no?

Hamed Jalali -

Yay! This is the second battery replacement I have managed to ace. A long time ago for an iPhone 4 and now for my I phone 6. Relatively easy except the sticky things. Hard to get out as instructed, hard to put the new ones on exactly as there was no clue in the video or written instructions. I managed, It works, I’m happy and so is my phone. I am a 58 year old female..

gloriac916 -

Congrats! You can find instructions for putting on the new stuff linked in the final step by the way. It’s a slightly more generic guide that works for multiple models, so it lives on its own page.

Jeff Suovanen -

purchased 2 batteries (eBay) for 2 phones. 1perfect. Mine crash/reboot cycles. new battery. Worked, but fast drain. Contacted seller, issued refund, replaced original battery. another battery- chose seller with better reviews, paid more. Weird issues similar to first battery. Worked at first, once run down, crashed wouldn’t charge. lots of testing later I realized all 3 of my replacement batteries lack any insulator on top of the metal of the battery connection point. Original battery has insulator. Read that a scratch in that insulating material can cause issues. electrical tape. Now same battery that wouldn’t go past 1% acting totally normal. confusing: if real issue, how do replacements work for anyone lacking the insulator? How could sellers overlook such simple and crucial thing? How did 2nd battery work at all while 2 others were useless? If anyone else receives a battery with exposed metal on top of connection point, may be worth a small strip of electrical tape to guard against weird issues.

Kyle -

My wife’s IPhone 6s took a swim and would not charge. After Googling possible repairs, I found Ifixit and ordered battery replacement kit. Their step by step instructions made the repair easy. Even for a old guy (71 yrs) with shakey hands.

Peter Ferrari -

I will be buying the clacker next time, but my son was finally able to insert a spudger into the slot. Almost lost the second glue strip. Great tools. Great parts.

bradtittle -

Great tutorial overall!! I’ve used the cheaper stuff out there to save a few bucks, but it’s not worth the headache. By far the quality and resources given by iFixit have been great and they will continue be my go-to. - The only thing that I’d suggest for any noob like me, is to take your time with the adhesive strips on the battery itself. Application was tricky and I got sideways real quick. So again, take your time!!

Daniel -

I can’t get my screen back on perfectly. The top of the screen won’t “seat” all the way flush and I don’t want to press too hard because I don’t want to break it! Anyone have a suggestion?

Bob Willix -

Never mind: make sure you put the top in FIRST when you reassemble or it won’t seat right! Thanks!

Bob Willix -

I was having unexpected shutdowns, low battery capacity (79%), and 3D Touch problems and LCD issues from the OEM battery being slightly swollen.

The hardest part of the repair was removing the screen due to the adhesive. Although I really like the adhesive seal because it helps keep the phone dust proof. Definitely plan on replacing it any time you remove the screen.

The rest of the steps were straight forward and easy. The guide was was thorough and extremely helpful! Thank you!

jhwv -

Thank you! Still have yet to test out battery but my iPhone 6s is all put back together and working! saved me some $$$

Gagerminnix -

Awesome tutorial! After finding out that my iPhone 6s’ serial number did not qualify for Apple’s reduced battery replacement price, I decided to give DIY a try. I was nervous at first, but everything went smoothly and my iPhone works great now. The steps are very clear and super helpful. Really glad I found and went with iFixit!

Flo -

worked on 2 phones, studied the materials first, went slow and careful, it all worked out, even the adhesive removal. Took off cover, took out vibe. decent kit, only needed one tool kit, bought 2 b/c I though the soft plastic tools would take a beating like opening an old ipod, nope. Nice kit, nice tips from the community.

csoltani -

Great tools/instructions. However the battery drains about as fast as my old one. Maybe my iphone 6s is just old? Did anyone else have about the same battery performance after replacing?

Michael Shearer -

Great instructions! thanks

Phoebe -

Bought the battery replacement kit for my wife’s 6S. Could not get past step one. Heated it as directed. Still no go. Heated it until could barely touch phone, still no go. Suction cup kept coming free. Absolutley no movement in the screen. No need to go through replacing a battery like this. Just designed so Apple can get more money for a way overpriced phone. Problem is other makes now doing the same. My Pixel 2 is same. My old Galaxy 5 was easy peasy. USB dock crapped out. Not worth the work to fix it.

Darthdaddy July 15, 2018

jkaknes -

Step one is the pentalobe screws—make sure those are out, or it’s never going to budge. If the suction cup is popping off, make sure your screen is spotless—clean it thoroughly with a microfiber cloth, and use a little liquid screen cleaner or distilled water if needed. The suction handle sticks very well when conditions are right. Also, I’d start off with an opening pick rather than a spudger—the pick is thinner and easier to get under the edge of the display. Hope this helps!

Jeff Suovanen -

Just successfully replaced my wife's battery on her iPhone 6s after she was given an 8 week wait for the official warranty repair. Got all ifixit parts in a week and took my time on each step (2 hours). The main tutorial and supplementary ones on applying battery adhesives and screen adhesive were great. I got my finger stuck on screen adhesive strip but made it work ok (maybe order a second one of those!). The phone works as before, so now to how longer it goes between charges.

Edward Gillan -

Great tutorial, anyone who messes this up shouldn’t blame ifixit. They should take a look at their own skills.

gary kowalski -

i followed the instructions step by step. how long does it take for the battery to turn on??

Joe Miles -

Great guide and an easy fix. However the 1.2mm screws in my display assembly would not come out so I skipped that step completely and was able to replace the battery with the display still connected. I do recommend taking the taptic engine out when taking out the adhesive strips. You will also need replacement adhesive strips because they will rip and tear when trying to take them out. Overall, guide was easy and the battery works great!

Savannah Floyd -

Steps 22-24 need to be revised. Any phone old enough to need a battery replacement will have brittle adhesives that will break every time.

Gerald Shaeffer -

Not necessarily true. I get 3 year old 6s’s that have the adhesive come right out. Just did one today in fact.

Sam Mencimer -

Does anyone know if the new ‘Battery Health’ percentage will return to 100% after replacing the battery with one purchased here? Is the feature solely dependent on hardware, or is there some sort of ‘memory’ in the software that displays the old health if the battery isn’t changed at an Apple store or authorized service center. Just wondering if I should take advantage of the $29 deal with Apple before the end of the year.

** Do they change the battery while you wait? Providing you schedule a genius bar appointment.

Uncle Reggie -

Not sure there, I’d take advantage of the $29 deal. However, I tried to last week and then the repair center said the water indicators were set on the battery apparently and wouldn’t replace it. They wouldn’t refund my $29 either, I called apple and they said they should have but now I have to go back and argue with them and get apple back on the phone. I checked the water indicators in the sim slot and tried looking down the microphone jack and didn’t see anything red there. Apparently those indicators can go off if you’ve had it in a humid area, like the bathroom on the counter while you take a shower.

Brian Matt -

The toolkit combo pack was a great value, and with some patience and attention to detail, it worked great! Be sure to read several steps ahead to see what’s coming, since some steps can only be done once…gulp! :)

Kevin Rollins -

Thanks for a great guide. I also bought the part/tools kit. The tools were of high quality and the guide made the repair simple. You just follow step by step. Thanks!

Joshua Edwards -

The battery connector on the replacement doesn’t fit!!! Argh!! I have mangled it now trying to get it to pop in to the socket and the gooey insulator stuff on top of it has come off. Did I just get a bad one?

R.J. -

@raekjensan Maybe, but first, double-check to make sure you’ve got the correct battery for your phone. I’ve seen too many people unknowingly trying to cram an iPhone 6s battery into an iPhone 6 (or the other way around). Those batteries are not compatible. If you’re not sure, check the model number on the back of the phone. Good luck!

Jeff Suovanen -

This is what happens when screw up in step 25.

https://i.imgur.com/xi6JkVj.jpg

Anders Linnet -

Yikes! Hope no one was hurt. Looks like the very first step was also skipped: always discharge the battery before you go prying at it.

Jeff Suovanen -

Now i have a brown Stripe on the right Side of the Screen :(

Mike -

Had trouble connecting the battery but finally got it to go. Phone powers up but won’t take a charge now. Any thoughts on next steps?

Sean Vedell -

Excellent guide! I completed on my first attempt. I will be doing my GF’s 5s next week. I definitely recommend just ordering the adhesive strips separately if you’re not going to be ordering a whole kit. I thought I could remove the strips without tearing them, but alas I failed : ( . Luckily, I decided to order the extra strips and had no problem removing the battery. I used a hair dryer to heat the bottom of my phone.

Again, great guide! Good luck, everyone!

Austin Asher -

Thank you so much for the photos. Totally agree removing the screen (physically disconnecting the three ribbon cables connecting the screen assembly to the phone base) is wisest precaution. I would never have been able to safely remove all the old gasket material from both surfaces without doing that. I also don’t believe any ‘while you wait’ battery replacement service (even an Apple store) replaces the gasket considering the time it took me to remove mine. The gasket of my phone was deteriorated and I had to use a dental pick and a cleaning patch dampened in Naphtha solvent to thoroughly clean both mating surfaces. Alcohol was only good at cleaning the outside of the phone when I was done and in a shot glass when the phone successfully powered up.

Bob -

Instructions were fantastic! It pays to read the comments-other users’ comments definitely helped me out! Take your time with this repair. Patience is key.

Jennifer Wood -

and when you remove the taptic engine, the sticker is even better removed

Michal Míka -

Great if it all goes well for you, but if it doesn’t you’re on your own. I’m a retired computer programmer and geek. (Still geeking!) Replaced the battery per instructions on my iPhone, but now it won’t charge. It’s definitely related to the battery replacement process since all was working fine before. I see others have had the same issue after performing battery and screen replacements. None of the suggested fixes have worked for me so likely I’ve damaged my phone and will have to get a new one. Off to the pros to see if they can help. Wish I would have spent the extra $40 and let a pro do it.

Douglas Campbell -

how bad is it that i forgot to put the covers connector brackets back on before I put the phone back together?

James Ilko -

@kick26 I’d install them whenever you get a chance. Leaving them off won’t hurt the phone, but those flex cable connectors can pop out if not secured under those cover brackets.

Jeff Suovanen -

Do I have to remove the protective glass on my Iphone screen to be able to use the suction cup ?

Felix Bauer -

Removing the taptic enginge as well as the screen (!!! very careful with the digitizer cable - reduce the angle when reattaching it to prevent tension) makes pulling out these straps very easy and uncomplicated. No need to pay someone a fortune for a little work like that!

Felix Bauer -

Thank you so much for this guide. It works just fine but…. I did not see any warnings about “Be sure to have new battery strips before you proceed”. That was not a nice surprise, but I made a workaround:-)

Crister Blom

Crister Blom -

Great guide! Thanks for the help.

Evan Noronha -

Done! Nice detailed instructions.

One thing… When I was done, the iPhone wouldn’t turn on. I suppose that the battery is shipped completely flat.

When I plugged it in, it kept flashing the Apple boot screen (black screen with white apple). It would not “force boot” like the instructions said. I assumed I had messed up putting the phone back together. I took it back apart and put it back together, and everything seems ok. (After you’ve done it once, taking it apart and putting it back together again gets easier!)

Turns out, since the new battery is completely flat, you need to leave it plugged in for at least fifteen minutes before it will do anything.

Now, I’m in the middle of conditioning the battery. I charged it to 100% plus a few more hours plugged in. Now I’m using it until it shuts down. The new battery is already lasting MUCH longer than the old one! All seems well now. Once the battery dies, I’ll charge it to 100% again, and it should be good to go after that!

I also love the tools that came in the kit!

Andrew Rinehart -

I got the whole battery replacement kit for my 6s. I did a read through first and pre-labeled everything that was going to come off. Saved me tons of time! I would do what others suggested below and remove the haptic sensory. It is 2 more screws and make the battery removal that much easier. The new battery and screen adhesives included worked flawlessly! I am ALWAYS a happy shopper/DIY when I order from ifixit!

Tyson Navis -

Schöne Anleitung, das braucht aber nicht abgetrennt zu werden. Ich frage mich, ob der schwarze Klebstoff besser entfernt werden sollte. Ich habe ihn lassen, aber mit der Pinzette wieder möglichst gut in Position gebracht. Etwas aufwändig. Was habt ihr gemacht?

Michael Gasperl -

The tools in the kit suck. I happened to have an electronics screw driver kit that came with an eyeglasses repair kit i bought. Better screw drivers make this much easier. Also some type of magnifying lens would have been helpful, the screws are tiny and hard to manipulate with the equipment they provide. My repair was a success. A 6S video would have been nice to have(they have one for the 6S plus), although the pics in this tutorial are adequate.

Altan Yenicay -

Just replaced the battery using this guide (and IFixit kit). On my phone the battery connector was very tough to get out and the pointed end of the spudger wouldn’t get it to release. Finally used tweezers in the space between the batter and the connector to loosen that end of the connector. It came out OK. Reconnecting video/digitizer cables was fussy too — that’s more about me though. Phone boots up but Battery Capacity was just 73%. I am going to charge completely (charge was at less than 10%) and check it again. A new battery should have more than that capacity though, right? Guide was helpful. We did remove Taptic as the white glue strips wouldn’t come out… both shredded. That was the longest step for us. Let’s see what happens w performance. If it’s good, I have another one of the same phone to do…

richardkujawa -

Capacity on a new battery should be much higher than 73%, but you won’t get an accurate reading until after it’s calibrated properly. Follow the calibration instructions carefully and then report back! If you still have issues, you may need to exchange for a different battery.

Jeff Suovanen -

Success too ! Finally took the time, the guide is neat, but it got me sweating a couple times :) I just did the battery adhesive wrong, replaced it with two-sided tape, hope this works with time. The screen adhesive is kinda annoying too, but it was included with the parts, so no complain there. Many thanks to iFixit as always, I can now keep my 6S a lot longer !

jacquesbressin -

I replaced the battery for my son’s 6S - he won’t take a new phone and he won’t have a phone without a headphone jack - happy to keep a warhorse on the playing field.

Uncle Reggie -

I decided to take out the taptic engine and it made it easier to pull the adhesive strips - plus it was only 2 little screws.

Uncle Reggie -

I had Apple replace the battery. In 6 months it was almost dead. I went back and Apple said the battery has a 90 day warranty! Ifixit with their 1 year warranty is wonderful.

s46sheldon -

I was really nervous about attempting this, but it couldn’t have gone better. The guide was great! I did not need to completely remove the cover, and I had no problems removing the adhesive . Thanks so much!

Andrea Olszewski -

Is this original iPhone 6s Battery Replacement?

Bakhita Al Ketbi -

In order to get separation on the screen, I used the blue Spudger to hold down the edge of the phone as I pulled up on the screen with the suction cup. I tried using the black spudger. It didn’t do the trick..

bradtittle -

Der Akku Wechsel gelang mit der Anleitung ohne Probleme. Leider war das Aufbringen der neuen Display Dichtung für das 6S nicht erwähnt, funktionierte aber gut mit der Anleitung für das iPhone 7. Danke !

Christoph Tippmann -

Excellent guide and complete kit. I completely removed the screen adhesive leftovers and replaced it, as commented others

Screen removal was rather easy as I also used a iSesame to cut through the screen adhesive in tandem with the prying with the plastic spudger and the pull action from the suction cup.

Perhaps the most attention need to go to carefully reseating the connectors and not mixing up the screws.

The battery adhesive tabs broke on me and after removing the Taptic Engine it was no problem to fish out both ends and the rest of the strips came out smoothly.

I did use a hot been back to soften the adhesive all around the screen.

Etienne -

Good instructions. But disconnecting the screen and removing it is not necessary. Fix it as described to a bottle or what you have. This works perfect. Every connector i do not open is a good connector :-).

Hans Dampf -

Get the kit!! USE A HAIRDRYER OR HEAT GUN FORSURE. I definitely skipped some steps (especially 18-20) because I compromised the shape of the screw from using the wrong screwdriver. I was still able to prop the phone up 90 degrees and follow the rest of the steps safely. Slow and steady with every step though, especially pulling the adhesive. And be very careful to realign the connecter back because once you stick on the battery there’s no turning back. Very nerve racking, but WORTH IT. My phone hasn’t blown up or had any problems and it’s been about 2 weeks.

Erica Eww -

I’m very disappointed about the quality of the battery you sell on your store.

My experience: despite my iPhone 6s was unable to determine the capacity of the iFixit battery, after a year and a half using it the battery itself suddenly seemed to be dead: every time I used to answer an incoming call or launched the camera, the iPhone suddenly shut down. In fact, the maximum capacity of the battery was at a stunning 76% (checked with coconutBattery) — just after a year an half of use! — with the performance of the iPhone halved (checked with Geekbench 5).

Since I “tampered” the iPhone by myself, an Apple PR refused to replace an original battery, therefore I bought another one from a famous online store, paid one third less of the price you ask, and got a battery that almost lets the iPhone determine its capacity — no more Service alert on the Battery Health status.

The only thing I’m satisfied from you is (of course) your exceptional guides and the quality of the tools you provided with the battery.

alessiodigennaro -

Thanks for this great guide! I even managed to remove both adhesive strips without snapping them. Taptic engine removal helps a lot.

Marin Stradiot -

Bien, le démontage n'est pas si compliqué (j'ai utilisé un sèche cheveu pendant 1 ou 2 minutes) mais le re-montage l'est un peu plus (comme d'habitude). Veuillez vérifier avant démontage que vous avez bien les adhésifs (ceux pour la batterie et pour l'écran) car ils seront détruit. L'adhésif pour l'écran est particulièrement casse pied à remettre et toutes les parties doivent être très bien nettoyées avant de mettre le nouveau.

Gui -

great instructions. bravo

Filemon Rael -

Great directions. I knew it was going to be a bit delicate, so I went slowly. All was great - except - durn those screws are small. ( I’m 75 yrs old - eyesight isn’t what used to be)

alwilk -

I changed the battery of my iPhone 6s, but after I reconnected everything the home button doesn’t work anymore(as well as the Touch ID)….. any suggestion?

Luca Spallanzani -

I could not have done this successfully without your help. Your instructions are presented professionally and concise. The pictures

helped immensely. THANK YOU!

lewis wyland -

Finished!!! Battery was hard to take off, but it’s done! And the iPhone is running! Thanks!

Lado Lettrage -

Just finished changing the battery on my iPhone 6. The hardest part of the whole process was dealing replacing the adhesive seal for the display. The instructions are well written and. Easy to follow. The pics are really great as they show what direction you should use to unplug the battery, screen, etc. If this is your first time doing this, then I recommend that you read through the procedure, then watch the video. When you are ready TAKE YOUR TIME! The parts you are dealing with are very small and the components are very fragile. That said, this is not a complicated process. You can do it!

Lon Adams -

These were decent but not great instructions. The omission of how to install/apply the provided seal in the iFixit kit was serious - I made a mess of that. It also would have been useful to (a) explain in-line the restart process you suggest is important, and (b) tell us how to avoid the seemingly automatic boot-up that happened as I assembled the case. It’s possible I touched a button, but there was no warning to avoid THAT. In fact, a quick 1-2-3 reverse instruction for reassembly would have helped. So, too, would have better instructions about positioning the battery so the connector cable wasn’t too cramped because the battery was too close to the motherboard connector. These are things an experienced assembler might know, but then that person wouldn’t need these instructions.

gary -

Bin sehr zufrieden mit der iFixit Anleitung, ging Problemlos.

Markus -

The guide and kit were very helpful with my first time in an iPhone since the iPhone 4. I’ll definitely remove the taptic part next time because I absolutely mangled the adhesive and had to scrape and pry it out with an old plastic card I shaped. When I removed the taptic I was able to use the tweezers to SLOWLY pull enough on the bits poking out it to pull with my fingers. Turns out my phone had more problems than the battery so I managed to save my battery to replace my wife’s terrible one. Just bought all the adhesives (and a couple unrelated fun stuff because why not?) and I’m looking forward to doing it again.

Xavier Santa -

Just completed battery replacement (and lightning / headphone connector) in my 6s. The instructions were easy to follow. Separating the screen from the adhesive was the most difficult part of the process. Likewise reapplying the new adhesive was a bit tedious also. I prevailed anyway and the 6s is as good as new.

Michael Bruce -

I successfully installed the battery - the instructions were good and easy to follow. However, now my Touch ID is not working, which pretty much disables the phone (though there are some Siri activated workarounds). Essentially I can’t switch between apps now. Any one else had this problem?

Alexander Holt -

I had the same issue. I opened the phone back up and found that one of my connections that I had temporarily disconnected to remove the top cover was loose. After firmly pressing it back into place and closing the phone back up, that solved the issue.

Good luck.

Jeff Soutar -

I thought I was having that problem at first, but it cleared up next time I tried it. I might have had something on my finger.

lkollar -

not too difficult of a repair, but not super eazy, the hardest part was either keeping the phone hot enough to remove the screen, second only to actually getting the adhesive strips out from the battery, once they started it was ok, but they were difficult to get going

Jason Murawski -

Great kit!!! This is what happens when competent people come together to make a product. I also got the kit via shipment in two days!!! Awesome!

Daniel Lopez -

hi

i have replaced battery and was working fine just needed to drain battery and recharge fully next day , now i have gone to recharge my phone and nothing is happening i have had it on charge for 5 hours and nothing is happening can you help please

p.russell_82 -

Hi

It's due to loose connection of your battery connector.

You should disconnect et and reconnect your battery connector.

Ankur Banik -

I replaced the battery and now the phone does not charge. I put the original battery back in and that will not charge either. I first measured 0.45 A on the “red battery splash screen” but now I get 0.00A. I cleaned out lint from the charging port to no avail. I have not used any new chargers or cables - so there should be no faulty charger causing a short. I used a non conductive spudger to remove the battery connector and have replaced multiple batteries without problem before. Now I’m reading about tristar and tigris etc and its just a headache, I cannot reball things. How can I figure out if it would be sufficient to replace the charging port or if the charging IC is damaged? I have a multimeter. Maybe Apple noticed I installed an iFixit-battery and fried the chip? Or can the new battery have had a short in it and fried my phone? I need help but don’t know where to ask and I am so tired right now, this is exhausting.

phoenix.carpenter -

Having spent more than 30 years of my life working as an electronics technician, I have higher expectations than most when it comes to precision repair tools. This kit was great, the tools were top quality, the online instructions very comprehensive, and EVERYTHING that I needed to do the job was in the kit. Even the packaging was exceptional. I would recommend this kit without hesitation to anyone who has dexterity to work with very small hardware and wishes to replace their own iPhone battery for a very reasonable cost.

Tony Starr 5/22/2020

Anthony Starr -

How about the stick tape that goes around the frame? Where can I buy that because there is no way to remove the original one without breaking it. Even if you use hot air to loose it a bit.

Zillo -

On Step 23, before removing the adhesive tapes, PLEASE, give MORE emphasis on the fact that removing the Taptip engine is an easy step and facilitate very much the removal of the tapes.

Zillo -

Of course you are right about it. By removing the taptic engine, you get much more room to stretch them!!

Konstantinos Risto -

Excellent guide! I just replaced my iPhone’s battery and everything went OK. Working those tiny screws was kind of a nightmare, but manageable. Thank you very much guys.

Lou Cid -

Very well pictured and detailed analysis. Continue the good work

Konstantinos Risto -

It was a cakewalk, thanks for the excellent description.

Step 2 - To warm up the front side to remove the display, I used a hairdryer.

Clear recommendation for iFixit. The future will be shown if the battery is even so excellent.

iPhoneOlli -

Hi, worked great for me, fixed in in around 30min. Thanks for the nice repair manual!

Jens Greiner -

An excellent description on replacing dead battery…Thank you very much.

Biggest difficulty was the replacement of the adhesive seal from the display…I guess mine will not be 100% water proof anymore, but I don’t care.

Complete repair took me roughly 1 hour. dismantling the display from the phone is highly recommended if you will use new adhesive strips for your battery. If you don’t, than you don’t have to dismantle the display and you’ll fix the repair within 30 minutes. I didn’t miss a single step in this tutorial. Works perfect.

Thomas

tcgoebel -

Thanks iFixit for your DIY kit, Replacing battery was real breeze. The guide was extremely useful and easy to follow if one is used to being hands on.

vishal mane -

Is it necessary to undo the 3 cables at the top of phone while replacing the battery? I have done the replacement as according to instructions, but I could see that I would be able to drop the new battery in place and plug it in, without undoing the 3 top cables and removing the front face of the phone. What am I missing?

Thomas -

If you don't remove the screen, there's a high chance of breaking it while replacing the battery. If you break one of the two adhesive strip then it's really hard to remove the battery with the screen still attached

Konstantinos Risto -

Very pleased; easy to fit, all the tools provided with step by step instructions. What’s not to like?

spongebob.earl -

Thank you so much for making this kit. My battery would barely hold charge even with the charging cable plugged in. The tool set made everything incredibly easy.

Side note: I am a moron and did not understand what the screen-sized plastic sheet with the thin black border was until after I finished assembling the phone.

Shinji Nakamoto -

Only thing I would add is when re-seating the battery make sure to align the new battery to the top of the frame. I had a bit of trouble reinserting my cable because I seated it at the bottom.

mdmetrichuk -

I also would get adhesive, just don’t do what I did. put the whole phone together screws and all then realize the adhesive ain’t on.

Brayden Bakke -

Another successful battery replacement thanks to iFixit!! This time, I had my 17 yr old daughter do the repair while I supervised and assisted as asked. The only problem she had during the procedure was the placement of the new adhesive around the edges. Not the end of the world I told her, just don’t get the phone wet. Once the phone was back together, the screen didn’t respond to the finger touch. Powered the phone off and checked the connections and sure enough, the digitizer cable wasn’t fully seated. Once that was done, the phone powered up and all is well. Thanks for your parts and guides. Without them, we’d have had to pay to have this done.

Lon Adams -

Great set of instructions! I was able to get the screen off without additional heat, just pulled up on the suction cup with slow and steady pressure.

kurtaschenbeck -

Hey guys, anyone have problems doing a battery replacements on iOS 14 and later phones? I seem to have extreme battery drainage after a few hours, without any usage at all.

hjbee3012 -

I followed all the directions but the battery just didn’t fit in the socket. I bought the right one but it just didn’t fit. I had to take the battery out and it bend really bad. I waisted money should’ve just went to the apple store for them to fit it.

jenifer herrera -

Sorry to hear that! Might possibly have been a defective battery, although usually when this happens it’s from trying to put an iPhone 6s battery into an iPhone 6 or vice versa. They’re not compatible, so it’s important to double-check. You can verify by looking at the model number printed on the back case—A1633, A1688, or A1700 is iPhone 6s, while A1549, A1586, or A1589 indicates iPhone 6. Hope you have better luck on your next repair.

Jeff Suovanen -

Buenos días y un diez por lo simple y sencillo que nos lo explicas

rokerorebelde -

Its very easy ^_^

Abdallah -

Hey I just replaced an old battery in my iPhone 6s with this guide. But now it won’t turn on again. The closing lid which has the contacts to the battery underneath it is slightly tilted. Might that be the Problem? Im quite helpless right now as I took it apart and put it back together now several times

Tobias Zimmer -

Definitely worth doing. Take your time and be circumspect about every step.

Matt Burleson -

This guide was spot on! My son and I did this together, it was nice to have an extra set of hands and also he’s pretty cool. I really like the comments from other people who repaired their devices in each step. You will be getting mentioned in every conversation for the next month!!

Jerome Walton -

The kit didn’t come with any instructions or even description of the parts, not even naming the contents. It’s VERY helpful to watch the YouTube video in addition to following theses steps. It’s what gave me the confidence to undertake this task in the first place. I didn’t realize this odd blue thing was actually replacement adhesive until I closed up the phone. I’ll hang onto it just in case I notice any issues, because the video doesn’t mention it, either, and says the phone works just fine without it.

Worth the price of admission, the precision tweezers in the kit. hose are really nice and will be employed many times in the future for other projects—or eyebrows, even—in the future. All of the tools are decent quality and more than a one-time use.

Karleen Smith -

Well done guide. Thanks.

Leon -

My iPhone and I go way back, even making it through a combat deployment together. It was MUCH more difficult than I expected, taking me about two hours start to finish. The kit itself was well done, with all the right tools. Pretty much all the difficulties that could be encountered, I encountered. From a difficult to remove screen to breaking adhesive strips, to hard to reattach ribbon cables, I experienced it all. I was very methodical, however, reading all the user comments before each step to make sure I did everything correctly and working very slowly and conservatively. I STILL ended up cracking my screen. It was a single diagonal crack going from lower left to about midway up on the right. I was very slow and careful, especially with the screen removal step, so I will say it is very easy to crack your screen. Reading the user comments before attempting is step is ESSENTIAL. My advice is to take it to a professional. Saving the $30 to do it yourself isn’t worth the aggravation or risk of damage.

Darren Ream -

So satisfying to replace the battery of my iphone 6s. Successful fix that I thoroughly enjoyed!

Adam Ganson -

I used this guide a battery replacement kid to replace my 6s battery three months ago (phone is from 2017).

Battery replacement went without a hitch and I was very happy with how the new battery was holding the charge, until two weeks ago; now my phone crashes randomly and restarts itself (sometimes every 3 minutes). The battery doesn’t seem to be holding a full charge anymore and occasionally crashes during the charging cycle (@around 57%). Any idea what might be causing this? Should I open up the phone and check ‘under the hood’, or should I give up and get a new phone?

cristiana.strava -

This issue is similar to one of the effects of flex damage on the logic board. If you still have the original battery you can try to reinstall that and see if it was an issue with the new.

Daniele Carminati -

Wish it was more obvious that the new screen adhesive was sandwiched between the two blue plastic sheets. I thought that they had thrown in a bonus screen protector. :/

Steve -

Hola, he cambiado la batería de mi iPhone 6 pero no me funciona el touch id, ¿cual es el cable que he podido dañar? Gracias

juan -

The Home buttom still works fine?

Daniele Carminati -

I found steps 17-22 unnecessary. You can leave the display connected.

Michael Lee Williams -

Yes, you can, but it is easier and safer to remove the screen.

Daniele Carminati -

Oh wow. I wish I would have noticed this before completing my battery replacement. Great comment / advice.

Jeremy Boles -

Accurate description of the process. I had no real problems, but it takes longer than 15 to 45 minutes for a neophyte, as slow and steady with careful attention to detail is required unless you do a lot of these.

hgstephens -

Replaced the battery with no problems, but now it gets very hot randomly when using the phone. Did anyone else have this issue after installing a new battery. How did you fix it?

Shane Stan -

Die Anleitung ist sehr detailiert und genau. Ich konnte jeden Schritt nachvollziehen und kam ohne Probleme zum Ziel. Die angegebene Zeit habe ich allerdings nicht erreicht, weil ein Klebstreifen riss und ich nur mit etwas Glück den Anfang des Streifens nachfassen konnte.

Bernhard Sohrt - 11.08.2021

Bernhard -

Question regarding Calibration of the new battery: above says charge to 100% then 2 more hours; then use the phone until it shuts off. Charge again uninterrupted to 100%. The package the battery came in says use to below 10%, then charge uninterrupted to 100%. Is one method better (newer) than the other?

Sue Livingston -

This guide was very helpful and I was able to change the battery of the iPhone easily. Just be careful not to sneeze near the very tiny screws as they may fly away :D

Giovanni Grazioli -

Hey, since you just replaced the iPhone 6s battery, can I ask you how much “screen on time” you’re getting with a full charge? (Settings > Battery > Last 3 days).

I’m trying to decide if it’s worth to replace the battery…

Marco Burato -

I bought the heat pad aswell as the kit & already had a magnetic pad & the changeover went really well, I was a bit apprehensive before I started on it, but with the correct tools, decent lighting & a flat surface this really is pretty straight forward if you follow the instructions. I’ve now done the initial battery charge & am running the battery down but after 24 hours my 6S is still on 61% which is a huge improvement on before when it went from 100% to zero in just 8 hours just on standby with no use. So I am now converted & with 5 iPhones in our house I can tackle the old spare iPhone 5S & iPhone SE with full confidence to give me a couple of decent spares that will work if needed. I may never need to buy another iPhone all the time I can buy new batteries for about £ 20 to give old iPhone a new lease of life!

Peter Brown -

Thanks a lot! Very easy reparation.

Lorenzo Colagiacomo -

Danke für die ausführliche Anleitung. Die Klebestreifen sind eine Herausforderung. Anwärmen ist hier immer hilfreich.

Roderich Vogelmann -

Might be good at step 23 on both the 6s display replacement and 6s battery replacement steps to note this is where the crossover occurs to replace the battery and/or the display.

johnfcassidy -

very well presented, clear and perfect exposure

Mario Lopes -

I’ve done this many times on many different phones (including this 6S). This time the screen is not coming up. Battery works and when I plug into my computer it recognizes the phone, but all I see is the screen lights up (while staying dark) but no logo or ios.

Gone back in and reattached the display connectors etc multiple times. No change. Any thoughts?

James -

Just brilliant! Thank you, it all works!..

JamieMac -

Great tutorial! Went smoothly and now the phone is ready for more years of trouble free service and we don’t have to buy a new one! Thanks I Fix It for helping us with all by hosting this site for information as well as selling quality parts and tools that make these repairs possible.

Julie Garbutt -

OK, so I finally got the battery out, and replaced with a new one, but when reinstalling the plate over the battery connector, the screws would not catch. I rearranged the plate several times, to make sure it was properly aligned. I also made sure the battery was flush, and the connector...and yes, I had the correct screws, although they are much the size of a grain of pepper!!! I eventually managed to get one screw on the plate over the battery connector but now the two screws beside the charge port won't stay in...and yes, the cover is flush too. So, I've put the Otter Box back on the iPhone 6s and will hike off to a phone repair depot tomorrow for an "intervention".
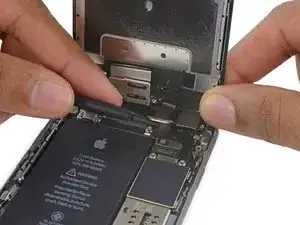
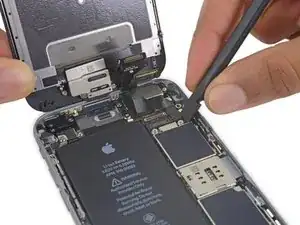
Joanne Watt -

Great guide. Followed this and had absolutely no trouble getting the job done. Nicely written. Thank you!

rockmaster mike -

Battery replacement went well. Let's see how many more years I can get out of this phone. Thank you iFixit and worldwide free manual contributors for all that you do for the Right to Repair movement! You guys rock!

vigzy -

Installed new battery all went well now trying to charge and all I get is Apple logo on and off - any ideas?

Bob -

Will I need to use a battery recalibration tool?

Benjamin Gustafson -

Bonjour à tous, c’est la deuxième fois que je réalise le changement de batterie (sur des téléphones différents :-) , merci à vous pour ce tuto !

J’ai pour ma part installé un nouveau joint d’étancheité, manque t’il le lien vers un tuto spécifique ?

Deuxième point, êtes vous certain qu’il faut charger à 100% la batterie ? Il y a plusieurs sites mentionnant qu’il faut maintenir la charge entre 20% et 80% ?

Merci encore pour votre aide.

Gui -

Bonjour Gui,

Merci de votre retour positif ! C'est toujours un plaisir de lire que nos tutoriels sont utilisés et appréciés :)

Pour la recharge de la batterie, oui, il faut la recharger une première fois à 100 % pour la calibrer. Plus d'infos ici : Battery Calibration

Ensuite, c'est vrai que les batteries apprécient particulièrement la charge entre 20 et 80 %, mais ce n'est pas facile à respecter entièrement avec un téléphone et ce n'est pas dramatique si on n'y parvient pas tout le temps. Vous trouverez plus d'infos sur les batteries téléphone dans cet article récemment localisé en français : https://fr.ifixit.com/News/67696/tout-sa....

Claire Miesch -

Have now successfully replaced two iPhone 6S batteries from iFixit. The second one proving more problematic than the first as both the adhesive strips on the battery snapped just to make it more eventful, but following the guide I was still able to successfully complete the replacement & now have 100% battery health once more. Next time I think I'll remove the Taptic Engine to make adhesive strips easier to access!!

Peter Brown -

After I replaced the battery the phone wouldn't charge and kept shutting down. I found the answer in the FAQ. Battery connector wasn't in place so I made sure the battery connector snapped in place and now its charging like a champ.

Bob Harris -

Excellent tutoriel, merci !
Je recommande également de retirer le Taptic Engine pour retirer la batterie, c'est uniquement 2 vis de plus, et ça facilite vraiment le retrait des bandes collantes de la batterie.

Sylvain JEAN -

Thank you Evan, this extensive, well organized repair guide took your unselfish time to help others (me). I really appreciate it.

Mike

Mike V -

I found the repair guide very well written and easy to follow.

Matt Fabiani 1/25/23

Tech4664 -

Worked out great for me! With reading and rereading instructions & comments (DO THIS!), took me about an hour / 1.5 hours. Takeaways 1. use heat! I used a space heater with fan, so I was able to hold up my phone while taking off the screen 2. I skipped the entire Front Panel Assembly (steps 17-22)... wasn't necessary. 3. DO remove the Taptic Engine! 4. I bought front screen adhesive just in case, but I couldn't find instructions anywhere on how to use it. It was a little messy, I ended up only using the corner adhesive (cut/ripped off the thin strips along the screen edges). 5. I ended up with a spare 1.5 mm Phillips screw??? not sure where it came from, but I hope I don't need it in there.

Kelly Archer -