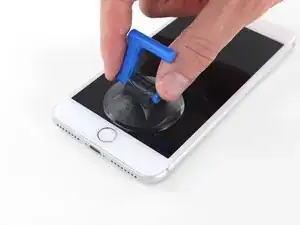
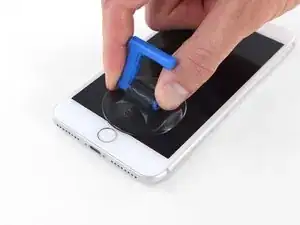
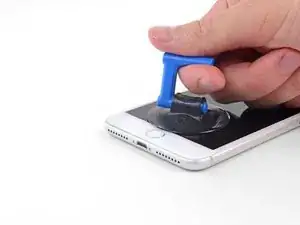
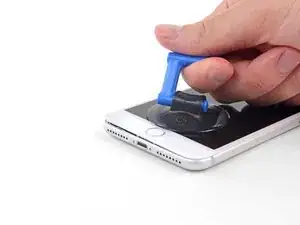
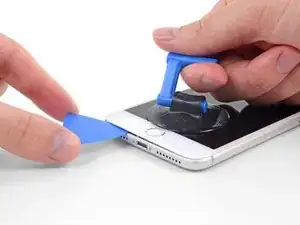
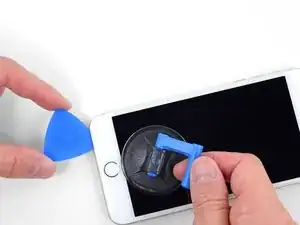
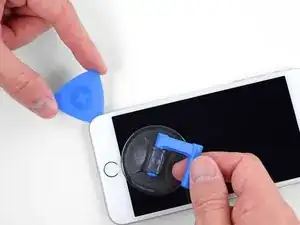
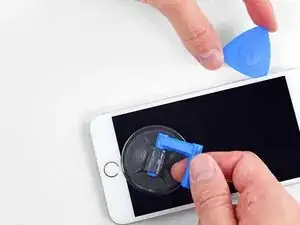
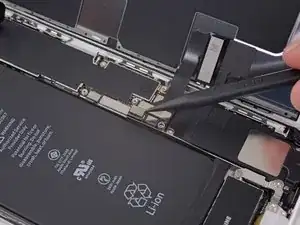
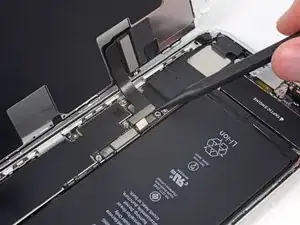
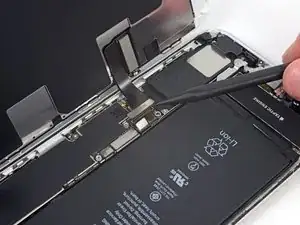
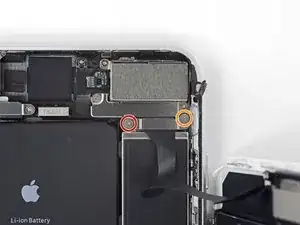
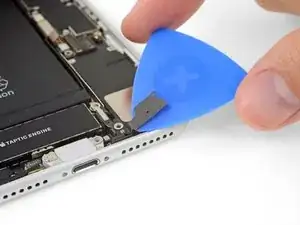
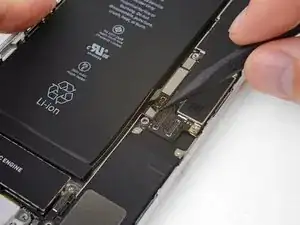
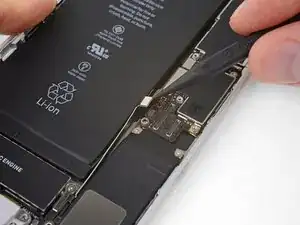
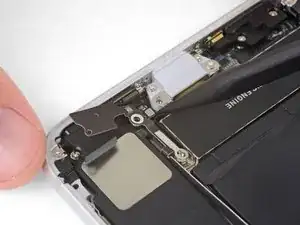
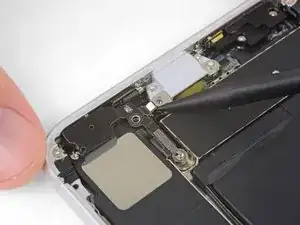
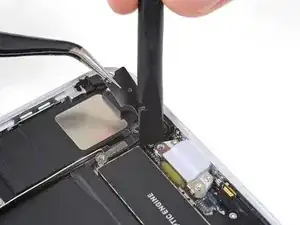
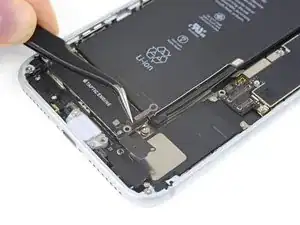
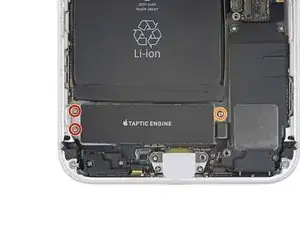
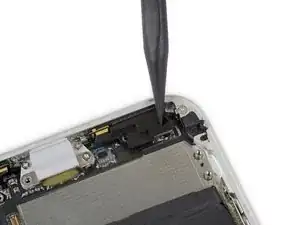
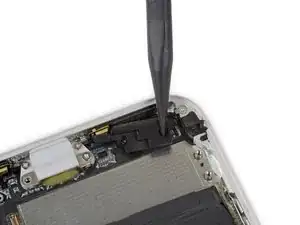
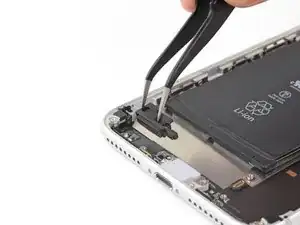
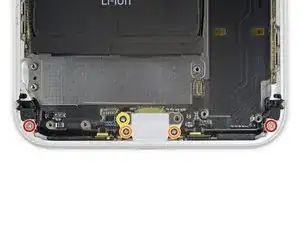
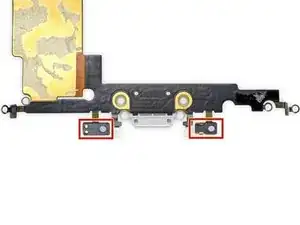
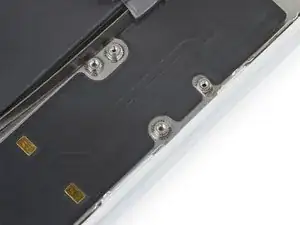
Einleitung

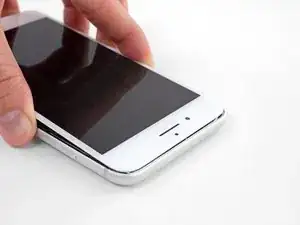
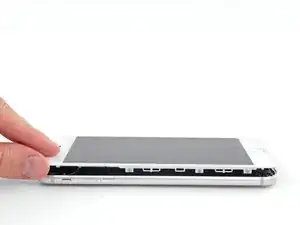
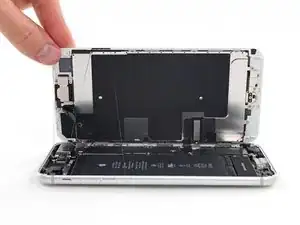
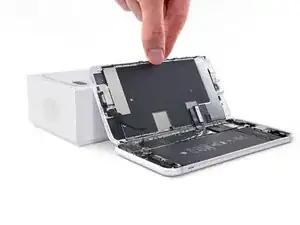
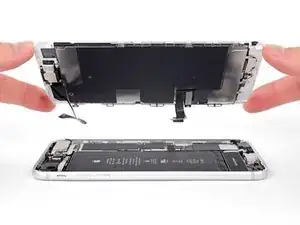
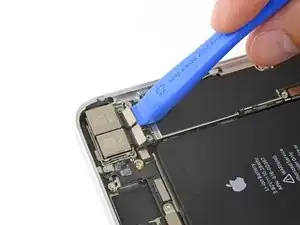
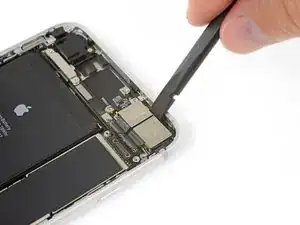
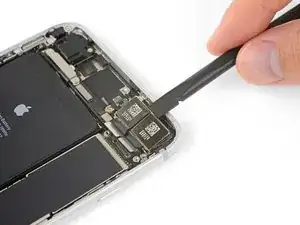
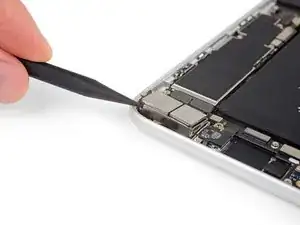
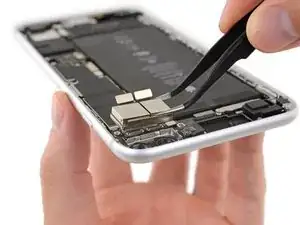
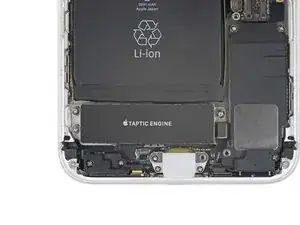
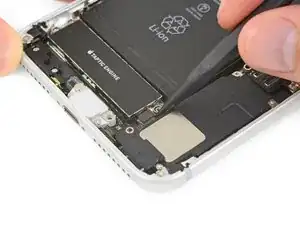
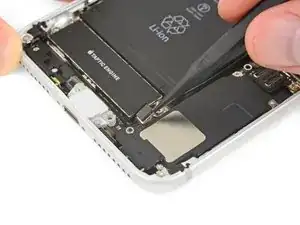
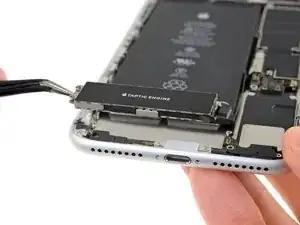
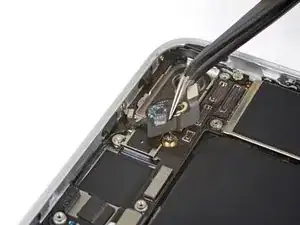
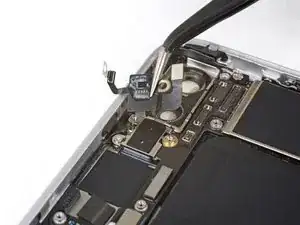
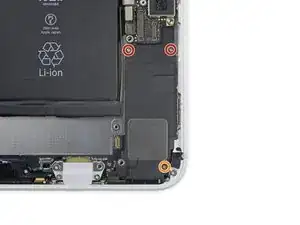
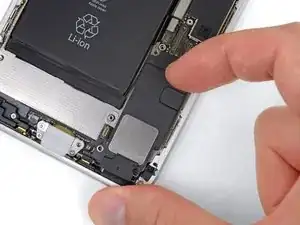
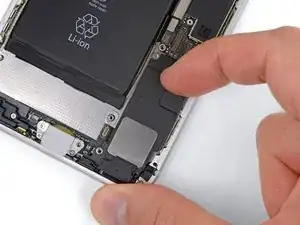
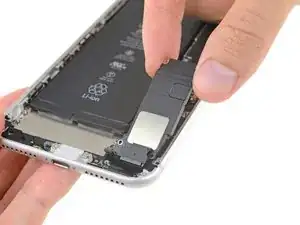
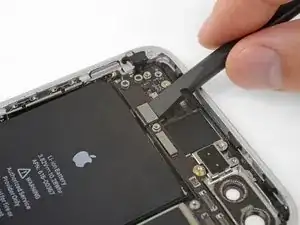
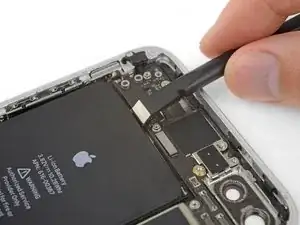
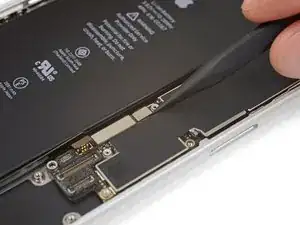
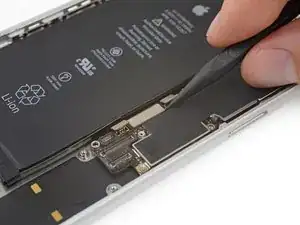
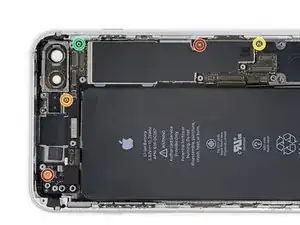
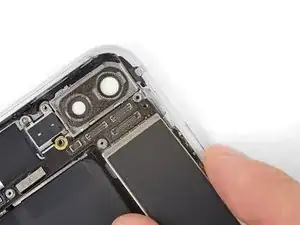
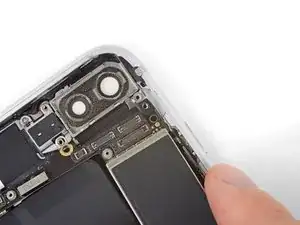
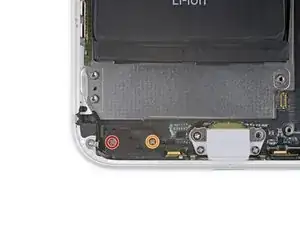
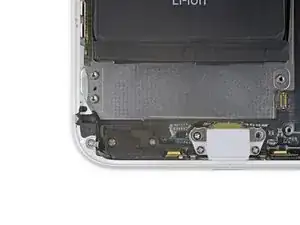
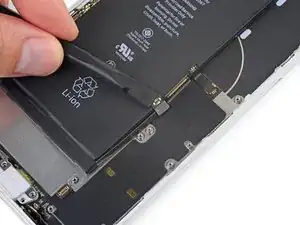
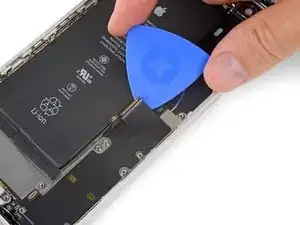
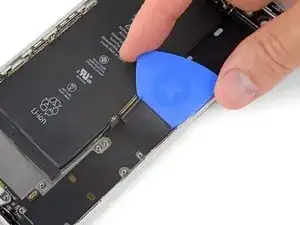
Diese Anleitung zeigt dir, wie du die gesamte Lightning Connector Einheit austauschen kannst. Viele Probleme beim Aufladen und bei Anschlussprobleme können dadurch gelöst werden.

  1. OqdAPX1NfcxJgNbg
    • Bevor du anfängst, entlade den Akku deines iPhones auf unter 25%. Ein geladener Lithium-Ionen Akku kann Feuer fangen und/oder explodieren, wenn er versehentlich beschädigt wird.

    • Schalte dein iPhone aus, bevor du daran arbeitest.

    • Wenn du ein iPhone öffnest, werden die Dichtungen des iPhones beschädigt. Halte eine Ersatzdichtung bereit, bevor du mit diesem Schritt fortfährst, oder achte darauf, dass keine Flüssigkeit eindringt, wenn du dein iPhone ohne Dichtung zusammen baust.

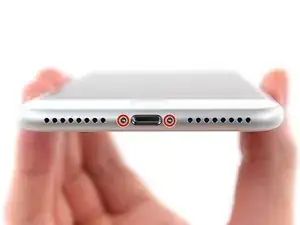
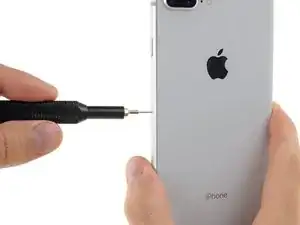
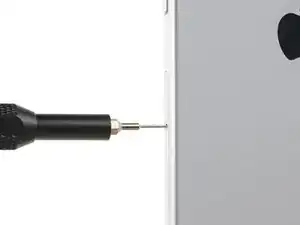
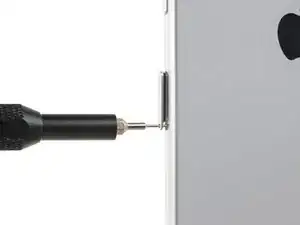
    • Drehe die beiden 3,5 mm Pentalobe Schrauben an der unteren Kante heraus.

    what do I do about super stripped screws?

    Ean Palacios -

    I’m sorry, your comment slipped past my radar earlier. For future fixers that might see this and ask the same question, you can check out our stripped screw guide for some detailed advice.

    Adam O'Camb -

    Do you need a toolkit like the essential toolkit

    Adam Palmer -

    Hi Adam. Having a tool kit with all of the listed parts above is best. The screw heads are very small and each set of screws needs a very specific type of driver to remove them without stripping any of them.

    Kyle Luksa -

  2. EXTwOVVOnkGXlAiy
    • Es ist leichter das iPhone zu öffnen, wenn du das untere Ende erwärmst. Du weichst so die Verklebungen auf.

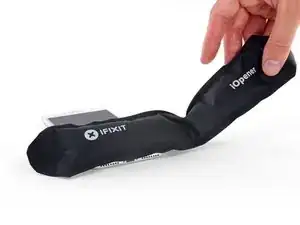
    • Du kannst das untere Ende des iPhones mit einem Haartrockner oder einem iOpener erwärmen. Wende die Wärme 90 Sekunden lang an, um den Kleber aufzuweichen.

  3. YFbVJy32AORrrT13
    YFbVJy32AORrrT13
    FJRpXo3rLQCQdx6q
    NAFGgIQsNbQXlaa6
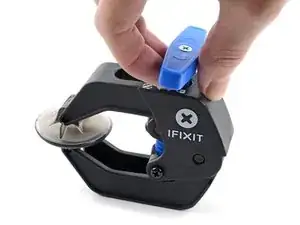
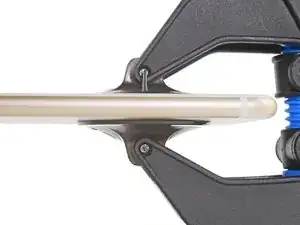
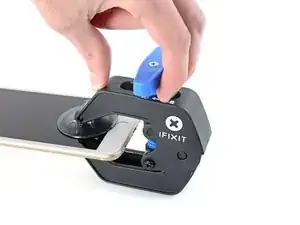
    • Wir haben die Anti-Clamp entwickelt, um das Öffnen von Geräten zu erleichtern. Die nächsten beiden Schritte zeigen, wie sie verwendet wird. Wenn du sie nicht benutzen willst, überspringe die nächsten zwei Schritte und folge einer anderen Methode.

    • Genaue Anweisungen für die Anti-Clamp findest du hier.

    • Drücke den blauen Griff zum Scharnier hin, um den Öffnungsmodus einzustellen.

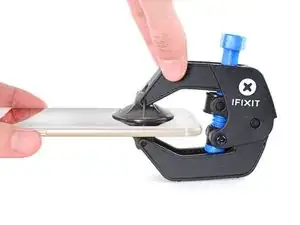
    • Setze die beiden Saugnäpfe direkt über dem Home Button am Display auf, einen auf der Vorder-, den anderen auf der Rückseite.

    • Drücke die Saugheber auf den Oberflächen fest.

    • Wenn die Saugheber nicht gut auf den Flächen haften, dann klebe Paketband darüber.

  4. 1xxoThH5QwjjODqQ
    1xxoThH5QwjjODqQ
    xIAMYtphPdkMrIJc
    xK1rEiHlYotpm5gZ
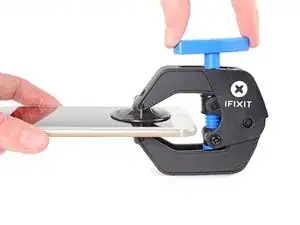
    • Drücke den blauen Griff vom Scharnier weg in die Stellung für den Öffnungsmodus.

    • Drehe den Griff im Uhrzeigersinn, bis du merkst, dass sich die Saugheber dehnen.

    • Achte darauf, dass sich die Saugheber weiterhin gegenüber stehen. Wenn sie sich nicht mehr gegenüber stehen, dann löse die Saugheber ein wenig ab und schiebe sie in die richtige Position.

    • Warte eine Minute, damit sich der Kleber allmählich ablösen kann und sich das Display unten löst.

    • Wenn es nicht gelingt, mit der Anti-Clamp einen ausreichend großen Spalt zu erzeugen, dann erwärme die Stelle nochmals und drehe den Griff eine halbe Umdrehung im Uhrzeigersinn weiter.

    • Drehe den Griff jeweils nicht mehr als eine halbe Umdrehung weiter und warte jedes Mal eine Minute lang. Gib der Anti-Clamp Zeit, ihre Arbeit zu erledigen.

    • Überspringe die nächsten zwei Schritte .

  5. 1SUHNLjLanp2x1y2
    1SUHNLjLanp2x1y2
    G2AloSCafqypVhRk
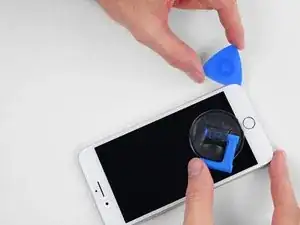
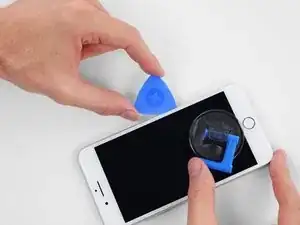
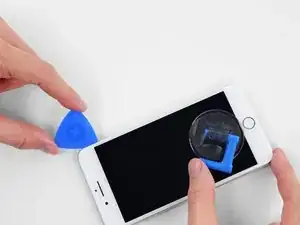
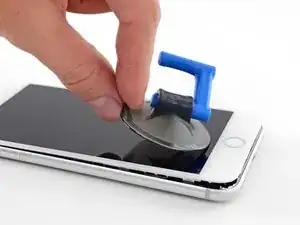
    • Setze einen Saugnapf auf die untere Hälfte der Vorderseite , direkt über dem Home Button.

    • Passe dabei auf, dass der Saugnapf nicht den Home Button bedeckt. Er kann sonst nicht dicht abschließen.

    • Wenn dein Display stark gesplittert ist, dann haftet der Saugheber vielleicht besser, wenn du die Scheibe mit durchsichtigem Paketband abdeckst. Du kannst anstelle des Saughebers auch sehr kräftiges Klebeband benutzen. Wenn das alles nicht hilft, dann klebe den Saugheber mit Sekundenkleber an der zerbrochenen Scheibe fest.

    Warning ! If you pull too hard (reheat the underside of the display again), you create an gap of air between the glass and the lcd display !

    When you replace the display assembly you end up with gray stains on the display.

    Result: you have to buy a new display (assembly).

    Arnoud -

    Using just the single suction cup that is included in the battery replacement kit probably wouldn’t open the device. An iOpener and an iSlack should be the recommended method. However, you can get it open with just the single suction cup and iOpener, but does take a lot of time.

    Get an iOpener and iSlack with the battery replacement kit.

    Chris -

    I used a flat x-acto (#18) blade knife tool to gently pry back the screen enough to allow me to insert the pick near the bottom corner. I then worked the pick under the screen as mentioned in steps 5 & 6 below then. This worked really well for me.

    Kyle Luksa -

    I used the suction cup without heating the phone - the adhesive came away quite easily without applying any heat. Maybe due to age of phone (nearly 4 years old). Worth trying.

    Ben Vinnerd -

    I can’t get the single suction cup to work. Hate being stuck on the simplest step!

    Donny -

    My screen was very shattered, and was quite hard to get suction, as my tape was very low quality. However, after pulling it up a little bit, I was able to insert a regular razor blade into the very small gap and used that as a lever.

    Michael Scroop -

  6. mrEFNcgfVQWurjTW
    mrEFNcgfVQWurjTW
    rErHmkOhfvSITnGD
    TohvbXinCCnyfcK6
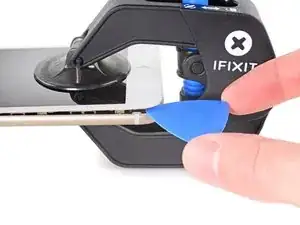
    • Ziehe gleichmäßig und fest am Saugnapf. Es sollte sich ein kleiner Spalt zwischen Front Panel und Rückgehäuse bilden.

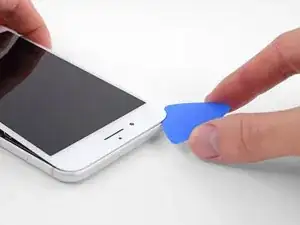
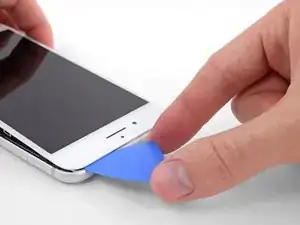
    • Setze ein Plektrum oder ein dünnes Hebelwerkzeug ein paar Millimeter in den Spalt ein.

    • Die wasserdichte Verklebung am Display ist sehr stark. Um den Spalt zu öffnen, musst du recht viel Kraft aufbringen. Wenn du Schwierigkeiten hast den Spalt zu erzeugen, solltest du nochmals Wärme anwenden, dann die Scheibe hoch und runter ruckeln, um so die Klebeverbindung zu schwächen.

    After multiple tries and using a very hot iOpener, it will not open.

    Kenneth Ewald, Sr. -

    In sheer frustration, I pulled out my trusty pocket knife and managed to lift the bottom of the screen slightly, but in the process, cracked the glass from the bottom to the home button. The case is open now.

    Kenneth Ewald, Sr. -

    this was by far the most difficult part. be diligent and follow the “firm and constant pressure” guide... the “gap” will be extremely “slight”. you will be able to slide a corner of the pry tool even if you cannot see the gap.

    Colleen V -

  7. AOHSGnMOFMrHBNmQ
    AOHSGnMOFMrHBNmQ
    pBblekYxOTaMfuJJ
    GvMBDIHTcivkDvXO
    • Schiebe das Plektrum um die Ecke und entlang der linken Kante nach oben in Richtung der Tasten für die Lautstärkeregelung und des Stummschalters. Trenne so die Klebeverbindung des Displays auf.

    • Halte vor der oberen linken Ecke an.

    Do not go over the top otherwise you can crack the screen. Sadly happened to me :(

    The instruction should be:

    “Stop near BUT BEFORE REACHING the top left corner of the display”

    Leonardo Piga -

  8. iiGOsaDUPLVF3bpu
    iiGOsaDUPLVF3bpu
    xIUoq1psydvfJCrU
    WRDGbKd2rpx3JRwL
    • Setze das Plektrum an der rechten unteren Ecke ein. Schiebe es um die Ecke herum, dann entlang der rechten Kante nach oben. Trenne dadurch die Verklebung.

    • Setze das Plektrum nicht zu tief ein, du könntest auf dieser Seite diverse Displaykabel beschädigen. Schiebe es nur wenige Millimeter tief ein, ungefähr in der Breite des Displayrahmens.

    I had really good luck using a hairdryer on some of the more stubborn portions of adhesive.

    Jessica Kirsh -

  9. dlBIvSNLXKCnX4B6
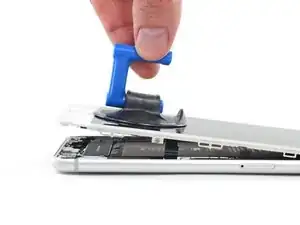
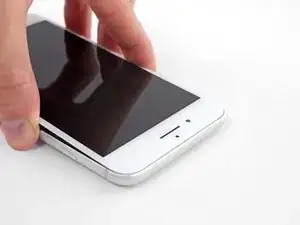
    • Hebe vorsichtig den Saugnapf an und mit ihm den unteren Teil des Displays.

    • Hebe das Display maximal 15° an. Du könntest sonst die Flachbandkabel des Displays überdehnen und beschädigen.

  10. STTnPPfiiKNEokvD
    • Ziehe an der kleinen Lasche am Saugnapf, um ihn vom Front Panel zu lösen.

  11. FWPXimHpMQKpmZZu
    FWPXimHpMQKpmZZu
    MGZUVhY6gplY6qCc
    voQbuSeunKejF3ic
    • Schiebe das Plektrum unter das Display und die Oberkante entlang, um die letzte Klebeverbindung zu trennen.

    Be very careful at this step. The glass at the top will break very easy when the display is lifted too much.

    Gerdschi D -

  12. Y3wG53ZtiZEQdGYY
    Y3wG53ZtiZEQdGYY
    FNyyLxBTwBhIDlrI
    • Schiebe die Displayeinheit leicht nach unten, weg von der Oberkante, um die Rasten, mit denen sie am Rückgehäuse gehalten wird, zu lösen.

  13. 4NykCXCCyRd5enLv
    4NykCXCCyRd5enLv
    mFZBjHhOBBSSbDKG
    yGLgglmNotb5obSH
    • Öffne das iPhone, indem du das Display von der linken Seite her aufklappst, so wie man die Seite eines Buches umschlägt

    • Versuche noch nicht, das Display ganz zu trennen. Verschiedene empfindliche Flachbandkabel verbinden es noch mit dem Logic Board.

    • Lehne das Display an einen geeigneten Gegenstand, um es gut zu stützen, während du weiter am iPhone arbeitest.

    Das “links” ist auf dem Foto rechts.

    Matze Diamond -

    Das ist falsch. Wenn man auf das iPhone sieht, ist der Home Button unten. Auf dem Photo ist deutlich sichtbar, dass die linke Seite angehoben wird.

    Hans -

  14. gdf4RAku2FO4NKSD
    gdf4RAku2FO4NKSD
    RrJOlSmc4jTe2Wsm
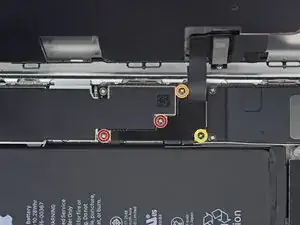
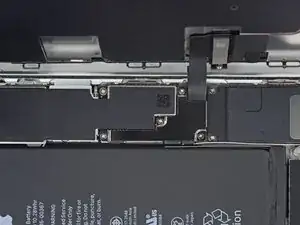
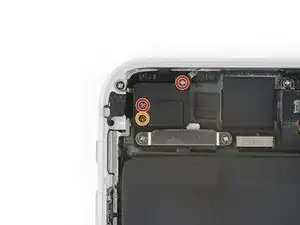
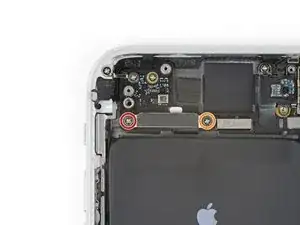
    • Entferne die vier Kreuzschlitzschrauben (JIS) mit denen die untere Display Kabel Halterung auf auf der Platine angeschlossen ist:

    • Zwei 1,3 mm Schrauben

    • Eine 1,4 mm Schraube

    • Eine 2,7 mm Schraube

    • Behalte in dieser Anleitung deine Schrauben sorgfältig im Auge, so dass jede Schraube beim Zusammenbau wieder dorthin zurückkehrt, wo sie hergekommen ist. Die Installation einer Schraube an der falschen Stelle kann dauerhafte Schäden verursachen.

    The Phillips screwdriver bit is the PH000. The measurement refers to the screw length.

    Jack Harry -

  15. FVmDfbaakEqqPyM5
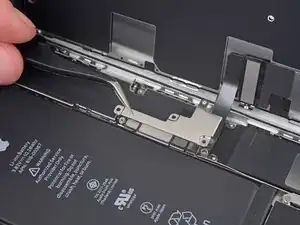
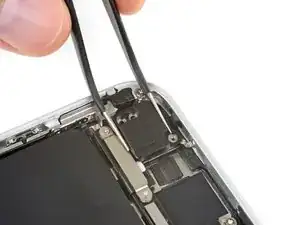
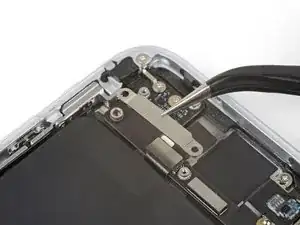
    • Entferne die Halterung am unteren Displaykabel.

  16. xCtNERRx2CKlovLn
    xCtNERRx2CKlovLn
    6OqRktbAd2XLTrpP
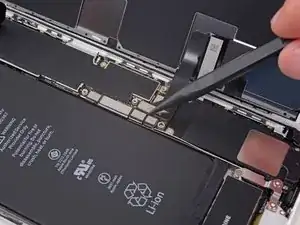
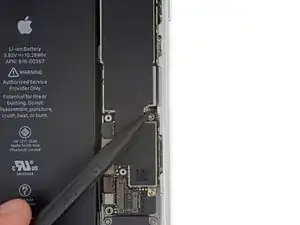
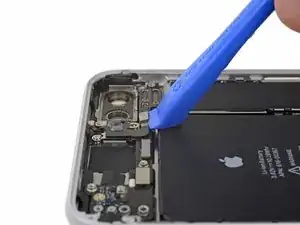
    • Hebele den Akkuanschluss mit der Spudgerspitze aus seinem Sockel auf dem Logic Board.

    • Biege das Akku Anschlusskabel etwas weg vom Logic Board, um zu verhindern, dass es sich versehentlich wieder mit dem Akku verbindet und das iPhone während der Reparatur unter Spannung setzt.

    When I reassembled the iPhone 8 Plus, I had to plug it into a Lightning cable to wake it up (just pushing power button wasn’t sufficient).

    browniestarmite -

  17. hSevVTlWDAgGghXZ
    hSevVTlWDAgGghXZ
    xRZuRojAQGBGB3jM
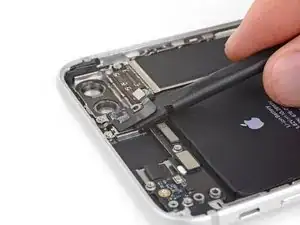
    • Hebele den breiten unteren Displayverbinder mit der Spudgerspitze oder mit dem Fingernagel gerade aus seinem Sockel.

    • Um Druckverbinder wie diesen wieder anzuschließen, musst du erst auf einer Seite herunterdrücken, dann auf der anderen. Drücke nicht in der Mitte. Wenn der Verbinder auch nur ein bisschen daneben sitzt, kann er sich verbiegen und irreparabel beschädigt werden.

    I got hold of a iPhone 8 Plus with cracked screen that I am planning to fix.

    Here is my problem:

    When I tried to take out the screen from my phone, (step 15-18) I was curious about the new screen, so I tried to connect it. It was completely dead! Then I tried the old cracked one, and suddenly that was dead to! This is a phone that some fool has been inside earlier and changed battery, but I suspect he has done some more really stupid things. The Taptic Engine is living its own life and vibrating every time I slightly touch the home button. (I have a new Taptic Engine) The phone is also full of dust and small particles that does not belong there. One tri-point Y000 screw (step 18) is even missing! Now the biggest problem is that both screens are black! I know the phone is on, because I hear voice command speak when I turn on the power. The screen worked before I tried to change it? And one last thing: My new LCD screen came with new flex cables. Is it possible to switch over, so I can use the old ones?

    smikalsen -

    Hi,

    Is your problem solved?

    Daniel Leprince -

    Be careful of damaging MOSFETs by the LH side of the large lower display cable. After replacing the battery and turning the device on, the phone showed low charge and didn't have a charging symbol even after plugging into multiple cables and chargers. Turns out I had damaged the logic board attempting to disconnect the connector.

    Chris Cerrudo -

  18. aWkRBoqdn5JLDxut
    aWkRBoqdn5JLDxut
    NNsd3K6mmfCyvmLZ
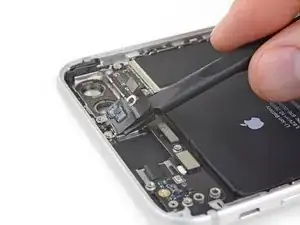
    • Löse den Verbinder am zweiten unteren Displaykabel mit der Spudgerspitze. Er ist direkt hinter dem eben gelösten.

    I used the other end of the spudger on this connector and it seemed to work a little better for me. I came in from underneath the top-right edge instead of the bottom right.

    Jessica Kirsh -

  19. oJa4BeNCiLydYrFd
    oJa4BeNCiLydYrFd
    GA64GXyHWNMhEGK5
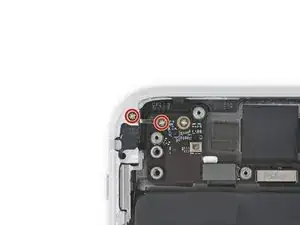
    • Entferne die beiden TriPoint Y000 Schrauben, welche die Halterung über dem Verbinder der Sensoreinheit am Front Panel befestigen:

    • Eine 1,0 mm Schraube

    • Eine 1,2 mm Schraube

    una vite da 1mm e due viti da 1.2 mm???

    Matteo Carachino -

    Ciao Matteo! Grazie per l’osservazione. Ho appena modificato il testo :) La traduzione è aperta a tutti. Hai quindi la possibilità di fare le tue suggestione direttamente nel testo e sei il benvenuto se vuoi usare di questa possibilità nel futuro. Grazie ancora per la vigilanza! Saluti, Claire

    Claire Miesch -

    The tool kit does include a 1.0 or1.2mm screwdriver! How am I supposed to remove those screws?

    peter frommer -

    Bought the screwdriver that supposedly fits these screws and it still doesn’t work.

    hypercarduser -

    My bracket looks different. Can’t get these screws out.

    Ray Rushing -

    kit came with wrong bit. i received 2x P02 (penta tips) and no tri point y000.

    Christopher Shane Gripp -

    There is no such thing as a trigger point y000 screwdriver. Why couldn't they use Philips like the rest of the screws.Nobody knows what these trips point y000 even look like. this is a scam to force you to buy a new phone.

    Al tb -

  20. hBRGDcEYEQNRA2A1
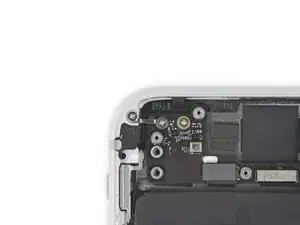
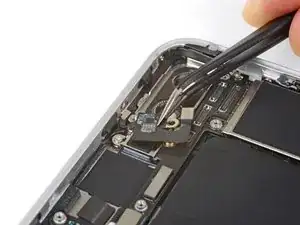
    • Entferne die Halterung, welche den Verbinder der Front Panel Sensoreinheit bedeckt.

  21. GacqUhpZexRIIL1r
    GacqUhpZexRIIL1r
    gTmxBknJLSOFdNJx
    • Löse den Verbinder der Front Panel Sensoreinheit mit der Spudgerspitze oder dem Fingernagel von seinem Sockel.

    What happens is this strip is torn and how does one fix it

    Mijinyawa Dauda -

  22. AVYiAe5OJSrbfHdg

    Should there be a step somewhere in here to point out when to remove the blue plastic from the new iFixit screen?

    Paul Santora -

  23. fBrfCqfGMiHrKgQj
    fBrfCqfGMiHrKgQj
    Qq6gXOHJIIEjWY2R
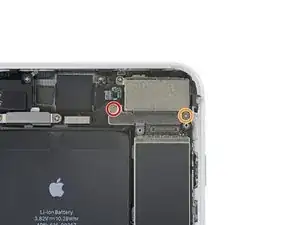
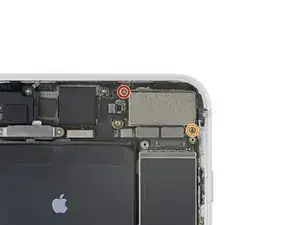
    • Entferne die beiden Y000 Schrauben, welche die Halterung der Steckerabdeckung der Rückkamera befestigen:

    • Eine 1,4 mm Schraube

    • Eine 1,4 mm (nicht-eisenhaltige) Schraube

    • Ein magnetischer Schraubendreher kann diese Schraube nicht anziehen. Achte darauf, dass du diese Schraube wieder an der gleichen Stelle eindrehst. Eine magnetisierte Schraube könnte den Kompass stören.

    the standoff screw underneath the left screw came loose together and was impossible to detach from the screw. In a later step (49) it was possible to remove it together with the antenna flex cable

    nilsplackle -

  24. G1XiSMD2cRMenDyp
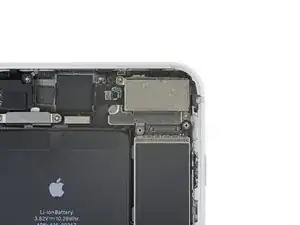
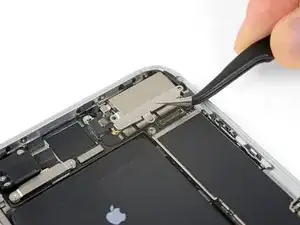
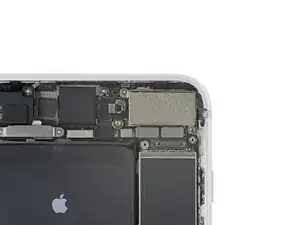
    • Entferne die Halterung.

  25. AfCQByWgFeuBkDGA
    AfCQByWgFeuBkDGA
    CiVyAWNoGgXJqWIR
    • Entferne die beiden Schrauben, welche die Abdeckplatte des Rückkameramoduls befestigen:

    • Eine 1,8 mm Kreuzschlitzchraube

    • Eine 2,7 mm Abstandsschraube (nicht aus Eisen)

    • Abstandsschrauben lassen sich am Besten mit einem Schraubendreher für Abstandsschrauben oder entsprechenden Bit herausdrehen.

    • Zur Not geht das auch mit einem kleinen Flachschraubendreher. Sei aber besonders vorsichtig und rutsche damit nicht ab. Du könntest sonst Bauteile in der Nähe beschädigen.

    Yeah, the flathead screw driver is not really a good option for the standoff screwdriver bit. I managed to remove the standoff screws easily enough, but replacing them with the flathead was laborious.

    andystills -

  26. FslTdFua1Jq4UKAA
    • Entferne die Abdeckplatte des Rückkameramoduls.

  27. fUtMsWMWxYfRG2bI
    fUtMsWMWxYfRG2bI
    uYPo1TsyDyxcZW4K
    4hHaRuUiM3VNM4mf
    • Löse die beiden Kamerakabelstecker mit einem iFixit Öffnungswerkzeug oder deinem Fingernagel, indem du sie gerade aus ihrem Anschluss nach oben hebst.

  28. eXsiACihPeKXjgus
    eXsiACihPeKXjgus
    Ku5bASXYSx6NOtdZ
    IjZPrkxWFrtoAJyH
    • Heble die Rückkameraeinheit mit dem flachen Ende des Spudgers von der Oberkante des iPhones weg.

    • Wenn du dabei Schwierigkeiten hast, dann nimm die Spudgerspitze und heble die Kamera an ihrer rechten oberen Ecke weg.

  29. CCZMtwOiS5c42MPh
    • Entferne die Rückkameraeinheit.

    Using the small supplied none-conductive baggy you get in your parts repair kit, it is generally advised to put your camera sensor in said bag to protect it from dust or other debris as this will not come off the sensor and will mean another repair where one could have been avoided.

    Imname62 -

  30. wFWuxyrGHNTEOapH
    • Entferne drei Kreuzschlitzschrauben, welche das obere linke Antennenbauteil befestigen:

    • Zwei 1,3 mm Schrauben

    • Eine 3,1 mm Schraube

  31. wIO5FTuJDiCHN1rL
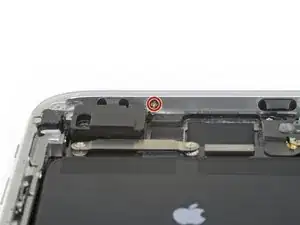
    • Entferne die 1,3 mm Kreuzschlitzschraube, welche das Antennenbauteil an der Oberkante des rückwärtigen Gehäuses befestigt.

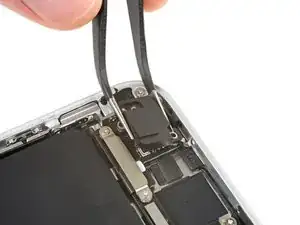
    This screw is stuck and will not come out. I'm using the same head I used for the previous one which is the same size. I've even tried them all. I can get any other screw fine but this one will not come out. Just wasted my time undoing everything up to then and this stupid screw is stopping me from finishing.

    Jalen Pace -

  32. Z1FXwi4X2rr1RkMM
    Z1FXwi4X2rr1RkMM
    tGjC1OcpFpLVsmQv
    FBOxwZOSMkLdjcWB
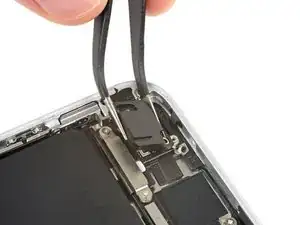
    • Der Schraubdom oben am Antennenbauteil steckt in einer kleinen Vertiefung in der Oberkante des iPhones.

    • Kippe das Antennenbauteil in Richtung Oberkante des Smartphones.

    • Schiebe den Schraubdom nach unten und aus seiner Vertiefung heraus.

    I accidently ripped the screw boss of the antenna component. Is that very bad? Do I need to replace the antenna component, or could I try to solder it back on, or does it even matter? Thanks in advance.

    Johannes Jüptner -

  33. pUhR2FTYYZMlqCPZ
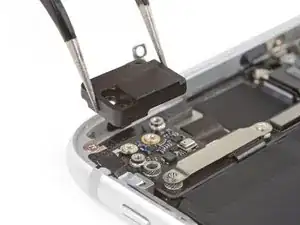
    • Entferne das obere linke Antennenbauteil.

  34. WCaxo3BGkjxOEdgo
    WCaxo3BGkjxOEdgo
    AUkubFnnLQIa2AJE
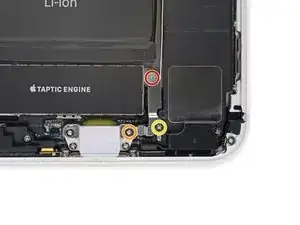
    • Entferne die drei Schrauben, welche die L-förmige Halterung neben der Taptic Engine befestigen:

    • Eine 1,3 mm Y000 Schraube

    • Eine 2,6 mm Kreuzschlitzschraube

    • Eine 3,5 mm Kreuzschlitzschraube

    De Y000 schroef nam meteen ook de  2.4 mm standoff-schroef aan de achterzijde mee. Wat lastig om die uit elkaar te halen.

    nilsplackle -

  35. 6d3fHeGCOLMXrDif
    • Entferne die Halterung.

  36. DFBBDfUmIWeEKUjL
    DFBBDfUmIWeEKUjL
    RWDskoH2EBsx1yhK
    xB11Y4PRLF2OXwUj
    • Trenne den verklebten Teil des Antennenflexkabels mit einem Plektrum von der Oberfläche des Lautsprechers.

    • Dieser Teil des Flexkabels ist leicht festgeklebt. Falls nötig, musst du es mit Hilfe eines iOpeners etwas erwärmen, um den Klebstoff aufzuweichen, ein Haartrockner geht auch. Dies erleichtert das sichere Ablösen (und wieder Befestigen) des Flexkabels.

    should i be worried if the piece with the two holes broke off

    Robert Quinn -

  37. vvOOoFAmmbASeNCN
    vvOOoFAmmbASeNCN
    GCLiDlktfSvveIjc
    • Heble das Antennenflexkabels mit der Spudgerspitze hoch und löse es vom Logic Board ab.

  38. VsduvZZnGIWNXXkS
    VsduvZZnGIWNXXkS
    wkZ23mfXWbWi34X4
    nCxYacnrqCRk33ad
    • Heble das andere Ende des Antennenflexkabels mit der Spudgerspitze hoch und löse es aus seinem Anschluss neben dem Lightning Port.

    • Das Kabel wieder anzuschließen kann knifflig sein. Erleichtere dir diese Arbeit und halte das Flexkabel so mit einer Pinzette, dass der Stecker auf den Anschluss passt. Drücke dann vorsichtig den Stecker mit dem flachen Ende des Spudgers herunter, bis er einrastet.

    I was unable to plug this back in when re-assembling. My home button doesn’t work anymore. The connector it was supposed to plug into seems to spin around.

    Dan Putnam -

    I had a similar experience during this repair. My problem was that the nib on the ribbon that actually connects in to the socket came off the ribbon cable when I initially detached the cable. I didn’t realize this until after the repair, but I also had to replace the Wifi Diversity cable entirely. A tell-tale sign is that you don’t receive good cell reception.

    Lucas -

    I did not notice until reassembly, but the antenna socket pulled off the board. I have no micro-soldering tools. The friction of the connector was greater than the solder holding it in place.

    David Hampson -

    The little connector in the first picture ripped the component off the circuit board when trying to pry it up so be careful. I’m guessing it’s like a previous poster said and the socket is stronger than the glue/material that holds the component to the PCB. This was on a new board during disassembly trying to locate a potential problem. Phone still workings with WiFi and cellular normally but the cellular signal is down about 1/3 on average wherever I am.

    J.Garrecht Metzger -

  39. ICJgunKoBJ6LEXMF
    • Entferne die Wi-Fi Antenne.

    This had a little adhesive on the metal band. Couldn’t just pluck it out as shown. What I did worked but what I should’ve done is run my blue puck up and down the length.

    Mark Hintze -

  40. ihmJZqssPBXO2qXW
    ihmJZqssPBXO2qXW
    6aHZVX2GXwlZC1yt
    • Entferne die drei Schrauben, welche die Taptic Engine befestigen:

    • Zwei 1,5 mm Kreuzschlitzschrauben

    • Eine 2,4 mm Abstandsschraube

    • Abstandsschrauben lassen sich am Besten mit einem Abstandsschrauben-Schraubendreher oder -Bit herausdrehen.

    • Zur Not geht es auch mit einem kleinen Flachschraubendreher - sei aber sehr vorsichtig und rutsche nicht ab, damit keine umliegenden Bauteile beschädigt werden.

  41. OjZ4vHLPiHQIAra1
    OjZ4vHLPiHQIAra1
    UMecLjXrJlTCxdcr
    • Heble mit der Spudgerspitze das Flexkabel zur Taptic Engine hoch und löse es ab.

  42. hDiqTTJ5Uiihvesu
    • Entferne die Taptic Engine.

  43. y1RXPZLKQWXhwKIE
    y1RXPZLKQWXhwKIE
    ShS12cauMgEZooeP
    AoIWdCsCIrCvfbZn
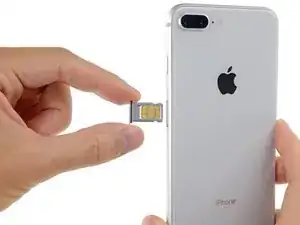
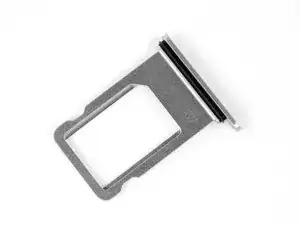
    • Setze ein SIM Kartenauswurfwerkzeug oder eine aufgebogene Büroklammer in das kleine Loch am SIM Einschub ein.

    • Drücke es fest ein, um den Einschub auszuwerfen.

  44. tFMNtgDcIW4taL2J
    tFMNtgDcIW4taL2J
    foUq1QMiL4xXHpMc
    • Entferne die SIM Karte vom iPhone.

    • Die SIM Karte fällt leicht aus dem Einschub heraus.

    • Achte beim Einsetzen darauf, dass die Karte im Einschub richtig ausgerichtet ist.

    • Der SIM Einschub ist mit einer dünnen Gummidichtung ringsum gegen das Eindringen von Staub und Feuchtigkeit geschützt. Wenn diese Dichtung fehlt oder defekt ist, solltest du sie oder den ganzen Einschub austauschen, damit die inneren Bauteile des iPhones geschützt bleiben.

  45. H5H4XhGfBwRSZv51
    H5H4XhGfBwRSZv51
    oCXXlngamniCnHvI
    WODSnbZ1eGHJl2QW
    • Schiebe den Auswurfkolben der SIM Karte mit der Spudgerspitze aus dem Weg für das Logic Board.

  46. rG3tLqQexjHjKGeT
    • Entferne die beiden Kreuzschlitzschrauben, welche die Halterung über dem oberen Kabelstecker befestigen.

    • Eine 3,1 mm Schraube

    • Eine 3,1 mm Schraube

    • Denke daran, dass die längere Schraube links sitzt.

    the right screw is 1,33mm, not 3,1mm.

    Boni Zei -

  47. Uk1vWJNRxp2DPADp
    • Entferne die Halterung am oberen Kabelstecker.

  48. WjA4Y2btIYInoFDK
    WjA4Y2btIYInoFDK
    hhDUnpeQODvDfo3y
    • Entferne die beiden 1,2 mm Kreuzschlitzschrauben, welche die Erdungsklammer in der oberen linken Ecke des Logic Boards befestigen.

  49. EXukqKdQKCnjVKWq
    • Entferne die Erdungsklammer.

  50. 4dbEXkVPmKrMxDan
    4dbEXkVPmKrMxDan
    RQqWA4gKDgSS5cHW
    • Entferne die 1,2 mm Kreuzschlitzschraube, welche das Antennenflexkabel an der Oberkante des rückwärtigen Gehäuses des iPhones befestigt.

    Here happened the same...

    Johannes Jüptner -

  51. VQLHQnMj6EjHvWFJ
    VQLHQnMj6EjHvWFJ
    WLrdvusPXHr4OTKi
    • Heble den Stecker am Antennenflexkabel mit der scharfen Kante eines iFixit Öffnungswerkzeugs oder dem Fingernagel hoch und löse ihn vom Logic Board.

  52. EcJAyvfNvnZjQb2D
    EcJAyvfNvnZjQb2D
    6sJnBLgdMyRXINCq
    • Schiebe das flache Ende eines Spudgers unter das Antennenflexkabel und trenne den Kleber auf, mit dem es befestigt ist.

  53. YJq6IlJFwWqqfxlv
    YJq6IlJFwWqqfxlv
    yJHcKjAAvTGKNLMF
    yBXQVjCCZnASbKtt
    • Der Schraubdom oben am Antennenflexkabelsteckt in einer kleinen Vertiefung in der Oberkante des iPhones.

    • Kippe das Antennenflexkabel nach oben in Richtung Oberkante des Smartphones.

    • Schiebe den Schraubdom nach unten aus der Vertiefung heraus.

    • Entferne das Antennenflexkabel.

  54. H1vDITQJMWQDcLDG
    H1vDITQJMWQDcLDG
    uLeGnmD4q3t6rD1L
    YAZgPcHkfcBPQCQc
    • Entferne die drei Kreuzschlitzschrauben, welche den unteren Lautsprecher befestigen:

    • Zwei 1,4 mm Schrauben

    • Eine 2,4 mm Schraube

    • Drücke beim Zusammenbau den Lautsprecher zur Unterkante des iPhones, bis die Schraubenlöcher passen. Halte ihn so fest und drehe die Schrauben hinein.

  55. fM3iWLQHyhfr2Ar5
    • Entferne den unteren Lautsprecher.

  56. VNEEH2foZABD3AoA
    VNEEH2foZABD3AoA
    4Zw3GLfENTderx3o
    • Hebele mit dem Fingernagel oder einem Spudger von der Oberkante her am Stecker des oberen Kabels und löse ihn ab.

  57. iCmNhITYNROQFWfo
    iCmNhITYNROQFWfo
    YcgpFMoGgpfq1tkS
    • Hebele mit der Spudgerspitze vorsichtig das Flexkabel der Spule für das drahtlose Laden hoch und löse es ab.

  58. cXe4UFIx52UEmW3M
    cXe4UFIx52UEmW3M
    dGKsIOpNELukWinO
    • Hebele mit der Spudgerspitze das Flexkabel zur Lightning Connector Einheit mit der Spudgerspitze hoch und löse es vom Logic Board ab.

    I did this repair and I followed it too a T, but when I reassembled, the flex cable for the Lightning connector assembly keeps popping out. Ive replaced it twice and followed your guide exactly. No mistakes. But when I go to clip it back in, it always does that….

    12 oz Willie -

  59. q4MTRCrrRk22iIq4
    q4MTRCrrRk22iIq4
    a2BwTt5stkMpREeo
    • Entferne die fünf Schrauben, mit denen das Logic Board befestigt ist:

    • Zwei 1,8 mm Kreuzschlitzschrauben

    • Eine 2,3 mm Abstandsschraube

    • Eine 2,4 mm Abstandsschraube

    • Eine 2,7 mm Abstandsschraube

    • Abstandsschrauben lassen sich am Besten mit einem [verlinktes Produkt fehlt oder ist deaktiviert: IF145-343-1] und Bithalter herausdrehen.

    • Zur Not geht das auch mit einem kleinen Flachschraubendreher. Sei aber besonders vorsichtig und rutsche nicht ab. Du könntest sonst umliegende Bauteile beschädigen.

    My repair kit from iFixit included a standoff screwdriver bit. I do not recommend trying this without one.

    jefflongcore -

  60. siI4jrNrwaRChLLT
    siI4jrNrwaRChLLT
    QRXILyAWkqYhHGDt
    TAHKEMRDPwCCxX2G
    • Hebe das Logic Board an der Unterkante hoch und schiebe es am iPhone nach unten, um es so zu entfernen.

    • Achte darauf, dass sich das Logic Board nicht an einem Kabel verfängt.

    • Beachte beim Zusammenbau die Position des schwarzen Erdungssclips an der oberen rechten Kante des Logic Boards nahe den Rückkameras. Das Logic Board muss unter diesen Clip hineinrutschen.

  61. iKSkqtWCxatoT2GP
    iKSkqtWCxatoT2GP
    JCbJlQQVkuSA1fIr
    • Entferne die beiden Kreuzschlitzschrauben, welche die barometrische Entlüftungsöffnung an der unteren linken Ecke des iPhones befestigen:

    • Eine 3,2 mm Schraube

    • Eine 1,8 mm Schraube

  62. 1pTfXBXwTOGJ3chQ
    1pTfXBXwTOGJ3chQ
    uTRBVQJTVXaNTH1I
    • Schiebe vorsichtig die barometrische Entlüftungsöffnung in Richtung Akku und löse sie so aus der Klebeverbindung mit der Unterkante des iPhones.

  63. bDBQ5xhjECsdJMe3
    • Entferne die barometrische Entlüftungsöffnung.

  64. SwemnkZPsQYAWwok
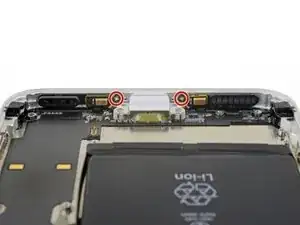
    • Entferne die fünf Kreuzschlitzschrauben, mit denen die Lightning Connector Einheit am rückwärtigen Gehäuse befestigt ist:

    • Zwei 1,2 mm Schrauben

    • Zwei 2,4 mm Schrauben

    • Eine 2,5 mm Schraube

  65. ukt4OltpYrDbHl2e
    • Entferne die beiden 1,3 mm Kreuzschlitzschrauben, mit denen die Lightningbuchse an der Unterkante des iPhones befestigt ist.

  66. gNWGFykX1WRE4fsn
    gNWGFykX1WRE4fsn
    HJ1gaAhr3AD6Sj4t
    uYkyBjaub21JbBy3
    • Heble die beiden Mikrofone mit der scharfen Kante des iFixit Öffnungswerkzeugs aus der Klebeverbindung zur Unterkante des iPhones.

    • Versuche nicht, die beiden Mikrofone ganz zu entfernen. Es genügt, sie so wie im Bild gezeigt, abzulösen.

  67. PYMgWZEaQh5YiqVK
    • Erwärme das rückwärtige Gehäuse hinter dem Flexkabel des Lightning Connectors mit einem Haartrockner oder einem iOpener. Dadurch wird der Klebstoff am Kabel weich und es kann leichter abgelöst werden.

  68. LnTeTHje3ECOuAnG
    • Biege vorsichtig mit dem flachen Ende des Spudgers den Stecker des Akkuflexkabels vom oberen Teil der Lightning Connector Einheit weg.

    • Sei in den folgenden Schritten vorsichtig beim Abtrennen der Lightning Connector Einheit und beschädige nicht versehentlich das Akkuflexkabel.

  69. rskFZJpCMYapk1Cu
    rskFZJpCMYapk1Cu
    ruPR6XUJmACDhRgd
    yT3L2YUIUgubMSjL
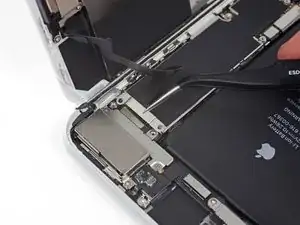
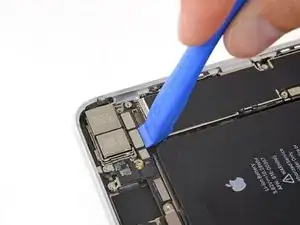
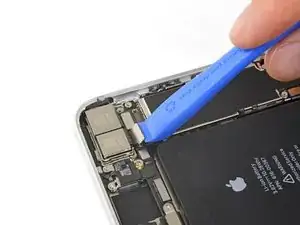
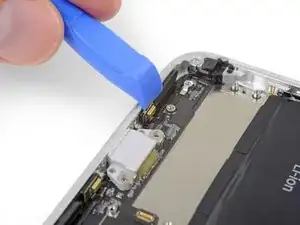
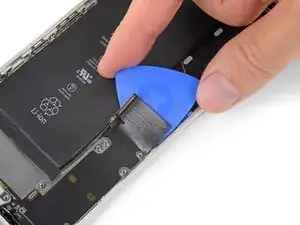
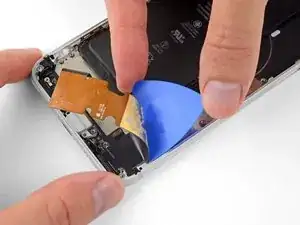
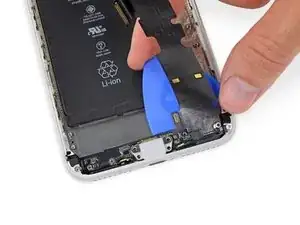
    • Schiebe ein Plektrum oder ein dünnes Hebelwerkzeug unter den oberen Teil des Flexkabels zur Lightning Connector

    • Schiebe vorsichtig das Plektrum in Richtung Außenkante des iPhones, (also weg vom Akku).

    • Ein Teil der Spule zum drahtlosen Laden befindet sich direkt unter diesem Teil des Flexkabels zum Lighning Connector. Zu starkes Hebeln kann die Spule beschädigen.

    • Erwärme immer mal wieder, wenn nötig, mit einem Haartrockner oder einem iOpener den Bereich hinter dem Flexkabel der Lightning Connector Einheit, so dass es sich leichter ablösen lässt.

  70. 4j5RFqDZsFxbdTgu
    4j5RFqDZsFxbdTgu
    H45RXudtV6hMD1HS
    QGcUhN4fZTKkEMGn
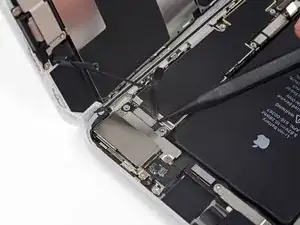
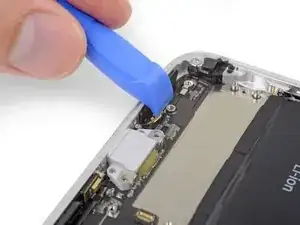
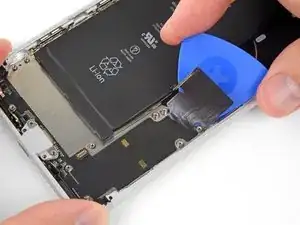
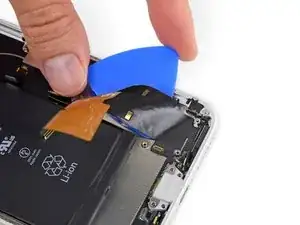
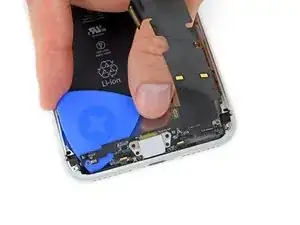
    • Fahre fort den oberen Teil des Flexkabels der Lightning Connector Einheit abzulösen, achte dabei darauf, dass keine anderen Bauteile beschädigt werden.

    • Halte den Akkuanschluss vorsichtig zur Seite gebogen, so dass er nicht beschädigt wird.

    • Sei sehr vorsichtig, dass der Akku selbst nicht beschädigt wird. Aus einem angestochener Akku können gefährliche Chemikalien austreten und/oder er kann Feuer fangen.

  71. eCitBmIpfyUkCuZr
    eCitBmIpfyUkCuZr
    XTrk6JVaV2CACXlW
    KOT4cuGXix1vAFqp
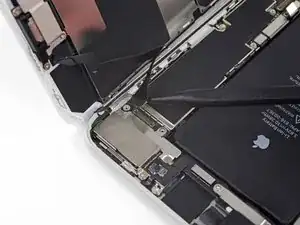
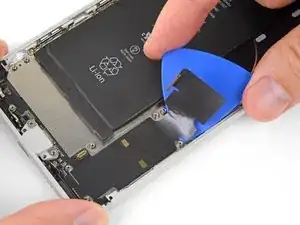
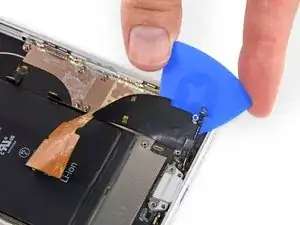
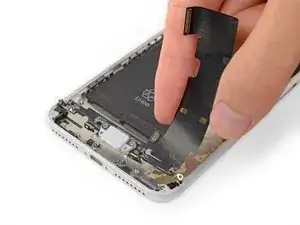
    • Fahre mit dem Ablösen des Flexkabels der Lightning Connector Einheit fort, bis du an der Unterkante des Akkus vorbei bist.

  72. gUOk3jbaiLvJsfTi
    gUOk3jbaiLvJsfTi
    FBBELu3Wbg51EHMN
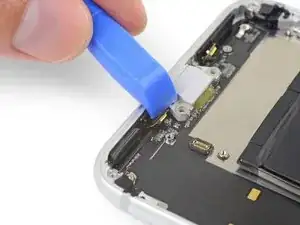
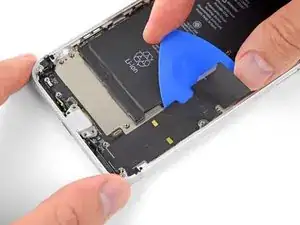
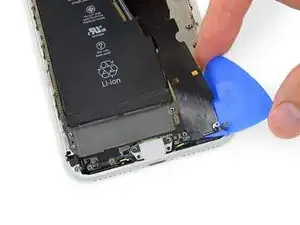
    • Schiebe das Plektrum vorsichtig von der Ecke des Akkus bis zur Ecke des iPhones, um den Teil des Flexkabels abzulösen, der am äußeren Rahmen befestigt ist.

  73. ZSMBK5AYeo2eA2BU
    ZSMBK5AYeo2eA2BU
    3eEeqfZSRT5HFgcG
    ZykMpGUROTMLj5Io
    • Schiebe das Plektrum entlang der Breite des iPhones und trenne die ganze Lightning Connector Einheit vom rückwärtigen Gehäuse ab.

    What purpose do the ribboned screw brackets or bosses have

    Hunter Shaver -

  74. XKBSR1R2DHqRRiMq
    XKBSR1R2DHqRRiMq
    MDqicSlay5IKTNs2
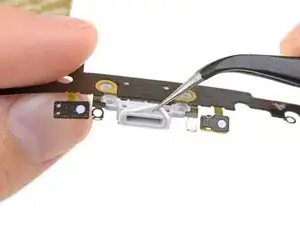
    • Entferne die Lightning Connector Einheit.

    • Bevor du die Lightning Connector Einheit einbaust:

    • Schabe mit einem Plastikwerkzeug jegliche Klebstoffreste vom rückwärtigen Gehäuse ab.

    • Beseitige sorgfältig die letzten Klebstoffreste von der Oberfläche mit Isopropylalkohol (90%ig oder mehr) und einem fusselfreien Tuch. Wische nur in eine Richtung, nicht vor oder zurück.

  75. vLm2U3mfWsPJJkNk
    vLm2U3mfWsPJJkNk
    TUVHPxBDuEJgXPUh
    lRX1GZeLIluvhuWN
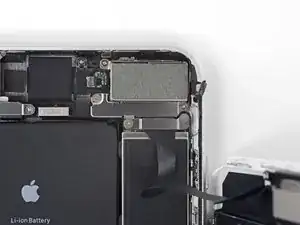
    • Eine Gummidichtung unten am Lightning Connector schützt das iPhone gegen das Eindringen von Feuchtigkeit und Staub. Wenn du einen neuen Lightning Connector einbauen willst, musst du diese Dichtung sorgfältig ausbauen und auf dein neues Ersatzteil übertragen.

    • Das kleine Klebeband unten an jedem Mikrofon schützt das iPhone ebenfalls vor dem Eindringen von Staub und Feuchtigkeit. Um möglichst gute Ergebnisse zu erzielen, solltest du diese beiden Aufkleber vor dem Einbau der Lightning Connector Einheit austauschen.

    • Wichtig: Baue die Lightning Connector Einheit so ein, dass sich die vier Schraubdome im rückwärtigen Gehäuse genau mittig in den Ausschnitten im Kabel befinden. Ansonsten sitzt das Flexkabel nicht richtig und du kannst es nicht mit seinem Anschluss auf dem Logic Board verbinden.

    Dopo la sostituzione non funziona più il microfono, ma se non ho capito male i microfoni sono integrati nel gruppo connettore di ricarica giusto? Questo significa che è difettoso? Non mi pare sia possibile montarli male (dato che appunto in effetti non sono da montare). Potrebbe essere qualche impostazione nel sistema operativo per abilitare i nuovi microfoni?

    giulio carlini -

    Correctly positions the new Lightning connector assembly is very important! I found that event the slightest misalignment will prevent you from easily reconnecting the flex cable to the logic board. I had to remove the logic board and peel back some of the new adhesive on my replacement Lightning connector a few times in order to get the proper alignment. I found it useful to plug in the flex cable prior to mounting the logic board so that you have at some leeway when lining up the connectors.

    Lucas -

    Make sure to save the rubber gasket for the lightning connector as my kit did not come with a replacement. The kit also included replacement screens for the microphones but no instructions or labelled parts so you’ll have to use your best guess as to how to install them. Make sure to take pictures of the old screens before you pull them out and use those pics as reference.

    J.Garrecht Metzger -

Abschluss

Vergleiche dein neues Ersatzteil mit dem originalen Teil, du musst eventuell einige Komponenten übertragen oder Schutzfolien vom neuen Teil abziehen, bevor du mit dem Einbau beginnen kannst.

Um dein Gerät wieder zusammenzusetzen, folge den Schritten in umgekehrter Reihenfolge.

Entsorge deinen Elektromüll sachgerecht.

Hat die Reparatur nicht ganz geklappt? In unserem Forum findest du Hilfe bei der Fehlersuche.

Jeff Suovanen

Mitglied seit: 06/08/13

407162 Reputation

15 Kommentare

40 minutes seems crazy fast for this repair. If anyone can do this entire repair from beginning to end utilizing these steps in 40 minutes… they should spend a day or two practicing the Rubik’s cube and go smash the world record.

The guide helped me accomplish the repair. So, for that, thank you very much.

andystills -

Very well done and easy to follow. Great piece of work and I appreciate the time spent putting it all together.

Have repaired 2 other iPhones, 6 and 6S, using the guides found here. When confronted with the iPhone 8 plus repair this is the site I came to.

Again, very well done indeed.

Kudos

Rick W -

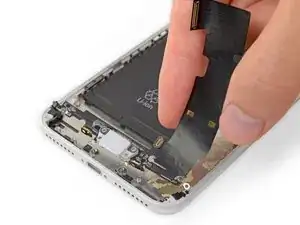
Where dose one find a new gasket for the lighting cable?
Joshua spaulding -

You will not find a more comprehensive or thorough or accurate guide to dismantling and replacing the charging port on an iPhone 8 Plus than this. Awesome guide, thanks for your attention to detail and thoroughness! Bravo!

Will White -

Thank you very much for the very detailed repair instructions. My microphone wasn’t working properly and I was able to get it fixed for just $12! (got the replacement from eBay)

Vishvaka Ranasinghe -

Dopo la sostituzione non funziona più il microfono, ma se non ho capito male i microfoni sono integrati nel gruppo connettore di ricarica giusto? Questo significa che è difettoso? Non mi pare sia possibile montarli male (dato che appunto in effetti non sono da montare). Potrebbe essere qualche impostazione nel sistema operativo per abilitare i nuovi microfoni?

giulio carlini -

Mi correggo, ho problemi solo durante le chiamate, se uso l’app note vocali o whatsapp o faccio video con entrambe le fotocamere non ho problemi

giulio carlini -

Why is removing the camera and antenna necessary for replacing the lightning port?

nvrm i see why

Miles Henry -

Buon pomeriggio, devo fare i complimenti al sito per come e dettagliato ogni guida e riparazione. adesso ho finito di riparare un iphone 8 plus e va una bomba

Rocco Granato -

Wish I had been told I would need a standoff screwdriver before I was halfway into taking the thing apart…

Nathaniel Moliterno -

This was not a quick job. It took me far longer than expected because the sound did not work the first time that I re-assembled it. I took the phone back apart far enough to remove the speaker and clean the contacts. On re-assembly, it would not boot cleanly. It continuously rebooted until I had to restore to factory settings and reload from save.

Make sure you have a current save _before_ you do this repair.

jefflongcore -

I want to let everyone know that it is absolutely unnecessary to remove the entire logic board when doing this repair. You only need to remove the SIM holder and the the 2 (or 3 on XR) logic board screws (2 saddle screws and 1 Phillips on XR, 2 saddles on 7/8 series) that hold the logic board down. Once those are removed, you can gently lift the lower end of the logic board up enough to slide the portion of the dock flex that is under the logic board out from under the logic board. A few things to keep in mind when removing the existing port are that once all screws and brackets and such are taken off, you need to start the pulling up and removal of the old charging port flex starting from the very bottom first, I start with the with the 2 microphones and then the lightning port itself. As you free the existing port from the bottom upwards, when you peel up the flex where it is held down with adhesive nearing the logic board, it will then simply slide out from under the logic board.

Show less

Chad McCollister -

Ran out of characters!..When you go to install the new port, you must START the process by sliding the new flex cable back up underneath the logic board first (you may need to hold the battery flex cable out of the way a bit and pre bend the new ports flex cable at the connector so that it will slide up easily) and then attach the new flex cable to the connector on the logic board FIRST before you do any other screw or adhesive installations. This way you don't end up struggling to try to get the connector to re-connect to the logic board at the end. If you don't do it this way and you start re-installing the new port from the bottom without pre-connecting it to the logic board, any slight misalignment may cause the connector to not line up properly when you go to connect it to the logic board. I feel on any iPhone component removal/replacement, the less extra parts and connectors you have to touch, pry on, disconnect and/or remove and then reconnect, the better. Good luck all! - Chad from GURUmicro.

Show less

Chad McCollister -

This was a very helpful guide and the photos were really well done. A few pointers for newbies to iPhone repair like myself.

1) The base install (no mesh screen replacements near the microphones) is about 3 hours. Another 45 minutes or so for the mesh screens as there were no instructions.

2) There were no instructions on how to start the phone back up so here is what happened to me. After plugging everything back in (but the phone screen still physically separated from the phone body) I could not start the phone from the battery despite it having about a 30% charge. I ended up taking the phone apart 2 times checking all the connections but couldn’t find a faulty one. In this process I ended up snapping a part related to the antenna off of the PCB (Step 36, see comment above). What ended up working was plugging the phone into a fast charger and waiting about 5 minutes. I wasn’t able to start it after 1 minute and was worried, but after 5 minutes it booted up normally and everything is fine.

J.Garrecht Metzger -

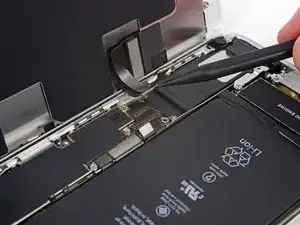
Does this remove any functionality with the phone? I know apple is very difficult with the “right to repair”. At least with replacing the home button and battery, fingerprint and battery health functionality is removed. Does something similar happen with this?
Bryan White -