
Introduction
This is a prerequisite-only guide! This guide is part of another procedure and is not meant to be used alone.
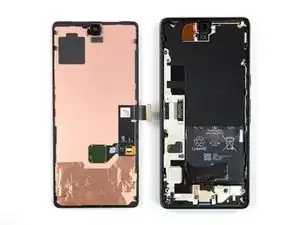
Use this guide to replace the 5G mmWave antenna in your Google Pixel 7.
Not every Google Pixel 7 is equipped with a mmWave antenna. Before using this guide determine which model of the Pixel 7 Pro you're using.
Note: Retaining water resistance after the repair will depend on how well you reapply the adhesive, but your device will lose its IP (Ingress Protection) rating.
You'll need replacement adhesive in order to complete this repair.
-
-
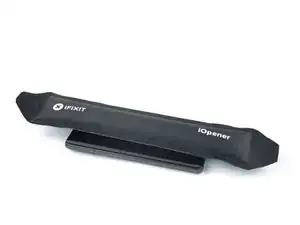
Apply a heated iOpener to the screen to loosen the adhesive underneath. Apply the iOpener for at least 3 minutes.
-
-
-
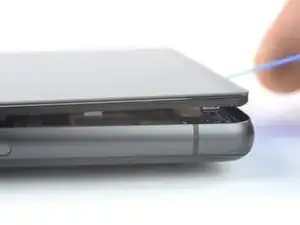
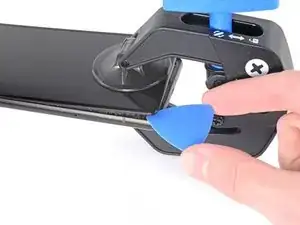
During the removal procedure, make sure to insert your opening picks in the right position to avoid separating the screen from its safety frame instead of the phone assembly.
-
There are several plastic clips around the whole screen. In case your opening pick gets blocked during the screen removal procedure it means you inserted your pick too deep underneath the screen.
-
-
-
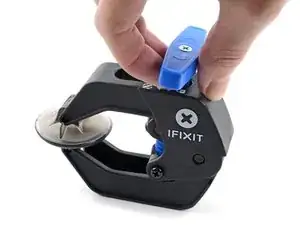
Pull the blue handle towards the hinge to disengage opening mode.
-
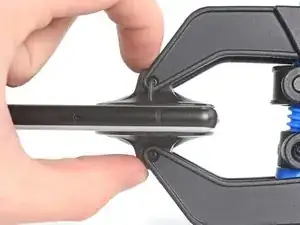
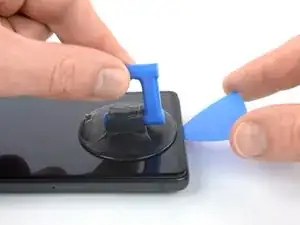
Position the suction cups near the bottom edge of the phone—one on the front, and one on the back.
-
Push down on the cups to apply suction to the desired area.
-
-
-
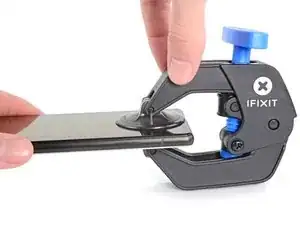
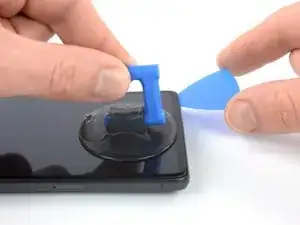
Push the blue handle away from the hinge to engage opening mode.
-
Turn the handle clockwise until you see the cups start to stretch.
-
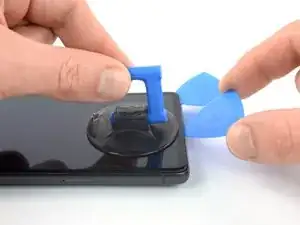
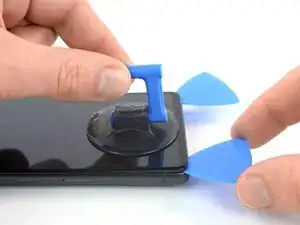
Wait one minute to give the adhesive a chance to release and present an opening gap.
-
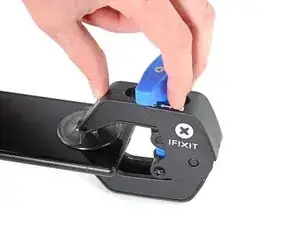
Insert an opening pick under the screen and its safety frame when the Anti-Clamp creates a large enough gap.
-
Skip the next two steps.
-
-
-
Once the screen is warm to the touch, apply a suction handle to the bottom edge of the screen.
-
Lift the screen including its safety frame with the suction handle to create a small gap between the screen and the phone assembly.
-
Insert an opening pick into the gap.
-
-
-
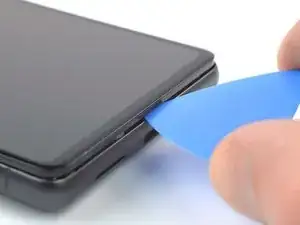
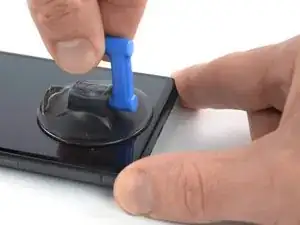
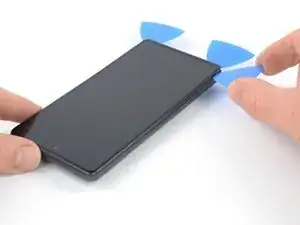
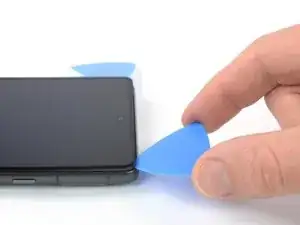
Slide the opening pick to the bottom right corner of the screen to slice its adhesive.
-
Leave the opening pick in place to prevent the adhesive from resealing.
-
-
-
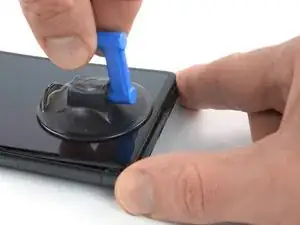
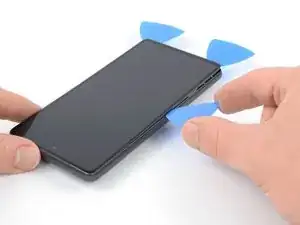
Insert a second opening pick at the bottom edge and slide it to the bottom left corner of the screen to slice the adhesive.
-
Leave the opening pick in place to prevent the adhesive from resealing.
-
-
-
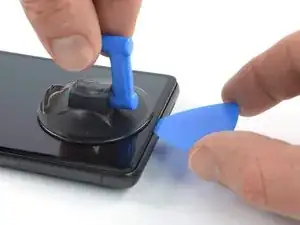
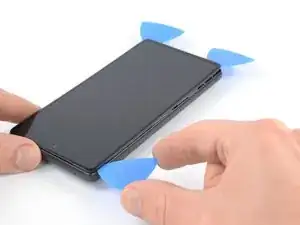
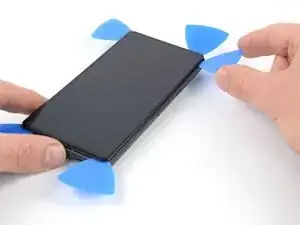
Insert a third opening pick underneath the bottom left corner of the screen.
-
Slide the opening pick along the left edge of the screen to slice the adhesive and to release the plastic clips.
-
Leave the opening pick in the top left corner to prevent the adhesive from resealing.
-
-
-
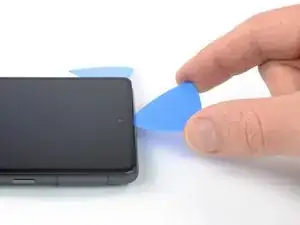
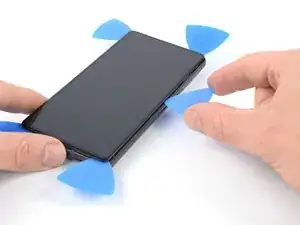
Insert a fourth opening pick at the top left corner of the screen.
-
Slide the opening pick along the top edge of the phone to slice the adhesive.
-
Leave the opening pick in the top right corner to prevent the adhesive from resealing.
-
-
-
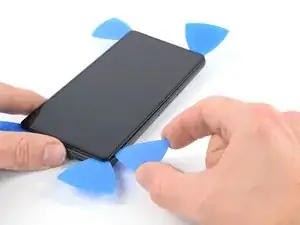
Insert a fifth opening pick and slide it along the right edge of the phone to slice the remaining adhesive and release the right plastic clips.
-
-
-
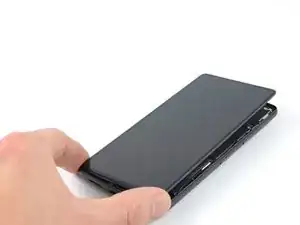
Lift the right edge of the screen up and towards the left side of the device, like opening a book.
-
Rest the screen upside down and parallel to the frame before continuing.
-
-
-
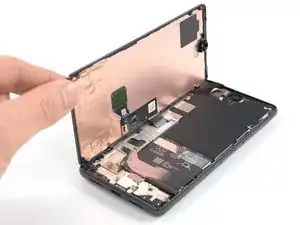
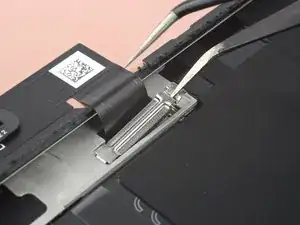
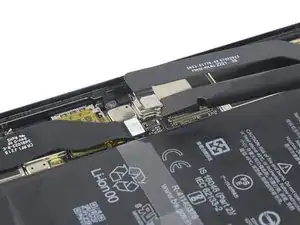
Insert one arm of a pair of tweezers into the opening at the upper end of the display cable bracket.
-
Push the bracket inwards and pry up to release it.
-
-
-
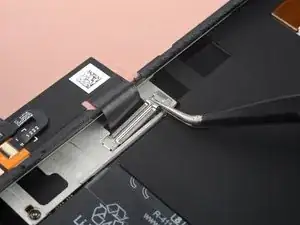
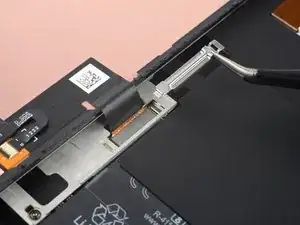
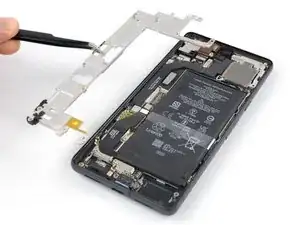
Use a pair of tweezers to remove the display cable bracket by pulling it from underneath the midframe and in direction of the cameras.
-
-
-
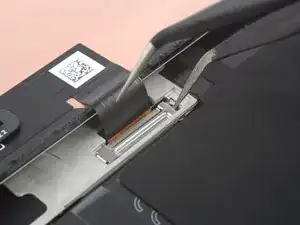
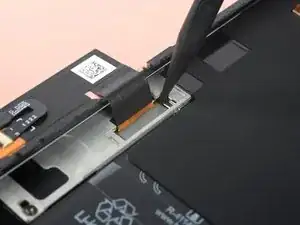
Use a spudger to disconnect the display flex cable by prying the connector straight up from its socket.
-
-
-
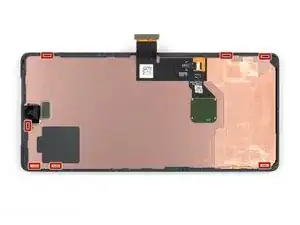
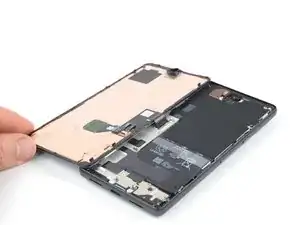
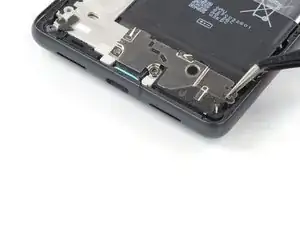
Separate the screen from the phone.
-
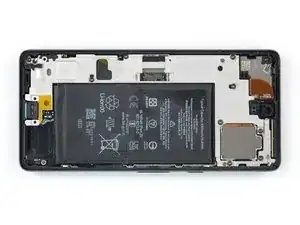
Check that all screws are tightened and there are no loose parts.
-
Apply new adhesive where it's necessary after cleaning the relevant areas with isopropyl alcohol (>90%).
-
Follow this guide if you're using custom-cut adhesives for your device.
-
Follow this guide if you're using a pre-cut adhesive card.
-
-
-
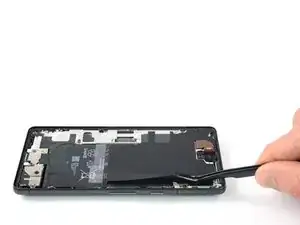
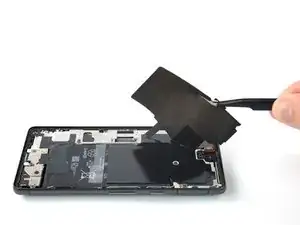
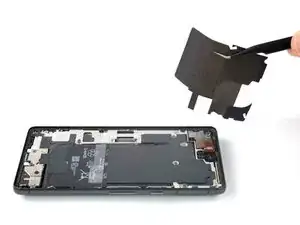
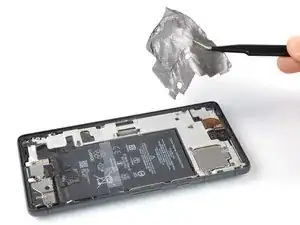
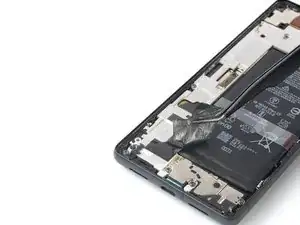
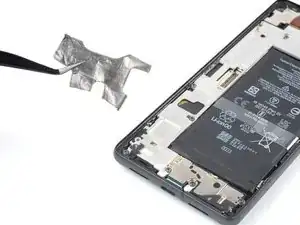
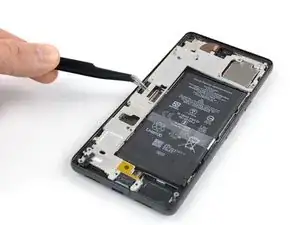
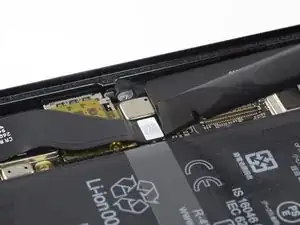
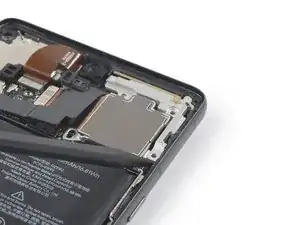
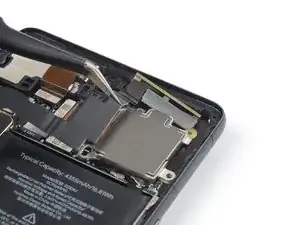
Use a pair of tweezers to carefully peel the upper graphite foil off the battery and midframe.
-
-
-
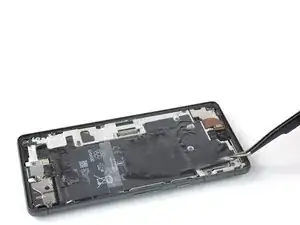
Use a pair of tweezers to carefully peel the lower graphite foil off the battery and midframe.
-
-
-
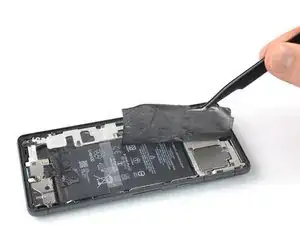
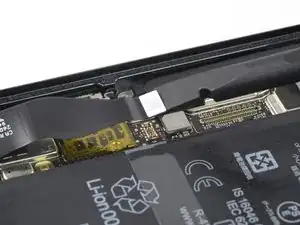
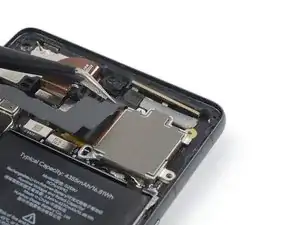
Use a spudger to disconnect the battery cable by prying the connector straight up from its socket.
-
-
-
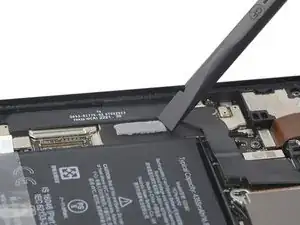
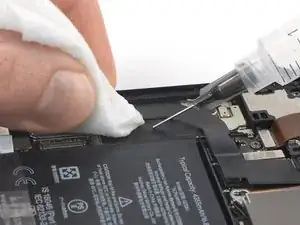
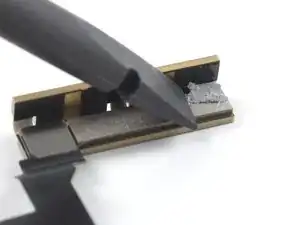
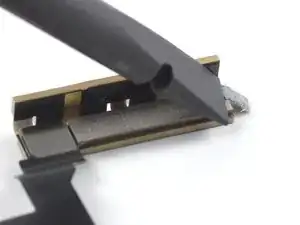
Use the flat end of a spudger to scrape the thermal paste off the motherboard.
-
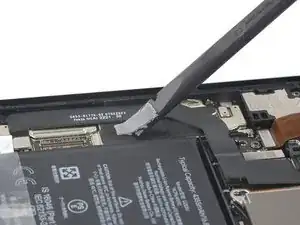
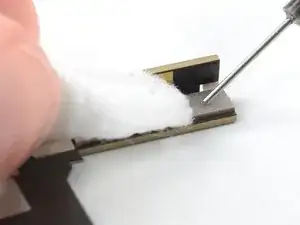
Clean any remaining thermal paste with isopropyl alcohol and either a coffee filter or a lint-free cloth.
-
Repeat the cleaning process for the thermal paste on the midframe.
-
-
-
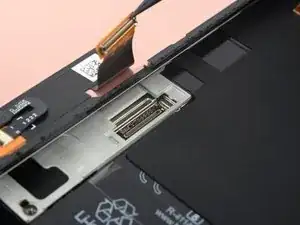
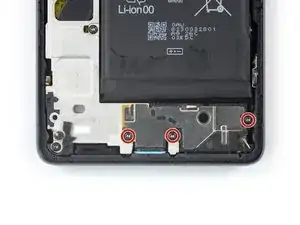
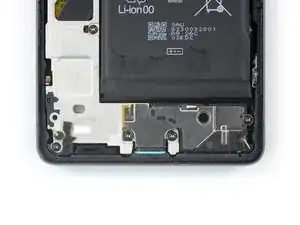
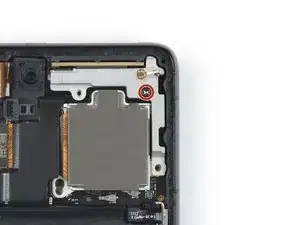
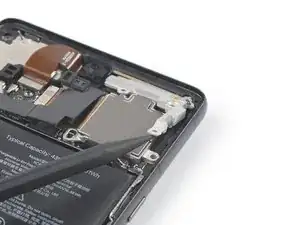
Use a Torx T3 screwdriver to remove the 5.1 mm-long screw securing the mmWave antenna bracket.
-
-
-
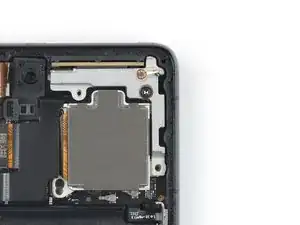
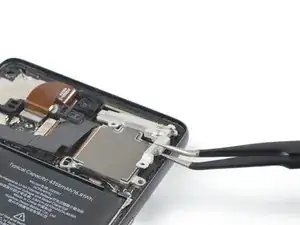
Insert a spudger underneath the bottom right edge of the mmWave antenna bracket.
-
Pry upwards to loosen the mmWave antenna bracket.
-
-
-
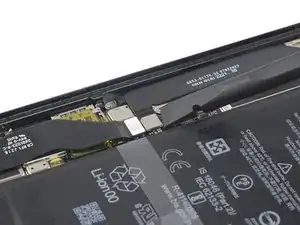
Use a spudger to disconnect the mmWave antenna cable by prying the connector straight up from its socket.
-
-
-
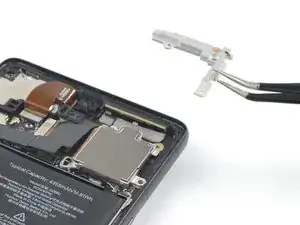
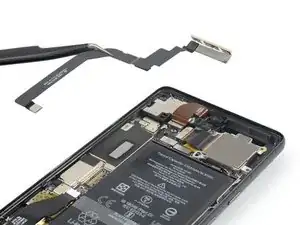
Use a pair of tweezers to lift the mmWave antenna (including its cable) out of its recess.
-
Remove the mmWave antenna assembly.
-
-
-
Use the flat end of a spudger to scrape the thermal paste off the mmWave antenna.
-
Clean any remaining thermal paste with isopropyl alcohol and either a coffee filter or a lint-free cloth.
-
Repeat the cleaning process for the thermal paste on the mmWave antenna bracket.
-


Compare your new replacement part to the original part—you may need to transfer remaining components or remove adhesive backings from the new part before you install it.
To reassemble your device, follow these instructions in reverse order.
Repair didn’t go as planned? Try some basic troubleshooting, or ask our Google Pixel 7 Pro answers community for help.
