Introduction
Follow this guide to replace a worn out and degraded battery in the Nintendo Switch Lite.
The Switch Lite uses JIS screws, but you can use a Phillips screwdriver in a pinch. Be very careful not to strip the screws. iFixit's Phillips bits are designed to be cross-compatible with JIS-style screws.
For your safety, discharge your battery below 25% before disassembling your Switch. This reduces the risk of a dangerous thermal event if the battery is accidentally damaged during the repair. If your battery is swollen, take appropriate precautions.
Note: This procedure requires removing the shield plate, which is bonded to the heat sink with thermal paste. The thermal paste will need to be cleaned off and reapplied before reinstalling the shield plate.
-
-
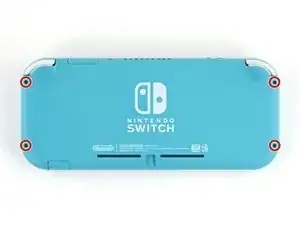
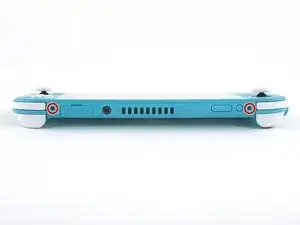
Use a JIS 000 driver or an official iFixit PH 000 driver to remove the following screws securing the back panel:
-
Two 3.6 mm-long screws on the top of the device
-
Two 3.6 mm-long screws on the bottom of the device
-
-
-
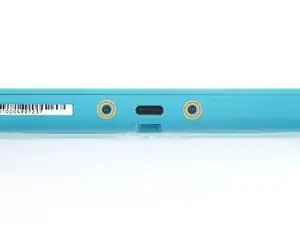
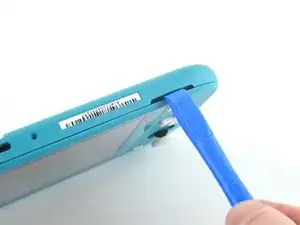
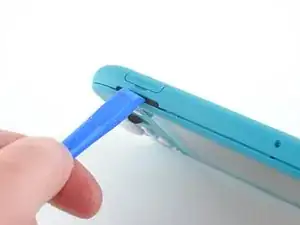
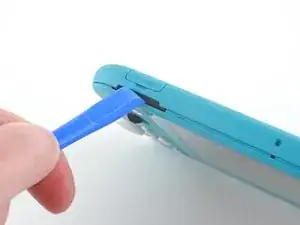
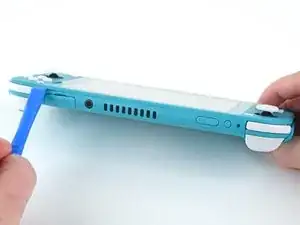
Insert an opening tool into the left speaker grille on the bottom of the device.
-
Twist the opening tool to release the clips securing the back panel.
-
-
-
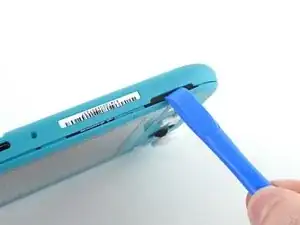
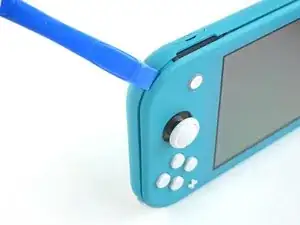
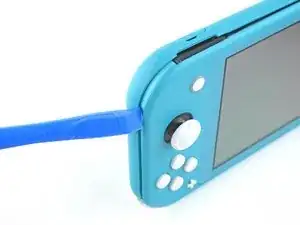
Slide the opening tool around the bottom-left corner to release the clips on the left side of the device.
-
-
-
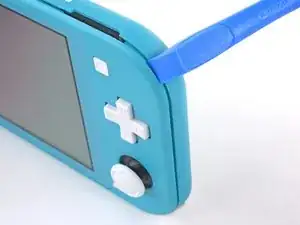
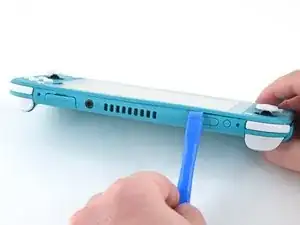
Insert an opening tool into the right speaker grille on the bottom of the device.
-
Twist the opening tool to release the clips.
-
-
-
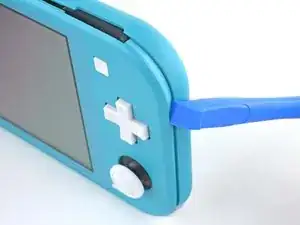
Slide and pry the opening tool around the bottom-right corner to release the clips on the right side of the device.
-
-
-
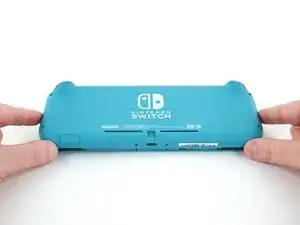
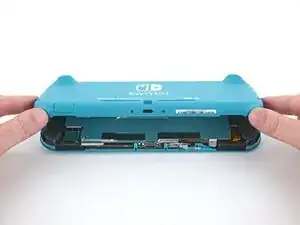
Continue sliding and prying the opening tool along the gap on the top of the device to release the clips.
-
-
-
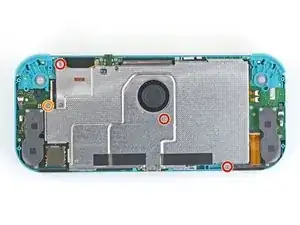
Use a JIS 000 driver or an official iFixit PH 000 driver to remove the following four screws:
-
Three 3.1 mm screws
-
One 4.5 mm screw
-
-
-
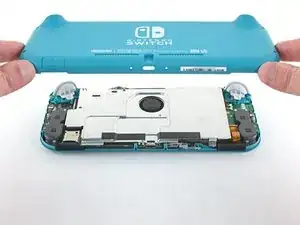
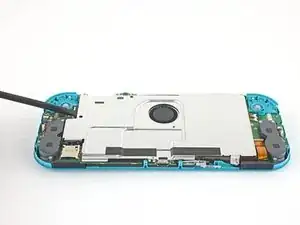
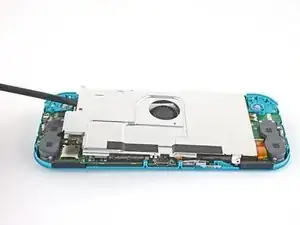
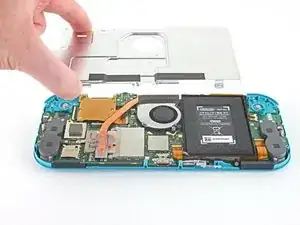
Use a spudger or your fingers to lift the shield plate up and out of the device.
-
Remove the shield plate.
-
-
-
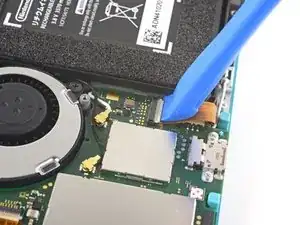
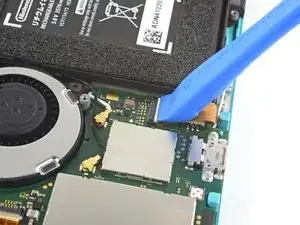
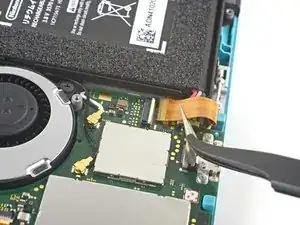
Use an opening tool or your fingernail to flip up the small, hinged locking flap on the motherboard interconnect cable's ZIF connector.
-
-
-
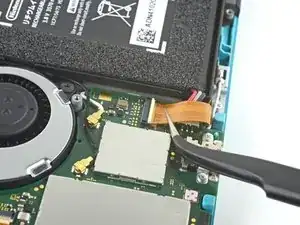
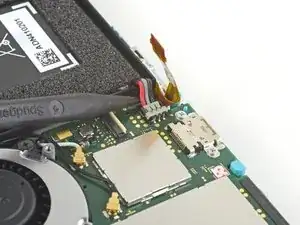
Use a pair of tweezers to slide the interconnect cable out of its connector on the motherboard.
-
-
-
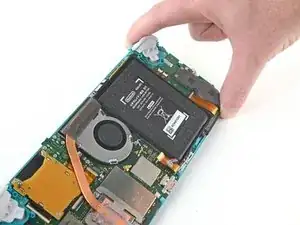
Use the point of a spudger to pry the battery connector straight up and out of its socket on the motherboard.
-
-
-
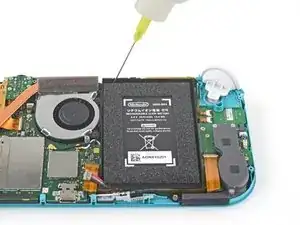
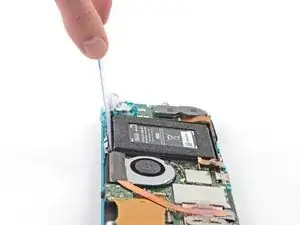
Apply a few drops of adhesive remover or high-concentration (90% or higher) isopropyl alcohol inside the battery recess along the top edge to weaken the adhesive.
-
-
-
Tilt the top edge of the device upward to allow the isopropyl alcohol to work its way underneath the battery.
-
Hold for 1-2 minutes to allow time for the isopropyl alcohol to weaken the adhesive.
-
-
-
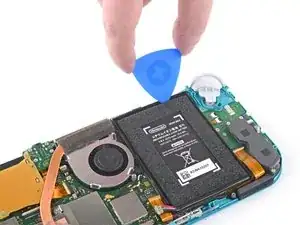
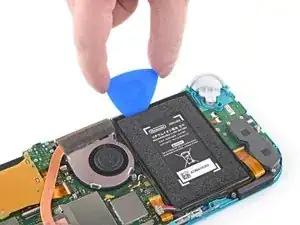
Insert an opening pick into the gap between the battery and the wall of the battery well.
-
Carefully dig the tip of the opening pick underneath the battery and slide it along the edge to begin slicing the adhesive.
-
-
-
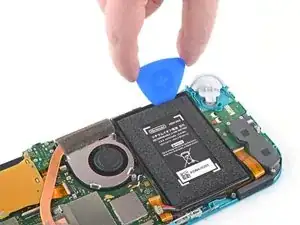
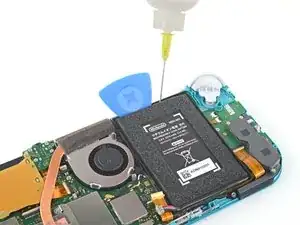
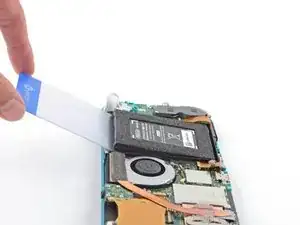
Leave the opening pick in place and apply a few more drops of adhesive remover or isopropyl alcohol inside the battery well.
-
Tilt the top edge of the device upward and wait 1-2 minutes for the isopropyl alcohol to weaken the adhesive.
-
Continue working the opening pick along the top edge of the battery, slicing more of the adhesive underneath.
-
-
-
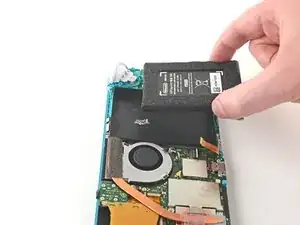
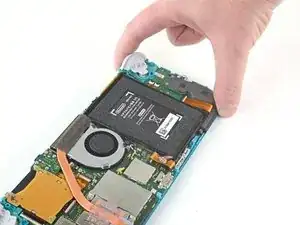
Once there's enough room, insert a plastic card underneath the battery and slowly pry the battery up.
-
Remove the battery.
-
-
-
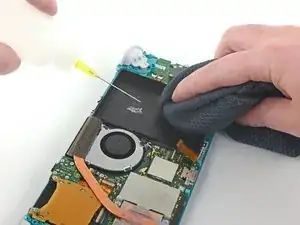
Use adhesive remover or isopropyl alcohol and a microfiber cloth to clean up any remaining adhesive left behind in the battery well before installing the new battery.
-
If your new battery does not come with pre-installed adhesive, follow this guide to install pre-cut adhesive on the bottom of the battery.
-


To reassemble your device, follow these instructions in reverse order.
For optimal performance, calibrate your newly installed battery after completing this guide.
Take your e-waste to an R2 or e-Stewards certified recycler.
Repair didn’t go as planned? Try some basic troubleshooting, or ask our Nintendo Switch Lite Answers community for help.

14 comments
Hello!
I am preparing to repair my daughters nintendo switch light. It has stopped charging out of no where. I have all the tools, I just can't find the battery anywhere. Where would you recommend buying it from?
If you are still looking Ifixit sells one themselves Nintendo Switch Lite Battery
Thanks for the guide. Battery replacement kits are now available on Amazon: https://www.amazon.com/Nintendo-HDH-001-... (they weren’t in November! I was also looking for this during that time)
Unfortunately, the battery was much harder to remove than I expected. I did use a lot of isopropyl alcohol, but the adhesive they use really was giving me a lot of trouble. I should’ve wisened up and googled other adhesive removal methods or tried a new approach other than prying with the spudgers.
Well, now the LCD now has what looks like pressure damage in the bottom left where I’d imagine a lot of the prying pressure went. It is much more noticeable when the screen goes all-white, and not too bad with darker colors.
I don’t blame iFixit for my mistake of course, and it is really disappointing that Nintendo used the amount of adhesive that they did. But I hope this comment can serve as a warning to others attempting this repair to be more gentle even if it’s refusing to come off.
vmgm -
Yikes! Sorry to hear this. How did you pry with the spudger exactly? If you kept it around the top edge of the battery well then I would assume it wouldn’t damage the screen, but if you inserted the end of the spudger deeper in the battery well and used that point as the fulcrum, then I could see that putting a lot of pressure on the back of the LCD.
@craiglloyd I did an embarrassing amount of spudger prying pretty much everywhere along the top/bottom of the battery, I actually broke a few spudger tips in the process so that might reveal something about my approach…
But, I’m starting to think it may not be LCD damage after all, but rather some isopropyl alcohol caught behind the screen– During my prying, the Switch case was getting pretty heavily warped, so maybe some of the alcohol (that I definitely used in excess) slipped in and got sandwiched under the screen? I started to notice this since the blotches seem like they’ve moved over time. Here’s an image of the screen now https://imgur.com/DjYmFnJ (and the dark gray blotch along the leftside isn’t a shadow, white spots in bottom left I thought were pressure damage)
It’s still very usable / not noticeable on black colors and thanks again for the guide! I can give the screen more time to see if it improves at all, or maybe try going back in and trying to see it is trapped alcohol that can be released
vmgm -
Have the marks faded over time? We have had the ame issue and believe it is the isopropyl alcohol :/ we didn't use loads but found there was a gap at the bottom of where the battery is held which clearly let some of the alcohol through. I'm really hoping it will evaporate over time but not sure :/
Sadly no, the marks are still there, and haven’t been motivated to try to fix yet. I’ve seen some videos online where people can coerce trapped isopropyl alcohol out without having to take a screen apart, but have been hesitant to try out some of the methods.
vmgm -
Any way of fixing the discolored left corner screen issues? I did a battery replacement and a very small portion of the lower left color is discolored.
Mike -
All my screws got stripped any ideas on how to remove?
Almost A Mammal -
A Y0 screwdriver seemed to work better for me.
Tommy Morrill -
What type of screw driver do I use to un screw the screws and which way
Luca Capito -