Introduction

This is a prerequisite-only guide! This guide is part of another procedure and isn't meant to be used alone.

  1. D6k2Wg4rpTq4dXNE
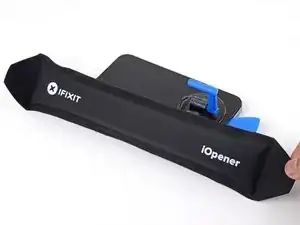
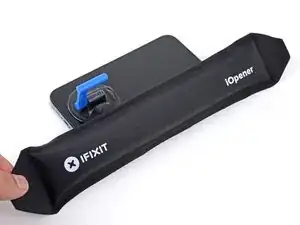
    • Heating the lower edge of the iPhone helps soften the adhesive securing the display, making it easier to open.

    • Use a hairdryer or heat gun, or prepare an iOpener and apply it to the lower edge of the iPhone for about a minute in order to soften up the adhesive underneath.

    • The edge should feel slightly too hot to the touch. Be careful not to overheat the iPhone, or you may damage the display.

  2. duXwu3rcLCgcPpO2
    duXwu3rcLCgcPpO2
    3peiRXqj4OwHQomb
    cB4GMSREsoJZ2fxG
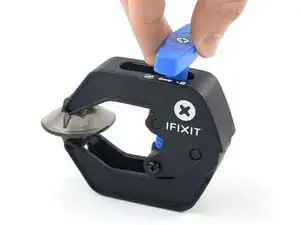
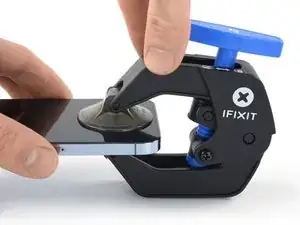
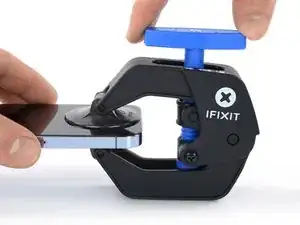
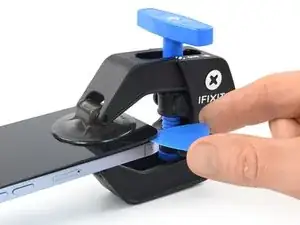
    • The next two steps demonstrate the Anti-Clamp, a tool we designed to make the opening procedure easier. If you aren't using the Anti-Clamp, skip down two steps for an alternate method.

    • For complete instructions on how to use the Anti-Clamp, check out this guide.

    • Pull the blue handle towards the hinge to disengage opening mode.

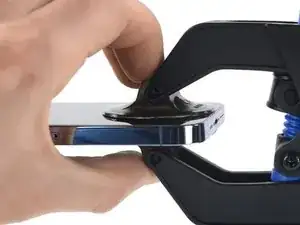
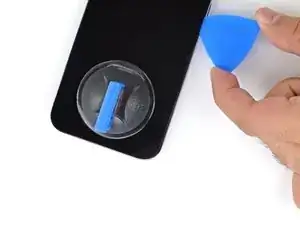
    • Position the suction cups near the bottom edge of the iPhone—one on the front, and one on the back.

    • Push down on the cups to apply suction to the desired area.

    • If you find that the surface of your device is too slippery for the Anti-Clamp to hold onto, you can use packing tape to create a grippier surface.

  3. AYrBlWKCF1XkBVeM
    AYrBlWKCF1XkBVeM
    BxiF3TjKKDWwrq2Y
    jELByl1yCEFmIxFH
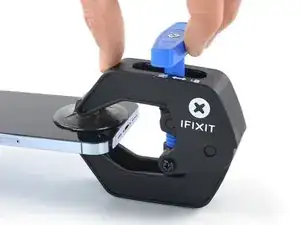
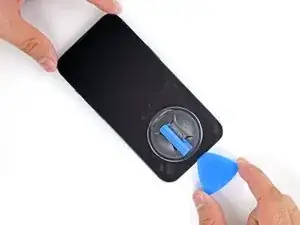
    • Push the blue handle away from the hinge to engage opening mode.

    • Turn the handle clockwise until you see the cups start to stretch.

    • Make sure the suction cups remain aligned to each other. If they begin to slip out of alignment, loosen the suction cups slightly and realign the arms.

    • Wait one minute to give the adhesive a chance to release and present an opening gap.

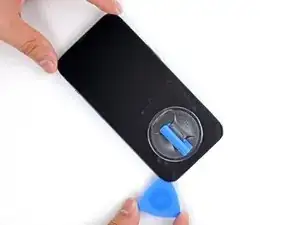
    • Insert an opening pick under the screen when the Anti-Clamp creates a large enough gap.

    • If the Anti-Clamp doesn't create a sufficient gap, apply more heat to the area and rotate the handle clockwise half a turn.

    • Don't crank more than a half a turn at a time, and wait one minute between turns. Let the Anti-Clamp and time do the work for you.

    • Skip the next step.

  4. CbacEqMtFHNOLXih
    CbacEqMtFHNOLXih
    T1wSIyp4UKqkOgeT
    G1kT1ASBC23jTtha
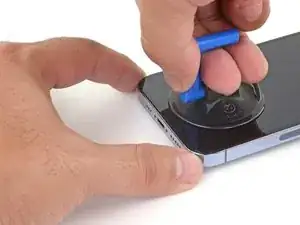
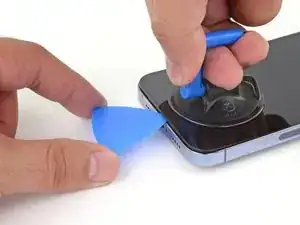
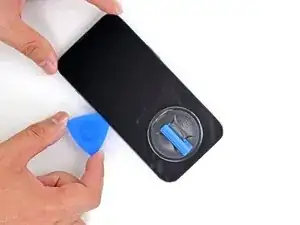
    • Apply a suction handle to the bottom edge of the phone, while avoiding the very edge of the glass.

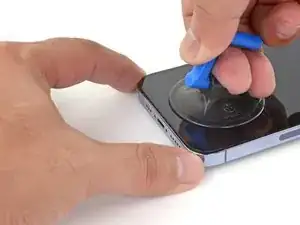
    • Pull up on the suction cup with firm, constant pressure to create a slight gap between the front panel and rear case.

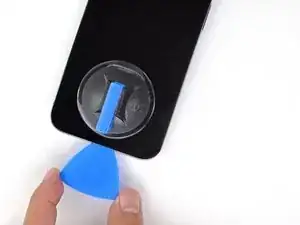
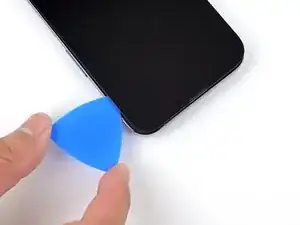
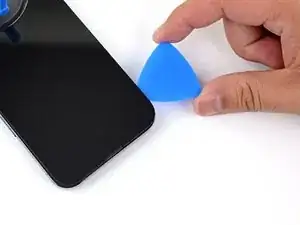
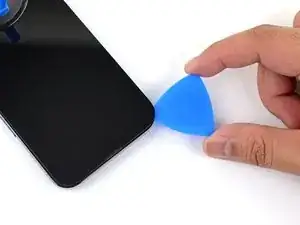
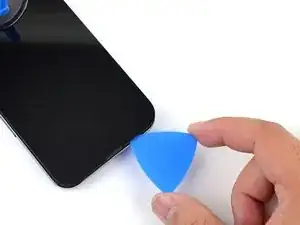
    • Insert an opening pick into the gap.

    • The watertight adhesive holding the display in place is very strong; creating this initial gap takes a significant amount of force. If you're having a hard time opening a gap, apply more heat, and gently rock the screen up and down to weaken the adhesive until you create enough of a gap to insert your opening pick.

  5. J53aPsksSGSPLNsg
    • Use a hairdryer, heat gun, or prepare an iOpener and apply it to the left edge of the iPhone for about a minute in order to soften up the adhesive underneath.

  6. RxFJUuDC6tnLrBal
    RxFJUuDC6tnLrBal
    gV4G4smBA3gX44Nb
    5TZ1mtTFECPfJqYp
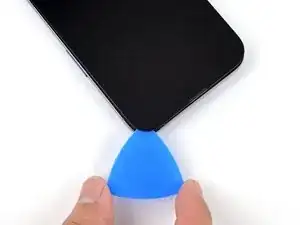
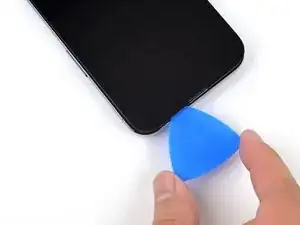
    • Slide the opening pick around the lower left corner and up the left edge of the iPhone, slicing through the adhesive holding the display in place.

    • Don't insert the pick more than 3 mm inside your phone, or you may damage the display cables.

  7. UWmQOXQmB55rBbaj
    • Use a hairdryer, heat gun, or prepare an iOpener and apply it to the right edge of the iPhone for about a minute in order to soften up the adhesive underneath.

  8. cjMsXPoMChOmKuOD
    cjMsXPoMChOmKuOD
    fIV42RCCfUJI1BHK
    vf4XLcPykBJbX4Xx
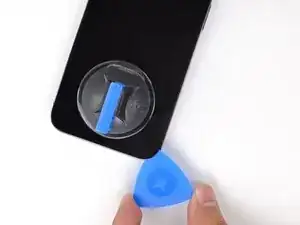
    • Re-insert your pick at the bottom edge of the iPhone, and slide it up the right side to continue separating the adhesive.

    • Don't insert the opening pick more than 3 mm into your iPhone, or you may cause damage to internal components.

  9. rIpZwSpqoVDYgeKr
    • Use a hairdryer, heat gun, or prepare an iOpener and apply it to the top edge of the iPhone for about a minute in order to soften up the adhesive underneath.

  10. LLOsq2hlZLeujrYD
    LLOsq2hlZLeujrYD
    gg2MREUicMRaLwmp
    Pt1WlJyE4ftx2RJM
    • Insert your pick into the right edge of the phone. Slide it around the top-right corner and across the top edge.

    • Again, don't insert the pick more than 3 mm or you may damage the front panel sensor array.

  11. mpqHbKtRStjwAJcg
    mpqHbKtRStjwAJcg
    PdjIZhVHFgT6BA3H
    2LvCpRHEI2tvxyRG
    • Insert your pick into the left edge of the phone. Slide it around the top-left corner and across the top edge.

    • Again, don't insert the pick more than 3 mm or you may damage the front panel sensor array.

  12. kYUZIKSLNLQwKTVL
    kYUZIKSLNLQwKTVL
    mZkV1DN2B3pmdsIy
    MtA5MYnZQIWPZJZu
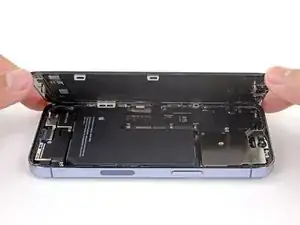
    • Remove your suction handle from the screen.

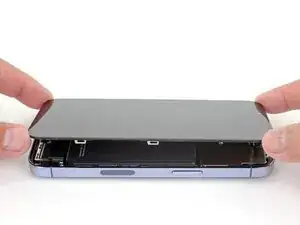
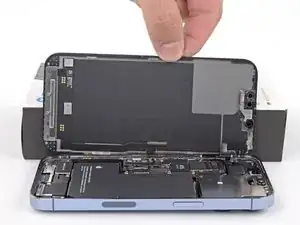
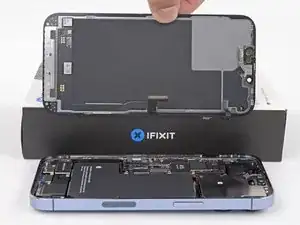
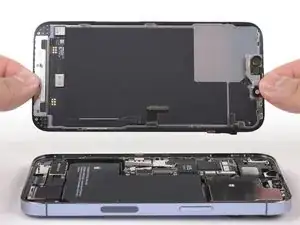
    • Open your iPhone by swinging the display up from the right side, like the front cover of a book.

    • Don't try to fully separate the display yet, as several fragile ribbon cables still connect it to the iPhone's logic board.

    • Lean the display against something to keep it propped up while you're working on the phone.

    • During reassembly, lay the display in position, align the clips along the top edge, and carefully press the top edge into place before snapping the rest of the display down. If it doesn't click easily into place, check the condition of the clips around the perimeter of the display and make sure they aren't bent.

  13. RJZbZHlDUiM2Co5P
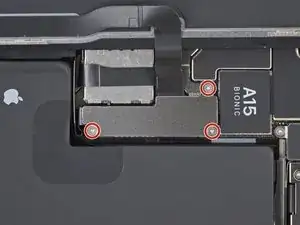
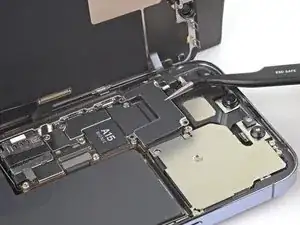
    • Use a Y000 screwdriver to remove the three 1.3 mm screws securing the battery connector cover.

    • Throughout this repair, keep track of each screw and make sure it goes back exactly where it came from to avoid damaging your iPhone.

    • During reassembly, this is a good point to power on your iPhone and test all functions before you seal the display in place. Be sure to power your iPhone back down completely before you continue working.

  14. xtObdygBXuyknykk
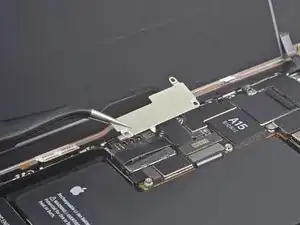
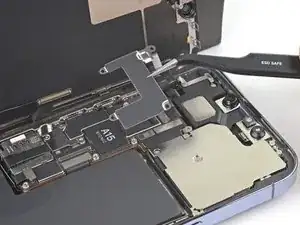
    • Remove the battery connector cover.

  15. mwMXIeIFrmUWUMtp
    mwMXIeIFrmUWUMtp
    exRuBlAPOVEovrEx
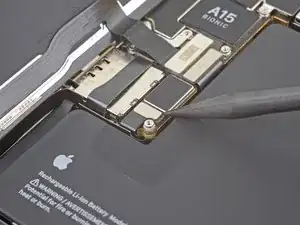
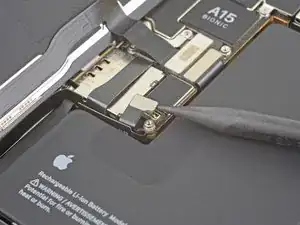
    • Use the pointed end a spudger or a clean fingernail to pry the battery connector up from its socket on the logic board.

    • Try not to damage the black silicone seal surrounding this and other board connections. These seals provide extra protection against water and dust intrusion.

    • Bend the connector slightly away from the logic board to prevent it from accidentally making contact with the socket and providing power to the phone during your repair.

  16. XSFXUT6pupbJQYZg
    XSFXUT6pupbJQYZg
    AORTCIoKK1dN365A
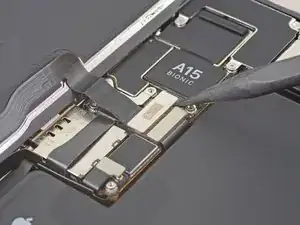
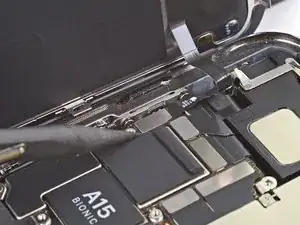
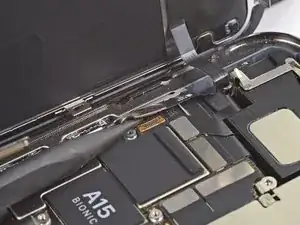
    • Use the pointed end of a spudger or a clean fingernail to pry the display connector up from its socket on the logic board.

    • To re-attach press connectors like this one, carefully align and press down on one side until it clicks into place, then repeat on the other side. Do not press down on the middle. If the connector is misaligned, the pins can bend, causing permanent damage.

  17. CAGaQD1ogBjAnNv2
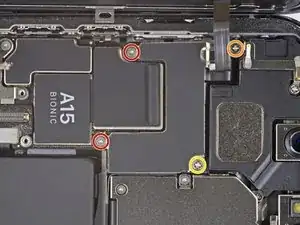
    • Use a Y000 screwdriver to remove two 1.1 mm screws from the front sensor connector cover.

    • Use a Phillips screwdriver to remove the remaining two screws from the cover:

    • One 1.5 mm screw

    • One 1.8 mm screw

  18. iGH6uIndkkMQ4F32
    iGH6uIndkkMQ4F32
    GhmXWpJT4jveLBFQ
    • Remove the front sensor connector cover.

  19. ZcTlWkvCKalByICc
    ZcTlWkvCKalByICc
    vIPgKlQyTloligmO
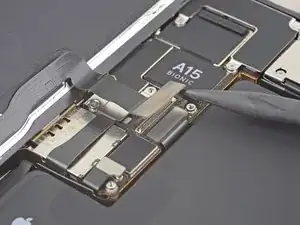
    • Use the pointed end of a spudger to disconnect the front sensor assembly cable connector.

  20. NACeXj4myHHFnpBL
    NACeXj4myHHFnpBL
    CWMpBGS42uT1NdwZ
Conclusion

Compare your new replacement part to the original part—you may need to transfer remaining components or remove adhesive backings from the new part before installing.

To reassemble your device, follow the above steps in reverse order.

Take your e-waste to an R2 or e-Stewards certified recycler.

Repair didn’t go as planned? Repair didn’t go as planned? Try some basic troubleshooting, or ask our iPhone 13 Pro Answers community for troubleshooting help.

Sam Omiotek

Member since: 25/02/19

59142 Reputation

0 comments