Introduction

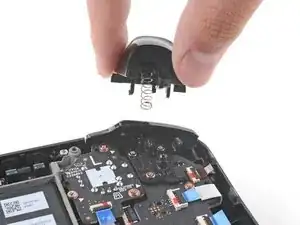
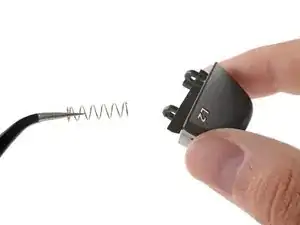
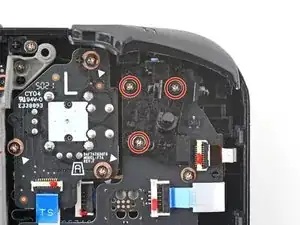
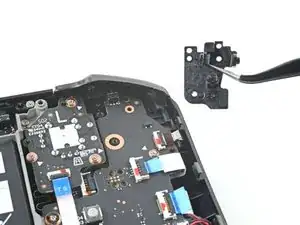
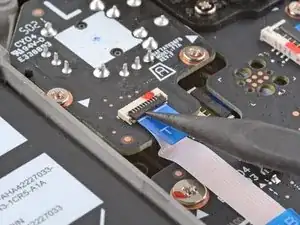
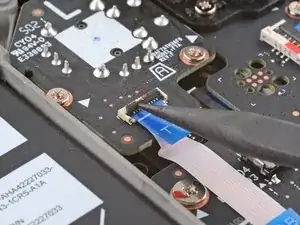
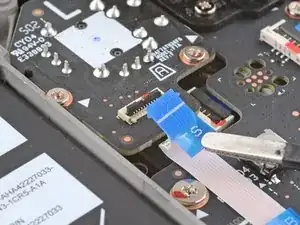
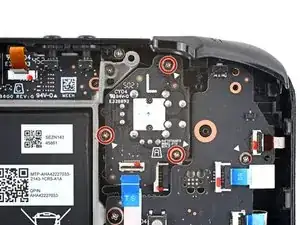
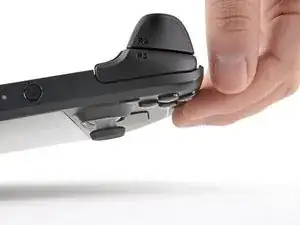
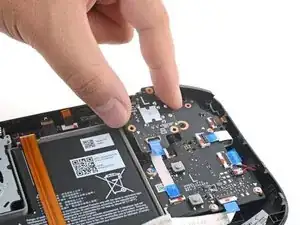
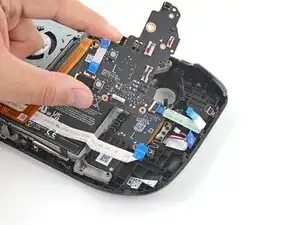
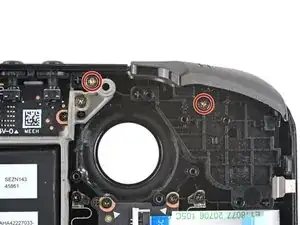
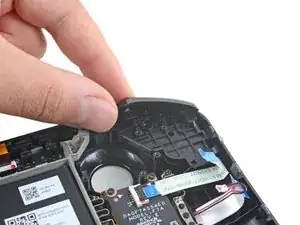
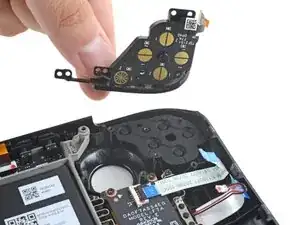
Use this guide to replace the D-pad (directional pad) button and its membrane in your Steam Deck.

Remember: follow general electrostatic discharge (ESD) safety procedures while repairing your device.

  1. vQyR3PAE4HOMSLAZ
    vQyR3PAE4HOMSLAZ
    aIKAs5r3P3bY2iTE
    hD1USYJCkAbkluud
    • Turn on your Steam Deck and allow the battery to discharge below 25% before starting your repairs, as a charged lithium-ion polymer battery can be dangerous if accidentally punctured.

    • As an extra precaution, Valve recommends putting your Steam Deck into battery storage mode within the BIOS before starting any internal repairs. Read how to do that here.

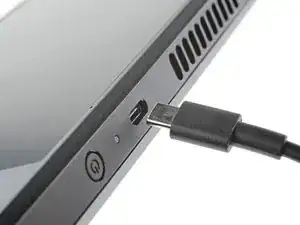
    • Power down your Steam Deck and unplug any cables.

    • If you have a microSD card installed, make sure to remove it before opening the Steam Deck. If you attempt to remove the back cover with it still installed, it could break in half.

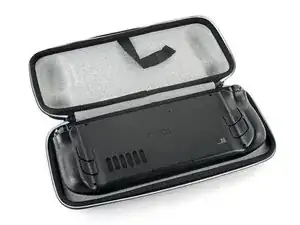
    • During your repair, it can be helpful to lay the Steam Deck face-down into its case at times to protect the thumbsticks and prevent wobble.

  2. bpUGGPG32OkLXnC4
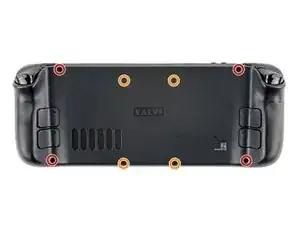
    • Use a Phillips driver to remove the eight screws securing the back cover:

    • Four 9.5 mm screws

    • Four 5.8 mm screws

    • Throughout this repair, keep track of each screw and make sure it goes back exactly where it came from to avoid damaging your Steam Deck.

    there should be a picture of the SD card slot at the start of every Steam Deck teardown. i know the note is there but i generally use the pictures to guide me and forgetting to remove the SD card is a very critical step

    Nathan Barrow -

    I agree, I just broke mine...

    Camille B -

    What is the the #1 philips used for? Only the #0 is mentioned in the instructions.

    Christopher Martin -

    I wish they would specify which size to use for which screws.

    Mark D -

    I found it easiest to use a PH1 for the red screws, and PH0 for the rest (including the internals.)

    Chris Clawson -

    Be careful you can strip the screws take your time

    I use PH00 bit

    jaybush74 -

    I used the PH1 bit for this. You can use smaller bits but ideally there should be no play of the bit in the screw head.

    Charles Semple -

    are there playstation replacements (circle,square,cross,triangle)

    Deór -

    I used the ifixit tools and used the 00 size for the screws on the back.

    Luis B -

    I've completed the guide and found it very helpful!

    I think somewhere in this part it would be helpful to name the size of the correct Phillips driver to use:

    Use a Phillips driver to remove the eight screws securing the back cover:

    Four 9.5 mm screws

    Four 5.8 mm screws

    Maynard -

  3. 6jtVcFtMGa5ZMqcF
    6jtVcFtMGa5ZMqcF
    Ux5LEj3JfJlkmQMQ
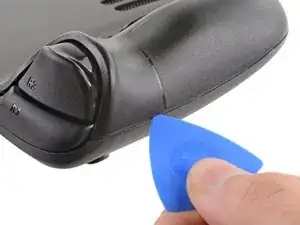
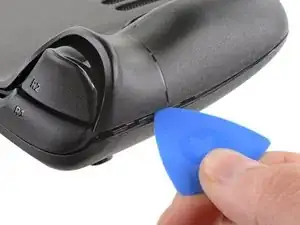
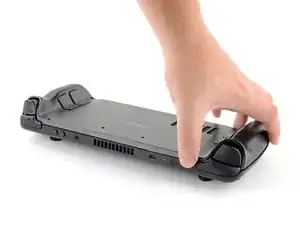
    • Insert an opening pick into the thin gap between the back cover and the front shell, along the edge of the right grip.

    • Pry up on the back cover to release it from the locking clips.

    I found it easiest to start this process at the top of the device near the fan exit.

    Peter Lindberg -

    second that and inserting the pick in the bottom middle and sliding the pick to each side

    Sub -

    I also found the top near the fan exit to be easier

    Travis Patton -

    Thank you for this tip, it definitely was easy starting at the top instead of by the bumper/triggers. After I opened the top I did the bottom and then it was way easier to gently open the sides. be very careful and go slowly to make sure that none of the clips are damaged

    Luis B -

    same; i pried from the top of the screen area. I was unable to find an opening on the side

    Dennis Wu -

    I also started from the middle of the deck and worked my way out since I couldn't get a grip with the pick on the deck's side grips. Since this is a common step for pretty much all guides for opening the deck I think it's also worth noting that you should be careful not to bend the trims/seams where the front and back covers meet with the pick. When I first opened my deck you can definitely see where I nudged the pick in between the covers since I was probably using too much force on the pick itself.

    Kaleb McKone -

    It would be useful to note here that if you want to insert the little blue triangular iFixit opening picks into the right side along the edge, there isn't actually a gap as the directions say, at least not on newer Decks. You'll be making the initial gap using the pick. Brace it on something because you will need to use enough downward force that you're flexing the pick a bit and it'll probably be digging into the skin of a bare hand. With enough force suddenly it will make a click and go in just a bit, and then you're in business.

    CaptFrost -

    plastic picks didnt work for me but finger males did the job on prying this open

    jacobbagsic -

    I found it easiest to open starting with R1 or L1 buttons and proceeding to the center of the top edge

    Karol Gro -

  4. 6IvIWWqEXPTqW1XB
    6IvIWWqEXPTqW1XB
    1FxwYDjIGOAOCZT2
    KpIx4YIAZrDH1b5T
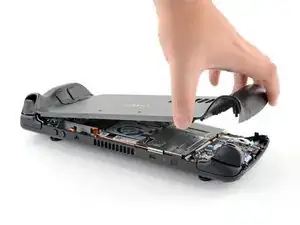
    • Once the clips are disconnected from one edge, the rest disconnect easily.

    • Grip the back cover at the opening you just created and pull it up and away from the device to unclip the long edges.

    • Remove the back cover.

    If you have an SD card, you will want to take it out. I followed the guide and didn't think about the SD card I had inside. When I went to snap the case back on it clapped shut on the exposed SD card, shearing it in half and leaving the bottom half stuck in the SD card slot. I am still endeavoring to get it out.

    Novice -

  5. WuMbLgtJF5JwQtjF
    WuMbLgtJF5JwQtjF
    I6pEKNGEKEDbNymT
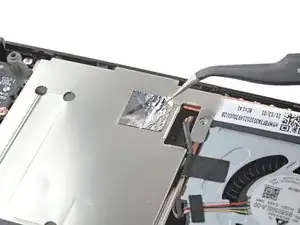
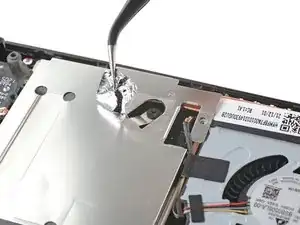
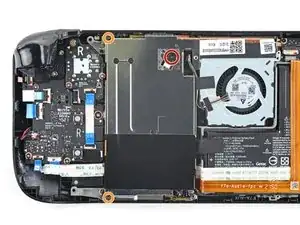
    • Use a pair of tweezers to remove the piece of foil tape covering the hidden screw on the board shield.

    • If possible, try not to rip or tear this tape so it can be reused. If necessary, you can fashion a replacement by cutting a piece of aluminum foil tape to fit.

    Use some heat here from a hairdryer to make this part easier.

    If you screw up here you can replace the little aluminium square with some aluminium tape from Amazon. No less than 50 microns thick, slightly thicker is fine. and the square is 13mm both ways.

    Matt S -

  6. fpjCmGxopRvFvGbm
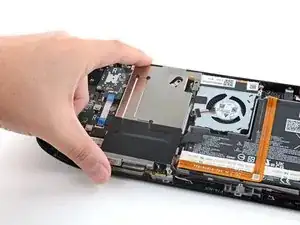
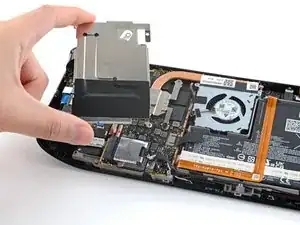
    • Use a Phillips driver to remove the three screws securing the board shield:

    • One 3.4 mm screw

    • Two 3.7 mm screws

    The procedure ended here for me, used an ifixit PH 00 bit on the screw behind the aluminium tape, bit wouldnt bite too great, one wrong twist and the screw was stripped. Not sure who or what initially screwed in that particular screw as the rest of the screws on the shield were fine, but boy is it in there tight. So now i have a stripped screw and a botched ssd replacement, don't think valve will let me RMA for this, but i'll give it a try and update accordingly.

    Y. van S -

    Any updates? Did they let you RMA?

    Emanuel Gjoni -

    I found one screw to be ridiculously tight too, managed to undo it without stripping thanks to reading your comment beforehand and going extra careful. Not going to lie, it was a tense moment :D

    Andy HL -

    I think the tendency is to go too small on the screwdriver bits because you're working on small electronics.

    I used the PH1 bit on the screw under the foil and the PH0 bit for the two remaining screws without any problems.

    Charles Semple -

    What does this shield actually do? Some kind of magnetic protection?

    Corey Cleric -

    if I had to replace the key (R2) and that's it, can I directly remove it or do I have to act here on the motherboard too?

    pujattidanny -

    have you gotten an answer yet? trying to change mines as well but dont wanna do too much to the deck

    briaNN -

    button Not key, i’m sorry

    pujattidanny -

    I used the ifixit tools and used the 00 PH for these screws with no issue

    Luis B -

    If only swapping the SSD, it is not necessary to remove the top left 3.7mm screw. The heat shield is flexible enough that you can move it out of the way to access the SSD screw. For me this was necessary as the 3.7mm screw was completely unmovable and quickly stripped.

    Scott A -

    FYI there is a little pin on the cover that slots into the board. It is located near the top screw. I needed that to be inserted for the cover to go back down properly.

    Seth Robinson -

  7. JXePTdtVUbrOvVJT
    JXePTdtVUbrOvVJT
    QqjInaZugM3yJK1q

    When putting back on, run a pick along the edge of the shield between the wires to make sure nothing is pinching and the wires are clear of the shield before screwing down.

    Matt S -

  8. XjI1homB4a5VNhbV
    XjI1homB4a5VNhbV
    qvcjxPUTxawsUUMB
    qa3R33nVHlO1SOpy
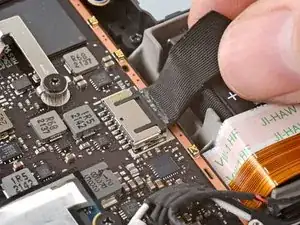
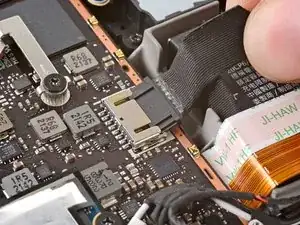
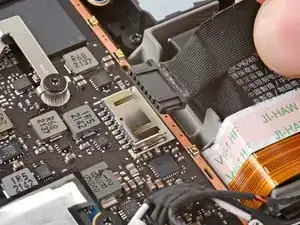
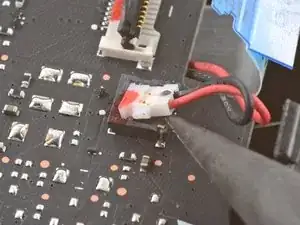
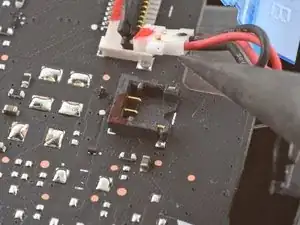
    • Grip the battery cable by its pull tab and pull it directly away from the motherboard to disconnect it.

    • Alternatively, use the flat end of a spudger or a clean fingernail to gently push the connector out of its socket, then disconnect it completely by hand.

    After fully reassembling my device I found that my battery was not showing any stats anymore. I couldn't start the device without being plugged in, however if I restarted it would stay on even if my power cable was detached. Battery showed 0%. It turns out I had not fully reinserted the battery cable at this stage during reassembly. MAKE SURE YOU PUSH IT ALL THE WAY BACK IN!

    Michael Hoffmann -

    Awesome thanks for this tip!

    petergeranio -

    It is helpful to lift up gently with a the tapered end of a spudger underneath the tucked-in portion of the battery cable, creating a bit of flex in the cable before pulling on the pull tab. I found that without doing so, the fabric pull-tab simply tore off of the cable under light-to-moderate force (the fabric itself ripped cleanly across, like a paper towel). Careful, gentle pressure with a spudger can be used to remove the plug by prying gently on the rear ridge of the plastic plug (not the wire!) if this happens.

    Gene Eckser -

    This is exactly what happened to me. Maybe it was a pull tab previously, mine was a ribbon cable that tore - captured the image here: https://www.ianwootten.co.uk/2022/11/22/...

    Ian Wootten -

    I found it less scary and easier to remove the battery connection by using a fingernail on the ridge and pushing it off the connector. I felt like pulling on the battery cable was too harsh.

    montgomery mchargue -

    Upon plugging the battery back in, I found it easy to use two spudgers- one on each side- to pull/push the connector back into it's port. Be careful to not put any pressure on the battery wires themselves.

    montgomery mchargue -

    When reconnecting the battery cable, you'll know when it's inserted and power is restored, because the white LED will illuminate at the top of the Deck near the power button. You should be able to see it while you're reconnecting the battery cable

    Michael Davis -

    Why not just let the battery discharge completely and then not have to disconnect it?

    Jeffrey Martin -

    Completely discharging a battery reduces its lifespan. It's completely unnecessary.

    Stefan Camporese (CENTER) -

    Because no lipo battery is ever completely discharged -- you would not be able to recharge it if it was. There will always be enough power left in it to cause damage if shorted even if it isn't charged enough to power up the device it's connected to.

    David Cameron -

    I would personally not recommend pulling the tab. It doesn’t apply force at the correct angle. You should revise these instructions to advise using a combination of pulling on the tab, and careful pressure on the connector towards the right of the mainboard to carefully work it out.

    Using the pull tab alone could cause problems if not done extremely carefully.

    William Winborne -

    This part was wayyyyy easier than I anticipated and I worried for nothing because I used the ifixit spudger to push it out a bit and then I literally used my finger nail and was able to slide it right off. Dont be afraid, its not that difficult and its not that delicate to break if you do it patiently

    Luis B -

    I inserted the cable very firmly with a spunger, being careful not to press down too hard on the cables, and even tried redoing it, but I don't see any LED illumination. I am now unable to boot the deck into the boot manager. Any additional tips?

    junefish -

  9. EWppHNyTD2c1kDxt
    EWppHNyTD2c1kDxt
    uIiUGhOUlETpu42S
    • The left trigger will be on your righthand side when working on the Steam Deck, as it's laying upside down.

    • The Steam Deck's triggers clip into place on two pegs on the trigger bracket, which doubles as the hinge.

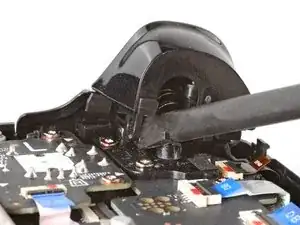
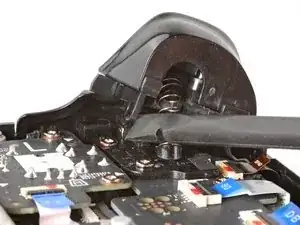
    • Place the flat end of a spudger onto the inside edge of the trigger's left clip.

    • Pivot the trigger clip out, away, and up from the peg to unlatch it.

    • During reassembly, latch the outermost peg first. Once in place, push down on the trigger to latch the innermost peg, producing an audible "click" sound.

    • Check to make sure that the trigger spring is properly aligned. Test the trigger action before continuing reassembly.

  10. SBsBhSJIRJhqfCNd
    SBsBhSJIRJhqfCNd
    eqNcME4RdKWjBlPH
    • Remove the left trigger.

    • Take care to not lose the trigger spring. It press-fits onto a peg on the trigger's underside.

  11. IQ1XfGaxeSPaaoo5
    • Use a Phillips driver to remove the three 5.2 mm screws securing the left trigger bracket.

  12. gLTTOYllyXg1MQkM
    • Remove the left trigger bracket.

    • Replacement triggers require calibration to work as expected. To calibrate new triggers, follow this calibration guide.

    If I only need to get to this part to check if I have to change the button or the daughterboard, do I HAVE to disconnect the battery ? The less I fiddle with things the more likely it is that I won’t break anything else…

    Monsieur_Croco -

  13. 6oggHEmLNyWtjQOW
    6oggHEmLNyWtjQOW
    gFu215gY6TEGHsXA
    vvsWCYPLany4OFI4
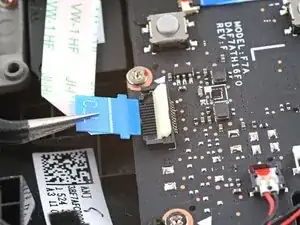
    • Use the pointed end of a spudger to lift up the small locking flap on the thumbstick cable's ZIF connector.

    • Use a pair of tweezers to slide the cable out of its connector.

    • Grip the cable by the blue pull tab, not by the cable itself.

  14. HRNOTKMgOUugPJFH
    HRNOTKMgOUugPJFH
    oPFIHB3Jmtv3SI3t
    • Use a Phillips driver to remove the three 5.2 mm screws securing the thumbstick.

    • During reassembly, you may need to hold the Steam Deck off of the work surface so it isn't resting on the new thumbstick while you tighten down the screws.

  15. IgmCIUSUWQftAMuX
    IgmCIUSUWQftAMuX
    V53KuXu23pjmic1d
    • Remove the left thumbstick.

  16. mDCVZu1Uhy4u1FDT
    mDCVZu1Uhy4u1FDT
    kGrqEKvGXVwu5Cl1
    LxMfQatUstacaDiZ
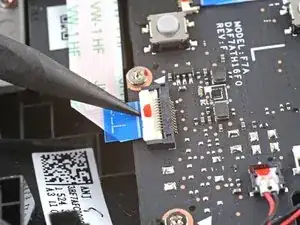
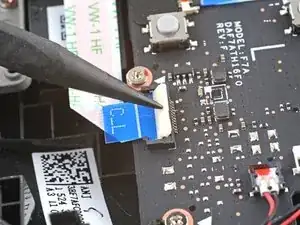
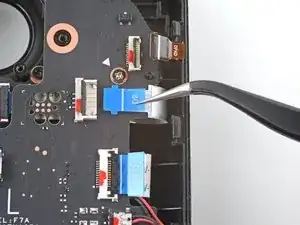
    • Use the pointed end of a spudger to lift up the small locking flap on the button board interconnect cable's ZIF connector.

    • Use a pair of tweezers to slide the cable out of its connector.

    • Grip the cable by the blue pull tab, not by the cable itself.

    Interconnect cable is along bottom of left board (on your right hand side). Ought to put a picture of where it is for easier reference.

    David Boers -

  17. BpQaphbbu6FsVrgA
    BpQaphbbu6FsVrgA
    pK1xSdVRI5etk6Lp
    YmJgw4ZUkjHTcmNR
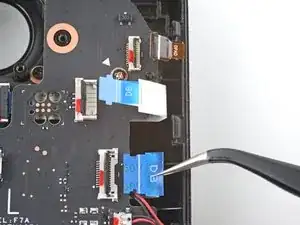
    • Use the pointed end of a spudger to lift up the small locking flaps on the rest of the button board ZIF connectors. Use a pair of tweezers to slide the cables out of their connectors:

    • Disconnect the D-pad cable.

    • Disconnect the touchpad board cable.

    • Disconnect the touchpad cable.

  18. N2a5ZS5voou2PGXw
    N2a5ZS5voou2PGXw
    N65FYVBb2Gr6RdCf
    HPFEq1JNulDkfuWS
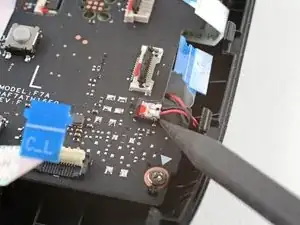
    • Exercise caution when lifting this connector—pry up on the connector itself, not its housing.

    • Use the pointed end of a spudger to lift up on the haptics cable to disconnect it.

  19. UcMiMRyDPQsrZjom
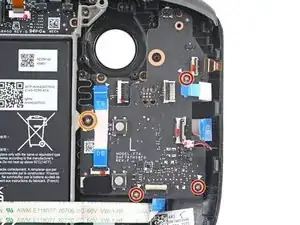
    • Use a Phillips driver to disconnect the four screws securing the left button board:

    • Three 5.2 mm screws

    • One 3.9 mm screw

    during reassembly you will need to remember to line up board with 2 plastic mounts. pcb has good flex and can push down top to get top screw to line up flush

    B P -

    also the 2nd cable from the top (the one below shoulder button cable) should be pulled free before tightening your screws lol

    B P -

  20. T3q2SpIndCErUVJK
    T3q2SpIndCErUVJK
    hYjLHCFdWsy1cjKZ
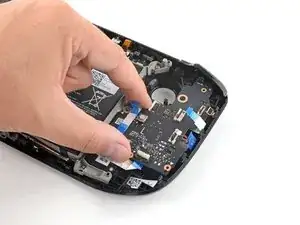
    • Remove the left button board.

    • Keep track of the Steam button and its membrane, as once the left button board is removed, they're no longer secured in place.

    This is useful, but how do I get a Left Button Board? Mine is damaged in the left bumper button micro switch and I need a replacement.

    KaizerJV -

    i thought i needed to replace L1 but i need to replace daughter board too. Valve has said they will supply left daughter boards they are just sold out rn

    B P -

    Where can I purchase a board

    Charlie Trevino -

    I need this board to fix my deck

    Avery Jones -

  21. dDfiRLnUIuQYrkl5
    • Use a Phillips driver to remove the two 5.2 mm screws securing the left bumper assembly.

  22. UWxDeMdNmPaRWWvD
    UWxDeMdNmPaRWWvD
    YPXc52UZSteMMMng
    • Remove the left bumper assembly.

    When reassembling, you may need to force the bumper in a bit until you hear it click.

    When I was first reassembling it, I had difficulty screwing the button boards back in. Additionally, my bumper and dpad felt like they were not sitting correctly, when fully reassembled. I believe this was because I didn't fully push in the left bumper assembly even though it looked like it was sitting in place correctly.

    Aki Nicholakos -

  23. utP3GHIroVbuN2s5
    utP3GHIroVbuN2s5
    GpeapUNMBOgdrsoV
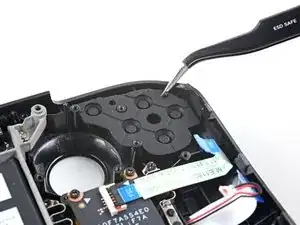
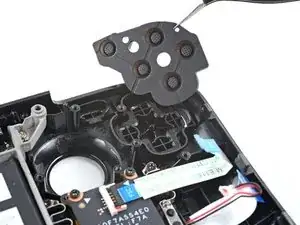
    • Use a pair of tweezers to remove the D-pad membrane.

  24. HjTccg3xnQ5241Vr
    HjTccg3xnQ5241Vr
    yIfkqDpLPgFbWUEK
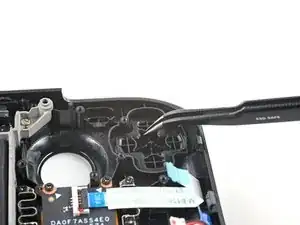
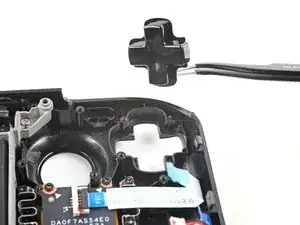
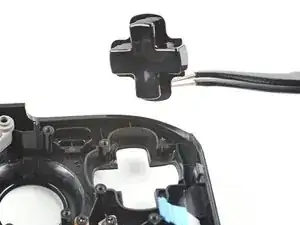
    • Use a pair of tweezers to remove the D-pad.

    • During reassembly, align the D-pad button such that the short side is facing towards the Steam Deck's outer edge.

Conclusion

To reassemble your device, follow these instructions in reverse order.

Take your e-waste to an R2 or e-Stewards certified recycler.

Repair didn’t go as planned? Try some basic troubleshooting, or ask our Steam Deck answers community for help.
Carsten Frauenheim

Member since: 10/03/20

87825 Reputation

0 comments