Einleitung

Diese Anleitung wurde von iFixit-Mitarbeitern erstellt und nicht von Google unterstützt. Erfahre hier mehr zu unseren Reparaturanleitungen.

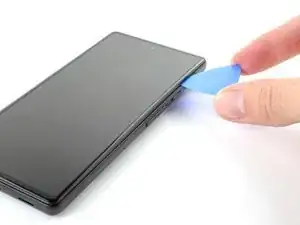
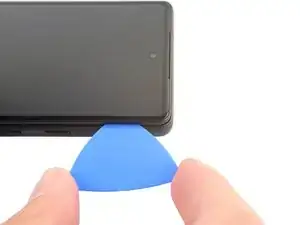
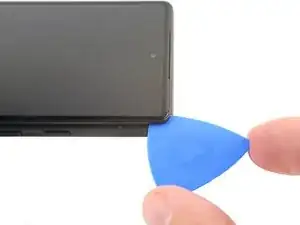
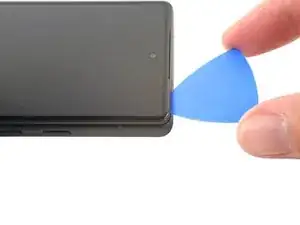
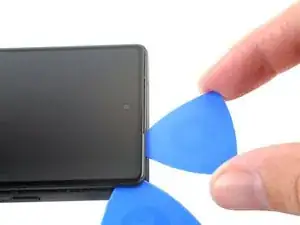
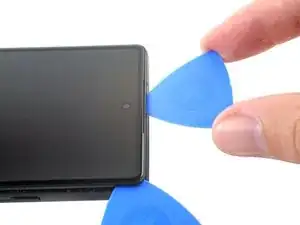
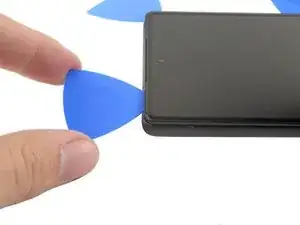
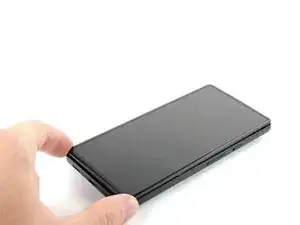
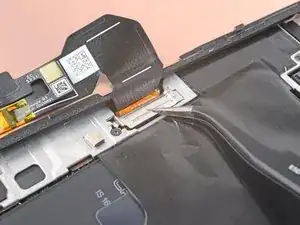
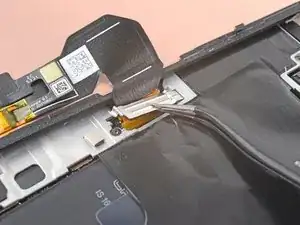
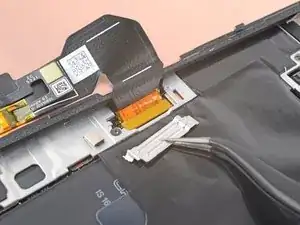
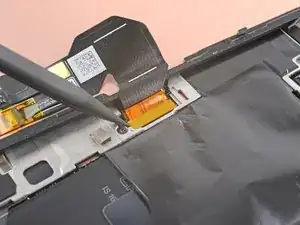
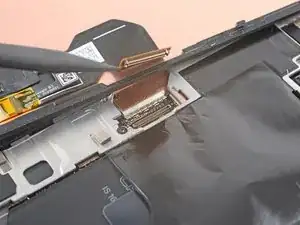
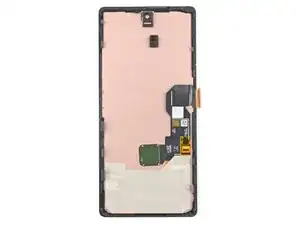
Diese Anleitung zeigt, wie ein defektes Display im Google Pixel 6a ausgetauscht werden kann.

Entlade zur Sicherheit das Handy vor der Reparatur auf unter 25%. Dadurch wird die Gefahr geringer, dass es in Brand gerät, wenn du den Akku während der Reparatur versehentlich beschädigst. Wenn der Akku aufgebläht ist, musst du entsprechende Vorsichtsmaßnahmen treffen.

Dein Ersatzteil ist wahrscheinlich schon mit einem neuen Fingerabdrucksensor ausgestattet. Wenn nicht, musst du den bisherigen Sensor auf das Neuteil übertragen und rekalibrieren, damit er weiterhin funktioniert.

Um die Reparatur abzuschließen, benötigst du passende Klebestreifen.

  1. XBVUE1Uv6VUMgXwN
    • Schalte dein Handy vor der Reparatur komplett aus.

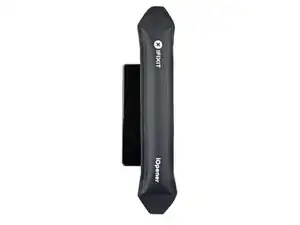
    • Lege einen erwärmten iOpener zwei Minuten lang auf die rechte Displaykante.

    • Du kannst auch einen Haartrockner, ein Heißluftgebläse oder eine Heizplatte verwenden. Sei aber vorsichtig und überhitze das Smartphone nicht, das Display und der eingebaute Akku sind sehr wärmeempfindlich.

    What's a good temperature to set to hotplate to for a repair like this?

    David -

    I used a hair dryer to heat up the adhesive. Unfortunatly the IOpener did not work for me. Even with the hair dryer, it was quiet difficult to soften the adhesive. It might have been due to the phone beeing only a few months old.

    It was quiet difficult to seperate the screen, but it eventuelly worked. I feel like it took the heat a while to move through the cover and heat up all of the adhesive. After almost giving up, I tried again after a few minutes without heating it again and it suddenly worked. So keep that in mind.

    LetsTryThisNext -

    Agree with LetsTryThisNext's comment -- it takes a while for the adhesive to loosen. Expect to be at it for 20, 30 minutes -- with the iOpener not working (for me either), re-microwaving the iOpener, then hair dryer, then suction cup not sticking, etc. Good idea to give it a few minutes between each heating attempt.

    Steve -

  2. Ddj6QlmyySZgoW6a
    Ddj6QlmyySZgoW6a
    hUPVuKPNoCOJIqv2
    UhmIq1ec1LqlbRRu
    • Während der Kleber weich wird, schaue dir folgende Informationen an:

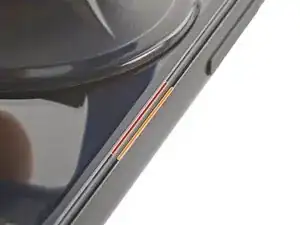
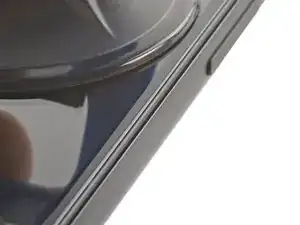
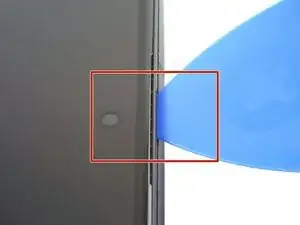
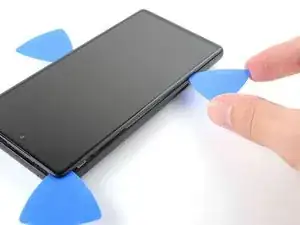
    • Displaynaht: Diese Naht trennt das Display vom restlichen Smartphone. Heble nie in dieser Naht.

    • Rahmennaht: Das ist die Naht zwischen der Kunststoffeinfassung des Displays und dem Rahmen. Sie wird mit Kunststoffclips zusammen gehalten. Hier muss das Hebelwerkzeug eingesetzt werden.

  3. XDaaq12ecnEIq4yD
    XDaaq12ecnEIq4yD
    alGoFZ4wLLdAvZAw
    BRy5TKDEcKNO3UDD
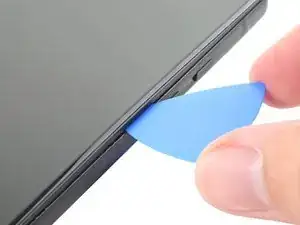
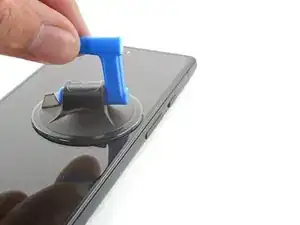
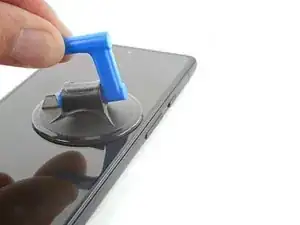
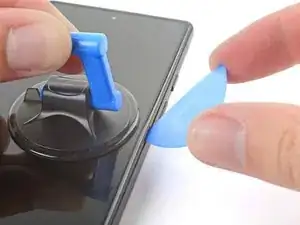
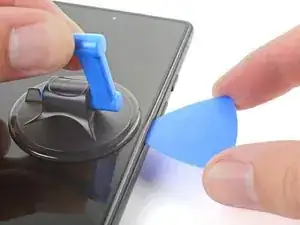
    • Bringe einen Saugheber mittig so nahe wie möglich an der rechten Seitenkante an.

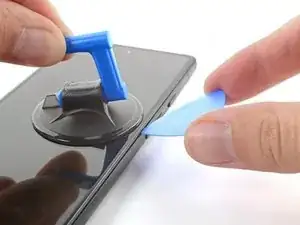
    • Ziehe fest und gleichmäßig am Saugheber, bis sich ein Spalt zwischen der Displayeinfassung und dem Rahmen öffnet.

    • Setze ein Plektrum in den Spalt ein.

    • Je nach Alter deines Smartphones kann dies mehr oder weniger schwer gehen. Eventuell musst du erneut erwärmen und nochmals probieren.

    • Wenn das Display stark gesplittert ist, haftet der Saugheber besser, wenn du das Display mit mit einer Schicht von durchsichtigem Klebeband überklebst. Du kannst auch starkes Paketband anstelle des Saughebers benutzen. Wenn alles nicht hilft, dann klebe den Saugheber mit Sekundenkleber fest.

    Would be helpful to have alternative solutions offered here for those with shattered screens, since suction cups don't work.

    Paul York -

    Hi Paul.

    Thank you for your comment! I have updated the step to provide an alternative solution for shattered screens.

    Alex Diaz-Kokaisl -

    Would just like to note that in my particular case even tape or super glue did not work, due to the screen being shattered right along the spot where you need to place the suction cup. I ended up resorting to inserting a razor blade into the seam to open it just enough to insert the pick.

    mkirwin -

    I'm in the same boat as mkirwin no amount of pulling with the suction cup worked, I had to use a razor blade to get the seam separated enough to insert a pick. Maybe I didn't heat up the adhesive enough but that stuff is super strong

    Tanner Davis -

    If your suction cup is not working properly: Heat it up a little bit and it will have a lot more suction.

    LetsTryThisNext -

    Ditto, needed to use a razor blade to get it started. Thank you mkirwin & Tanner D for posting that tip here.

    Steve -

  4. aKADaMwDF1Su2ytM
    aKADaMwDF1Su2ytM
    ojCAATkuclM4RkHa
    CNQEOHFpaOTP5Nlf
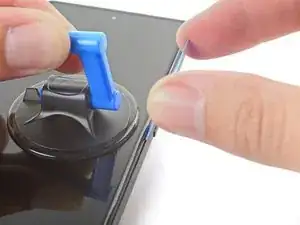
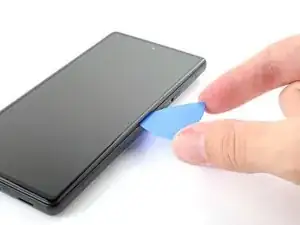
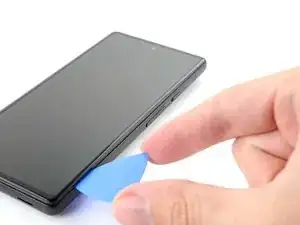
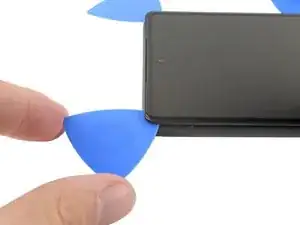
    • Lasse den Saugheber befestigt und kippe das Plektrum steil nach oben.

    • Drücke das Plektrum nach unten, während du es steil hältst.

    • Schiebe das Plektrum nur 3,5 mm weit ein, damit keine Schäden im Inneren entstehen.

    Unfortunatly my plectrums I got with the pro tool kit bent way too easy to open up this first crack between screen and housing. But the reason might have been, that the adhesive was not soft enough yet

    LetsTryThisNext -

  5. fm3oG32vJ2EEBhuc
    fm3oG32vJ2EEBhuc
    gBarY33TTTBZCBZS
    T1RrWIEZYKqCKLue
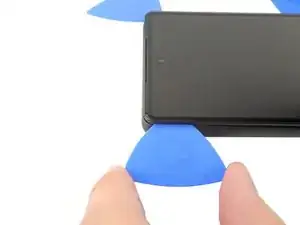
    • Schiebe das Plektrum an der rechten Kante entlang, um die Clips zwischen Displayeinfassung und Rahmen zu lösen.

    • Lasse das Plektrum in der rechten oberen Ecke stecken.

  6. dfU45x4Vk5SuSwn1
    dfU45x4Vk5SuSwn1
    GEBiXPOdSYHlB2oP
    QbSiwkPDRt5wPR2F
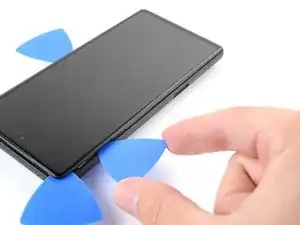
    • Rolle das Plektrum um die obere rechte Ecke des Smartphones, um die Clips zu lösen.

    • Lasse das Plektrum in der oberen rechten Ecke stecken, damit die Clips nicht wieder einschnappen.

    • Setze das Plektrum nicht tiefer als 4 mm ein, damit keine Schäden im Inneren entstehen.

  7. MsjU6gcvUNhlBLuU
    MsjU6gcvUNhlBLuU
    LUT1jGbhZPrJ4FFO
    FL2DT6sQmAqd2TjO
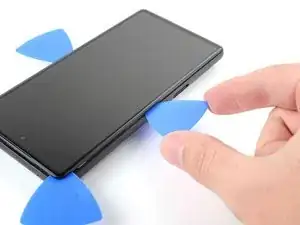
    • Setze ein weiteres Plektrum in den eben entstanden Spalt ein.

    • Schiebe das Plektrum an der Oberkante entlang und löse dabei die Clips.

    • Wenn du an der Frontkamera bist, setze das Plektrum nicht tiefer als 3 mm ein, damit das Objektiv nicht beschädigt wird.

  8. NkLX4XJsx4UEFs6e
    NkLX4XJsx4UEFs6e
    yHuNMCvi4SaACvqa
    odm622mGQ4Njy6KU
    • Rolle das Plektrum um die obere linke Ecke des Smartphones, um die Clips zu lösen.

    • Lasse das Plektrum in der oberen linken Ecke stecken, damit die Clips nicht wieder einschnappen.

    I found that using the side of the pick instead of the point made it easier to keep from over-inserting the pick and it provided more area to keep the glass separated from the frame. It was also easier to slide it around the edges this way. Still had to use the point to get under the frame initially.

    mark schneider -

  9. NLdAYs426UBCVRRt
    NLdAYs426UBCVRRt
    LKjkWexcYPlXuaoI
    rOTvEBRGLhXVPsqb
    • Setze ein weiteres Plektrum in den eben entstandenen Spalt ein.

    • Schiebe das Plektrum an der linken Kante entlang und löse dabei die Clips.

    • Setze das Plektrum nicht tiefer als 3 mm ein damit keine Teile im Inneren beschädigt werden.

    • Wiederhole das Verfahren, also Rollen und Lösen an der letzten Kante.

    • Nun sollte es möglich sein, das Display vom Rahmen abzutrennen. Wenn es noch nicht geht, dann löse eventuell noch eingehakte Clips mit einem Plektrum.

  10. BwXKiaQCfotybFTs
    BwXKiaQCfotybFTs
    1R1JaSBgkHIBHQ21
    sxfrVYeyPct14MLK
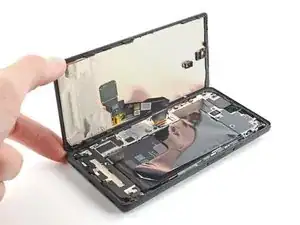
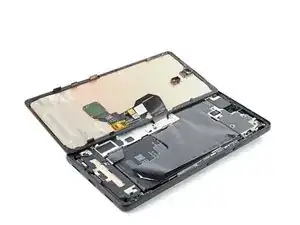
    • Entferne das Display noch nicht ganz, es ist noch durch ein Kabel mit dem Rahmen verbunden.

    • Hebe das Display an der rechten Kante an und klappe es wie ein Buch nach links auf.

    • Lege das Display mit der Scheibe nach unten parallel zum Rahmen.

    • Verdrehe das Display nicht und entferne es nicht zu weit vom Rahmen, um Schäden am Flachbandkabel zu vermeiden.

  11. 4aDiGqShEoknkpOW
    4aDiGqShEoknkpOW
    OAULhXU5sTSSnHiC
    nUiacYiY3BDiH12K
    • Das Displaykabel-Halterung ist mit Metallclips befestigt.

    • Biege die Halterung an der linken Seite mit einer Pinzette hoch, bis sich der Metallclip löst.

    • Entferne die Halterung des Displaykabels.

  12. 3L5D4qAJI4iQK3yD
    3L5D4qAJI4iQK3yD
    ylWfImyWZSXKtZTw
    • Heble den Druckstecker des Displaykabels mit einem Spudger hoch und trenne ihn ab.

    • Um Press-fit Verbinder, so wie diesen hier, wieder anzuschließen, musst du ihn erst sorgfältig ausrichten und auf einer Seite andrücken, bis er einrastet. Wiederhole das dann auf der anderen Seite. Drücke nicht in der Mitte. Wenn der Stecker schlecht ausgerichtet ist, können die Kontakte verbogen und dauerhaft beschädigt werden.

    be incredibly careful when removing and installing the cable, the many tiny components along the edge and under the tab are incredibly fragile. This is one of, if not, the most important step.

    Jeffrey Leon -

    At this step I had some trouble to reattach the connector. When I pushed down one side the other would pop up again. I solved the issue by carefully pressing down both sides with the tweezers.

    LetsTryThisNext -

  13. V1xthfC5ChONrdSh
    • Wenn du das Display wiederverwenden willst, dann zeigt dir diese Anleitung, wie man neuen Kleber anbringt.

    • Wenn du das Display austauschen willst:

    • Folge dieser Anleitung, um den Bildschirm neu zu verkleben.

    • Achte darauf, dass alle Schutzfolien vom Ersatzdisplay und aus der Vertiefung für die Frontkamera abgezogen sind.

    • Kalibriere deinen Fingerabdrucksensor neu. Folge dazu dieser Anleitung.

    • Falls du Probleme beim Kalibrieren des Sensors hast, musst du vielleicht den Google USB Treiber herunterladen.

    Don't forget the display cable bracket folks! This was my first at home repair and Im kicking myself forgetting the bracket.

    Tanner Davis -

    The fingerprint sensor calibration is impossible to complete in some cases. No matter what, I get an error "Your phone's current software version: TQ2A.230305.008.E1 is newer than this repair tool has." from the google software updater. This indicates it is a known issue "https://issuetracker.google.com/issues/2... not fixed for a year. The Google USB driver does not help if you're not on Windows and get this error. I tried on both mac and linux, no dice.

    I'm SOL without a fingerprint sensor. Screen works again though, and everything else went ok with the repair.

    Scott Carey -

Abschluss

Vergleiche das Ersatzteil mit dem Originalteil. Möglicherweise musst du fehlende Bauteile übertragen oder Schutzfolien vom Neuteil abziehen.

Um dein Gerät wieder zusammenzubauen, folge den Schritten dieser Anleitung in umgekehrter Reihenfolge.

Lief die Reparatur nicht wie geplant? Probiere zunächst einige grundsätzliche Lösungen oder frage in unserem Forum nach Hilfe bei der Fehlersuche.

Alex Diaz-Kokaisl

Mitglied seit: 16/01/22

69204 Reputation

27 Kommentare

How do I glue the new screen to make it waterproof.

Brenda Holt -

My screen replacement of my 6a was a success. Thank you IFixit :) Very good kit with good tutorial :)

fpoulin1 -

Just replaced the screen and it is a GREAT REPLACEMENT. Only issue is the fingerprint reader isn't working. Issue is with google NOT this replacement screen. I haven't been able to find a solution. Even when trying to install google's "Install fingerprint calibration software". I have an appointment with "Ufixit" to see if they can resolve it. Google's tech said it isn't a common issue but just wanted to share my experience.

Also...Install steps only show how to take the screen off. Steps to install would be helpful because there are some tips to aligning/applying the adhesive that would be helpful to consumers.

Jon Holland -

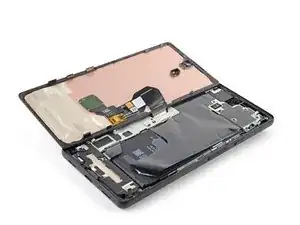
the new display's fringer sensor must be replaced with the same(old screen's).
Rahilkhan Pathan -

In the end I was able to get everything working. BUT, there needs to be a reassembly process. I was finally able to make it work, but it isn't terribly intuitive. Just simple instructions for the adhesive like this side down and peel this first, etc. would be really useful. I ended up with incomplete adhesion (and thus incomplete water resistance) because the adhesive failed to easily remove from the backing. I'm sure it's because I did something wrong, but I was on my own for this part.

Likewise, the fingerprint reader recalibration is very poorly documented on Google's site, requiring that you hop around until you click the right places to download the right USB drivers, unzip them, navigate through Windows device manager, install new drivers, and then finally complete the process of resetting the fingerprint reader. Took me almost an hour of cursing to get this working (heck, took 15 minutes just to get it to the fastboot screen...very finicky).

Anyway, good first 15 steps. Just wish there were 30 or so.

Paul York -

Replaced my screen successfully but as Jon and Paul pointed out there is a number of things I wish I knew / understood during the repair :

## Backup your phone (mandatory)

- Fingerprint calibration will require that you reset your phone so back it up now.

## Screen adhesive

- Buy some screen replacement glue (B7000 glue or B7010 adhesive)

## Fingerprint reset

- On first boot everything will be fine EXCEPT the fingerprint reader that need "unrollment"/calibration.

- A QRcode link is printed on the new screen but use the link provided by ifixit in the introduction of this repair (https://pixelrepair.withgoogle.com/udfps)

- Before you install the software on the pixel you will need a computer and the right USB driver : search "Google USB Driver" or go to https://developer.android.com/studio/run...

- Once you have completed the procedure on pixelrepair.withgoogle.com the fingerprint reader still won't work

- You need to reset your phone to factory settings (be sure to back it up before)

- Voilà

Laurent A. -

First, it is very upsetting to buy that screen and install it to finally discover that the fingerprint reader is not working.
I see that you got yours working, but i just can't get mine working. To resume: I can see my pixel 6a when i lunch the https://pixelrepair.withgoogle.com/udfps application in normal mode. But if, i put my pixel in FastBoot lunch the app, and plug the pixel to the usb port. It doesn't see it.
Any clue? The pc is a HP Envy.

daniel -

i cannot get my volume up rocker to work. I have cleaned out the phone with compressed air and inspected the button. I am not sure what to do.

nick peloquin -

For anyone wondering - you can replace the screen, "install" the fingerprint calibration software at https://pixelrepair.withgoogle.com/udfps and restore full functionality of the fingerprint reader in the replacement screen WITHOUT needing to wipe/reset your phone. The google tool even says as much, but I wanted to confirm that, for me, it indeed did not require a device data wipe.

Jason Harper -

I just received my repair kit this morning. Took me less than 30 minutes following the instructions you guys gave was spot on. I haven’t seen my wife smile so big in a long time. Thanks I fix it. Will be coming to you from now on 10 out of 10.❤️🙏👍

Kenneth Higgins -

I got the screen for PIxel 6A and I have no skills in replacing a phone screen. The instructions on this page were helpful. The suction cup was not helpful.

What I learned:

If you can't get under the screen, then a pocket knife works good to wedge under it and pry it up.

If your phone is on, but the screen it not lighting up/working, then you need to really push the connector into the phone. If it's loose, then it's not going to send a signal. You shouldn't be depending on the bracket to hold the connector in place.

The items I found useful in the tool kit were the tweezers, the picks, and the alcohol prep pad. I probably should have cleaned the old glue away better, but honestly my phone is in a case, I think it will be alright.

Amelia Richards -

The instructions should have contained reassembly instructions. And some more options for removing the screen, especially when it's shattered. The suction cup did not work, the packing tape I had wasn't strong enough. Eventually got it with duct tape. Also some instructions or video on how exactly to hold the phone while pulling with the suction cup would be helpful. That was rather tricky. I needed three or more hands which I was unable to sprout on short notice.

Saif Ahmed -

Make sure you remove the small protective film over the selfie-camera hole (if there is one) or your selfie camera will be waaay out of focurs.

Sam Robertson -

Comment to above: It's a small white piece of fabric tape about 1/2 inch long over the camera and onto the back of the display. Note that there is something that looks like a bigger neater piece of tape on the bottom and you shouldn't pull THAT off - its also on the back of the old display so you can just compare that two and pull the single piece of tape off over the camera on the new display as explained above to make them look similar.

Sam Robertson -

I can't complete this repair...I have two problems:

1. I can't get the bezel to come away from the screen enough to fit an opener in. I heated the screen for up to 10 minutes with the iOpener and it does not seem to get hot enough or I am not able to get enough leverage to pull the screen away from the bezel. The phone is only weeks old, not sure if newer or older is supposed to make this more difficult.

2. There should be specific instructions on applying the adhesive and replacing the screen, the "just do everything in reverse" doesn't seem very helpful here. This doesn't seem as straight forward as that.

Andrew Kulp -

Great tutorial, I have experience replacing other screens and doing such repairs so the tutorial was easy and t the point. I had the toolkit from a few years ago and it worked flawlessly, had to heat the adhesive a bit first to get the device to open, all went smooth after that. Thank you!

beriisrude -

Help! I dropped and shattered the screen and replaced it according to the guide, but the screen still isn't working! I can tell the phone is turning on because holding the power button gives the quick double-vibration from activating Google Assistant, and I can power-cycle it by pressing and holding power and volume up for 10-ish seconds (I know it's power cycling because the Google Assistant double-vibration stops working and then starts working again a minute later). I've tried reseating the display connector a few times now, and I don't see any bent pins so I'm sure I'm aligning it correctly. I haven't sealed it up yet because I wanted to test it first, but the display should work even if it's not glued in, right? What else could be going wrong? Is it most likely that I destroyed more than just the screen when I dropped it, or is there something else I can check?

Jordan Kizer -

I just got my Pixel 6a screen replacement and I noticed several plastic tabs around the perimeter. the removal instructions refer to these as well. my broken screen does not have these tabs. the new screen does turn on when I test it, but I do not see how I can get it to go back together without removing the tabs. I confirmed that my phone is a Google Pixel 6A under the system settings tab.

Russ Caldwell -

Thank you to Jerry. I forgot to follow the directions for removal of screen as mine was spidered in two spots and also at the Right side start point. Went back and got the plastic frame out.

Russ Caldwell -

This repair absolutely cannot be done without the Anti-Clamp. The screen is held in such a way there's no way to get it off without it, unless you want to fight it and risk the screen.

Nick -

I managed to do it without the anti-clamp, but my original screen wasn't too badly cracked (just one corner) and it took me 2 tries with the heat pad to get it. It really was a struggle, though, trying to figure out how to hold the phone down without pushing down on the screen too much at the same time. It took me around 15 minutes to remove the screen by pressing down at the very top and bottom while pulling up on the middle... probably worth buying the anti-clamp to skip the struggle.

Houston Searcy -

sorry auf deutsch ....... was bedeutet bei displaykauf ...... mit Rahmen? ...... ohne Rahmen? Ich muss nur das display bei meinem pixel 6a wechseln, weil kaputt. Es funktioniert alles, nur das Glas ist kaputt ...... danke für eine Antwort.

yala -

La partie deu recalibrage de L'appareil ne fonctionne tout simplement pas!
J'arrive à mettre mon téléphone en mode Fast Boot mais le téléphone n'apparait pas dans la liste dans ce mode. Si l'appareil est en mode normal, il apparait...

daniel -

I did it! I gotta say my behind was puckered pretty tight trying to figure out how to get that ribbon cable back on! In the end, I watched a couple of youtube videos of people doing it, and (like them) used my finger to push down one side instead of trying to use the spudger. It would be nice to give people some extra guidance or a really close up picture of the positioning of the cable for reassurance, because it was a struggle!

Good guide, though. I appreciate it! Fingerprint sensor is working after using the linked tool as well AFTER installing the USB driver, which was also linked 😄

Houston Searcy -

The adhesive was stubborn to clean off, but everything else went smoothly and everything works!

Mark Pruett -

My Pixel 6a screen replacement was a success thanks to this guide.

I followed all the instructions, including the adhesive replacement guide. My only issue was that the iOpener didn't provide enough heat to loosen the glue when opening the phone, however, the hair dryer did the job.

- With enough heat to soften the adhesive, screen removal was easy with zero damage to internal components or connectors.

- Adhesive reapplication guide was perfect (be sure to properly remove old adhesive)

- Fingerprint sensor calibration worked on first try (be sure to install Google USB Driver before attempting, and restart phone after calibration).

- I did not have to reset my phone.

- I did not have to re-register fingerprints

- I haven't experienced any screen discoloration or touch issues

NOTE

The included suction handle is functional, however the Anti-Clamp is the better tool for the job. Sadly, I didn't purchase a Anti-Clamp, so I substituted with a suction cupped wall hanger to be able to get suction and pull from both sides.

Randy Huntley -

Do this after the screen is installed to get the fingerprint reader to work again. Very easy. fingerprint reader not working after screen replacement

Jordan Fleuriet -