Einleitung
Macht OEM Wärmeleitpaste dein MacBook Pro träge, wenn er heiß wird? Diese Anleitung zeigt dir, wie du den Kühlkörper entfernen und neue Paste auftragen kannst.
Werkzeuge
Ersatzteile
-
-
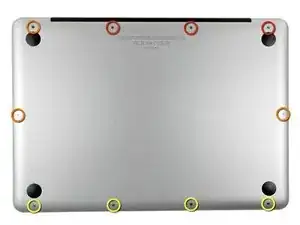
Entferne die folgenden zehn Schrauben:
-
Drei 14,4 mm Kreuzschlitz #00 Schrauben
-
Drei 3,5 mm Kreuzschlitz #00 Schrauben
-
Vier 3,5 mm Kreuzschlitz #00 Ansatzschrauben
-
-
-
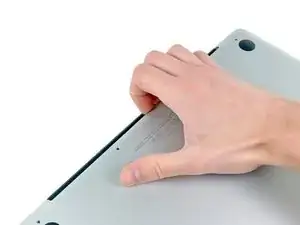
Löse mit den Fingern in der Nähe vom Ventilator die Gehäuse-Unterseite vom Hauptteil des Gehäuses.
-
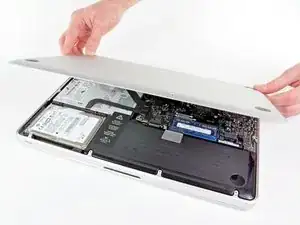
Entferne die Gehäuse-Unterseite.
-
-
-
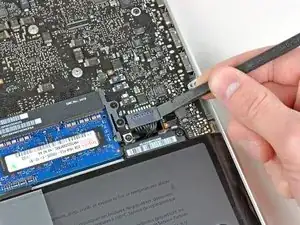
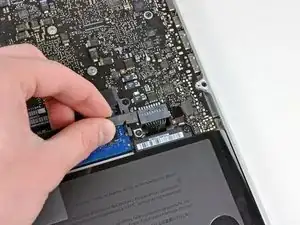
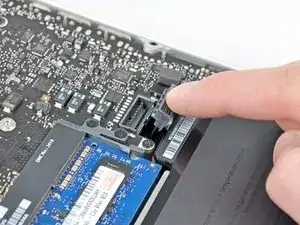
Löse mit der Kante eines Spudgers den Akkuanschluss nach oben, weg vom Sockel auf dem Logic Board.
-
-
-
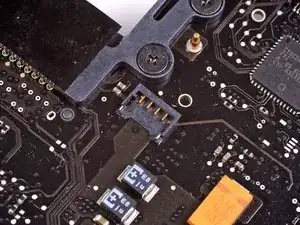
Biege das Akkukabel vorsichtig weg vom Sockel des Logic Boards, damit es sich nicht aus Versehen beim Arbeiten wieder verbindet.
-
-
-
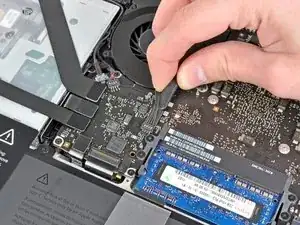
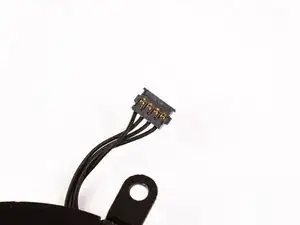
Nutze das flache Ende eines Spudgers, um den Stecker des Lüfters vorsichtig vom Anschluss auf dem Logic Board zu trennen.
-
-
-
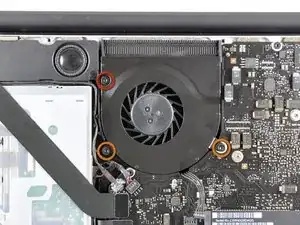
Entferne folgende drei Schrauben, die den Lüfter auf dem Logic Board befestigen:
-
eine 7,2 mm T6 Torx Schraube
-
zwei 5,3 mm T6 Torx Schrauben
-
-
-
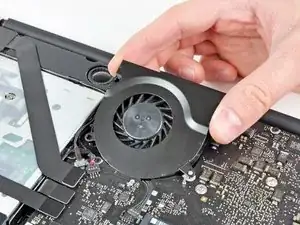
Achte auf die Kabel und hebe den Lüfter vorsichtig aus seiner Aussparung auf dem Logic Board.
-
-
-
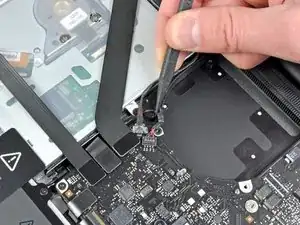
Ziehe das Kabel zum rechten Lautsprecher/Subwoofer mit der Spudgerspitze unter dem im oberen Gehäuse eingeformten Haltebügel heraus.
-
Ziehe das Kabel hoch, um den Verbinder aus seinem Sockel auf dem Logic Board zu heben.
-
-
-
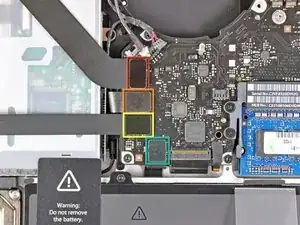
Löse folgende vier Kabel:
-
AirPort/Bluetoothkabel
-
Kabel zum optischen Laufwerk
-
Festplattenkabel
-
Kabel zum Trackpad
-
-
-
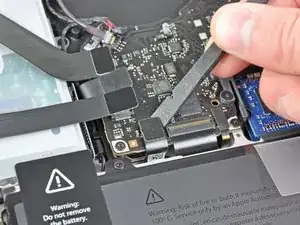
Klappe den Sicherungsbügel am Sockel des ZIF Verbinders des Tastaturflachbandkabels mit dem Fingernagel oder dem Spudger nach oben.
-
Ziehe das Flachbandkabel mit der Spudgerspitze aus dem Sockel.
-
-
-
Wenn vorhanden, musst du den kleinen schwarzen Klebestreifen über dem Anschluss der Tastaturbeleuchtung abziehen.
-
-
-
Klappe die Halteklappe auf dem ZIF Verbinder der Tastaturbeleuchtung mit dem Spudger oder dem Fingernagel nach oben.
-
Ziehe das Flachbandkabel zur Tastaturbeleuchtung aus seinem Sockel.
-
-
-
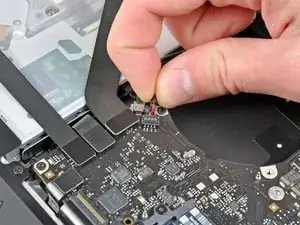
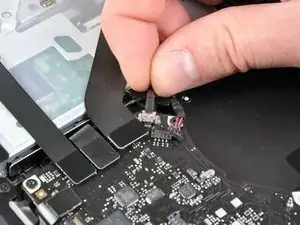
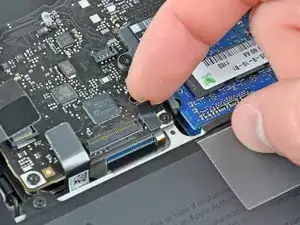
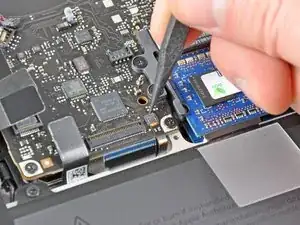
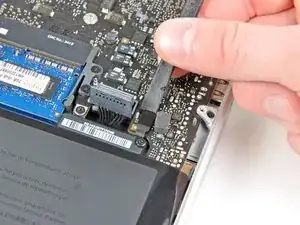
Ziehe den Verbinder zum Ruhesensor/Akkuanzeige mit dem flachen Ende des Spudgers aus seinem Sockel auf dem Logic Board.
-
-
-
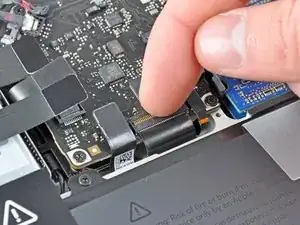
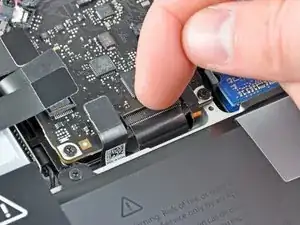
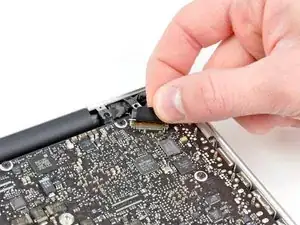
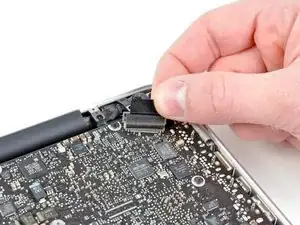
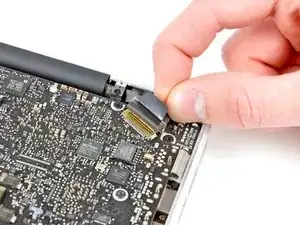
Fasse die Plastikzuglasche auf dem Sicherungsbügel des Displaydatenkabels an und drehe ihn in Richtung des DC-in Anschlusses des Computers.
-
Ziehe das Displaydatenkabel gerade aus seinem Sockel auf dem Logic Board.
-
-
-
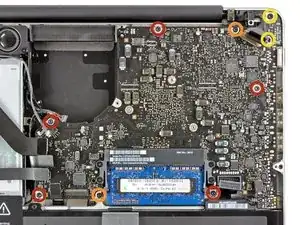
Entferne folgende neun Schrauben:
-
Fünf 3,6 mm T6 Torx Schrauben
-
Zwei 4,3 mm T6 Torx Schrauben
-
Zwei 7,2 mm T6 Torx Schrauben
-
Fünf 3,0 mm Torx T6 Schrauben
-
Zwei 3,6 mm Torx T6 Schraube n
-
Zwei 6,7 mm Torx T6 Schrauben
-
-
-
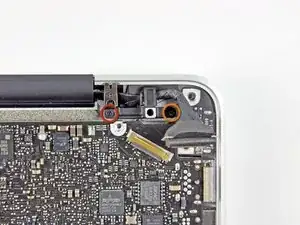
Entferne folgende zwei Schrauben:
-
Eine 8,6 mm Kreuzschlitzschraube
-
Eine 5,5 mm Kreuzschlitzschraube
-
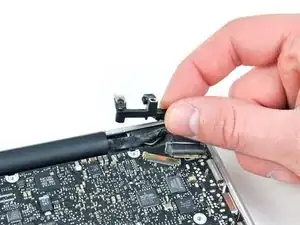
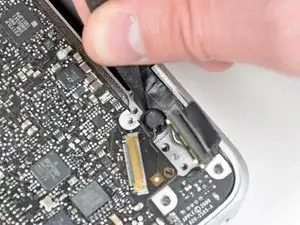
Entferne die Halterung des Displaydatenkabels vom oberen Gehäuse.
-
-
-
Das Mikrofon ist am oberen Gehäuse festgeklebt. Löse es vorsichtig mit einer Spudgerspitze vom Kleber.
-
-
-
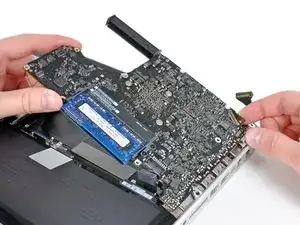
Passe auf die vielen Anschlüsse am Rand auf und hebe das Logic Board am Ende beim optischen Laufwerk hoch.
-
Biege die Platine nicht, wenn du sie aus dem Gehäuse heraushebst. Achte auf die flexible Verbindung zur DC-in Platine, die sich am Gehäuse verfangen könnte.
-
Entferne das Logic Board.
-
-
-
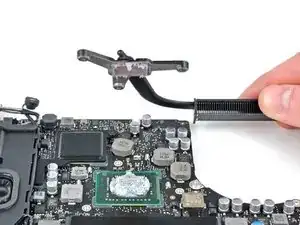
Der Kühler ist mit drei 8,4 mm Kreuzschlitzschrauben #1 am Logic Board befestigt. Drehe sie heraus.
-
Um dein Gerät wieder zusammenzusetzen, folge den Schritten in umgekehrter Reihenfolge.
17 Kommentare
Awesome guide, I was able to complete the whole job (very slowly and carefully) in an hour start to finish. I am not an expert, I am just your average, everyday DIYer. I'm actually a medical student with an interest in engineering and "tinkering" looking to save money however I can. I would HIGHLY recommend this to every one of my friends (and I may even do this for some people). My keyboard doesn't get warm anymore, and my fan stays quieter doing more things. I'm now running 40-45 degree temps instead of 70-85 temps. Incredible. Like others on the internet, my computer had a TON of paste on it that was all over the CPU. I feel better now that I know how my computer was put together (by me). Good luck!
I also reapplied thermal paste under the heatsink on my early 2011 Macbook Pro. Temps are on average much lower, now my cpu almost never spikes above 70 C. I used the mac application Hardware Monitor to check temps in real time before and after. Previously doing pretty much anything on my MBP would cause the fan to spin at its max rpm and the computer was almost always hot to the touch. Now it's silent (also swapped the hdd for an ssd) and the fans almost never turn on at all!
I followed the guide after my MBP began showing extreme CPU temps like 95-98 C.
I removed all the dry paste that was left on top of the CPU, and replaced it with a brand new paste.
But it didn't work. I'm still getting these high temps. I reopened my computer and placed even more paste. But it's not cutting it.
I'll try a new cooler. Maybe that helps... though. I'll comment here if it does.
Rodrigo -
Less is better, you want a very thin (think see through silk thin) coating between the CPU and the Cooler otherwise it acts as an insulator and causes more heat not less. just enough to make sure that no air is between the two.
Awesome guide Ifix it rules! Loved the step by step format. Im not a big fan of videos. The zoomed pictures saved my life as reference. Perfect!






How much weight can I save by removing the optical drive?
gunes314 -
You can save a lot of weight if lets say your installing a solid state drive or putting in a second hard drive but if you know that you use the CD/DVD disc drive a lot then you might just want to leave the drive alone.
Marshall WahlstromHelgren -
Tip: Use one of those weekday pill holders to have a cheep way to store screws you remove and each day of the week can be for different sizes or parts. It has been handy to have (much less expensive than the magnetic mat.
Robert Wacker -
Hello, where can I buy the screws I need in case I lose one of them?
taylornya -
iFixit sells a kit: Macbook Pro Unibody (Anfang 2009-Mitte 2012) Schrauben-Set für das Gehäuse
Darrell Johnson -
I have one stripped screw... How opening without drill it?! Any suggestions please?
rodrigosady -
I also stripped a couple screws. I wasn’t able to open it up without drilling. After drilling the heads and removing the cover it was easy to hacksaw the tip and unscrew with a standard driver.
Michael Wilkens -
We have a guide for that!
Wie man eine rundgedrehte Schraube entfernt
Sam Omiotek -
My top tip - make sure you buy good quality Phillips screwdrivers and a magnetic holder. Cheap screwdrivers won’t get the screws undone safely. Without a magnetic holder you have no chance of getting the tiny crews in and out safely.
jeremyyoung -
A good Phillips 00 is your friend here. Also, when reinserting the screws, gently start anticlockwise and you wil feel a click at the start of the thread. This tells you you’re in the right place and less likely to cross-thread through force in the wrong place.
Iain Boyd -
I feel like these are 000 screws. Amazon sales describe them as such and my 000 screwdriver fits better
cam2000deluxe -
Before ordering a new Trackpad remove the existing battery and try clicking the Trackpad. If it clicks OK with the battery out the source of problem is likely a swollen battery, which should to be replaced even if it still works to some degree. From the side of the battery you will likely see the soft part of the battery bulging beyond the hard case.
Patrick Langvardt -
That’s absolutely correct as I can testify. With the battery removed I also adjusted the T6 set screw that adjusts the sensitivity of the trackpad click, evidently someone had cranked mine down tighter than the factory setting.
Gary Register -
Le quatrième paragraphe dans les instructions en français n’est pas correct : ce ne sont pas les 2 petites vis, mais les 7 petites vis qui sont inclinées. Et les 3 grandes sont bien verticales.
Degeorges -
Bonjour ! Merci de votre observation. J’ai corrigé la traduction. iFixit étant un wiki, n’hésitez pas à modifiez si vous remarquez une erreur :) Encore merci de votre attention et à bientôt !
Claire Miesch -
Tip: if you have a magnetic screw mat or similar, lay the macbook over the mat to make sure it catches any screws that may decide to fall of and hide under your table
Moritz -
Funny, it's not her hands that are doing the close ups. :)
Cinemated Man -
What's the difference between the shouldered and non shouldered screws? They look exactly the same to me.
MLNLRD -