Einleitung

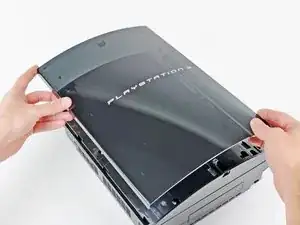
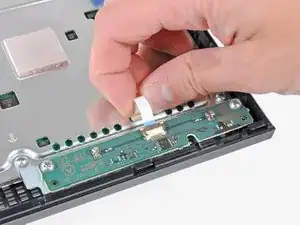
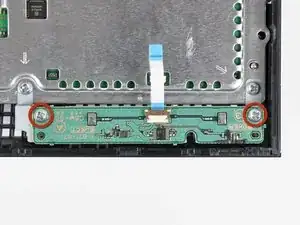
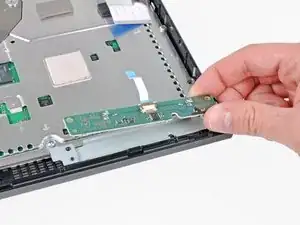
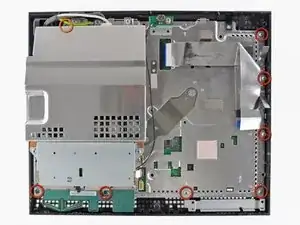
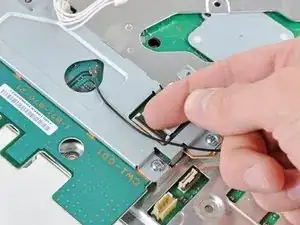
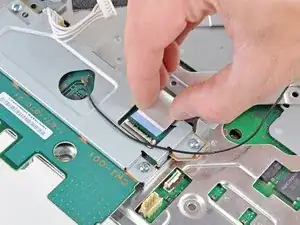
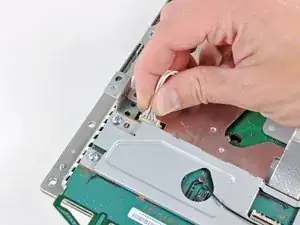
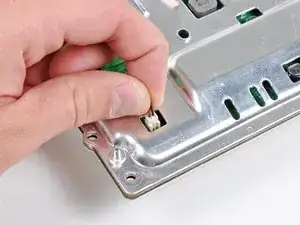
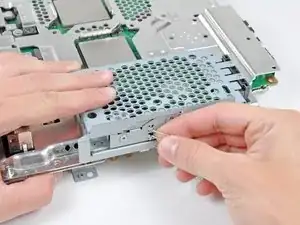
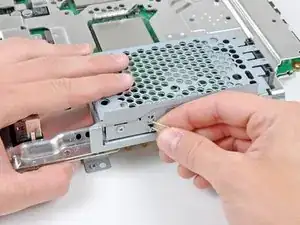
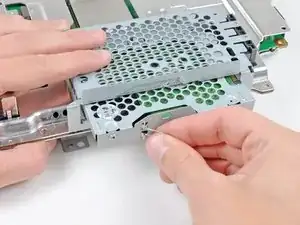
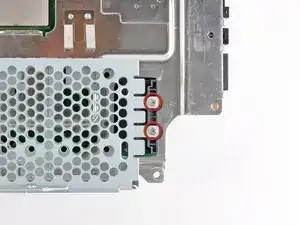
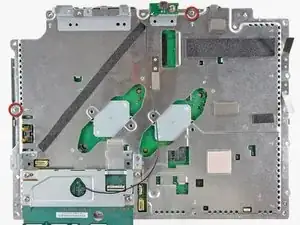
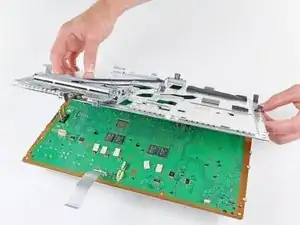
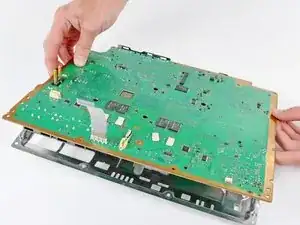
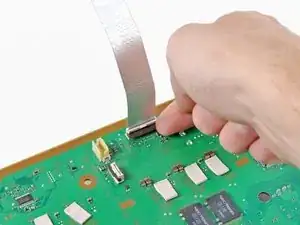
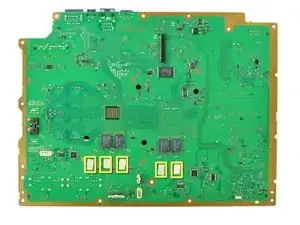
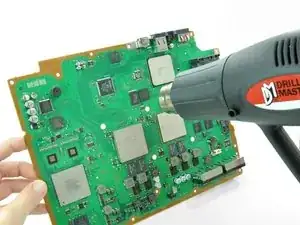
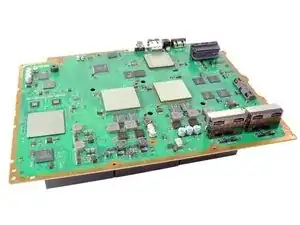
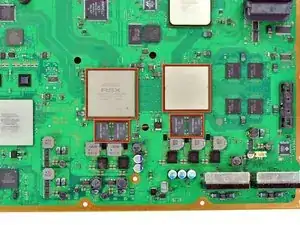
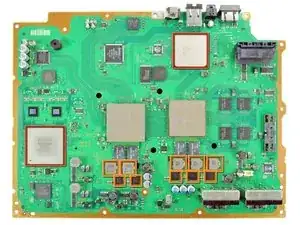
Diese Anleitung zeigt dir, wie du mit etwas Glück den Yellow Light Of Death" (YLOD) -Fehler in der PlayStation 3 reparieren kannst.

Es lässt sich nicht vorhersagen, ob die Playstation wiederbelebt werden kann. Dieser Yellow Light Of Death" (YLOD) -Fehler in der PlayStation 3 ist ein Hardwarefehler, er kann verursacht sein durch eine CELL/RSX - Überhitzung durch ausgetrocknete Wärmeleitpaste unter dem IHS, defekte NEC/TOKIN Kondensatoren, einen Kurzschluss auf der Platine, falsche RSX, etc.

Hinweis: Es kann sein, dass deine PlayStation innen etwas anders aussieht. Führe die Reparatur sehr sorgfältig durch.

  1. XC4PojAakGaJAFNl
    XC4PojAakGaJAFNl
    w6MZgkkapHlYZyjY
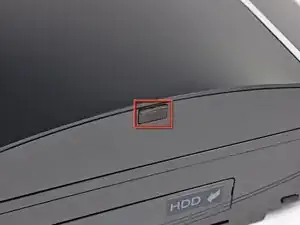
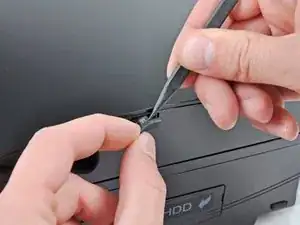
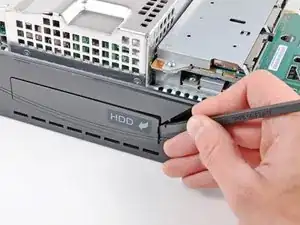
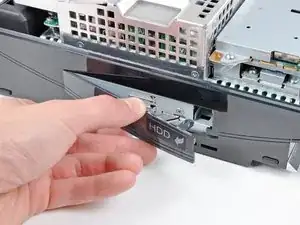
    • Entferne mit der Spitze eines Spudgers den schwarzen Gummi-Schraubdeckel von der Seite der PS3.

    • Die Schrauben-Abdeckung kann unter einem Garantie-Aufkleber sein. Dieser Aufkleber wird nach dem Entfernen sein Aussehen ändern und "VOID" (Ungültig) anzeigen.

    Fake repair. Real fault: How to Delid and fix the Yellow Light of Death for good (NEC TOKIN Replacement) https://gbatemp.net/threads/how-to-delid...

    Player -

  2. oshv21lAV45JYI3H
    • Entferne die 8,5 mm TR10 Torx Security Schraube von der Abdeckung.

    How to Delid and fix the Yellow Light of Death for good (NEC TOKIN Replacement) https://gbatemp.net/threads/how-to-delid...

    Player -

    I need a tork screw bracket / holder A/E/B/E01- MG and security torx screw for a CECH-AO1 do u guys sell these?

    vuhx -

  3. vT35crSssXRtUiCa
    vT35crSssXRtUiCa
    Hq6BfirJtZsLRxlL
    1HexXRWUkCZGc3fT
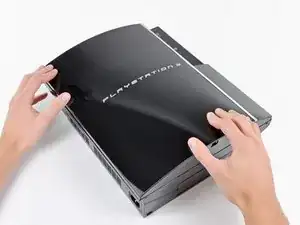
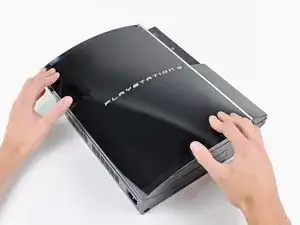
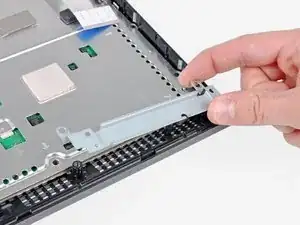
    • Ziehe die Abdeckung in Richtung des Festplattenschachts, dann hebe sie vom Körper der PS3 ab.

    How to Delid and fix the Yellow Light of Death for good (NEC TOKIN Replacement) https://gbatemp.net/threads/how-to-delid...

    Player -

  4. bGm1uV3D5RH6tHdi
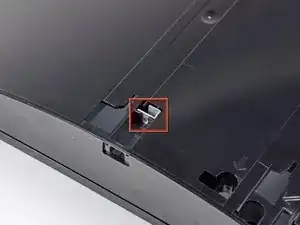
    • Achte auf den kleinen Metallbügel, der lose in der oberen Abdeckung gehalten wird.

    That small metal bracket/socket set up looks completely different in the ps3 I'm working on. Model: CECHK01.

    Any suggestions?

    Marcus -

    different in mine too, Model: CECHP01

    Link Adrian -

    mine does not have one at all

    ian.downard01 -

    1How to Delid and fix the Yellow Light of Death for good (NEC TOKIN Replacement) https://gbatemp.net/threads/how-to-delid...

    Player -

    Did not find in my CECHH01

    Philippe Morin -

  5. XRh3WC3LKEbh42KV
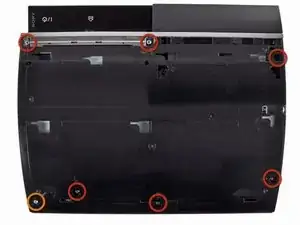
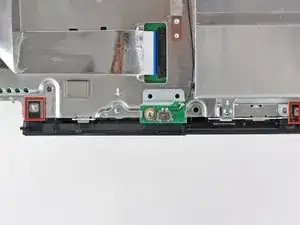
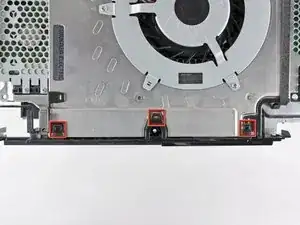
    • Entferne die folgenden sieben Schrauben:

    • Sechs 52 mm Kreuzschlitzschrauben

    • Eine 30 mm Kreuzschlitzschraube

    2 more smaller screws (don't know what size...small) just below the top middle screw and top right screw (in the picture). Look for the arrows...

    E Goo -

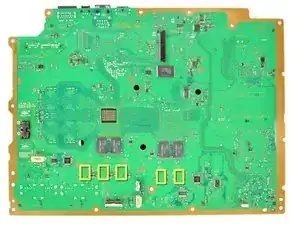
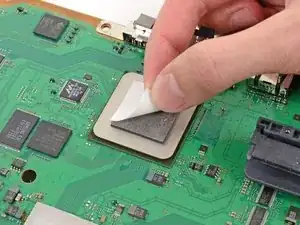
    can confirm, might be the backwards compatibles only

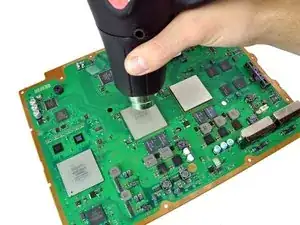
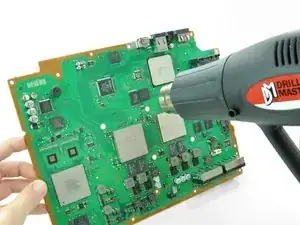
    Jordan Giese -

    after you remove the screws, you may have to push a tab to take the cover off if you meet resistance on one side of the cover. Here is a link to a video that explains it, saved me lots of trouble:

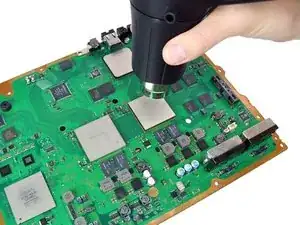
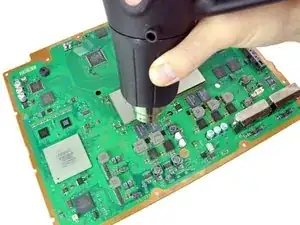
    http://youtu.be/jZgekNsRB-A?t=1m54s

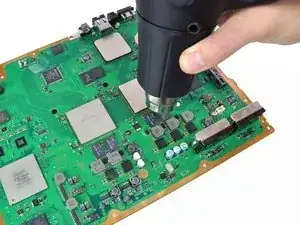
    ericksi33 -

    Thanks @ericksi33, this really helped me out.

    hogurt -

    1st attempt, fan loud. Ps3 lasted about 2 wks. 2nd attempt noticed very poor contact between heatsink & cpu,gpu when taking it apart. Research - Found a better way to apply thermal past. I personally disapprove of guide on this. A small bit about the size of a grain of rice in center of cpu is plenty. Clamp the heat sinks back on. Then take it apart & check contact area. Thermal paste should have spread to about the size of a quarter.(more is better. Less then a nickel size is poor contact) possibly weak clamps. Carefully applied pressure onto the cpu & gpu, pressing them into the heatsinks before clamping heatsink clamps on. Achieved greater then quarter sized thermal past spread. Fan silent in comparison & ps3 lasted about a yr. Rarely did I ever hear the fan go to high and get loud after that. About to begin my third fix on this same ps3. One of the first 80g backwards compatible. other then those notes and that this guide was for a different model ps3 (minor differences) I liked this guide. easy to follow.

    brettgomes -

    Although the battery is described as proprietary, it looks like it is the common CR2032 lithium coin battery that is used in calculators and some computers. I haven't had to replace mine but I suspect under the heatshrink cover is a battery holder which will allow the coin battery to be removed and replaced. Then wrap with electrical tape and reinstall.

    RickP -

    I tried this with the heatgun and it ruined my PS3. The CPU and GPU are NOW RUINED!!! It did not work for and made things worst!!! I sent it to a place to get reballed and they said the HEATGUN had overheated my processor and killed them!!! So think twice about doing this. Just because it is already broken, DON'T THINK YOU CAN'T MAKE IT WORST!

    georgehollyoh -

    Why would you try it with a heat gun, no were is it mentioned to do that

    Phillip Pereira -

    There are 2 additional screws to remove , front center and front left , just behind the already marked screws.

    mikentc90 -

    As mentioned and I’ll add so detail too. If you have a model with the card readers there are two more small screws that also need to be removed before moving on to the next step.

    screech -

    2How to Delid and fix the Yellow Light of Death for good (NEC TOKIN Replacement) https://gbatemp.net/threads/how-to-delid...

    Player -

    I felt more comfortable with #2 screwdrivers.

    Philippe Morin -

  6. ILqbDWeJe5dF1lSK
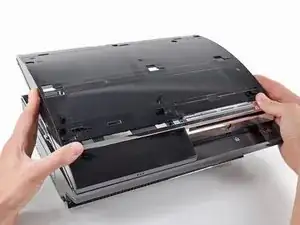
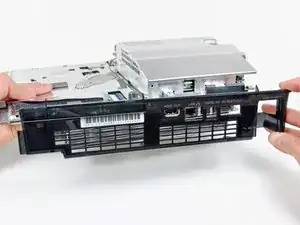
    • Hebe die obere Abdeckung von der Hinterkante und drehe sie in Richtung der Vorderseite der PS3.

    • Entferne die obere Abdeckung.

    • Hinten rechts in der Ecke befindet sich ein kleiner Plastikhaken. Löse diesen vorsichtig, indem du mit einem Spudger durch die Öffnung dagegen drückst.

    Disconnect the memory card ribbon cable.

    Tobias Stockmann -

    The top would hardly budge on the left back corner and was stuck on the right back corner. There is a plastic hook that needs to be unfastened to lift the top off. It is located in a hole on the top back corner on the right hand side, so the corner straight across the on off button. Just gently push the plastic hook a bit front the rear of the machine with a spudger. It gives easily and the top will be free to lift off after that.

    cornellg -

    I can confirm on CECHH01.

    Philippe Morin -

    Some more details here as well.

    The newer model without SACD support appears to have added that clip to the back right that needs to be pressed to release the top shell.

    If equipped with the card reader you can either have to disconnect the ribbon cable or unclip the reader from the top shell after lifting it up to get finger or tool in there to push clip to side and release reader from top shell. Note: if you failed to remove the card reader screws in the previous step these clips can break.

    screech -

    The original 60GB with the CF card reader on the front has a button protruding out. This will make it difficult to remove the top. You need to unscrew the memory card reader so it can come out easily.

    Brian Caines -

    Wow, this needs more attention. This isn't explained in any disassembly guide I've seen. You also need to be cognizant of the card reader cable when you're lifting off the lid.

    SolidSonicTH -

  7. OdxmYRCnAtAtZTiC
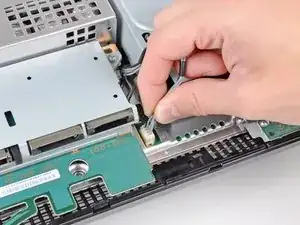
    • Trenne die Blu-ray-Stromkabel von der Hauptplatine.

    • Ziehe den Stecker gerade nach oben und aus der Fassung.

    I would add… “Be careful taking these type of connectors apart” …. its easy to pull the entire thing off the motherboard and rip pads !

    The pulled pads can be replaced but its extra work you don’t need :-) and requires equipment and skill to do and cold require jumper wires.

    asears -

    Pull the cables gently, the plug will come out of the socket. The plug is encased by the socket.

    A K -

    That’s also what I did.

    Philippe Morin -

    My PS3 is the CECHL01 and I had to remove the PSU to get to the disk drive ribbon cable.

    Benjamin Burden -

    I mistakenly ripped the whole thing out... I do not know where to begin on repairing it.

    Tom Gillis -

  8. ieKbPALPyOT6aHOM
    • Hebe vorsichtig das Blu-ray-Laufwerk von der Kante, die zur Stromversorgung zeigt, an und drehe es weg vom Gehäuse, um den Zugang zu den Flachbandkabeln zu ermöglichen.

  9. JrydZ5XFLxnDoEkA
    JrydZ5XFLxnDoEkA
    NRlknsmmnErk36XY
    Gf6tmmxAdjQaJtwa
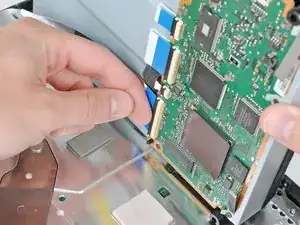
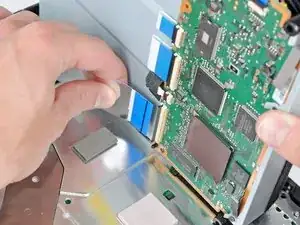
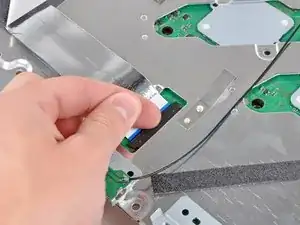
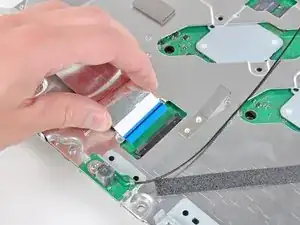
    • Klappe mit deinem Fingernagel die Halterungen der Flachbandkabel an der Buchse nach oben.

    • Achte darauf nur an der Halteklappe und nicht an der Fassung selbst zu hebeln.

    • Ziehe das Flachbandkabel aus der Fassung.

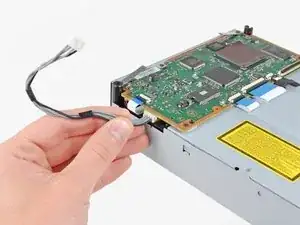
    • Entferne das Blu-ray-Laufwerk aus der PS3.

    • Wenn du das Blu-ray Laufwerk austauschst, verwende das Netzkabel vom neuen Laufwerk.

    Not all systems look like this, some have tape instead of the flap.

    gatewaynomad -

    Every system that I have seen has had the ZIF connector, while some had tape over the connection as well. If your connectors are taped, be sure to remove the tape, then proceed with undoing the ZIF connector.

    Brett Hartt -

    The version 2 systems baseboard PCB started switching to the new narrow 24 pin ZIF header/ribbon and Blu-Ray drive connection.

    You should not attempt to detach the taped ribbon cable from the drive end first as described above for the older wide 60 pin ribbons. You must remove the drive and ribbon as one unit to protect the fragile ZIF sockets.

    The slimmer fragile ribbon is taped to the drive housing to afford a more secure ZIF connection. The opposite base connection is slightly under the PSU.

    continued

    shadetree -

    From continued

    One should firstly remove the PSU: Disconnect the drive power cable as described above. Unscrew the 5 (3-P1 2-P2) PSU mounting screws. Now leaving the power cables attached, lift the PSU off the power baseboard PCB pins and move over slightly to access the baseboard drive cable end ZIF. Release the ZIF latch and slide the entire (drive and ribbon) strait away from the baseboard ZIF to disconnect.

    After the complete drive/ribbon removal, you can carefully remove the restraining tape on the bottom of the drive to release the ribbon ZIF, then remove the 24 pin ribbon from the drive logic PCB.

    Install in reverse order making sure to add new tape to secure the ribbon to the drive.

    shadetree -

    I needed to remove the PSO completely to reach the baseboard drive cable end ZIF. To do that disconnect the power and data (I assume) cables and then pull the unit straight up. To longish prongs are heading straight up into it from the baseboard and it is a bit tight, so gently pull until it's clear.

    cornellg -

    If you are replacing the Blu-ray drive, you must use the same daughterboard that came with your PlayStation 3. The daughterboard is paired to the motherboard, and the Blu-ray drive will not work with a different board. -------------- I understand however my daughterboard is not on the bottom of the blu-ray drive it must be on the inside. Is there any advice out there on how I go about doing this as I am not sure what I am doing???? If someone could post a link or any tips it would be greatly appreciated.

    jimmy -

    When I received my new drive there was a sheet that said you could keep the old boards but you have to 'flash' them with the ps3's digital information. Currently trying to figure out how.....

    Cheffy -

    My CECHH01 has its blu-ray drive encased in a shield plate. Only one ribbon cable is visible. (The one we have to disconnect). Mine had some tape over it.

    Also, I used a spudger instead of my nails.

    Philippe Morin -

  10. srybvbL2FRQyrvc5
    • Ziehe das Flachbandkabel gerade nach oben aus seinem Anschluss auf dem Motherboard.

    Some PS3 versions do not have a separate control board, since the buttons and LEDS are located on the motherboard (for example, in my PS3 model CECHG04). In this case steps 10, 11 and 13 are not applicable.

    markp -

    This is also true for my CECHH01. ?‍♂️

    Philippe Morin -

  11. YwVpEZ3cxJnHpDJB
    YwVpEZ3cxJnHpDJB
    ROIGUjOmDbAubmIA
    • Entferne die zwei 12 mm Kreuzschlitz Schrauben, welche die Kontrollplatine im unteren Gehäuse befestigen.

    • Entferne die Kontrollplatine inklusive daran hängendem Kabel von der PS3.

  12. xaRKXjmUEQmOZKK1
    • Entferne die folgenden acht Schrauben, welche die Motherboard Einheit im Gehäuse befestigen:

    • Sieben 12 mm PH2 Kreuzschlitz Schrauben

    • Eine 30 mm Kreuzschlitz Schraube

    On my machine (fat PS3 with no card reader and 2 USB ports), there is no upper right screw to remove.

    alansliu -

    That 30mm screw is the one lower down under the power cable, not the higher up one with the embossed arrow pointing at it.

    James Beegle -

    Hey guys, that red and orange you are using are not at all identifiable as separate colors to some of us with colorblindness. I had to get my buddy to tell me which one was orange and which was red. In the future, it would be most helpful if you stuck to contrasting colors. Great guide, thanks for making it!

    Aksel Barnes -

    Step 17 helps with the 30 mm upper left screw

    joshuavivelavida -

    For any further vision impaired people trying to follow along, the single 30mm screw is in the top left of the image.

    James Beegle -

    Voting up the comments about the orange v red colors on the images, I'm surprised that such a simple edit has not been done over the past three+ years.

    Palfrus Wyrmrest -

  13. QtjWjem3O4L2TOUu
    • Entferne den Sicherungsbügel.

  14. eypILN1mQVYGMDRO
    eypILN1mQVYGMDRO
    jbeanei2UIcxUDvo
    • Öffne mit der flachen Seite eines Spudgers die Abdeckung des Festplattengehäuses vom unteren Gehäuse.

    • Entferne die Abdeckung.

  15. jrPSWIRYp3XOm6O3
    • Hebe die Motherboard Einheit aus dem unteren Gehäuse.

    My Ps3 was a little different..

    The rear backing plate is connected to the fan shroud beneath the unit that is screwed into the bottom of the case.. And these large chrome pieces attatched to the fan were stuck to the tray that the board is on. Came a part pretty rough, guessing the ps3 got so hot it turned the grease into glue lol

    intotec239 -

    If you already suspect you may have a slightly different PS3 model to the one pictured here STOP RIGHT NOW! Do not try and lift the motherboard off the lower casing if it is not coming easily. On mine, the cooling fan and heat sinks have extra screws directly into the lower plastic case and you will not be able to lift the motherboard out until after you have done Step 27. So skip this step, continue through the guide, skip 18-23 (you probably don't have a memory card reader). After unscrewing the 4 screws in Step 27, pull hard to separate the motherboard from the heat sinks (they will be attached with thermal paste like a glue). Only then will you be able to access the screws to separate the large fan and heat sinks from the plastic lower case.

    Incidentally I totally smashed mine trying to get the lower case off here at step 15 - I broke the screws off, warped the metal on the heat sink and snapped pieces of plastic. But I continued and did the heat gun stuff and it still actually worked!!

    Fat Albert -

  16. xTyFVOwmmMXMJwCY
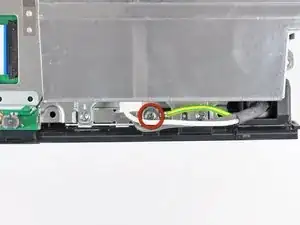
    • Entferne die 7,7 mm Kreuzschlitz Schraube, welche das Erdungskabel mit dem Gehäuse verbindet.

    On my PS3 the ground wire(green/yellow) was actually routed under the bolt for the power supply, so I had to remove the power supply before I could removed the AC inlet

    jorgebustos2254 -

  17. q4nQocigEmFQXOxy
    q4nQocigEmFQXOxy
    1dtWtiQIZQJLClNx
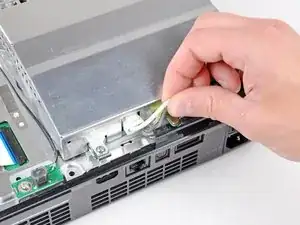
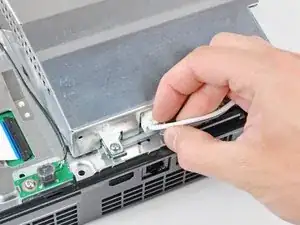
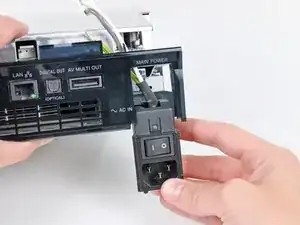
    • Ziehe das Stromkabel etwas weg vom Gehäuse, um an den Stecker zu gelangen.

    • Während du den Schliessmechanismus zusammendrückst, ziehe das Stromkabel aus dem Anschluss.

  18. 4tTsFnti5NTSTEjG
    • Ziehe das Netzteil von unten nach hinten aus dem Gehäuse. Achte dabei auf Kabel, die du versehentlich mitreissen könntest.

    I had to loosen the two screws on the perforated cover to get the ground wire out.

    asciimo -

    Had to remove 2 screws (the top 2 screws marked in step 25) to get the ground cable out.

    deuxphoria -

    Like @asciimo and @deuxphoria, I had to loosen the same two screws to get the ground wire out. When you're putting the PS3 back together and you're doing the steps in reverse, it helps to leave those two screws unscrewed during Step 25 and wait until you put the AC inlet back in Step 18.

    hogurt -

    You can put the 2 screws back in step 25, just put the AC Outlet before you put in the back plate. (Do Step 18 before step 19 when you are going in reverse)

    xaviertaylor -

  19. BMk4KNKoXZ6YF2GO
    BMk4KNKoXZ6YF2GO
    fX3utQJL1rNCyfP3
    • Öffne mit dem flachen Ende eines Spudgers vorsichtig die Clips an der oberen und unteren Kante der hinteren Abdeckung, während du diese langsam vom Logic Board abhebst.

    If going in reverse do this step after step 18, otherwise you will have hard time getting the earth cable routed.

    xaviertaylor -

  20. YpQbYrWnVeVDcZyc
    • Entferne die Abdeckung vom Logic Board.

  21. HOyAUdTf4TPkM4C1
    HOyAUdTf4TPkM4C1
    1tFt4heuTLaSCXDo
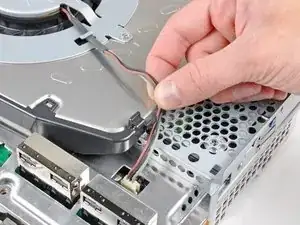
    • Entnehme das Lüfterkabel aus der Halterung am Kühlkörper.

    • Ziehe das Kabel aus dem Anschluss auf der Hauptplatine.

    • Achte darauf, den Stecker gerade nach oben herauszuziehen.

  22. dtMlYNqdVr2ISNBq
    • Entferne die zwei 9 mm Kreuzschlitz Schrauben, welche den Speicherkartenleser im Gehäuse befestigen.

    Only the very first release of the PS3 used to have the memory card reader. Most recent models do not have it (such as my PS3 model CECHG04). In this case just skip steps 22 and 23.

    markp -

    Also, these screws should be removed in step 5 to prevent breaking the clips that secure the card reader to the top shell.

    screech -

  23. AaMp5W2SDhPLWjON
    AaMp5W2SDhPLWjON
    tTYOxpUaPFQOYGDj
    • Hebe den Speicherkartenleser soweit an, dass du das Flachbandkabel herausziehen kannst.

    • Klappe den Bügel hoch, der das Flachbandkabel des Speicherkartenlesers befestigt.

    • Stelle sicher, dass du nur den Bügel nach oben klappst, nicht den Anschluss an sich.

    • Ziehe das Flachbandkabel aus dem Anschluss und entferne den Speicherkartenleser.

    I have a CECHA01 and the card reader is attached to the top cover. Per comments at step 5, the 2 screws mentioned at step 22 are removed at step 5. The ribbon cable mentioned here in step 23 should be removed at step 5.

    Jon Tyre -

    If leaving card reader attached to top shell this step should be part of step 6.

    screech -

  24. OTnnIGdXxhQRIEdZ
    • Ziehe die Stromkabel aus der Vorderseite des Kühlkörpers.

    • Ziehe den Stecker Richtung Vorderseite der PS3.

  25. gPUND35OSiSGrNVe
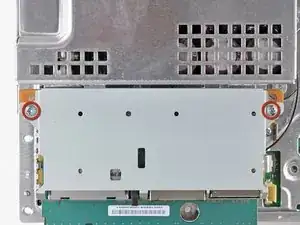
    • Entferne die fünf 9 mm Kreuzschlitz Schrauben, welche das Netzteil im Gehäuse befestigen.

  26. EOlHOqPhCdcX4WOM
    • Hebe das Netzteil an der vorderen Kante an, um die beiden Stifte freizulegen, die es mit dem Motherboard verbinden.

    • Entferne das Netzteil.

    I had a small black wire taped to the side of my power supply. If you have this - remember to remove the tape, first, or you run the risk of pulling the wire out.

    Oliver Clare -

  27. OLZ2uFatyPysN2qo
    • Entferne die vier 16,5 mm Bundschrauben, welche den Kühlkörper auf der Hauptplatine befestigen.

    • Entferne die zwei Bügel, die von den Schrauben gehalten wurden, die du gerade entfernt hast.

  28. RBXS1euymxJTE3sU
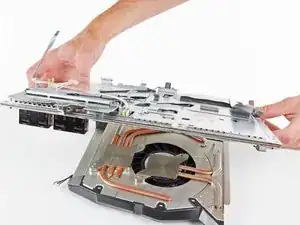
    • Hebe die Motherboard Einheit vom Kühlkörper an.

    • Der Kühlkörper könnte noch von der Kühlpaste gehalten werden. Sollte dies der Fall sein, sei sehr vorsichtig beim Abziehen des Kühlkörpers. Achte darauf, dass du nicht die Kupferrohre verbiegst.

    • Achte darauf, dass du eine neue Schicht Kühlpaste aufträgst, wenn du den Kühlkörper wieder einbaust.

    • Noch nie selber Kühlpaste aufgetragen? Unsere Anleitung zum Auftragen von Kühlpaste macht es dir einfach.

    • Wenn du gerade dabei bist, die YLOD-Anleitung zu befolgen, achte später darauf, wo genau du sie aufträgst.

    so do we apply arctic silver 5 thermal paste to the heat sink pads that attach to the CPU GPU,Or do we only apply thermal paste to the chips /pads CPU GPU ?

    David -

    In some PS3 versions, such as my PS3 model CECHG04, the heat sink is attached to the lower half of the motherboard shield, so in order to remove the motherboard you have to lift the top cover and detach the motherboard from the heat sink.

    markp -

    Yeah, on mine (which is the very first revision of the PS3), you have to add a SUPER heavy amount of thermal paste, for it to even make contact. Odd.

    Christopher -

    Can someone confirm what material the heatsink is made of for those wanting to apply liquid metal (I'm sure as !&&* not taking the risk) but might be of interest to others…

    Jjj -

  29. Vdqibftvt2ZeEuaK
    Vdqibftvt2ZeEuaK
    xxPidWRmydTkKaGW
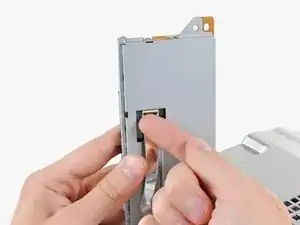
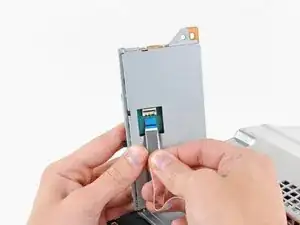
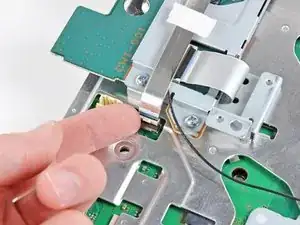
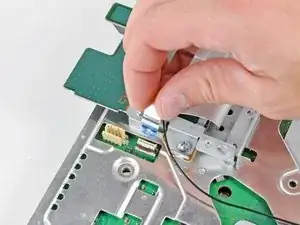
    • Hebe die Halteklappe am Kabel des Blu-Ray Laufwerks an.

    • Achte darauf nur die Klappe, nicht den Sockel selbst anzuheben.

    • Entferne das Kabel des Blu-Ray Laufwerks.

    On my 60GB model, the Blu-ray ribbon cable was very easy to disconnect, but a real pain to re-connect. It's not as easy as pushing the black fap down to secure the ribbon. This YouTube video helped enormously: https://www.youtube.com/watch?v=Zn1pMLGH....

    hogurt -

    To follow what hogurt said, you have to push down and back a bit with the clip. (Watch the video, it’s good). If the clip bounces right back with resistance, STOP and don’t keep pushing or you will break the clip.

    Steven Vallarian -

  30. E33mwljbCb5Sgyeu
    E33mwljbCb5Sgyeu
    3HtRE4FuHUcy4g4H
    • Hebe die Halteklappe am Speicherkartenleser an und entferne das Flachbandkabel.

  31. QUpeOgDX4rDWxkf4
    QUpeOgDX4rDWxkf4
    fwMuTkmvMaHK5lkl
    • Hebe die Halteklappe am WiFi/Bluetooth Kabelsockel an.

    • Ziehe das Kabel heraus.

    Missing a step here where you actually remove the cw1-100 board. 4 screws and it comes out.

    Steven Vallarian -

    What does the black cable?

    Robert Brown -

    This cable is the antena cable for WiFi and Bluetooth. This cable is used to conduct electric signal between the antena and the wireless network chip integrated to the device's motherboard.

    Brendan -

  32. WuPAnODLYhmaM3QU
    • Löse das Stromversorgungskabel vom Motherboard und lege es beiseite.

    • Ziehe das Kabel dabei senkrecht nach oben raus aus dem Anschluss.

  33. 2ZSNnUF5S6XaBEjU
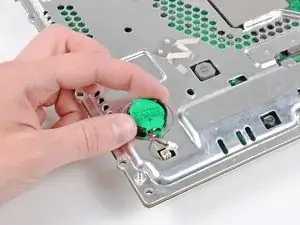
    • Löse das Kabel der PRAM-Batterie vom Motherboard.

    • Der PRAM Sockel ist empfindlich und bricht leicht aus der Platine. Wenn irgend möglich, halte den Sockel auf dem Motherboard fest.

    In the most recent PS3 versions, the PRAM battery is located on the motherboard: remove it before performing the reflow and don’t forget to put it back before starting the re-assembly.

    markp -

  34. JMMhvyyAnxMrO1YS
    JMMhvyyAnxMrO1YS
    QhiDbxWTPBRv4Enc
    6qJJCFfrgKH2PTQg
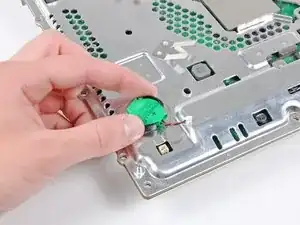
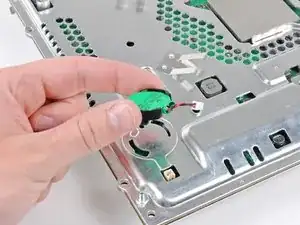
    • Drehe die PRAM-Batterie leicht gegen die Uhr und entferne sie vom Motherboard.

    It is quite hard to rotate counterclockwise, but by rotating it slides out, no pulling up is needed. Hard to do by hand, but much easier if you use some flat nose pliers.

    jerseyzangel -

    Same here. Even with pliers, my PRAM battery was incredibly difficult to remove. When it did finally come loose, part of the black plastic that keeps it secure broke off for me. The whole thing is loose now when I put it back, but still stays in place.

    hogurt -

    Worked. Took 3 hours to complete.

    ****NOTES that weren't mentioned here****

    1. Heat Gun on processors = zigzag from top left to bottom right - then circle back up to the top left. repeat.

    2. No thermal pads available in your area?

    I used the same thermal pads that came with the PS3

    3. No T-10 security screw driver?

    I broke the very first step - I didn't have a t10 security driver and jsut figured I would risk breaking the cover a bit by pulling it straight up - popped right off - then broke the stupid screw right off of it.

    4. took 15 minutes to find things to ensure the motherboard we perfectly level.

    5. I let the Motherboard sit for exactly 17 minutes and then applied Arctic silver.

    6. No Screwtray ?

    I used a piece of duct tape, sorta flipped it around so it was a sticky pad to grab all the screws and not let them get unorganized.

    I hope I remember to report back how long the system runs until it dies again, which I hear happens fairly quickly after this type of operation.

    Good Luck.

    infinitist -

    mine has a small round tab on the PRAM battery housing that locks it in place. i had to slip the flat end of the spudger between the PRAM battery housing and motherboard cover to release the tab. after that it rotated quite easily with no need for pliers or anything.

    jcelkay -

    I didn't handle the motherboard correctly and Mistakenly ripped off the wires off PRAM! How can I fix it?

    Renata Szczech -

    Like jcelkay said, I just needed to use the back end of the spudger on the non-cable side of the PRAM and sort of finesse it a bit. When I did this it became much easier. Getting it back on I had to do the same thing.

    Naomi Young -

  35. xnWxm56LBvNPm2nN
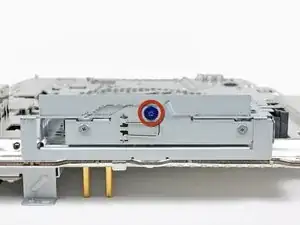
    • Entferne die blaue 8 mm Kreuzschlitz Schraube, die den Rahmen des Laufwerks am Chassis befestigt.

  36. RMellgA2sfDabr6D
    RMellgA2sfDabr6D
    3vcbaGSDWkdUuRMC
    q2d4xtQMDQlU6ZYR
    • Schiebe den Rahmen des Laufwerks Richtung Vorderseite des Motherboards.

    • Entferne das Laufwerk vom Motherboard.

  37. EfPNGC6afTnZpWES
    • Entferne die beiden 3,7 mm Kreuzschlitz #0 Schrauben, die das Chassis am Anschluss des Laufwerks befestigen.

    The fixit kit doesn’t come with a Phillips head small enough?

    William Chance -

  38. VDu2IJH6PrCZD4g3
    • Entferne die beiden 8,3 mm Kreuzschlitz #0 Schrauben, die die beiden Hälften des Motherboards zusammenhalten.

    On step 38 what is the thread count on the 8.3mm screws? I'm missing and need to know before I go out to the store.

    ericambrose32 -

  39. HppSYQKg5RiOHlNH
    • Fädle das WiFi/Bluetooth-Flachbandkabel vorsichtig durch die Öffnung in der oberen Motherboardabdeckung.

    • Enferne die obere Abdeckung.

    This step is tricky, because the thermal paste from the chips could act as a ‘semi glue’, so you have to softly try for some minutes…

    Roger Tranchez -

    Also, if I understand correctly, once this step is done, you pretty much NEED to have replacement pads at home, because I the old ones might be wrecked. :P Is it true?

    Philippe Morin -

  40. TTdsFYrPfpmtEv1I
    • Entferne das Motherboard von der unteren Abdeckung.

  41. NNWUo1QFA6UwyhKq
    NNWUo1QFA6UwyhKq
    EOdI3PyLfVK4g1ns
    • Kippe die Halteklappe am Anschluss des WiFi/Bluetooth-Kabels nach oben.

    • Ziehe das WiFi/Bluetooth-Flachbandkabel vom Motherboard.

    • Das Motherboard ist nun frei.

  42. ps1xSKaxSOBHW3DE
    ps1xSKaxSOBHW3DE
    HbxhMGSvrRWZPMct
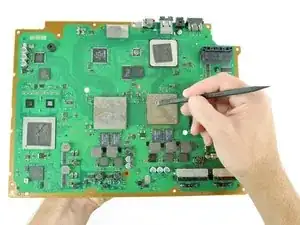
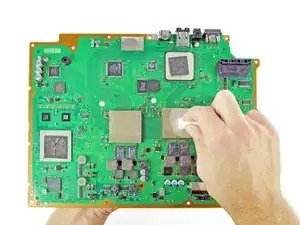
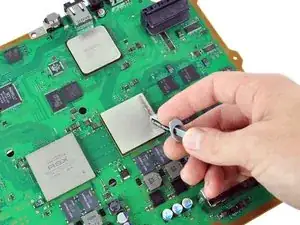
    • Mit dem flachen Ende eines Spudgers kannst du die alte Wärmeleitpaste von den beiden großen Chips auf dem Motherboard, der CPU und der GPU, abschieben.

    • Mit einem geeigneten Reinigungsmittel wie beispielsweise dem ArctiClean von Arctic Silver oder auch mit hochprozentigem Alkohol lassen sich die beiden Chips reinigen.

    • Entferne genauso die Paste vom Kühlblech.

    Thermal paste took very long to clean completely, you better have a lot of time on your hand.

    Jacob -

  43. TwWRWbHWFlfxxfWP
    TwWRWbHWFlfxxfWP
    2WSmZcv6tIJqXeNq
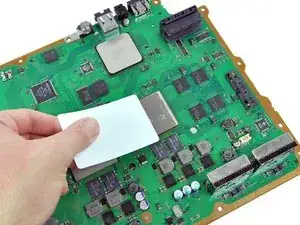
    • Löse die Wärmeleit-Pads auf dem Motherboard entweder mit den Fingern oder mithilfe eines Spudgers in der folgenden Reihenfolge ab:

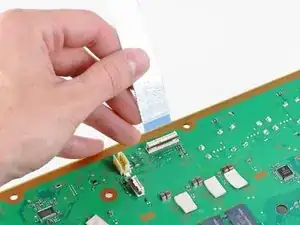
    • Große Quadrate

    • Kleinere Quadrate

    • Kleine Rechtecke ( auf der Rückseite des Motherboards, wie im zweiten Bild gezeigt)

    • Manche der kleineren Pads kleben vielleicht eher am Metallgehäuse als auf dem Motherboard selbst.

    On my motherboard, where the thermal pads are marked orange, all the ones on the top row dont have thermal pads at all. Am I suppose to add thermal pads to them anyway even though there was none to remove?

    Ragnarok -

    For the people watching this nowadays and having the same “problem”

    Probably, the pads are on the iron cover instead of the board but there are definitly thermal pads on every location

    Cedric Hallard -

    Little tip: use the old thermal pads as templates for cutting the new ones.

    joshuavivelavida -

    Can somebody please tell me where I can obtain these “Thermal Pads”?

    Ken

    drkenw@hotmail.com

    Thanks

    Kenneth Wedsted -

    I know this is old, but I read that 1.5 mm and 2.0 mm (thickness) pads are suggested. As for which thickness goes where; I don't know. :P Some companies make good ones, like Arctic and Thermalright.

    A new guide or even pre-cut kits sold on iFixit would be cool, as long as they are not dry.

    Philippe Morin -

  44. tHqRL1YDvTAUqKQm
    • Stelle die Heißluftpistole auf niedrige Stufe (oder etwa 300° C) und lasse sie etwas laufen, um sie auf Betriebstemperatur zu bringen.

    • Halte das Motherboard senkrecht und erwärme es komplett mit der Pistole. Es soll warm, aber nicht zu heiß sein.

    • So verhinderst du Schäden durch zu starke punktuelle Erwärmung.

    When in the guide it says put the Heat Gun on a "Low" Heat does anyone know what temp the Temp of their Low setting was?

    Bob -

    I had that same question. But I found a answer somewhere else on this site. I used 250 Celsius and it worked like a charm.

    OptimusImpreza -

    I just used the lowest setting on my heat gun which was 300 C

    Thurstan Johnston -

    I have just completed this repair: my old PS3 is now working again and I have successfully transferred all the content to a new PS3 super slim.

    My old PS3 is the CECHG04 model (the one without the memory card reader and with only two USB ports), so it’s slightly different from the one shown in the guide and in the video: I have added some notes in the previous steps to highlight the differences. Some tips about the reflowing: I used a Wurth HLG-2000 LE Heat Gun that has a rotary dial to adjust the temperature in 15 steps. I did a few tests and I found out that position 4 of the dial is approximately 100°C, while position 7 corresponds to about 250°C. I warmed up the motherboard using the heat gun at 100°C, then I increased the temperature to 250°C and I heated for about 30 seconds (using the recommended zig-zag motion) only the GPU.

    After the reassembly I was quite surprised to see that the PS3 was up and running again !

    markp -

    Just wondering if I can still use the old pads on the psi and just reflow the gpu and cpu chips?

    christopherrybock -

    Do we need to use a heat gun? Maybe a hair dryer or nothing at all? What's the purpose of the heat gun in simple terms?

    Zach Z -

    To remelt the sodering into place

    Irving Ibarra -

    A hair dryer will work as well as a heat gun. Both blow hot air, which will melt solder at between 200F and 350F, depending on the type of solder used.

    gordonhamachi -

    Some questions on warming up the motherboard:

    1) What is ‘low heat’? Do we have a ballpark temperature range we should be looking for?

    2) About how far away should the heat gun be from the motherboard when warming up the whole board?

    3) About how long should warm up the board for?

    haxin -

    I followed the manual today and my PS3 works again!

    I used 150 to 200 °C to warm up the board. Then used 300°C for 30 sec, let it cool down and again 45 sec after that.

    Cedric Hallard -

  45. pN4ZaNPloOqNTpXB
    pN4ZaNPloOqNTpXB
    5EU6ZbAMglsywSuY
    • Du musst das Motherboard auf einen stabilen Träger aufsetzen, so dass CPU und GPU komplett gleichmäßig unterstützt sind.

    • Dieser Träger soll Temperaturen von mindestens 300°C aushalten können. Vorschlag: Altholz, alte Bücher, alte Schachteln.

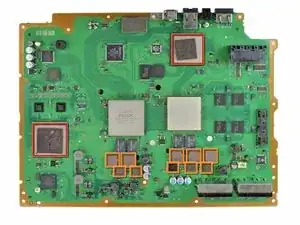
    • In den folgenden Schritten wirst du das Lötzinn unter den rot markierten Chips verflüssigen.

    • Berühre oder verschiebe während dieses Vorgangs keinesfalls das Motherboard, das kann zu irreparablen Schäden führen. Warte bis es ganz abgekühlt ist.

    I found preheating an electric oven to 250celcius, turning off and placing it inside for seven minutes before applying the heat gun worked best for me. After failing doing it by the book. Oven was bellow 200 by the time I had it setup, but I had preheated for 10 minutes extra preheat to warm the entire oven, and had done a dry run first to check start and finish temps first. My old 60 gig ran 50 hard hrs of Skyrim, and was left on in Aussie late summer Unprotected by air con. It's still runs as my backup drive. Thumbs up I fix it, shared my find on Facebook with anyone I thought would like the site, or share it to get the message out. After all, ifixit is more than just a repair guide. "Re-home, repair..then recycle" would be an even nicer ethos I think though

    Micah McCabe -

    I tried this with the heatgun and it ruined my PS3. The CPU and GPU are NOW RUINED!!! It did not work for and made things worst!!! I sent it to a place to get reballed and they said the HEATGUN had overheated my processor and killed them!!! So think twice about doing this. Just because it is already broken, DON'T THINK YOU CAN'T MAKE IT WORST!

    georgehollyoh -

    can this be done without heat gun procedure? ie. can heat gun be skipped?

    Kevin C. -

    It really depends on your situation. The heat gun is preferred as it will basically redo your solder for you. It's extremely difficult, if not, impossible to resolve these chips manually. Using the heat gun will lightly melt the solder under these chips and basically “reset" the solder underneath so that if overheating is the issue, then it will most likely be solved.

    Albert Ayala -

    What should the surface temperatures be on to of the chip and the board around it.

    Dave Young -

  46. xaraT3adJvY6gKwV
    xaraT3adJvY6gKwV
    ODhbE5Nmp4uT6W5J
    • Erwärme die beiden mit "RSX" und"CELL" markierten Prozessoren nun jeweils 2 Minuten lang gleichmäßig mit einer kreisförmigen Bewegung. Halte das Gebläse etwas mehr als 1 cm entfernt und stelle dabei eine niedrige Hitzestufe ein. Erwärme die unteren beiden Bereiche 30 Sekunden mit den gleichen Einstellungen.

    • Beginne an der mit RSX markierten GPU und arbeite dich zickzackartig voran.

    for my 1000w heat gun it takes 45 seconds and twice to work

    not "roughly 25 seconds" ;)

    s6963172 -

    What temperature should the board be at for me know it is finished

    Nathan Ferris -

    No flux? And shouldn't it be like 45-60 seconds each chip?

    Emm Cee -

    Some questions on reflowing the solder under the chips:

    1) What is ‘low heat’ setting? Do we have a ballpark temperature range we should be looking for?

    2) About how close should the heat gun be to the chips?

    3) Once complete, is there anything we can look at to determine whether or not this was successful before closing up the console?

    haxin -

  47. AMLOtckHJTWeBJhP
    AMLOtckHJTWeBJhP
    qNVUPKuFnobHVEge
    • Heize die anderen Chips mit genau der gleichen kreisförmigen Bewegung auf, jeden für etwa 25 Sekunden.

    What is the minimum and Maximum temperature the chip should be?

    Dave Young -

    Some questions on reflowing the solder under the chips:

    1) Does this mean we’re heating each chip for a grand total of 50 seconds each?

    2) About how close should the heat gun be to the chips?

    3) Once complete, is there anything we can look at to determine whether or not this was successful before closing up the console?

    haxin -

  48. jk2RmqUhNWSHQZGW
    jk2RmqUhNWSHQZGW
    oyClUyFLnuSIbZeZ
    vGdVYhJSxWTfSuWE
    • Bevor du weiterarbeitest, vergewissere dich, dass das Motherboard ganz abgekühlt ist.

    • Wenn du bisher noch nicht mit Wärmeleitpaste vertraut bist, empfehlen wir dir diese Anleitung zur Lektüre während der Wartezeit.

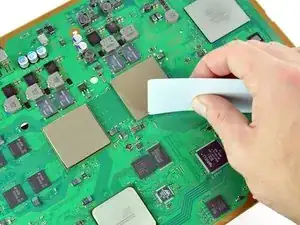
    • Trage eine dünne Schicht der Paste auf die CPU auf.

    • Mit einer geeigneten Plastikkarte kannst du die Paste dünn und gleichmäßig auftragen.

    • Verfahren genauso bei der GPU.

    • Entferne überschüssige Paste vom Motherboard.

    After we apply arctic silver on the CPU GPU is there a time period for the paste to be connected back? and will it set harden if not connected.

    Ive read that the arctic silver exspands on heat consumption.

    David -

    Awesome. Worked. I thought I ran out of thermal paste when reattaching the heat sink but then realized that the heat sink touches the CPU and GPU. Doh! Bought new thermal for nothing, but I guess it's good to have on deck for future stuff. I'll let you know if it kicks the bucket again, though!

    Tamer -

    I used almost completely a 2,7 grams tube of Arctic Silver Ceramique 2 on the CPU and GPU. I did not replace the thermal pads.

    markp -

    I spread a thin layer of the compound as instructed here. After putting it back together I went from the yellow light of death, to the PlayStation overheating within 30 seconds. I then disassembled, and instead of spreading a thin layer once more, I applied a pea-sized dab of the compound in the middle of each chip. I then reassembled without spreading the compound. The PlayStation now runs with no issues.

    I read on several forums that the compound will spread on its own through heat and the reassemble of the components.

    Kurt Grahovac -

    Best to state which setting required or best suited when using a hear gun. There is quite a huge difference.

    James Smith -

  49. tOSOfGAHkCHbrtik
    tOSOfGAHkCHbrtik
    3miKXPoG1cQYvl1J
    xhTBXfNeSNGwaBQX
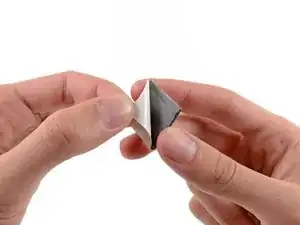
    • Klebe die neuen Wärmeleit-Pads wie folgt auf das Motherboard:

    • Große Quadrate

    • Kleine Quadrate

    • Kleine Rechtecke

    • Wenn du die Wärmeleit-Pads selbst zuschneiden willst brauchst du Material mit einer Dicke von etwa 2 bis 2,5 mm. Danke an howardsarah34 für die genauen Maße.

    • Zwei Quadrate zu 3 x 3 cm

    • Zehn Quadrate zu 1 x 1 cm

    • Fünf Rechtecke zu 1,5 x 0,5 cm

    i am a little upset. My backs of my "fresh thermal pads" were not plastic there were paper and they do NOT pull off easily at all.. tore a couple of them getting them off. I hope this is ok. any suggestions as to how to not have this happen next time?

    hockeydude17 -

    The white plastic covers were tough to peel off for me as well. An X-ACTO knife or utility blade really helps in this regard.

    hogurt -

    I tried this with the heatgun and it ruined my PS3. The CPU and GPU are NOW RUINED!!! It did not work for and made things worst!!! I sent it to a place to get reballed and they said the HEATGUN had overheated my processor and killed them!!! So think twice about doing this. Just because it is already broken, DON'T THINK YOU CAN'T MAKE IT WORST!

    georgehollyoh -

    For the foam pads, if you push into one of the corners, it will force the layers of removable plastic and the sticky tape to seperate just enough to get a finger nail or a pair of tweesers on the plastic and carefully pull it off the pad. This worked on all the pads for us.

    DR 09Aug2014

    Dan Reeser -

    hi everyone is was wondering what size thermal pads i will need to fix my ps3

    be great if anyone could tell me saves opening my ps3 just to check what size i need

    john -

  50. TnJIklcDMvYuKCQ2
    • Ziehe die restliche Schutzfolie von der anderen Seite der Wärmeleit-Pads ab.

    It took some doing, but this fix seems to have worked. Granted, I've only just turned the system back on and started an update, but that's a heck of a lot better than the yellow light I was getting before. I used the kit, and while peeling off the plastic-y paper backing from the thermal pads was a nuisance, everything I needed was included, and I didn't have any trouble following the instructions in this guide through to get the ol' PS3 up and running again. Thanks, ifixit!

    mccarley -

    Hi do we apply the thermal paste on all the square {silverones} GPU CPU or just the two in the middle ?

    Also do we apply thermal paste and thermal pads on all 4 silver squares GPU CPU.?

    David -

    ti will be for ever if i do the same steps i'm not gonna see the yellow light again????plz answer

    sofiane kiiler -

    I tried this with the heatgun and it ruined my PS3. The CPU and GPU are NOW RUINED!!! It did not work for and made things worst!!! I sent it to a place to get reballed and they said the HEATGUN had overheated my processor and killed them!!! So think twice about doing this. Just because it is already broken, DON'T THINK YOU CAN'T MAKE IT WORST!

    georgehollyoh -

    Did not work :( plz help

    antonio -

    My PlayStation has life again thank you for this guide it was easy just took me a while to fix but I'm happy

    Joseph -

    I just finished this repair. I had tried swapping drives and cleaning out the dust with an air compressor without any luck. After following these instructions carefully I've now been running my PS3 for about 4 hours without any issues. Even if it still dies at least I now have backups for all of the games. Thanks!

    Kevin -

    Great step by step instructions! I did it as a favor for my neighbors kids.

    So far, so good!

    If it didn't work for you try wrapping the entire motherboard in tin foil and putting it in the microwave for about 10 minutes. That will definitely do the trick! (-;

    Wolfgang -

    Tin foil in a microwave?! Pretty sure that would permanently fix your problem. ... setting your motherboard and microwave on fire will definitely keep you from ever worrying about fixing it again. Lol

    cbeardsley1982 -

    just turned my ps3 on and it worked! although, the fan seems to be going on overdrive within 30 seconds of me turning it on. seems like its overheating really quickly. haven't ran it more than a minute at a time. i think i didn't put enough thermal paste on? if i were to open it back up and put more on, would i need to scrape off the paste i just applied or can i still use that? should i have used the whole bottle?

    bmouser10 -

    Pleasr i did this and my ps3 will on work for about 30 second then develop the YLOD again... Please what should i do?

    Muiz hammed -

    I’m quite surprised that it’s actually working… nice, thanks for a guide !!

    so far so good an old ps3 up and running.

    Tomasz Sergiej -

    Consider suggesting a material type for substitution on the thermal pads.

    I have a suggestion, because your guide was nearly perfect. If I’m being completely honest, it was perfect. Maybe my remark is a product of the age we find ourselves in today, because it was insignificant and had zero effect on the outcome of your manual.

    J.H. Grice -

Abschluss

Um dein Gerät wieder zusammenzubauen, befolge diese Anleitung in umgekehrter Reihenfolge ab Schritt 41.

Brett Hartt

Mitglied seit: 13/04/10

125814 Reputation

222 Kommentare

Done this twice, first time it lasted 2 weeks and the second time 10 days. I'll do it one more time and if it goes again, I think I'll be buying a new console.

Great repair guide, clear and simple -I don't know why it's rated as difficult -there's no soldering or wiring to do.

Franco -

great repaier guiad

hamza -

Great kit! And it worked! We have brought the PS3 back to life! Hoping it stays this way! But for the price of the kit it is worth the try!

ekozocas -

I completed this repair last night. It wasn't as hard as I thought, though it did take me almost 3 hours to accomplish. My PS3 is back up and running, and the fan is so guiet not I can hardly hear it.

I will add that these pictures provided are from a 60GB launch PS3. I have an 80GB (MGS4 Bundle), and some of the inner workings are a little different. The card reader remains attached to the upper casing, and the ground wire for the A/C switch is run under the power supply... as opposed to over it as it is in this guide.

Overall, this is a great guide and the kit was a great price. I hope my PS3 will remain operational at least through Christmas... I've got my eye on the UC3 Bundle; )

jshaas -
This is an excellent guide! I've had the YLOD before about a year ago, and my brother shipped it off to get it fixed for me (his COD:MW2 was stuck inside). It cost him $150 to get it repaired because the warranty had run out. While it did work for an entire year after the repair (which is very surprising with most people saying theirs only worked for about a month after getting it fixed), I definitely don't think all that money was worth it. I am extremely pleased that I was able to fix it myself with absolutely no cost to me (I borrowed a heat gun and thermal paste from a friend). No cost is way better than $150 obviously. I do intend to sell my PS3 to Gamestop though and buy a new slim, which I hear is less likely to get the YLOD due to better cooling. I will most likely open it up at replace the thermal paste though, as I've heard the paste Sony uses is very cheap, along with a few modifications for better cooling.

--------------

Long story short, this guide just saved me $150 dollars. Also, my PS3 is the 60GB backwards compatible if that is of interest to anyone.

Kar -

Finished this repair today after purchasing the kit. A total success. I am hoping for many more years with my playstation. Thanks to ifixit for the incredibly clear guide on how to do this repair.

goblue1229 -

Success! Great guide with screw size and location detail that beats anything I've seen. My first gen. 60g is back in action without having to call Sony or spend $150.00 for a refurb. Thanks for the pdf. format as well, I'll be back to your site for sure. daddyed

daddyed -

My PS3 has been revived! It took me two tries to get it right. The first time, I didn't get it hot enough, so I heated the heck out of it the second time. And now I will be enjoying my PS3 all over again. Thanks iFixit!

isaacarchuleta -

I can't believe people are actually getting results with this, heat gunning the RSX is at most going to allow for a poor reflow and possible warping at the corners of the chip without a proper board holder.

Also, at the temperatures required to reflow the solder, the thermal transfer compound between the RSX chip and it's heat spreader is going to be rendered much less effective.

As preventive maintenance, replace your power supply if it's the less efficient ZSSR539IA model with an APS-226 or 231 and clean then reapply the thermal paste. Once the YLoD occurs though, the system really needs to be reballed, reusing old solder and possibly shorting contacts under the chip with leftover flux is a bad idea.

Mark -

The point of the guide is to help those that already have the YLOD. 99 people out of 100 that look at this guide have no need for preventative maintenance because the damage is already done. Also, if your PS3 in not working, there is little to no risk of breaking anything. If I have a YLOD I don't care that heat gunning my RSX chip might warp the board because it's already broke.

ficoho -

Worked great for me on the first try. I had the state of mind that I can't break it any further,lol. Thanks MJ for the helpful video.

irv -

lol. awesome state of mind, irv. i agree.

h bomb -

Worked perfectly! Thanks iFixit!

adrian -

It work's great but I put the Mainboard into the oven with 200 degree celcius for 7 minutes. It's easylier as with the Heatgun.

many greets

Fex

Fex -

Hi,

1- For how long dit it last ?

2- I’m supposing you did NOT removed the covers for the RSX/CELL chips before putting the board into the oven, right ?

I did the heatgun thing and it lasted just one week. Next, I’m planning to removing the covers from both chips and reapply thermal paste.

Roger Tranchez -

Great step-by-step guide and MJ is pretty cute on the video! It worked perfectly for me... As mentioned in another comment, the assembly may be a little different depending on the model, but nothing to worry about. Thanks a lot!

amuralima -

Color me impressed. Was able to resurrect my 60Gb model in about 3 hours. I have no real expectation that it will last, but I was able to retrieve my son's favorite disc using this guide, and the system seems to be running much cooler that it did before (fan is not coming on nearly as much) since I was also able to clean out all of the accumulated dust from about 3 years of usage. Kit was worth every penny to me.

mikehulen -

I bought the kit and followed the guide and got it back up and working in a couple hours. I'm a total novice with this stuff and it was pretty easy. I must have a different model so some screens were off but with some educated guessing I must have done the right thing(s). Came out with a couple extra screws but again, didn't seems to hurt. Have used the PS3 for a hour or two at a time for a couple sessions and still working great. Hopefully it will stick. Last time I sent it out for a repair ($80) and the tech shop fixed it then, and it lasted about 6 months before YLOD again. I sort of don't expect this to be a long term fix, but now I know what to do to fix until a cheaper PS3 arrives... thanks iFixIt!

gregglavine -

Great guide and kit.

A lot easier than I expected, but did take me quite a bit longer than an hour. Playstation seems to be working fine, and at first I thought I must have forgotten to re-connect the fan as it's so quiet now.

Thank you.

Kevin Aitchison -

I felt the same way, I don't think that the fan wasn't this quiet when i purchased the system.

nateprejean -

Thank you so much for this. I suffered a YLOD on Saturday and I got all the parts together and just tackled it this evening. It was a little difficult putting it back together but I eventually go everything back into place. Re flowed the chips and added Arctic Silver Ceramique 2 and the PS3 started right up. No red lights, No YLOD, No noises!

In fact, It sounds so much quieter now. And the fan seems to be running a ##%! of alot better since it was aired out. My only suggestion is to maybe get a inter cooler to maybe extend its lifespan. Who knows?

Thank you for this guide. It was very well detailed and straightforward. It saved me alot of money and it adds a newly profitable skill under my belt. Keep your head up!

DiscoTaco -

I was able to get through the guide with little issue. The process took a little longer than the 1 hour suggested but the guide did an excellent job of guiding what to do and where things were.

The issue that I have with the repair is that it lasted less than 24 hours. I know that there is no guarantee that the fix will work or even how long it will last once completed but after seeing the YLOD return the next morning I couldn't help but feel that my 180 minutes (I took my time to ensure everything was done properly) could have been better spent driving to a store to buy a new PS3.

In short-Great guide but questionable results.

ficoho -

I hate to be critical, but there should be some fore-warning on this guide. It voids your warranty, and any chance of Sony servicing the console. In my opinion, this is a repair that only a company with BGA rework equipment should do. Any DIY fix will last a very short amount of time. (I've experienced it myself - trust me, I've tried on many xbox 360's)

Daniel -

highly recommend. 6 months ago my PS3 had ylod. Ordered kit. Its been working ever since (its now July). All I can say is take your time (4hrs for me), lay out parts as you go (you'll be stripping it to bare bones). FOLLOW DIRECTIONS. They are easy to follow. Get muffin tins to put small parts & screws in and label what step they were removed so that when you put it back together its easy.

guyruffner -

Great help and highly recommended! I'm not the most mechanical guy but these directions and images made this project easy. After a few hours, I plugged it in and heard that beautiful horn sound to indicate my PS3 was back. I must admit that putting everything back was a little harder than taking it apart (especially the Wi-Fi cable) but I thank you ifixit.com. Plus now I own a heat gun!

captfluoro -

Hi. I have done everything that is in the guide, but the problem still retables itself. The LED doesn't change after the reparation. Somebody knows if I have to do some kind of "reset" before using PS3? Help me....

mattesenatore -

I bought the kit and everything... My PS3 only worked long enough for me to get excited about it. Updated the PSN firmware which took about 45 mins... But when I put a game in the PS3 shut down :-\ I waited a while and let it cool though. It came back on for a second but again, shut down and gave the YLOD again. Not sure what went wrong but at least I tried. Kind of seems like a waste of money now but I can't say my results are typical.

cupidboy1814 -

anyone using cechh version. have problem with step 15. seems to be a catch on the left hand side of rear cover (looking from the back). cant detach motherboard assembly from lowercase. pls advice

chewguopiao -

What has two thumbs and can fix a YLOD? This guy, thanks ifixit! The pictures on this guide were pretty different from the inner workings of my ps3 but helped enough. I'm going to take something else apart now -Nate

nateprejean -

Revived a CECHE01 console to life which I believe is a 2nd Gen or 3rd Gen unit. I also did some mods to keep it running cool.

So All in All I used

-Compressed Air

-19 Bladed Fan for Heatsink

-APS 231 Power Supply

-Artic MX-4 Thermal Paste

-Ifixit Kit which includes Pads etc

-Added a 19 Bladed Fan to the Heatsink and tossed the original 15 bladed Fan

(These can be found on Ebay for under $30)

-I replaced the original APS-226 Power Supply for the more efficient APS-231 Unit which runs cooler and draws less amps and is compatible with my unit and the 1st and 2nd gen PS3's (These can also be found on Ebay for under $30 but if you have the Slim model disregard because these have a much better power supply already)

Identification Chart can be found here: http://www.edepot.com/playstation3.html#...

-Used Artic MX-4 instead of the pasted that comes with this kit because the curing time is instant and has much better properties

This install is rather simple but the hardest part is keeping the screws organized and remembering where they go for the reassembly. The install time is listed as 1 hour plan for about 2-3 hours if this is your first time doing this. The Ps3 fan has 5 different speeds and is loudest in playing Blu-Ray Movies. If this fix doesn't work go to a professional who has reballing equipment.

RemzRR -

Having experience fixing laptops this project was a new challenge for me when my ps3 shown the YLOD and this guide helped me understand and accomplished the task. But it is worth noticing that the pictures don't apply to the original PS3 which has the memory cards reader and extra usb ports on the front. But is easy to figure out what to do having all those self describing pics. Thanks!!!

luisjust4u -

Thanks for the clear guide! This did work for me and my PS3's YLOD problem. After reading many comments here, I was not shy with the heat-gun step. The amount of dust inside of this almost six-year old console was amazing (no doubt contributing to heat issues)! It did take me all of 3 hours, but I took my time, kept screws organized into separate compartments based on steps in the guide (recommended). I was quite happy to see the normal start-up sequence happen after the repair was complete. I feel that I saved myself some serious cash and learned something in the process - a win-win! If I have to do it again, I probably will be able to do it in half of the time. XBOX 360 RROD fix next!

refischer -

Went form having ylod to stuck at standby with solid red light unable to power on :(

matt hamada -

Me too.Any ideas for this???

kostgog -

Did you check that the flat cable going from the mobo to the touch panel didnt get damaged? or maybe is just not well connected to it. If it doesnt do anything, it can be a power-on touch button problem, instead of something more complex.

Alain Martinez -

Thanks. Perfect guide and it worked, only issue could be the temperature and time of the heatgun. I tried on several scrap harddrives before doing it to the PS3 board to verify the right temperature and time- by testing you can check when the chips gets unsoldered. It may be a good suggestion for people that does not have long lasting success with this repair. It may be that you do not get the temperature high enough to get the solder to float underneath the chip. Frank.

Frank Moeller -

Heat gun trick worked great, though my original ps3 looked different on the inside (im in the uk, power supply unit is black in this one and the chips are arranged around it differently). Dissassembly was still fairly easy, although there were two large metal prongs sticking up into the power supply unit, which put up quite a bit of resistance to taking it off. Anyone else who is taking apart a uk one, once your sure youve removed all the screws and plugs, a bit of elbow grease is needed.

Aidan -

Hey, what model is this? I have the same issue but I'm in the US. I have a model with a black power supply and no card reader. It's the 40 MB version, I think first gen. It's also one of the models that doesn't play PS2 games at all (not even the software version).

The internals look entirely different and I'm afraid of messing it up.

Galenb -

My buddy's ps3 got the ylod and he got a new one. Gave me his old one and said if I could get it working to save his data I could have the ps3. Got the kit, saved his data, and scooped myself up a ps3 on the cheap. Thanks for the guide!

tyderiumds -

THANK YOU!!!!!! I’m really happy with your guide. I rescue my PS3 from YLOD with the help of your spectacular fix guide. It’s very accurate and precise. It was a flawless step-by-step fix! Thank you again ifixit, keep up the good work!

Spirit Catcher -

Our PS3 suffered an apparent YLOD attack after about five years. Figuring it was a goner anyway, decided to take a flyer on the iFixit repair kit after watching Fixit videos and guides--and it worked! :) Guide was extremely clear--even down to the number, size/type, and location of fasteners. Took about four hours, but not on all repair, mainly just because we were curious about what was inside and how it was put together. Very rewarding!

Another advantage over just buying a new one was that it allowed us the opportunity to back up saved-game data, as hadn't been done recently at the time the YLOD struck.

One suggestion: The video is good for an overview, but as the video says, when you're actually working, follow the GUIDE and not the video.

THANKS, iFixit!

Kim -

I have to admit I was skeptical about this working, but it did. Who knows how long it will last, I have heard 2 days to 2 years. I was only concerned about it being online long enough to transfer my saved data to a new PS3 and it was. Well worth the $50.

jasonmckee -

Great guide and easy fix

richpiaia -

fixed....didnt take long either. thanks

alanlegardo -

I am VERY DISAPPOINTED! I have bought the ylod fix kit, followed all of the instructions, yet my PlayStation 3 still has the yellow light of death wtf man, just a waste of time and money!

Ghost82evil -

Great kit and repair guide. One suggestion though: Instead of just a red triangle w/ bang to mark critical steps, make the text red too. I was zoomed in on the repair guide, missed the red marker, and pulled off the PRAM socket:(

beakes -

Thank you, Brett & MJ for the excellent guide and video!

My 1st gen PS3 had succumb to the YLoD after 6 years of virtually daily use, and I was able to get it up and running with the help of your instructions!

This was the first time I've taken apart my PS3 and it had accumulated a very significant amount of dust, which certainly contributed to it overheating thus causing the YLoD. I thoroughly cleaned the entire system, and used Arctic Silver 5 along with ArctiClean on the CPU, GPU and heat sinks to improve dissipation.

Since I already had all of the necessary tools, my only expense was $15 for the thermal pads (bought separately on Amazon), thus saving 80-90% of what it would have cost to send it in to get fixed professionally + I got the pads delivered next day and installed in under 2 hours, as opposed to waiting for roundtrip shipping and the repair turnaround time (1-2 weeks).

I had no expectations going into this, especially considering the age of my console, so I'm extremely happy with the results!!

ivan8 -

Just tried this and my ps3 is alive again... thank you. Will be transferring to a new slim as soon as possible just in case the repair doesnt last....

darin holmes -

Worked like a charm, my PS3 is back alive and kicking (even though it's been only two days). Was able to back everything up which was my main concern, money well spent. Thanks a lot iFixit!

formula1 -

just finished and the ps3 started to work. i hope it lasts at least a coup of weeks

neneblue18 -

This worked great for me and I'm glad that I bought the tool kit because it really came in handy. My 1st Gen PS3 has been down since 2011 and now I can play those games that I held on to.

Thanks iFixit

Alex -

Excellent guide! I was able to bring back my PS3 Phat back to life!

jessehernandez -

I would just like to say thank you. Guide was fairly easy to follow and the video assited. My Son and I did this in about two hours with a few breaks. Now a day later and a few hours of play and this guide and the kit did indeed fix our YLOD. Thank you very much.

Jim and Joseph

East Stroudsburg, PA

jimmy151 -

PS3 CECHH01 Time to complete ~45 minutes. - Well, I have to admit that I am actually surprised that it worked. It didn't seem like 25 seconds per chip was actually enough time to melt the solder. Since the picture guide doesn't address my model of PS3 I just went to town and took it apart. This model is very straight forward to take apart with no surprises or special tools needed. So far everything seems to be working as it should. I guess we'll see if the repair lasts a reasonable amount of time. Thanks!

The Ed -

WAHOOOOOOO!!! iT TOTALY WORKED!!!

Now to back it up to a new ps3...

Rob Emmer -

I was a little nervous about trying this on my own (with help from my son), but I made it through. I bought the iFixit kit, followed (most) of the directions, and my PS3 is up and running. My particular unit is slightly different in some areas than in the guide, so there was a little guess work in spots (esp the heat sync/fan was connected differently to the CPU. At first, I thought the (RSX) cover came off when I removed the heat sync, but I found out that was how it was supposed to be... weird but I handled it. I have an older unit), but it worked out. Thanks iFixit!!

jflo69rmnp -

This guide is extremely helpful. I did the reflow twice, and it finally worked on the 2nd try.

Make sure you heat the board components well to get the solder flowing. Also, make sure you let the board cool for 15-20 mins afterward.

Also, be careful to attach all the wires correctly, making sure they're all properly seated. If you mess up one connection, you'll have to do this time consuming process twice.

I also took the hard drive out, put it in a Ziploc bag, and placed it in the freezer the second time I did the reflow. The old "Freezer trick" is one I've seen save many hard drives, especially those of the Seagate variety in the PS3.

I'm not sure what made it work the second time, but be patient. It's worth trying more than once, so make sure to save some thermal paste.

I have the 80GB launch version of the PS3, btw, which is notorious for YLOD. My son plays his PS3 pretty hard, so I'm surprised it didn't break sooner.

Just be patient and take your time. It will work.

vinzunza -

Unless you have other serious problems, this guide works. i had a different model than the one here (CECHG01) but, follow the guide and it will serve you well. Took a gamble buying my PS3 at a Goodwill for $50, had the YLOD but, with help from this site, i brought it back from the dead. It currently cant find the HDD but i think that's mostly due to my ignorance trying to reconnect the blu ray to MB ribbon wire and bent it horribly plus, i mildly injured the infamous clip. Avoid those mistakes, and you'll have a working PS3. Thank you Ifixit.com.

Brenton Spencer -

Did it twice now on two different PS3 Worked beautifully both times great guide.

dionjones2 -

EDIT: Forgot to mention, 60 gig release version. Canada.

Got the kit, ripped her apart, did the stuff, and no dice. Turned on long enough to eject the blue ray disk and yellow light again. However, the cable for the blue ray (where it connects to the motherboard) on the motherboard side of the connection, the fastener broke. I figured if I put the cable in place, held down the fastener and crazy glued it, would stay put, ensuring a tight connection. that part at least seemed to work, but after several unsuccessful attempts at start up, I started ripping it apart and troubleshooting all my connections. No luck so far. Would the glue have wrecked the whole thing? Or is it possible there is another issue? Anyone got any ideas?

Again, what happens when I start up: Everything seems normal. Blue light comes on. sounds like it's starting up. Fan kicks in fast, Yellow light.

When I first had the yellow light, the fan didn't even kick in, nor did the blue light.

Thoughts? Suggestions? I really want to finish gta5 ._.

cannonball29 -

can u fix mine

jamie -

Though the internals are quite different - especially the way the heatsink (fan unit) joins to the mobo, no card reader, no separate control board - following this guide as closely as I could seems to have fixed a YLOD on a CECHG03 PS3 - at least it has fired up and is now updating.

Many thanks.

Dave -

About a month ago my PS3 took a turn for the worse and after seven years finally fell to the YLOD. I researched and found this website with high hopes of being able to repair my system. After reading all of the reviews, I came to the notion that it is literally a 50/50 chance of resurrecting my system. I bought the repair kit and received it within a few days. Today I performed the operation that was needed to potentially bring my system back to life.

After two 1/2 hours of taking apart my system, I finally was able to plug it back in. I turned the switch and the red light came on! Success! Well...up to this point it was. I turned on the PS3 and waited. It started and prompted me to reset the date/time. I was happy to assist with this matter. After two minutes of running, the fan started to get loud and the system shut off again and with an unwelcome sight, the yellow light ventured back into my life. I tried this two more times before I came to the conclusion that it was never coming back.

Michael -

Unfortunately, it didn't work for me. Still with a YLOD :(

Philippe Leduc -

IT'S ALIVE!!! That is all I got to say. The heat gun actually worked though I was extremely skeptical if it would do anything. Currently my formerly YLOD PS3 is working. It has lasted long enought to do a 10 hour backup and I watched some Netflix too. Used another guide to take it apart and used this guide to put it back together. This one is much better.

This guide would be better if it had pictures of the screws and not just tech specs for the screws. Sometime you forget what goes where after a few days. I fixed it!! Thank you :-)

marcvill -

Why did my USB ports stop working after this fix?

Larry -

Followed directions exactly, no more YLOD, but system says system is too hot within a minute of booting. Took 5 1/2 hours, waited over 20 minutes after heating. Unfortunately a waste of money :-(

aegixx -

i got one to repair from my kid, after taking it apart, it appears someone already tried this method and failed. the reason? the burned in one spot too long, and actually blew the tiny capacitors off their pads about an inch in which they settled and cooled. plus you can see the solder pools under one of the processor, another indication they stayed in one spot too long.

iamgrendle -

I was getting ready to pack up my games and belongings after getting ylod; thanks to ifixit (totally love this whole site), not only am I playing my ps3 again with all my saves and everything, but I'm bragging to my friends how I epicly fixed it!

gregmoldovan -

Terrific guide. I used this guide and the toolkit sold by ifixit and everything worked for my 60GB CECHA01 model. My PS3 died while watching a Blu-ray, so my Blu-ray was stuck inside and I hadn't backed up any of my game saves or anything. I bought a new slim PS3 and was able to fix the fat guy (thanks to this guide!) and got my Blu-ray disc and transferred all my data to the slim. Plus, the fat guy's still working. It's only been a day, but still. Thanks for this guide, Brett and thanks for the helpful video, MJ.

hogurt -

I just completed this fix on my A01 launch console, and to my surprise it seems to have actually worked. I'll update when I know how long it lasts. I was a bit skeptical, but for the price, and considering I am obviously 5 or 6 years past the warranty, it was worth a shot and I got my stuck disc back and hopefully I'll be able to get through GTA 5. Thanks iFixIt!

brianbclarke -

UPDATE: The fix worked for about 3 months for me. Enough to finish GTA5 at least. I re-did the heat gun and thermal paste again and it worked for less than a week after the 2nd fix. RIP PS3. Still a great kit and it was worth it for me.

brianbclarke -

So even after fixing PS3 YLOD, it’ll still fail again sooner or later? can we just do the ifixit again and again? why RIP PS3?

Kevin C. -

The fix worked but didn't last. I could get my disc out and update the firmware. Then I left it 6 days (because of a vacation) but it YLOD again now. I didn't change the thermal pads but they seemed fine. My PS3 is about 6 years old.

Diego -

I found it quite nice that she added the step of heating up the entire board to this process. I have found that taking a hair dryer and heating up the entire board keeps the board from curving due to uneven heating. Most of the videos on youtube don't mention this, and this woman does. This video is right on and will work 100% of the time.

Aeon PC -

I had little doubt that this would work. Considering all the positive feed back I have read in the comments on the site. I have a launch 60G and it had been going strong until about a month ago. I figured I would give ifixit a try. If the stories are true about the going rate of $150 to send it to Sony to fix. Why do that when brand new system will cost you $200! The guide was great and tear down was easy. The only step that I left out was 34 detaching the pram battery. I could not get it to turn and did not seem to be a necessary risk to force it and break it. Reassembled it and fired it up this morning (with the eject button! in case it did not work. I might at least get the disc back) and I am enjoying the fruits of my labor. One concern I do have is, in the hour that it was running the fan did seem to kick in to the higher speed more often then I remember. It did not feel hot though! Not sure if that is good or bad. Thx ifixit for the fun experience and bringing my ps3 back to life for the time being.

apvapor1 -

Rejoiced for a whole ten seconds as my PS3 showed signs of life after this fix, but then the fan started revving like crazy and my PS3 shut itself off about a second later. Turned it off and on again a few times just to be sure, but still no dice. Any advice on what I might have done wrong?

vezper -

I'm having the same issue. After a few seconds, the fan gets really loud, I get a message saying that the system is overheating, then it shuts down.

I remember clearing the fans of dust when I had disassembled everything...

demonfox09 -

*UPDATE* Just fixed the issue. Apparently the reason the fan revved up then shut off was because the thermal paste couldn't contact the heatsinks from the CPU/GPU. (Had to disassemble up to Step 28)

I looked around and found this thread:

Heatsink doesn't make contact with processors

However, even after filing the heatsink's "ears" for a while and putting folded paper under the clamps, I was barely getting any paste on the heatsink (and I was running out of paste). So I simply applied the paste to both the processors and the heatsink whilst still adding pressure to the clamps.

It's working like a charm now, fan was near silent for the first 7 or so minutes, now it's running normally.

demonfox09 -

i did it but after the fix my ps3 did'n work at all T^T, what can i do naw

dragon -

I first found the video on YouTube and it helped me through the disassembly, coming down to the end the video skipped over some minor but necessary steps though, so I came to this guide to be sure and to assist in the re-assembly.

I got a lot of trouble to fit the Blu-ray cable back into the motherboard, but a friend helped me out there. Instead of the heat gun I put the board in the oven at 200 degrees for 10 minutes as some recommended.

In the end the PS3 worked! But with all my troubles to get the Blu-ray cable back in I smudged the thermal paste on one of the chips a few times and noe it looks like my PS3 is overheating after a few minutes of use.

I'm going to get more thermal paste and redo this guide, but just to replace the thermal paste.

rmjb -

My PS3 model was slightly different but I followed the guide and now it's working like new. I'm crossing my fingers hoping it will last a good while!

Brandon Roediger -

Just went trhough the process go it up and running.... i have the 40 gb fatty... it started up i did the update. i played GTA5 and the back up fan kicked in... which it always did, as ive sent it to playstaion twice to be fixed i figured i'd try to fix it my self this time and so far so good, if it YLOD again can u do this process again?

tim -

I did and it worked for a few hours. My friend did his and it never worked. We contacted a local electronics repair company called Video Game Console Repair Center at 614-218-1122 and had them reball the consoles. Mine works great now, it has been 3 months so far. My friends needed a new processors because the we ruined them with too much heat from the paint stripping gun. Would not recommend this cheap slick rick repair. Lol!

Joe James -

Lol, you're totally not advertising for that company at the phone number you so artfully placed in your message. This repair will definitely work for a lot of people.

Christopher Reid -

This was an experience of overcoming the fact that there are variations of the motherboard, drives, etc... but continued on. Wondered if the board was cooking until read that some had to heat it twice - time to cook that sucker (also an old motherboard, found in the trash, served as a test subject)! Worked like a charm.

The pads are rather expensive but figured IFIXIT has helped me so I foot the bill; but the video is somewhat deceptive, though, as MJ repaired her playstation in under five minutes and it took me waaaaaaaaaaaaay longer.

=;8-)

fmc0235 -

Hello all. This is a great guide but as someone else posted above, putting the board in the oven at 200c for 7 min works perfectly (i've done many boards over the years like this, not just ps3's). But id suggest turning the oven to 215c then then when you open it to put board in turn down to 200c, this will keep the elements from going red and maybe causing localized heat damage.

LOVE THIS SITE!

Thomas -
Easy as PIE!. Although I didn't use the heat gun. As someone posted above putting the board in the oven, after removing thermal pads, works wonders. I've been doing this trick with boards for a long time. Turn oven to 215c, place board on ceramic backing disk with no chips touching the ceramic. Place in oven and turn oven down to 200c, this will keep the elements from coming on and maybe causing localized heat damage. Turn oven off a 6 min, again to help ensure elements do not come on. Pull board out of oven at 7 min very, very gently. You don't want to move it around much as the solder needs to set. Remove board from ceramic and place on a metal backing dish, to help remove heat from board. Then reinstall.

Love the site, ifixit ROCKS!

Thomas -
I CAN'T BELIEVE THIS WORKED! My PS3 YLODed about 3-4 weeks ago. I was pretty desperate to get my save data off the hard drive and onto a new PS3. Here are some tips:

Watch the video and print out the guide

There are A LOT of parts, make sure you have a lot of table space or an extra table to put parts on

Keep track of screws by putting them in cups and label them in order. This will help with reassembly

Don't be afraid to yank out the ribbons. Some smaller ones have release hatches so look out

PRAM battery is difficult to remove. I pulled the socket when the guide told me to be careful and it still came out okay

Have duster and a coffee filter to clean off the massive amounts of dust

Heat the board up for at the very least 20 min ON LOW

Thermal paste is VERY sticky and tough to push around. The card works the best to get it thin and flat

I dropped my board after heating and it still worked out okay. Be careful and be aware that the board can get VERY hot while heating.

GOOD LUCK!

christopherbransom -
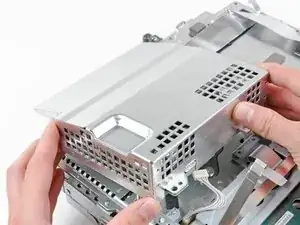
I did this repair this morning and it appears to be working fine. It was fairly straight forward. I watched a few different YouTube videos first and found it easy. Remember that the screw length quoted includes the head. I mixed up a few screws but then got them sorted out.

david -

I had success following the steps. I didn't use the iFixit kit, so no new thermal pads and I used Best Buy Dynex thermal paste. I has two issues. 1) as predicted by the guide I did remove the battery plug from the motherboard. 2) Only the color XMB icons were "folded" at the lower right hand corner. My fix was to do a complete format which took over 3 hours for a 60GB drive. Rebuilding the database/file system would not do a long lasting fix.

Martin

This was a great and relatively easy to understand guide.

Martin -

Hi to everyone.

I did all of these things in the video, but now there is no light in my Ps3. I dont know why .

There is no electric . I tried it with different cable, but nothing happened. There is no red, yellow or green light.

Could someone help me please ??

Thx for answering

umur demir -

Hi to everyone

I did all of these at the video, but there is no light on my ps3 now. I tried it with different cable, but still no electric . I dont know why. There is no red, yellow or green light. I am ready to try everything now.

Could someone pls help me ???

umur demir -

Great video! Kit has everything you will need. Mine was a tad dusty (60GB launch model) so I got some compressed air and a shop vac. Was very skeptical if it would work but it sure as !@#$ did ^^b

Thanks again to the ifixit.com staff and community!

I think I will still do a backup and replace this one though. It is over 7 years old...

Dia -

Are the pads necessary? And for how long is this gonna work?

bieke98 -

Did this yesterday and my PS3 is working again! The annoying thing is that of course I have a single screw left over!

Thurstan Johnston -

I tried this with the heatgun and it ruined my PS3. The CPU and GPU are NOW RUINED!!! It did not work for and made things worst!!! I sent it to a place to get reballed and they said the HEATGUN had overheated my processor and killed them!!! So think twice about doing this. Just because it is already broken, DON'T THINK YOU CAN'T MAKE IT WORST!

georgehollyoh -

I just did this whole process. Took me about three hours. And it didn't work. The PlayStation acted just like it did before I did any of this. Is there something I did wrong? I did exactly what the guide said. Could I have used too much thermal paste? Not enough? Maybe hooked something back up incorrectly? Help!!!

Mar -

I finished, hooked up my system, turned it on, and everything worked... For about 5 minutes. My system was able to stay on for a few seconds to a few minutes before getting another YLOD. I listened to the system and never heard the fan kick on. I know I connected it. I took my system back apart looked at it and was very close to just tossing it in the trash. I was so !@#$%^ that I was going to loose all my data. I wiped everything down and put it back together. There must not have been a clear connection the first time because after I tried a second time, everything was fine. The fan kicked on and I was able to save all my data and transfer it to a new system. I don't know for how long this fix will hold, but it did what I needed it to do.

schudogg1304 -

So my ps3 got the ylod about a year ago and it's been sitting since. I just did the repair and the ps3 seems to be running right again. I can turn it on and put in and take out games without it crashing. But whatever I do I can't get the audio/visual to work. I have regular component cords, infrared cord, and an hdmi cord plugged in to see if any of them work and nothing shows up on my tv. I was hoping someone could shed some light on this problem

Devin -

I just tried this and it didn't work. The PS3 wasn't working anyway so it wasn't a loss and didn't hurt anything. Just bummed - I was hoping it would be an easy fix! :(

Kristy -

I am attempting to fix my MB after YLOD, I am also very intent on doing it RIGHT.

My concerns are longevity and cost. My local game store offers YLOD fix for $40, but says results very from 3 days to 3 months... not worth it.

From what I have been researching, it seams that most tech repair shops "reflow" MB's as its time and cost effective for them, but results are temp at best. I do not believe re-ball is something one can do with out the right equipment.

I believe a reflow will be my first try, with a few considerations; What is the best method for getting the best results: Gun vs. oven?, What are the most heat sensitive components on the bored and what is there max temp?, What are the Spec. requirements for the thermal pads?, PSU swap or no?

My PS3 is model # CECHH01, PSU # EADP-300AB, I am swapping 15 blades for 19 for sure. Any known reason to swap the PSU? If so, for what?

I am still researching how to get the best "reflow".

no more room to type :-(

HellSpawnLover -

I bought the kit. I followed the instructions. PlayStation works again... at least for now.

Took 3 hours, including dust removal from ALL parts, with 1" paint brush.

Thanks for guide and kit.

NICK -

Awesome but my ps3 did not recover on the first go around.

Charlie Finness -

tried it yesterday, it took me less than 2 hours and it worked like a charm

did some stress test and no problems at all it ran all day long

the interior of my PS3 was very different than the guide though

hopefully I can enjoy my ps3 for a long time more now

Steven lqw -

Follow thru all the directions, except for using a heat gun to warm up the mother board, insted I set the mothe rboard in the oven for 5 minutes at 200 degress, and continue with the rest of the directions to fix the Yellow Light of Death Repair and I am back with my PS3 working as new. Thanks for all your information, it was great.

John -

Did this repair last night and my first gen PS3 is back up and running, plus i got my friend's game out that's been in there for almost a year! The toughest parts for me were the top cover (step 6) and removing the PRAM battery (step 34). Those two things did NOT want to budge!! I kept feeling like i was going to break them. Removing/re-applying the paste took a while too, as i was extra paranoid about getting the layer of thermal paste just right. All in all, it was a good experience. Easy to follow guide and great tools. Hope my repair will last!

xxmaxnashxx -

Followed guide. Used heat gun to warm entire motherboard and made circular motions over the 4 chips in the directed zig zag fashion. I read that some people did not heat it enough and had to do it over again, so I heated each chip for roughly 35 seconds each on low heat then went back and did them all again for 35 seconds each while still making sure the entire board was warm. Put it all back together and still the same YLOD. :/ I guess I'll try again in a week when I have more time. Maybe I will heat each chip for a minute instead.

ddearment -

can you guys please go on this website it shows how to do it. http://ca6aaaynu7luht39wuvf1v8x6o.hop.cl...

asf -

Finally was able to sit down after a year of in-operability and found this guide. Had the same problem previously and paid $150 to have playstation fix it and problem returned after few months, was apprehensive about spending the money again so let it sit. Took only couple hours and system is back up and running again!!! Wish I had looked into this sooner.

mrjlmayer -

Just finished this, and so far so good. Thanks for the easy to follow instructions. Time will only tell if it holds up.

swhirledge -

Really a good guide by iFixit. Clear and descriptive as it can be though mine is a different ps3(CECHP12). I was wondering instead of a heat gun is there other ways to resolder the chips properly? Several other comments mentioned placing the board into an oven at 200c for 10 minutes. Is that correct and can it work? Just a precaution :/

Josh -

Followed this method in tandem with a Wikihow (for the disassembly procedure -- I discovered this guide after I'de started taking it part). When I plugged the PS3 in again I had a solid red light and touching the power switch at the front wouldn't allow me to turn the machine on. Fortunately, partially inserting a disc into the tray caused the machine to spring into life. Seems I've broken the front power button somewhow, but the good news is that the PS3 is usable and stable again. I can power on and off with the controller and the eject button is still responsive to input. Been using for a few hours now without issue.

Nigel Brown -

Hi,

Just did it, and the PS3 is back, hoping for a long time...

Just bought the repair kit + followed the procedure. Great guide. Thanks,

Thierry

thierry -

Hi Again,

I have also followed the following video, giving an other way of applying the ceramic thermal paste, and the video was exactly the PS3 that I have(same chips on the board) .

https://www.youtube.com/watch?x-yt-ts=14...

Regards,

Thierry

thierry -

May not have been the safest thing to do for my PS3, but it worked like a champ! Breathed new life into my baby. Very easy to follow instructions.

cbeardsley1982 -

I followed the instructions to the T and my ps3 turned on for 10sec then off stating that it became too hot and shut down.the fans turned on super loud to try and cool it down but to no avail. Any help I Fix it?!

fcfdroid -

You're not reflowing. If you do manage to get the solder balls hot enough, the board would have been flexed to !&&* using this heatgun method.

This is a terrible idea. I'm surprised that a site like ifixit would advocate using a heatgun to reflow anything.

Not only is it very difficult to control the temperature, the fact that you're not using thermocouples to monitor the temperatures is going about it blind. You're also not using a preheater to heat the bottom of the board.

Shame on you!

pure3d2 -

This is a method for people like me, who have an old YLOD PS3 lying around taking up space. I have a working PS3, and I had nothing to lose if I messed it up. It was already dead. This process worked like a charm!! In fact, I plan to get another kit to fix my other YLOD PS3.

Nathan Friese -

Great guide, but worked for one game of NHL 14 and back to YLOD...

cptcaveman25 -

The best guide ever. Many thanks for creating it. I followed it and was able to repair my console.

boianvalentinov -

This is just about the best and clearest step by step guide i have ever seen.

Just finished repairing my son's 60gb PS3.

Turns on and runs perfectly.

Many many thanks for your superb guide.

Milton -

I don't understand how anything is re-soldering? A heat gun won't melt solder will it?

zep101 -

I follow the direction and got system to work but it went back and repeat the YLOD. This did help for a moment but it is not a permanent process. How do I make it a permanent fix??

tamarickw -

I had success on the first try. It took me a long time though. Thank you ifixit.com

nateortiz -

My son and I sat patiently and took apart the PS3 following the instruction in the ifixit guide in a couple of hours SUCCESS!!!! It is priceless to see my son overjoyed and back to his "Ratch it and Clank" game. Thank you ifixit. Customer for life!!!

kid8860 -

Plz tell me should i teak a risk I m a girl and I love my ps3

MaCho Dz -

Just do it, it is easy, and if its not working, youve got nothing to lose.

Alain Martinez -

Cant fix my ps3 2nd generatin it went blue light green light and wnt again to yellow can you help me anyone

ian medina montero -

well the guide and kit were very easy to follow and I was able to do it with relative ease. I actually got the console to boot up to the dashboard again, however, the fan is louder than a jet engine. just when I think it cant get any louder, the rpm jacks up. the system gives me a message saying its too hot.

can anybody help me here?

rutawitz -

The guide was great, but I did watch an additional video showing the heat gun time. I didn't want to burn the chips, this was my brothers 1st gen PS3 and I wanted to fix it for him. The only thing that I also had to do was reset the video by holding the power button. Doesn't help I'm a Microsoft fan and not that of Sony. I hope that everyone else has an easy time like I did.

jstarr80105 -

If u wanna make it last longer I would recommend the ps3ez chill mod that hooks up to the fan and then you can control the fan speed

Chris Rybock -

For now it started working, but lets see how long does it take...

Hope it lasts forever..

timer starts now....

Faisal -

very excellent guide, easy to execute. I didn't even do the entire thing:

I disassembled the ps3 until I had the mainboard out, and removed the metal shield from the bottom. with the rest of the components intact, I used my hot air station to reflow the CPU/GPU.

with the processors facing down, and some tin foil with square holes cut (to better shield the rest from the heat), this whole job took me less than 30min.

I used the GeForce GPU reflow profile that I use for macbooks, and it worked like a charm.

Ronnoc Nailli -

I was very meticulous with following the guide, but unfortunately, it did not work. Has anyone gotten any luck trying it again a second time? I don't know whether I should even bother trying it again if it didn't work the first time. Any help would be appreciated.

alasmm9764 -

I did, see my comments for seanbirss below.

Linh Fong -

I followed these instructions, adapted slightly for my 3rd generation ps3. Unfortunately I ripped out the fan connection while trying to disconnect and ended up having to solder the connection. (I had a soldering iron but this was actually my first soldering project-- whew.) I think the soldering worked (I heard the fan start-- much quieter now) but sadly the YLOD greeted me once again. Did I mess up the thermal paste? I think I used too much because I ran out. I guess this is worth a final shot once I acquire some more thermal paste.

Erin Nichols -

Epic repair guide & video. My PS3 was clearly a different model than the one referenced in the guide, but the repair still worked like a champ - so stoked about that - THANK U IFIXIT!

I did two separate 30 second rounds of heating on each of the four referenced areas on the motherboard. Notable differences - [Step 5] the top cover was not as easy to remove as the guide assumed, there was a fastening clip towards the left rear of the cover that had to be unhooked. [Step 10] This control board assembly did not exist. [Step 12] Step 27 is required during this step in order for Step 15 to work. [Step 13] The control board bracket did not exist. [Step 15] Motherboard assembly came out with heat sinks, fan, and plastic frame detached. [Step 22 - 23] Memory card reader did not exist. [Step 43] Motherboard is a bit different, with thermal pads in different places. Just note where they are, and replace the ones you remove.

Alan Bairley -

How do I use the pad and paste is there a video that could show me how to do it?

I found plenty of videos regarding how to use the paste but not the thermal pads ?!

Maria Abu Khader -

Thnx for the great guide! works for me! :-)

Dirk Gerritsen -

My PS3 seems to be a really, really old model, it was tricky to get open, but I did the same thing with the heat gun, only that after applying heat and letting it cool down on the upper side, I turned the board upside-down and repeated the same exact process, it's working now!

lsocorro -

So is this guide saying thermal paste OR thermal pad. Using both is apparently bad

sean9115 -

I just tried this and I really, really hope it works. It's cooling now from the heatgunning I gave it.

John McGuire -

No way. It worked. I've been prepping for a few weeks, but I had 0 confidence in my repair skills. I did the heatgun method following this guide and a bunch of videos on Youtube and BAM. It's on with the green light right now. Wish I had controllers to test it, but we'll see how long it lives.

John McGuire -

This guide is FANTASTIC! I had pretty much written off my 2 YLOD PS3s. I had replaced them already with a 3rd PS3, but now I have brought my original (1st lot) PS3 back to life! I have been playing it for several hours at a time to see if it will hold up and everything is great so far. I will be buying another kit to revive my other one very soon. Thank you ifixit!

Nathan Friese -

Arch, powered it on after i followed the video and step by step. still got the YLOD. any advice???

seanbirss -

Apply more heat. It didn't work for me the first time. I opened it up again and this time, I warmed the entire board first until warm to the touch. Put a book on the edge of one side of the board that doesn't have the two prongs sticking out to level it up so when you heat/melt the soIder, the chips don't move around. I applied low heat on the back of the CPUs and the rams for 90 seconds each. I waited for the board to cool down before turning it over (make sure not to move the board during the cool down process as you might disturb the chips). Now apply more heat to the front of the motherboard directly over the CPUs and th rams for about 60 seconds on each. Wait for it to cool down completely before apply thermal paste and reassemble the unit. Good luck.

Linh Fong -

This guideline is awesomme. It worked. I did it exactly as described in the steps, except from the fact I have the PS3 slim, so the disassembling is different, but the part with the heat gun followed preciselz and the Playstation is just working as new!!!!!!!!!!!! thanks guys

Wax H -

I have just completed this repair, after many hours, I booted up the Ps3 and it ran but pretty soon after booting the fans starting going really fast - I shut it down asap but could that indicate that my thermal paste application is dodgy? Will wearily boot it tomorrow and see if it YLODs again..

Jonah Porter -

I'm having the same issue. It turns back on but theven fan gradually speeds up to max within 2-3 minutes of powering on. I left it running to see if it would reset or explode. Neither happened. But I did receive a message saying that the system was running too hot and needed to be turned off and cooled down. By the way, the fan at full speed, sounds like a modle jet during take off.

I have no idea what is causing this anday no idea what to do about it.

Marvin Allen II -

Hi, is there a guide to reassemble the unit after repair. After 50 steps of taking the unit apart, I don't think i will remember how to put them back properly without a guide. Going backwards with the steps would be very confusing. Thanks fo any reply.

Linh Fong -

@mulan There is no dedicated guide to reassemble the device. However, you can follow this guide in the reverse order starting at step 41 to reassemble the device.

Brendan -

Hi, Im new to the iFixIt Community. I myself had the YLOD on my PS3 CECH-A01. I didn't use this guide, but its similar to what I did. Heres a few tips. MOD YOUR CASE!!! Cut a hole using any can and heat it up on the stove. When hot place it on the center of the area where the fan is and let it melt on threw... Provides airflow into your system to keep it cool.. To cover the hole, use a 6 and a half inch car speaker cover to make it look nice. UPGRADE YOUR POWER SUPPLY! The 231 unit runs much cooler than the factory installed one. Also, cut 4 holes with a drill on the side where the warranty sticker is to allow the hot air to escape more freely. You can cover with a screen that you can buy at a smoke shop... UPGRADE YOUR FAN TO A 19 BLADE FAN! Provides max airflow throughout the system. Get some 1.5 inch rubber pegs and Crazy Glue them to the corners on the bottom case to allow air into the fan hole. I heated my board in the oven at 300 degrees for 10 to 15 minutes. It works!!! Good Luck...

Jose Vazquez -

Where can you buy the CPU pads??

John Barnes -

Quick question, why wouldn't you also remove the CPU chip and re-apply solder for that? Since it was that causing one of the main issues? The solder would be dry and dusty underneath surely?

craigrogers88 -

I bought the YLOD repair kit from ifixit and followed this guide step by step. The only thing I did differently was that I didn't apply thermal paste to the fan as well as the CPU and GPU, I only applied to the CPU and GPU directly. Everything works now with my PS3 and I am so happy that I could back up my saved game of The Last of Us and keep playing too :) Let's hope it lasts!

Paco Jesus -

Hi everyone. Please be aware of your PS3 model before going about this. This model is different from the earlier ones, and as such the process of dismantling is different. Please google your PS3 model and look up the disassembly. I did not and attempted to do this all following iFixit's guide, and almost ended up giving up before making some searches. It would have saved me a lot of time and effort had I considered this.

Siddharth Bayyavarapu -

I've done this 6 times! I can't figure it out. could the bluray drive be a reason!?

Nate -

I had the same problem. First i get Yellow, then three beeps then flashing red.I followed the guide. The fan runs quietly and air that comes out of the back is not too hot . It worked wonderfully, for about an hour. Then it bricked. I let it cool then run it again, same thing, it YLODed . After cooling it for The 3rd time it was a minute or running then YLOD.

My model is CECHG01.

Any suggestions?

talhasafi.g -

I cant believe this worked... but it did. I don't know for how long.. but THANK YOU!!!

mmbnyc2003 -

It worked! Struggled a bit with disassembly because my model is different than the guide, and I wasn't sure how long to keep the heat gun on the chips. But it fired right up, and I was able to eject the Blue Ray from the public library, so that was good. Then I played Ratchet & Clank from the HD for about an hour, and all seemed well. Will see if I can play from a disc tonight. Hope it lasts. I'm not averse to buying a PS4, but I have all these PS3 games — it would be a shame to never get to play them again.

Craig Johnson -

I'm sorry to say that this guide didn't work for me. First, my PlayStation is different from the one they show. It is not slim, but it is different. I think mine is older. I has to watch different videos on how to dismantle the console. I did all the thermal paste and pads as this guide said. Put it together and....it actually got worse. Now, when I press the button to start it gets green then immediately it turns red with just one beep and turns off... I won't try it again. I wasted $40 and a couple of hours of my time. Next time I'll just get another used console...

Ivonne Perez -

I'd never even heard of a PS3 YLOD until I got one the other day. Bought the repair kit (I'd been wanting a heat gun anyway so woot), followed the guide, and now I have a 100% working PS3. Can't complain.

Erik Oleson -

I too have a different model of Playstation 3 fat, but I am doing the repair anyways ! I am currently waiting for the board to cool down, and I am hearing some weird tiny crackling noises... I hope that it will be fine even if it's making these !

Tsaku -

Hey, it works ! I think that the sounds were probably coming off the cardboard box the board was placed on.

Tsaku -

No, they came from the MoBo, because I didnt use a cardboard box, but some ceramic thingys, and I heard the same crackling. It worked at the end, but it was weird.

Alain Martinez -

Had Trouble and did not work for me

justin mancha -

1st gen PS3, got the YLOD for the first time a few days ago and followed this guide. Took me about 3 hours but now the PS3 is back up and running beautifully again. I was totally skeptical about taking a heat gun directly to a CPU/GPU but thought I had nothing to lose and it worked! Kids can watch Netflix and play games, everyone’s happy. To apply the thermal paste I used the guide mentioned in this article, using a plastic bag to spread it evenly with my hand. Instead of buying the kit, I just bought some thermal paste (with remover and primer) and thermal pads on amazon, cost about $20.

Nick -

​Thank you so much for writing this very detailed guide. I also used the oven & flux solution idea from this other tutorial: https://www.instructables.com/id/How-to-...

I used Arctic Clean and Flux solutions and oven instead of heat gun. I used a ceramic plate (placed upside down) as a support.

I just put it directly into oven, 200c, and left it in there for 6 minutes - door closed. Then after 6 minutes, I turned off oven and left it longer (maybe 10 minutes).

Now my PS3 runs nicely, and much cooler. I remember placing my hand at the air vents to check and it used to be super hot all the time. Now it's cool air, even whilst playing intensive games.

Kevin C. -

FURTHER ADVICE:

Keep the PS3 upside-down (ie. the top on the floor). As you now know, the motherboard is actually internally upside-down inside the casing thus the CPU/GFX chips are upside down.​

This should be the correct orientation (according the PCs, etc). so that in future if it does overheat, at least the CPU/GFX chips will sit in place due to gravity.

Kevin C. -

Blasting a chip with a heat gun or sticking a board in the oven is not a “fix,” it doesn’t fix the problem (which is a bad graphics chip). By heating the chip up, you’re only temporarily reviving the system and it’s anyone’s guess as to how long it lasts (anywhere from an hour to months).

This is also why you don’t buy used chips off ebay or pay for services that claim to repair boards with this problem, because reflowing a crap chip doesn’t magically fix the fact that the chip is crap. That’s why you’ll never see a warranty for these greater than 90 days, because the person who “repaired” it knows that they didn’t actually repair it and that it will probably fail after 3 months if not before then.

Also, blasting/baking is not “reflowing,” actual reflowing involves an expensive machine that you use to remove the chip, replace the solder, and then resolder it in place. But since the solder balls under the chip are not the problem here, reflowing a crap chip won’t magically fix the crap chip, either.

Adam Baldwin -

Hey, I did this entire thing step for step and reassembled and switched it on, it worked for 2 mins and then began flashing a red light. Anyone knows what's wrong and how to fix it?

Kavir -

The PS3 Red Light Of Death (RLOD) is caused by the system overheating internally, or by a hard disk drive failure. What I suggest you do is open up your PS3, clean out the dust from the system entirely, and re-apply new thermal compound. If that doesn’t work, then it may be a hard disk drive failure. All you need to do is grab a new hard drive from the likes of Amazon, Newegg, etc and reinstall the OS onto it. A regular laptop hard drive will also work fine.

Source: http://www.ps3-help.com/fix-red-yellow-l...

Here’s a decent guide on how to upgrade (or replace) your hard drive: https://www.techradar.com/how-to/gaming/...

Hope this helps!

Alixnator -

I tried all these steps and nothing happens and my ps3 WON'T WORK after yellow light of death

Yousif Almaiasi -

What happens when you try to power on your PS3? Does it not turn on at all? Only for a second? Is there a video output?

Alixnator -

my PS 3 is old thats

probably why —___—

i miss my old PS 3 Pls There Can Be A Fix Pls

jeffrey -

I can’t believe this worked so well. YLOD is gone, PS3 works, AND I was able to clean 1/4” of accumulated dust inside (fixed the overworked fan). I’d certainly not classify this as easy and it took a solid 2 hours (I’ve repaired/upgraded a lot of iphones, androids, tablets, and laptops but not a PS3). Lots of bits to keep track of and re-building the motherboard sandwich with all the sticky pads and paste isn’t trivial. I think the hardest part was removing the “peel off” backings from the 3M thermal pads without taking the adhesive film. Use a razor blade to scrape the adhesive film off the peel off back if it feels like you’re splitting the pads in half. Also, when you’re re-attaching the top motherboard cover dont’ forget to insert the tabs at the back into the slots of the bottom MB cover. It’s an easy detail to miss and your case won’t line up when putting it all back. Not sure if people are still repairing these in 2018 but if so, there are a couple tips. Thanks for the guide!

Richard Pearse -

I tried it, no YLOD but now it has GLOD, and the video reset trick dose not work anyhelp?

Lagercat -

I recommend you try this guide: PlayStation 3 "Green Light of Death" (GLOD) reparieren

Basically hold down the power button until you hear a beep 2 or 3 times. This will reset the video settings to the lowest possible configuration. (If this works be sure to give the author +30 points on the guide).

Alixnator -

Hi, I know it’s a bit old, but recently my brother in-laws PS3 start showing similar problems, and I remember the same symptom a while back with Macbook Pro 2010 and the famous result is heating, baking or reballing the GPU not until Louis Rossman point it out that the culprit is not the GPU but the capacitor tantalum used on one of the power rail start to fail overtime (I believe it’s the nature of such capacitor to fail after 3-4 years of use) I find any video that repair YLOD by replacing capacitor in English but I find one in Portuguese https://www.youtube.com/watch?v=ljoMvkX0... and in Indonesia https://www.youtube.com/watch?v=y0BoTTaj... (the last one is so poorly done but it show how to replace the capacitor chip. Any thought on this? I still didn’t believe that the problem is permanently fixed using heating method, any comment on how long the fix last using this method?

Bobby Haryanto -

I think you should try to do the YLOD repair first, and if that doesn’t work, try to replace the capacitor as you said. Most PS3 deaths are most commonly with the OG Fat PS3 and it’s due to heat. Though iirc it was fixed with the release of the PS3 Slim/Super slim.

Alixnator -

Thank you so much for this guide! This helped me to revive a YLOD PS3 (CECHH 01) I bought at a thrift store! Instructions are easy to follow, seemed very straight forward. I would recommend if anyone has a YLOD PS3 to use this guide as it helped me to revive my PS3. So far, running great. Will update if anything happens. Thanks again!

Alixnator -

My PS3 stopped working, so I completed this repair with heat, heat-conducting paste & all. The PS3 started working again, but NetFlix stopped working. I deleted the app & the Game Data associated with it and reinstalled NetFlix. No go…The screen goes blank, the HD light flashes a few times, then stops. The WiFi light pulses. The System utilities tell me I’m connected to our network, and the clock’s set. If anyone has any ideas, I’d appreciate some help.

Steve Gibson -

Also did this repair 2 times. It was a pretty interesting and enjoyable repair. Time consuming but straight-forward compared to some of the others I’ve done. But, as I’ve seen in many other comments, it didn’t last. I got another 6weeks max out of the system before it started up again with the YLOD. It’s too bad because it seems like the repair is hitting on the right problem, it’s just not producing a durable solution.

Richard Pearse -

Did not work. &&^&^$^ $@$*!

Daniel Marzo -

You need to reball the chip for complete fix. This method can only extend your PS3’s life just for a while, after a certain period of time YLOD relapses again. Maybe this is appropriate for people who just want to rescue data inside HDD.

prednin5mg -

When i power on my ps3 it shows green …yellow… then red light blinking ……can it be repaired? Please help

LęǾn Kęnnędÿ -

Hello please my console is having a ylod fault pls where is the nearest place around. Nigeria lagos state, ajah ,majek second gate ibeju lekki epe Express way…

Muiz hammed -

There is another guide with 40 steps to follow where you just replace the thermal paste. I did this one, not knowing this guide existed, and my ps3 died the next morning. The other guide left me with a lot of leftover parts. Please remove it so no one else makes this mistake.

matt litzinger -

My ps3 is working perfectly except no sound and the video output settings buttons is not working either…. any help please

Eric Selassie Quaye -

Grazie per la splendida guida.lo seguita passo a passo e il risultato e fantastico la mia Play3 funziona che e una meraviglia grazie alla vostra guida spero duri nel tempo almeno un paio di anni ma cmq vada siete dei grandi.consiglio questa guida a tutti colora che hanno avuto questo problema perché sicuramente alla fine funzionerà ancora grazie.

Nico Limongelli -

Four years ago, after over 7 years of use, my PS3 80GB (CECHE) threw the Yellow Light of Death. I took it into a shop to get it repaired, and the fix did work, but then the PS3 threw another YLOD. Many months later, there was no YLOD, but the PS3 would not display a picture at all through the HDMI cable (I didn’t test the conventional RCA cables, so they may or may not have worked).

I put off trying to fix it until today. I ordered the YLOD fix kit, followed the instructions and after I finished reassembling the PS3. I turned it on, and there was still no picture. Alarmingly, the PS3 started to overheat after a minute of use, so I frantically turned it off and disconnected all cables from it.

I don’t know what else to do now. I could try and salvage the PS3 or I can donate it to iFixit or elsewhere so they can harvest parts from it. I need to find a way to extract what exists on the 80GB hard drive and wipe the hard drive on the console before I get rid of it, so my personal data is not compromised.

Paulina Duarte -

Ultimately, I extracted the hard drive and gave the rest of the console plus the controllers to a local retro gaming shop for them to use for parts or to learn how to take apart/tinker with.

Paulina Duarte -

The steps are clearly laid out but not for my model. Not all PS3’s are the same so I could only use this as a general guideline and took lots of pictures along the disassembly route. After all that my PS3 still won’t work. It’s a shame to have over 50 great games that I can’t use and even if I bought another used one another failure would sooner or later hit it. I’d buy a brand new PS3 if they still made them since none of the newer models are backwards compatible.

Stan Lake -

There’s a new guide out there that points out that the culprit might be the “chips“ (aka NEC/TOKIN capacitors) next to the RSX/CELL. I guess it makes sense to look back and notice how the guid also tells us to heat up those “chips” which apparently restores some of the capacitance. But the best seems to be to just replace them by new tantalum capacitors (470uF - 6.3V). The idea is to replace each of the NEC/TOKIN capacitors by 4 tantalum capacitors. You don’t need to replace them all, and can start by replacing only one and see if it works. Some people say to replace only the 4 on the rear side of the board, assuming that the side that contains the CELL/RSX is the front. Note that you’ll be getting 1880uF per replaced capacitor, which if they are in parallel and the ones on the front don’t have any issue other than lower capacitance, their capacitance could be reduced down to 520uF and it would still work. Guide here:

https://www.psx-place.com/threads/tutori...

paulo.fernando.silva -

I tried doing this to my ps3 but I have a completely different motherboard inside mine. None of the chips look like or match with the one in the diagram. What chips am I supposed to put the pads on?

Matthew Mummey -

My original (fat) ps3 (60gb) just recently got the YLOD for the first time. 12 years before I got this; I’m quite impressed.

However, I didn’t want to give up my trusted old system yet and bought the ifixit kit. It took me a little more than the 1-2 hours prescribed (closer to 3.5 as I had to take it apart a second time and apply more thermal paste) but it worked.

It would be good if the kit included everything you needed. I was missing a Philips #0 screwdriver. Also, the instructions for reassembly are not just doing everything in reverse and are easier if you rearrange a few of the steps to make the assembly more straightforward.

An indication as to how much paste is needed would be helpful. I initially put too little on and had to do the whole operation again. The coating needs to be smooth and covering the whole surface, but not thin. Make sure you use the entire tube of paste across those two chips.

Other than that, this was an excellent kit and a good guide. My ps3 is alive and fighting another day.

pauldburton -

… and after ten more hours of play, it died again. If you do this repair, use the extra time to download your content. She’s a goner this time. Rest well, my friend.

pauldburton -

This heating the GPU and CELL is bullshit, the REAL FIX is replacing the NEC TOKIN caps as mentioned a few posts up, i have repaired over 10x FAT ps3 with tantalum caps and they all work flawlessy and will last for years to come i cant beleive it took 10years to find this TRUE method of YLOD repairs,,,

keegan luka -

ikr, i still can’t believe they really found the true problem for most ylod cases

Jeremiah -

awesome I just managed to bring an old system back to life thanks to this guide and i feel like a million dollars for it. thx ifixit great stuff

Asio Otus -

The main cause of the YLOD is the failing NEC Tokin capacitors. They will need to be replaced with either another or with a tantalum capacitor 470uf. All reballing and reflowing is doing is heating up the NEC Tokin capacitor to get them to temporarily work again. Only the 360 suffers from the solder connections cracking because of its thin motherboard which tends to bend when it gets hot. Whereas the PS3 has a thick motherboard and cools better.

More info is here:

PS3 Nec Tokin Replacement tutorial

https://www.psx-place.com/threads/tutori...

Misdiagnosis of the PS3

https://www.youtube.com/watch?v=nLoijF9-...

PS3 Repair

https://www.youtube.com/watch?v=w76MCbJx...

Player -

I have made an alternative guide about replacing the NEC/TOKIN capacitors on the PS3. If you would like to contribute to this guide, any help would be appreciated!

Andrew S -

Thank you. I appreciate the pictures and written instructions to complement the quick video overview. The illustrations helped give me confidence to complete the work. The system is working again!

David Marks -

Be sure to check out my guide if you really want your PS3 to work. The true cause is the failing Nec Tokin capacitors. If you have soldering skills this guide should come in handy. https://www.reddit.com/r/PS3/comments/hx...

Player -

Gutted, all that work and still red flashing light. Good guide though

Cat Overend -

first attempt of repairing this . Was getting red light not yellow but seams to have worked . I am a tech for a devise repair company thanks for the guide

Travis Whitehead -

Hi, incidentally think the problem with some YLOD is actually not the same. To check, always try the console without the HDD AND memory reader fitted. This typically forces it into recovery mode and will usually result in some sort of display permitting further diagnostics.

Also useful, I found that many old graphics cards have iron containing pads on the memory chips and to a lesser degree GPU, potentially allowing things like induction reflow. It still needs preheating but has potential as a less invasive repair technique as can be controlled more precisely than the heat gun, and often the pads that are bad can be reflowed with some knowledge of where they are without doing them all.

Might need an induction shunt or special mu metal shield on the inductors or simply use a different frequency than usual.

I “invented” this method as a way to get a DL machine on the cheap by repairing broken 1080 Ti’s but it turned out the faults on these are different and harder to repair.

Andre -

i saw a video on youtube in which that guy used some machine and took out the cpu and gpu under which he had to apply more thermal paste 5 dots each…then he cleaned the cpu and gpu with some more professional tools…do we also need to do that or is the way told above effective enough??

pls help…im trying to do it at home as a diy project

Rishi Arveti -

For me it was enough with the paste descibed in the manual

Cedric Hallard -

I followed the manual today and my PS3 works again!

I used 150 to 200 °C to warm up the board. Then used 300°C for 30 sec, let it cool down and again 45 sec after that.

PS3 starts up now! I will test it following weeks and see for how long this helps ^^)

Thank you for the clear manual!

Cedric Hallard -

This is no doubt the most BS solution out there. Ifixit essentially trying to scam people out of their money by selling them a bunch of things that won’t repair their ps3s. All this does is heat up the faulty flip chip enough that it will work for a short time.

RockL79 -

A few cables were in different places and the older models have some quirks, but this guide worked for me and unbricked my backwards compatible 60gb model from 07.

Jordan Giese -

I was able to do this without too many issues. Only comment I would make is to have a well lit area while working. Makes finding those screws a little easier. At the very least, a good flashlight.

tanismcclay -

My playstation 3 got this error probably 7 or more years ago and sat. I finally looked up a possible fix for this error and came across this. Mine is a CECHH so it was a little different from the one in this guide, but I bought the repair kit and followed it and now in 2021 my ps3 is updating. My controllers also work after not being charged all this time. Some things I did different:

-I had pretty much the same heat gun so I didn’t order that kit. It is a 2-setting heat gun from Harbor Freight and the lowest setting for it is 572 F (300 C). I heated the board like you said and followed the same pattern per chip. Only I did it for 35 seconds each and held it probably 1-2 inches off the board. (The board was hot after this, but that is why the preheat step is so crucial.)

-Only the 4 small black chips and the big one above the processors had thermal pads. I replaced new ones on those and added 4 to the gray chips above the small black chips. I also put the rectangular pads on the back.

Thank you!

Jonathan Patillo -

I can’t believe this is still a guide on iFixit. It is misinformation. The YLOD issue could be multiple things, from your console needing a delid (new thermal paste underneath the IHS), to bad NEC/TOKIN caps to a faulty RSX. “Nuking” the board with heat which this guide suggests may temporarily revive your console if the flip chip (RSX) is faulty but won’t fix it and you’re bound to have it fail again.

wavvy01 -

iFixit made this guide a while ago and I don't think they're planning on modifying or deleting it. I have made an alternate guide which details the process of replacing the NEC/TOKIN capacitors on the PS3, one of the most common causes of the YLOD failure.

Andrew S -

Would a package of 85×45 thermal pad be enough for this?

Jason Q. -

Didn't work did exactly everything but it's the same as it was before, I mean worst because it would boot sometimes now it doesn't boot

Rui Neto -

This is not the recommended way to fix it anymore. It is now known that the 90nm RSX is defective due to issues in the materials used in its assembly. The only real, permanent fix for the YLOD is to use an Orbis modchip and replace the 90nm RSX with a 65nm or 40nm RSX.

Andre Brait -

It helped but it keep on turnin ydol every month please help chinokothomson@gmail.com

THOMSON CHINOKO -