Einleitung

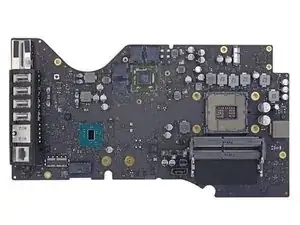
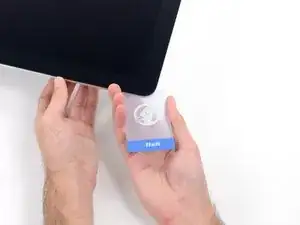
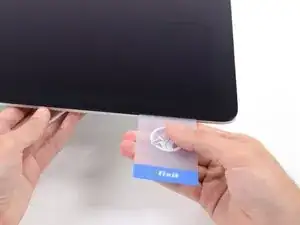
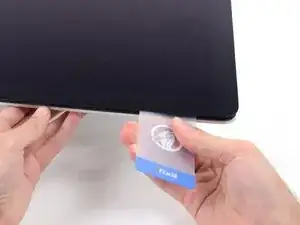
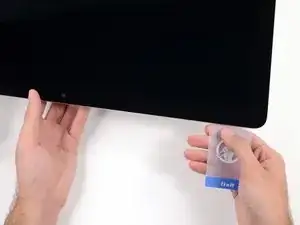
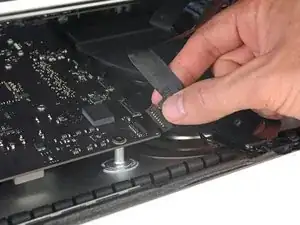
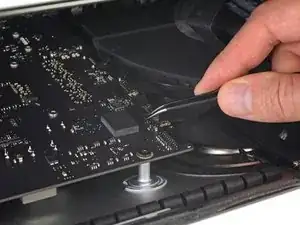
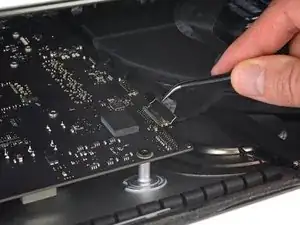
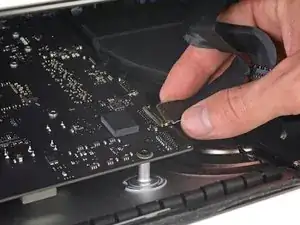
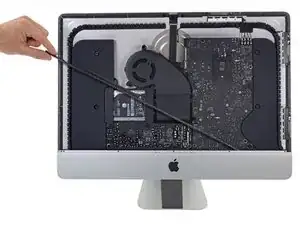
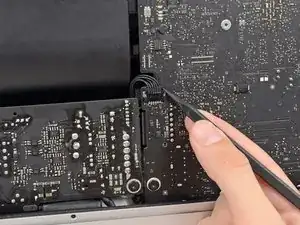
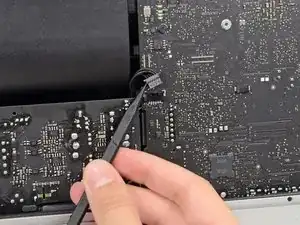
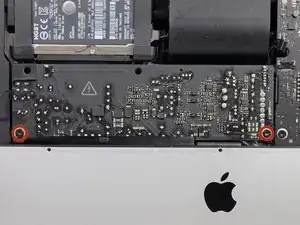
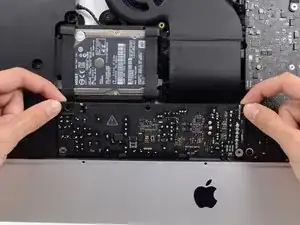
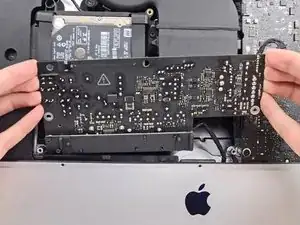
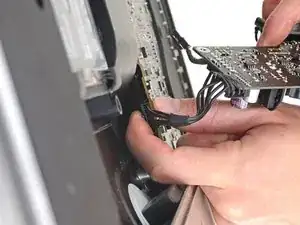
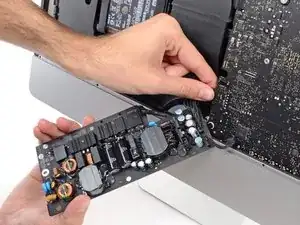
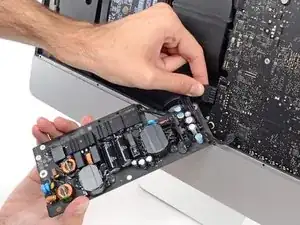
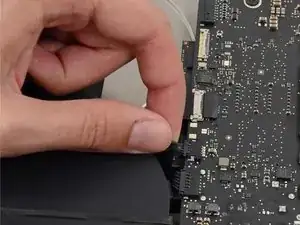
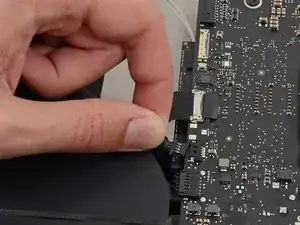
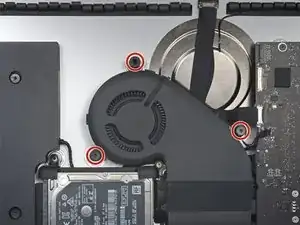
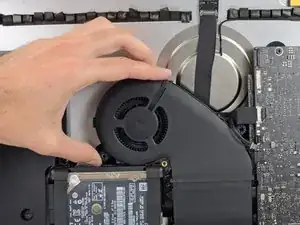
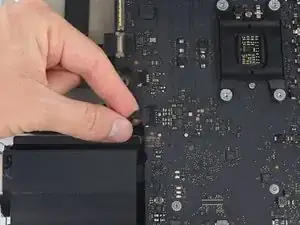
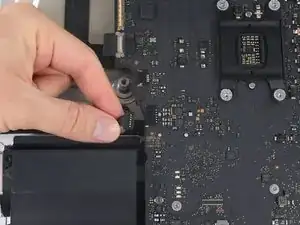
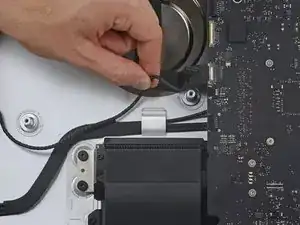
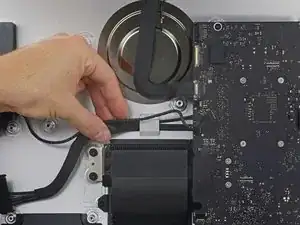
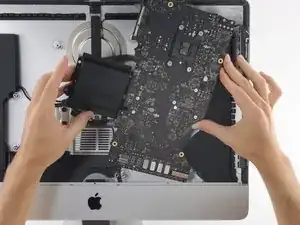
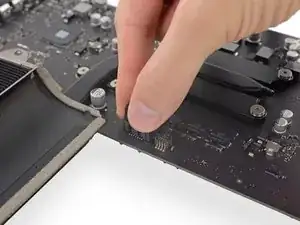
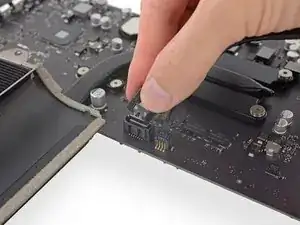
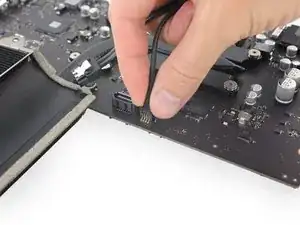
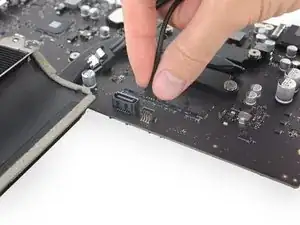
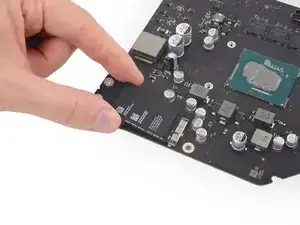
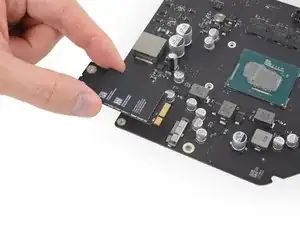
Hier wird der Austausch des Logic Boards am 2017er iMac 21,5" Retina 4K gezeigt.

Einige Bilder in der Anleitung stammen von einem 2015er iMac, der geringfügige Unterschiede zeigt. Auf den Reparaturverlauf hat das keinen Einfluss.

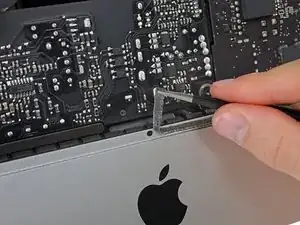
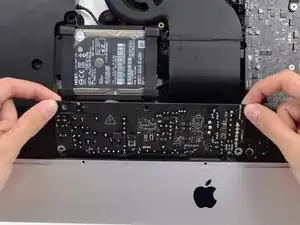
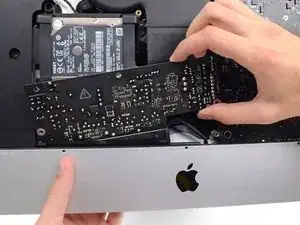
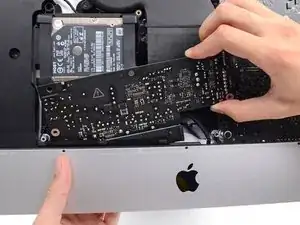
Die Anleitung ist als "potentiell gefährlich" eingestuft, weil du am Netzteil arbeiten musst, welches große Kondensatoren enthält. Ziehe den Netzstecker und halte den Einschaltknopf mindestens zehn Sekunden lang gedrückt, damit sich die Kondensatoren entladen. Fasse die Platine nur an den Kanten an und berühre keine Bauteile an der Oberfläche.

  1. SrDNTSYqyhGMRNDC
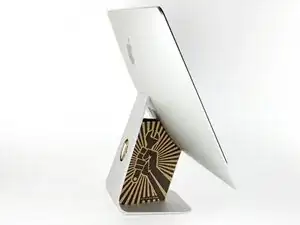
    • Mit einem frei beweglichen Gelenk kann der iMac unkontrolliert pendeln, das macht es schwer an ihm zu arbeiten. Es geht leichter mit einem iMac Service Keil, es kann aber auch ohne ihn durchgeführt werden.

    • Wenn du die iFixit-Reparaturhilfe aus Karton verwendest, dann baue sie zuerst mit Hilfe dieser Anleitung zusammen.

    • Bevor du beginnst an deinem iMac zu arbeiten: Ziehe den Netzstecker, drücke und halte den Ausschaltknopf für mindestens zehn Sekunden. Dadurch werden die Kondensatoren im Netzteil entladen.

    • Sei sehr vorsichtig und berühre nicht die Leitungen oder Lötstellen an den Kondensatoren auf der Rückseite der Platine des Netzteils. Fasse diese nur an den Kanten an.

    The wedge is an extremely tight fit for this model. I was worried that the amount of force needed to use it as shown might damage the stand, so I used it with the long side down instead. It worked fine that way and didn’t need anywhere near as much force to insert.

    roberttrevellyan -

    Here’s a good YouTube vid on upgrading the RAM: Can a Normal Person Upgrade the RAM in the 2017 21.5" iMac?

    Dan -

    Here are a couple tips from me:

    1) Expose the adhesive to extreme temperatures. I did this by transporting my iMac in my car, screen-down on a piece of cardboard on a cold February morning (in Chicago). When I went to pick up the iMac, the screen practically fell off the chassis. I would have been distraught by this if I hadn’t already planned this replacement. So it was a happy accident.

    2) Remember to expell the residual power from the power supply by pushing the power button while the iMac is unplugged. This does NOT guarantee it’s safe to touch, but when I accidentally brushed the solder and exposed capacitors, I didn’t get shocked.

    jerrid_foiles -

    Instead of using the wedge, I placed the iMac faced up with the top side (web cam) facing me while I ran the pizza roller around. It worked out great!

    Sam Fung -

    “All iMacs also come with a traditional hard drive” mine doesn’t!! it’s HDD bay is completely empty, no SATA cable or anything. I guess I’ll have to upgrade the PCIe SSD instead.

    Chris Hughes -

    There is no replacement glass for this model, it is part of the LCD and impossible to remove or replace- the entire LCD has to be replaced unfortunately if the glass is cracked or damaged. You will have to Google search for a replacement. Also be careful with some of the lock tight tork screws as I broke one of my screw mounts taking one out.

    Phil Tesone -

    I used this service wedge but also found it a very tight fit. The same stabilization can be achieved by using a big rolled up towel.

    Ernst -

    While this is a good instruction guide, I recommend to also look at OWC’s instruction video about drive installation, before starting the exercise. Those install videos are very detailed and useful.

    Ernst -

    Main advice: TAKE YOUR TIME with the pizza roller.

    Make several passes, until you really feel like there's no more sticker in the way. Stay away from the camera though (approx. 1inch / 2.5cm on both sides). This will reduce the work left with the plastic card. Adhesive is really on the edge of the screen so there is absolutely no need to go any further than the recommended 1cm / 3/8inch depth.

    Where are the sensitive parts?

    Facing your iMac, imagine you're looking at a watch. There are antennas on 1, 2 and 4 o'clock. Do not insert any metal piece there (nor anywhere else, btw). Other than that AND the screen cables underneath the camera, not much danger.

    Froggy Manny -

  2. QPZ14vf5mNSObPx1
    QPZ14vf5mNSObPx1
    1KAQXZNy65Y1ferW
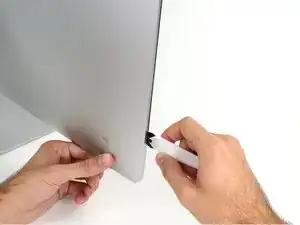
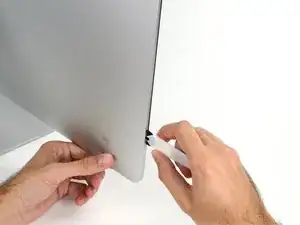
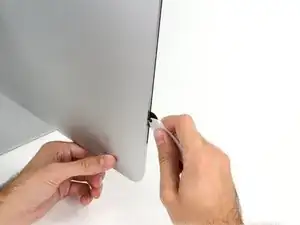
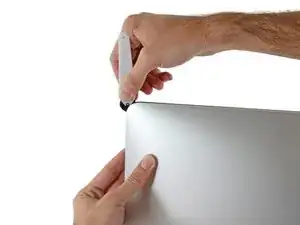
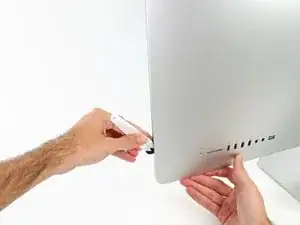
    • Setze das iMac Opening Tool an der linken Seite des Displays, in der Nähe des An/Aus Schalters beginnend, in die Spalte zwischen Glaspanel und Rückgehäuse ein.

    • Die Achse am iMac Opening Tool verhindert, dass du es zu tief einschieben kannst. Wenn du ein anderes Werkzeug verwendest, musst du aufpassen, dass du es nicht tiefer als 9 mm in das Display einschiebst.Sonst riskierst du ein Durchschneiden der Antennenkabel, was zu ernsthaften Schaden führen kann.

    Don’t get too worried about starting exactly where the picture says. The glue is stronger in some parts so just start wherever is easier and then work slowly and patiently around in the direction shown.

    Richard Cook -

    As this guide doesn’t cover replacing the adhesive strips, I found referring to the following was useful (noting that it’s not for the same model of iMac, so the modification they mention wasn’t necessary): IMac Intel 21.5 "EMC 2544 Klebestreifen ersetzen

    Alan Digby -

    It is very easy to crack the glass in front of the LCD during this step. I used the guitar pick, maybe it was too thick… crack is just on the frame but anyway it is disappointing :(

    Nikolay -

    This part of the exercise should be done with extreme patience. I took my sweet time with the opening tool, rolling it through the entire panel and enclosure gap over and over again, until I was very sure no parts were sticking together anymore. And when I thought I was I done, I decided to do it over again.

    Ernst -

    You can "warm up" the adhesive before try to cut it with the tool using a hair dryer. Heat the edges for about a minute, keep moving it so you don't cause stress in the glass. Also the above note.. use the tool and then the cards. Do not use a guitar pick or other objects as the thickness will cause you to break the front glass, which is a bonded part of the display (expensive).

    Carl Schultz -

  3. SdaoaCo1EmiD4NqV
    SdaoaCo1EmiD4NqV
    eOsvYmvle2iDrZvZ
    LS2Bi6uDXDmSSIOJ
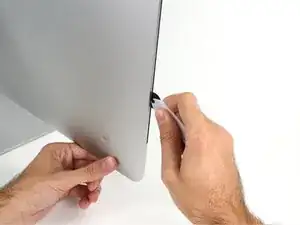
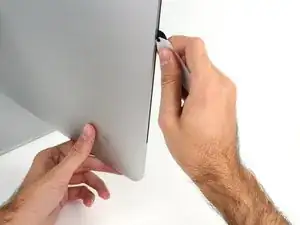
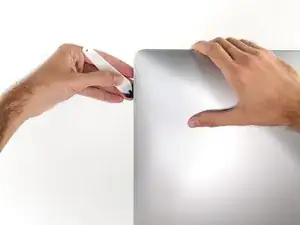
    • Benutze es wie einen Pizzaschneider - Rolle es entlang des Spalts und trenne dabei den Klebeschaum in der Mitte.

    • Achte darauf, dass du es immer mit dem Handgriff hinter dem Schneidrad führst. Wenn du ziehst, kann sich das Rad aus dem Griff lösen.

    • Lasse das Werkzeug die linke Seite des Displays entlang laufen.

    Erreur de traduction: "de bas en haut" et non de" haut en bas" sur le côté gauche de l'écran

    Moreau -

    If re-opening a screen that was opened and re-attached using iFixit’s adhesive strips, I would strongly recommend heating it first with an iOpener, heat gun or hair dryer. 20 minutes after attaching with the iFixit adhesive I tried to open it again with the pizza slicer to fix something and cracked the screen on the left-hand side.

    plasticpool -

  4. r1eMkSSjJdpmWr1B
    r1eMkSSjJdpmWr1B
    d6iAMVdqVUdnvYnD
    PsnDnjYNWucTLycx
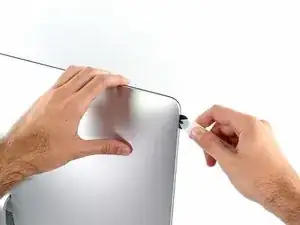
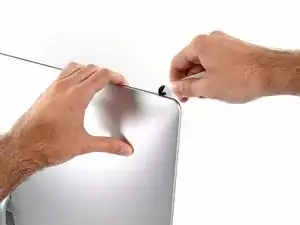
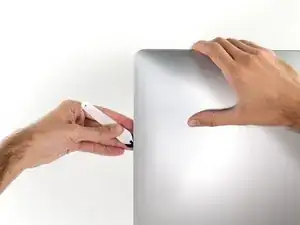
    • Fahre fort und lasse das Werkzeug um die obere linke Ecke laufen.

    Ne pincez pas l’écran avec l’autre main. Vous exercez une pression inutile sur le verre et empêchez la roulette de couper le joint.

    phfoglia -

  5. sZNVaGR3f2vruyLS
    sZNVaGR3f2vruyLS
    HDO3QbYuc4krqwHX
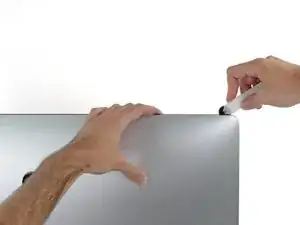
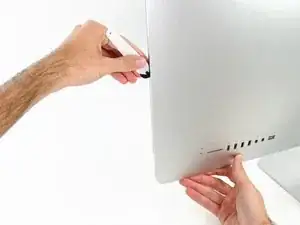
    • Schneide die Klebeverbindung entlang der oberen linken Seite des Displays auf.

  6. vSKcLcMFSZoPp6Gp
    vSKcLcMFSZoPp6Gp
    uiuQPD3lViaQODlB
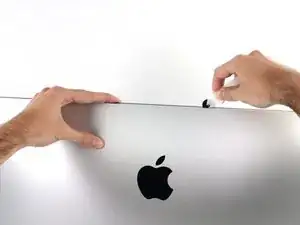
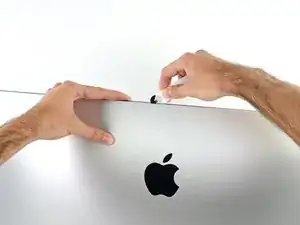
    • Fahre an der Oberseite des Displays fort.

    • Du kannst das Werkzeug mehrmals hin und her schieben. So trennst du so viel wie möglich von der Klebeverbindung auf.

    In this step can I cut along the display without make any damage to the front camera?

    arisnordico -

    Hi! Actually - there is no need to cut the tape around the camera area - there is no tape to cut at all! And so, the way go is easy - just pass 10 mm to the left and to the right from camera and start cutting!

    P.S. Just did the whole procedure to replace a RAM and to add SSD on PSIe an hour ago! Seems to be different reading the instructions... you know - 2/10 and so on. But it's really not that hard, trust me. I'll give it 5/10.

    P.P.S. By the way there is one trick to pass the difficult steps. Any action which requires pulling smth (motherboard, speaker, power supply unit) from the narrow crack (or should i say - slit?) at the bottom of your Imac is really not so easy.

    And the trick is to first remove a thin metal stripe with some kind of insulation on it which held by 5 small (very small!!) screws at the bottom of your Imac. After you done it - it's easy to pull everything! Pay attention to the fact that one of this 5 screws at the center are more shortly than others.

    dv1977 -

    I did all steps like this manuell but now the Display wont work only some colered strips are to see! Whats happend??

    Can anybody help me ? Maybe the connector cable is broken?

    djfanta -

    Check both connectors, probably one of them not seated well

    pzhivulin -

    You can add a SATA SSD if you already have a PCIe SSD Factory?

    kaserlik -

    If you're changing cracked EMC 2638 display to new assembly, there's two more steps:

    Step 24: Use the tip of a spudger to flip up the metal retaining bracket on the display data cable.

    Carefully pull the display data cable from its socket on the display assembly.

    Step 25: Use the tip of a spudger to unplug bracket of the thermal sensor small cable near display data cable.

    Carefully remove scotch tape covering thermal sensor. Using iSesamo or flat tip of the spudger carefully peel the thermal sensor away.

    pzhivulin -

    omg - forgot to switch the termal sensor from the old display...

    now fan runs like crazy...

    Andrei Balotescu -

    The key thing is to never put any force on the opening tool when working through the tape. Just roll it back and forth with ease.

    Ernst -

  7. eDPbRqQfKjS4oUnZ
    eDPbRqQfKjS4oUnZ
    qm5g46NqRXJjxaVm
    krs4wdofACqDD6Ju
    • Schiebe das Werkzeug um die obere rechte Ecke des Displays.

  8. 3c3b2XusJDWQekW6
    3c3b2XusJDWQekW6
    NGOHPeVZ52OQCRWQ
    • Rolle das Werkzeug die rechte Seite des Displays nach unten.

  9. SAgRGwk3lGGO3ZCH
    SAgRGwk3lGGO3ZCH
    1DLPSpBELT2mxJok
    • Beende das Schneiden mit dem iMac Opening Tool unten auf der rechten Seite des Displays.

    • An dieser Stelle solltest du noch einmal das Werkzeug um das ganze Display laufen lassen, um wirklich soviel von der Klebeverbindung wie möglich aufzutrennen.

    Yes, do it many times to loosen the adhesive.

    Noah Ralston -

    Would be good data to show the 3 areas (wifi antennas where the "tape" is larger and covers them. The rest of the "tape" is 1.4" and easy. Also after removing the display, be sure to remove the old "tape" from both the display and the rubber parts of the case. Use the spudger to start an end and it should pull off easily. Careful on the baackside of the display as you can scratch off the black paint/covering.

    Carl Schultz -

  10. HVK2HNgts1D53wOs
    HVK2HNgts1D53wOs
    QrZMXcap4the5yXk
    hZXQgXJhIoKTxBwH
    • Das Werkzeug hat den größten Teil der Klebeverbindung aufgeschnitten., aber das Display ist immer noch ein wenig mit dem Gehäuse verklebt. Den letzten Rest musst du mit einer Plastikkarte lösen.

    • Lege den iMac mit der Scheibe nach oben auf den Tisch.

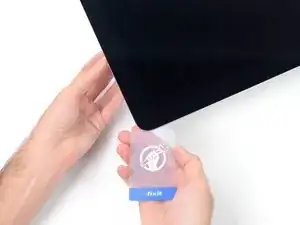
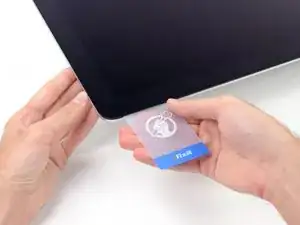
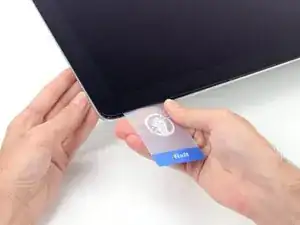
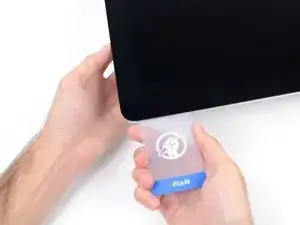
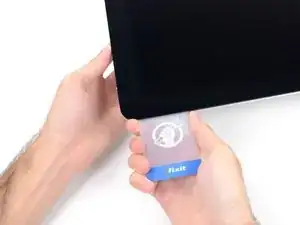
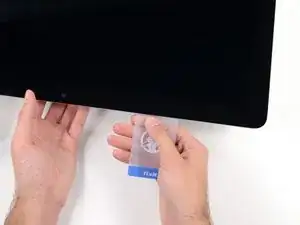
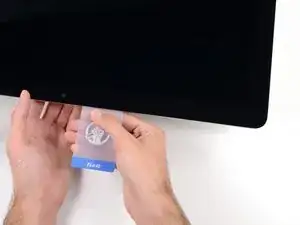
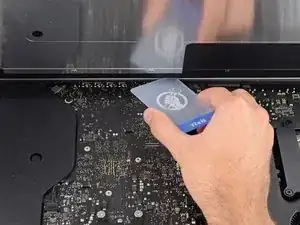
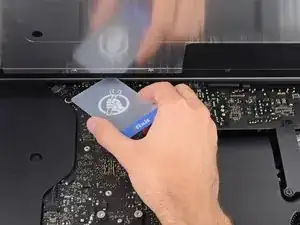
    • Beginne in der oberen rechten Ecke und zwänge eine Plastikkarte zwischen Display und Rahmen.

    • Achte darauf, die Karte nicht tiefer als 9 mm einzuschieben. Du könntest sonst Bauteile im Inneren beschädigen.

    this step is extremely important NOT to stick in the cards too far….. doing so, you risk a 600 euro replacement as I experienced………

    Edgar Broekema -

    I drew a 3/8” line on my cards with a marker first.

    Max Romano -

    I’m reading this on the EU store, please change all measurements to cm/mm.

    Morgana Devina -

    @ifixit The next batch of cards you create should have a line printed on the card 3/8” in from the edges. Would make a nice reference.

    Richard Giratd -

    Here’s where OWC provides glass removal suction cups, which is a better solution than plastic cards.

    The suction cups help to easily lift the glass panel, without risking the damaging of any internal wiring that the plastic cards could cause.

    Ernst -

    Better to remove stand wedge at this point? Can’t see from pics

    derekrobinson -

  11. wUjiMGtv2IpkNB5p
    wUjiMGtv2IpkNB5p
    LncJQeQQOAvg3CMA
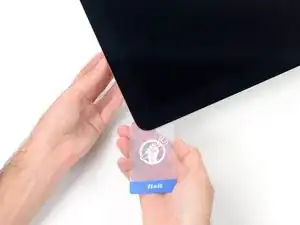
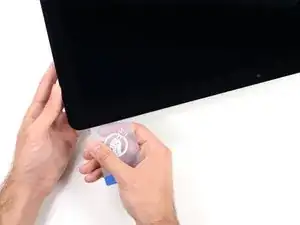
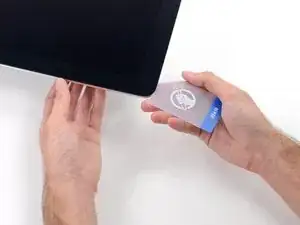
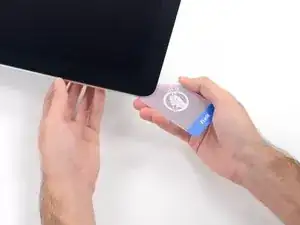
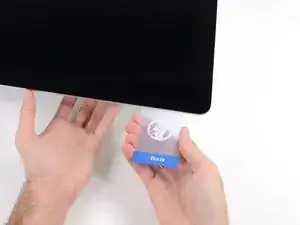
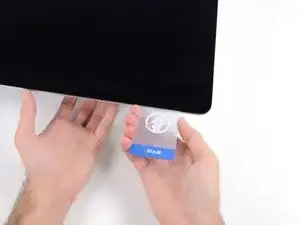
    • Verdrehe die Plastikkarte seitlich und vergrößere so den Spalt zwischen Display und Rahmen.

    • Bewege die Karte vorsichtig und langsam, damit das Displayglas nicht zu stark belastet wird - du brauchst nur einen Spalt von etwa 6 mm Breite zu öffnen.

    This part must be done very carefully or you can damage the flat cable from display, despite it was under a iron cover.

    Cassio Machado -

  12. qmVJHqIxctiuCbE5
    qmVJHqIxctiuCbE5
    6PF3COgq44osRMSX
    1nZLqZWsCa1xRTOR
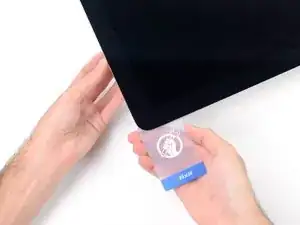
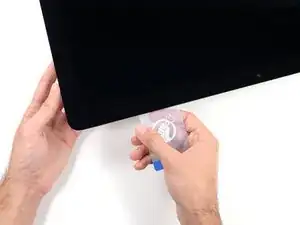
    • Schiebe die Karte zur Mitte des Displays hin und schneide so allen Kleber an der rechten oberen Ecke des iMac auf.

    • Halte unbedingt vor der iSight Kamera an, damit sie nicht beschädigt wird.

    You don't need to do it like this, simply open the iMac bendidng the LCD completely and use the pizza cutter to remove the adhesive.

    Felix -

    Using glass removal suction cups will avoid running this risk of damaging the camera (or any wiring).

    Ernst -

  13. pwG3JFqqfxxQXLID
    pwG3JFqqfxxQXLID
    wKv4nNrdklsj61AD
    • Zwänge die Plastikkarte erneut in die obere rechte Ecke ein und lasse sie dort stecken. Damit verhinderst du, dass sich die Teile wieder verkleben.

  14. B1l4C4H1WK3CwfsH
    B1l4C4H1WK3CwfsH
    5gnKwfWW1K2gnkAY
    dU3V1S5PiPpZoiRX
    • Setze eine zweite Plastikkarte an der oberen linken Ecke des iMac in den Spalt zwischen Rahmen und Display ein.

  15. 1eeYyLOXUgoVdMcU
    1eeYyLOXUgoVdMcU
    XNwnBG1I3otkGVaj
    • Verdrehe die Karte nach oben, vergrößerte so den Spalt zwischen Rahmen und Display ein wenig.

    • Drehe, genau wie an der anderen Seite, langsam und lasse dem Klebstoff Zeit beim Auftrennen. Achte drauf, das Displayglas nicht zu stark zu belasten.

  16. 1AtMSKY35dfSoyov
    1AtMSKY35dfSoyov
    eYI56QJhkhMLdtyx
    oVDneBvJQXNCvQpC
    • Fahre mit der Karte zur Mitte hin, halte auch hier wieder vor der iSight Kamera an

  17. KlhOFUANthUfPZrW
    KlhOFUANthUfPZrW
    KGDDBwLWXguRGlso
    • Zwänge die Karte wieder bei der linken oberen Ecke ein.

  18. xXVPepFcNBfFlYLm
    xXVPepFcNBfFlYLm
    mJWDXXcMCnL6OwqX
    lGcKi3n1DVFdANJw
    • Verdrehe nun beide Karten seitlich, wie im Bild zu sehen an den Ecken eingesetzt, und vergrößere den Spalt zwischen Gehäuse und Display.

    • Wenn manche Stellen noch verklebt erscheinen und sich nicht trennen lassen, dann musst du aufhören zu verdrehen und mit einer der Karten die Klebestelle auftrennen.

    • Fange an, die Oberkante des Displays vom Rahmen weg zu heben.

    • Hebe es nur ein paar Zentimeter an - die Datenkabel und Versorgungskabel des Displays sind immer noch am Logic Board angeschlossen.

  19. 2CYaRvZMKD1MHJWF
    2CYaRvZMKD1MHJWF
    fHCLPYQIpP4EVOLZ
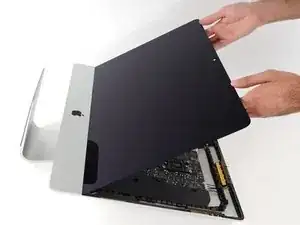
    • Hebe das Display soweit hoch, um leichten Zugang zum Verbinder zu haben. Hebe es aber nicht zu hoch (höchstens 20 cm), damit die Kabel nicht zu sehr angespannt und die Verbinder nicht zu sehr belastet werden.

    • Halte das Display mit einer Hand fest und löse mit der anderen Hand das Kabel der Stromversorgung des Displays.

    It was difficult to remove this connection. I ended up having to gently pull-up vertically a little on the wire side to unsnap it about 1mm and then horizontally wiggle it out.

    delacrj2 -

    I had a difficult time removing this connection. I had to lift the wire-side about 1mm before it unsnapped and then carefully wiggle it out horizontally.

    delacrj2 -

    Can this cable be replaced? I am worried mine is damaged. I have no display after the screen fell and stressed the display flex cables following an SSD upgrade.

    Jeremy Brainard -

    This step should be done with extreme caution and care, as this step 19 is not described in great detail (sorry, author).

    The first (most outward) cable will slide out by gently pulling it by its tabs. The second (inner) cable is more tricky, as the locking lever must be moved backward first, before gently pulling backward on the cable connector. The angled tweezers are useful here, to help lift that locking lever, because fingers are too big for this.

    Ernst -

    be VERY careful and SLOW...take your time. These displays crack VERY easily when removing and they'll spider web on you. I've done probably 20 or so of these and cracked 3 being super careful.....ugh.

    Faslane -

    I found the best way to unplug this display power cable was to use my right hand, and the fingernails of my index finger and thumb to grab the ends of the tabs on either side of the connector, squeeze, and pull the connector out gently.

    Phil McInnis -

  20. Zh56FQPLtH1qJkBF
    Zh56FQPLtH1qJkBF
    RuoSZ5iXxQqvKfcF
    MuEuntgC4FjFNuDJ
    • Halte das Display weiterhin mit einer Hand fest und klappe den metallenen Sicherungsbügel am Displaydatenkabel hoch.

    • Ziehe das Displaydatenkabel vorsichtig aus seinem Sockel auf dem Logic Board.

    • Achte darauf, dass du den Verbinder des Displaydatenkabels gerade aus seinem Sockel ziehst. Halte ihn dabei parallel zur Platine, damit er nicht beschädigt wird.

    Cannot seem to find a replacement cable for this, as I suspect mine is damaged. Can’t even find a part number. Anyone know what it might be?

    Jeremy Brainard -

    https://www.amazon.com/gp/product/B08TTL...

    That's the part I ordered for mine and it seems to work ok. I did make a point of contacting the seller and advising them of my requirement and they ensured I got the right part and it matches the description of the link. Bear in mind I bear no responsibility if yours does not work since I am just sharing what I did and what I ordered. Thanks.

    Jim Stanford -

    I also need that cable.

    cameronjpu -

    It's a little difficult to tell... but looking at the connection to the logic board on the video data cable, are the pins faced up or down?

    On the display, same question since it appears you have to "twist" the cable during the reconnection step.

    Jim Stanford -

    For this particular cable, take a good look before pulling on anything. Plug is locked on its socket with a bracket. You can lift this bracket by holding the small, flat black plastic handle that is attached to it. If you're struggling to grab it, use the end of the pizza roller handle to lift it, or the tweezers. Cable then comes off by pulling parallel to the main board.

    Froggy Manny -

  21. faYLZCcUqNgfLImh
    faYLZCcUqNgfLImh
    fTsCL5NUphoD5vbV
    • Hebe das Display nahezu senkrecht hoch.

    • Es gibt jetzt immer noch einen Klebestreifen am unteren Rand des Displays, der dieses wie ein Scharnier am Rahmen festhält. Du kannst den Klebestreifen ablösen, indem du das Display ein paar Mal hoch und runter bewegst.

    The best way to remove the chin adhesive is to use the tabs at either end (there are two strips that run from each outside corner to near the centre). Carefully pull the tabs up and the strips should peel off.

    Advance Technical Service -

  22. JPTg4NhGasMGYSuQ
    JPTg4NhGasMGYSuQ
    Y5FlxocLLXGaRWmi
    • Du kannst, wenn nötig, verbliebene Reste des unteren Klebestreifens mit einer Plastikkarte ablösen.

    At step 21-22, releasing the adhesive strips from the bottom of the display, I noticed a tab on the outer end of each strip. Pull the tab to remove the whole strip, no need to mess around with the plastic cards!

    roberttrevellyan -

    Instead of the plastic cards, use the flat end of a spudger. Use it as scraper. Be careful as there are antennas mounted on the inside edge of the frame on the right side (facing you), and the top right (facing you). The original adhesive strips are on those as well. - ECJ

    ECJohansen -

    A little bit of hot air (eg. hair dryer) will help soften the adhesive. Use a piece of cardboard or equivalent if you want to avoid blowing hot air towards the electronics.

    Be careful to remove absolutely everything - any remainder will create a bump and prevent your screen from sticking back to the frame when reassembling.

    Froggy Manny -

  23. W11PURO2LYnqVMEL
    W11PURO2LYnqVMEL
    4x45fNhvlBjfqU3f
    WstuEbNDdOlFKIns
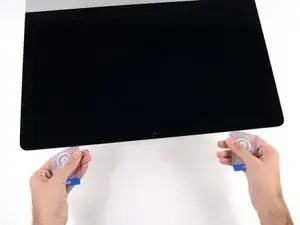
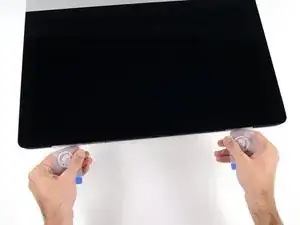
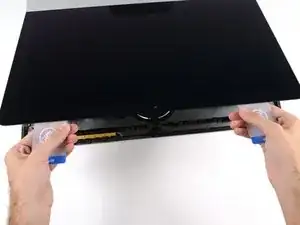
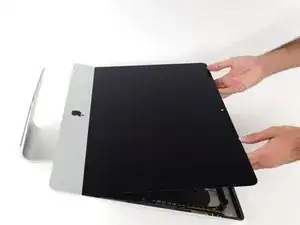
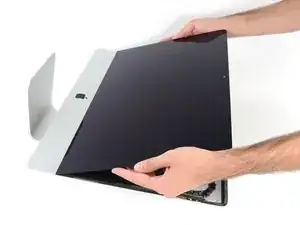
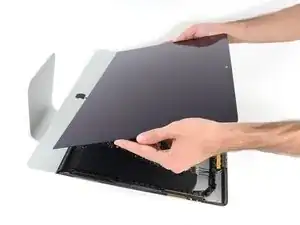
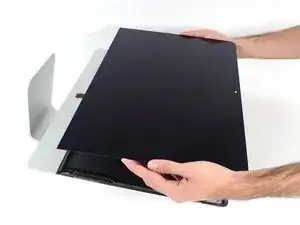
    • Hebe das Display vom Rahmen weg und entferne es vom iMac.

    • Möglicherweise musst du es von einer Seite her langsam anheben, um es von restlichem Kleber abzulösen.

    • Sei sehr vorsichtig beim Hantieren des Displays - es ist groß, schwer und aus Glas.

    • Der Kleber lässt sich nicht mehr verwenden, um das Display erneut festzukleben. Folge dieser Anleitung, um die Klebestreifen, welche das Display am Gehäuse festhalten, zu erneuern.

  24. NcuxI1qtaekXpOl6
    NcuxI1qtaekXpOl6
    mphdji2lKIR3CwWS
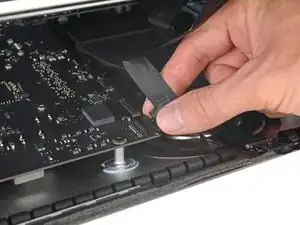
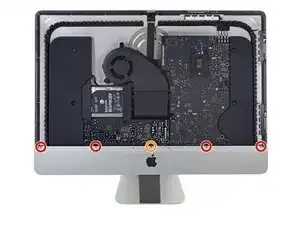
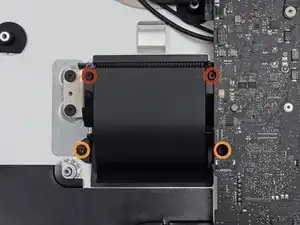
    • Entferne folgende fünf Kreuzschlitzschrauben, welche die untere Auflagestütze befestigen:

    • Vier 3,2 mm Schrauben

    • Eine 1,7 mm Schraube

    • Du musst eventuell den Displayklebestreifen an der Unterkante des iMac Gehäuses abziehen, um an die Schrauben zu gelangen.

    I would recommend that those trying this have the project tray to contain all of the screws.

    Mikkif -

    2 notes for reassembly, carful with screws not to strip the heads as they are really really small, make note to cut a gap in the the adhesive over the whole for the microphone.

    I managed to strip the head of one of the screws when putting it back in. So be carful with them when putting in / taking out. If you strip it on the way out you will need to take a fine drill and rill it out. Going back in, well as long as you never need to strip it down again not a problem.

    The second problem is a real pain, you need to make sure to cut a gap in the adhesive just to the right of Center at the button to allow for the microphone opening. If you don’t, the adhesive tape will stop any real pick up on the Mic, so you just need to cut a small gap in it before putting on the screen. Unfortunately I didn’t find this out (or do my checked before sticking it all back down, so have to pull screen back off and reapply new adhesive with a cut out in it at an other time.

    Andrew Taylor -

    Refer her for more info on the mic / adhesive work around —> Muffled Microphone - iMac 21.5" (mid 2017) - Following Adhesive Strips

    Andrew Taylor -

  25. JXwmPAMGvia4gxmW
    • Entferne die untere Auflagestütze (auch "Kinnriemen" genannt) vom Gehäuse des iMacs.

    Keep this long, aluminium part very straight when pulling it away or you might bend it

    Froggy Manny -

  26. vnCZOVJAfQMkCXVO
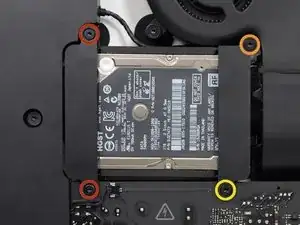
    • Entferne folgende Torx T10 Schrauben welche die Festplattenhalterungen am iMac befestigen:

    • Zwei 21 mm Schrauben

    • Eine 9 mm Schraube

    • Eine 27 mm Schraube

    At step 26, when reassembling, it's super easy to over-tighten the 9mm screw and strip the brass ferrule out of its hole in the plastic bracket (%#*@).

    roberttrevellyan -

    Mine has 4 different length screws, the two red colored 21mm screws in this guide are actually two differ lengths

    anonymous 523 -

    Mi imac does not have a HDrive whats the steps to follow?

    Charlie -

    buongiorno, l'imac del 2019, non monta alcuna ssd, ma monta una m2 direttamente sulla scheda madre!

    pertanto nella guida andrebbe aggiunto il cavo sata con sensore temperatura da aggiungere sulla scheda madre, per poter collegare un nuovo hd ssd altrimenti rimarrete come me bloccati con un imac aperto e non assemblato, in attesa di ricevere il cavo acquistato su internet da amazon o terze parti.

    vi consiglio inoltre di aggiungere una foto reale del ò'imac 2019 nella guida in cui manca l'ssd, renderà subito la problematica che avranno in molti!

    Donato Altomare -

  27. MFEFhp6PYNe1LMei
    MFEFhp6PYNe1LMei
    YOZ6AmbKs2AlGURG
    • Entferne die linke und die rechte Festplattenhalterung vom iMac.

  28. mvMdQktTba6hAHXt
    mvMdQktTba6hAHXt
    Xrb5HKoQvsB3M1aL
    ngWQxHCLD5HUmXC1
    • Bei den nächsten Schritten musst du mit deinen Händen in der Nähe der offenliegenden Oberfläche der Netzteilplatine arbeiten. Berühre keinesfalls die Oberfläche der Netzplatine oder eine der offenen Lötstellen. Du riskierst bei Berührung einen elektrischen Schlag von den vielen großen Kondensatoren auf der Platine .

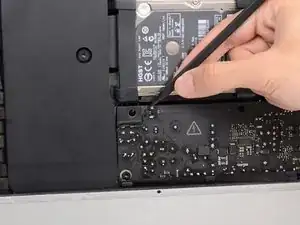
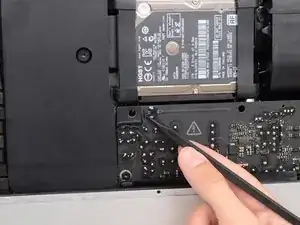
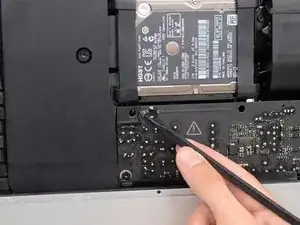
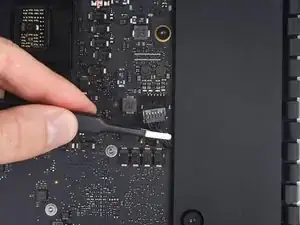
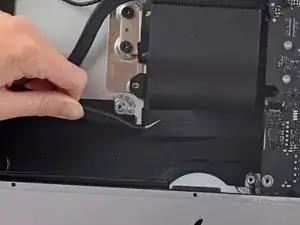
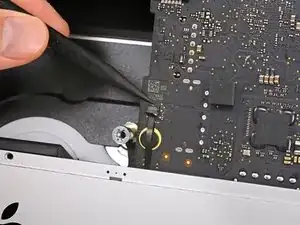
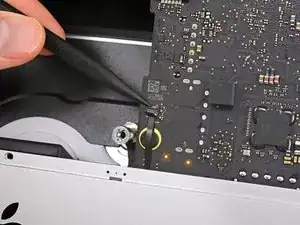
    • Drücke abwechselnd mit der Spudgerspitze an jeder Seite des Kabelsteckers der Einschalttaste und lasse ihn so allmählich aus seinem Anschluss herauswandern.

  29. FRyHHB3eYim1Mlap
    FRyHHB3eYim1Mlap
    QYTUyMIUOCpNBKj3
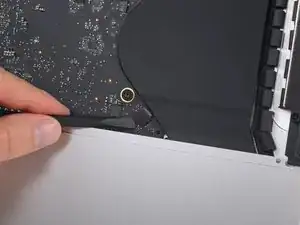
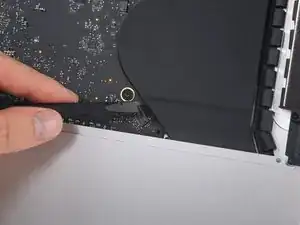
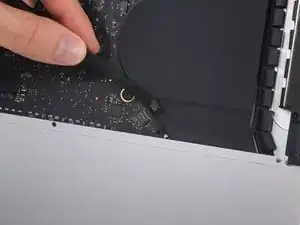
    • Drücke abwechselnd mit der Spudgerspitze an jeder Seite des Steckers am Kabel der Netzteilsteuerung und lasse ihn allmählich aus seinem Anschluss herauswandern.

  30. CH3APYFIpiKhphHv
    • Entferne die beiden 7,2 mm Torx T8 Schrauben, mit denen das Netzteil am Rückgehäuse befestigt ist.

  31. ydiE3k5Fa2YpKhyx
    ydiE3k5Fa2YpKhyx
    2WOoukeWyEZYOdGS
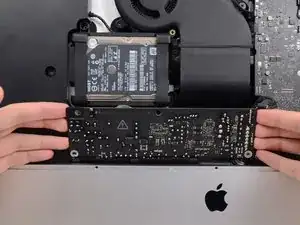
    • Wenn du am Netzteil arbeitest, sei sehr vorsichtig und berühre nicht die Anschlüsse der Kondensatoren oder offene Lötstellen auf der Rückseite des Netzteils. Fasse die Platine nur an den Kanten an.

    • Kippe das Netzteil nach vorne.

  32. PKvyIF2PGHKLVC2I
    PKvyIF2PGHKLVC2I
    QS1usHIbpanvhs6M
    mWlTKHdQmhbCG6Sm
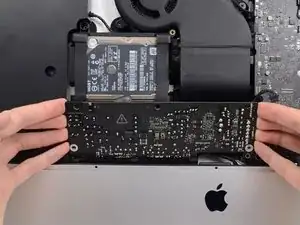
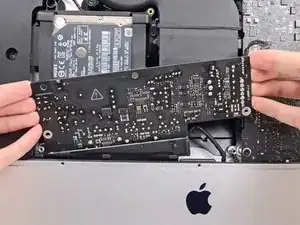
    • Ziehe das Netzteil ein wenig nach oben und aus dem Rückgehäuse heraus.

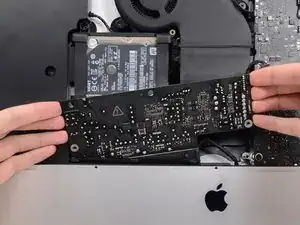
    • Drehe das Netzteil gegen den Uhrzeigersinn, hebe die rechte Seite dabei etwa 2,5 cm höher an als die linke.

  33. wWakaG6mtCcwjET3
    wWakaG6mtCcwjET3
    yOSa1on1CEscZMhj
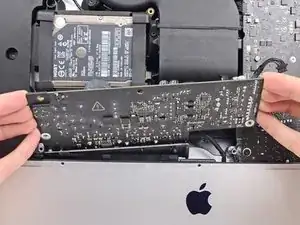
    • Schiebe das Netzteil nach rechts, um die Schraubenpfosten am Rückgehäuse freizulegen.

  34. jLV1p6yQHGorKX6J
    jLV1p6yQHGorKX6J
    RXTvMCHuVc2YG6Bw
    AhUBHxjjc4AVbOIJ
    • Rücke das Netzteil nach vorne und hole es aus seiner Vertiefung im Rückgehäuse heraus.

    • Versuche noch nicht, das Netzteil ganz vom iMac zu entfernen, es ist immer noch am Logic Board angeschlossen.

  35. cbv6FeSmQ2uPUJLi
    cbv6FeSmQ2uPUJLi
    2TTX1JBYPKyJJDpy
    DpV1XSNW6lES4k6h
    • Sei sehr vorsichtig und berühre nicht die Anschlüsse der Kondensatoren oder offene Lötstellen auf der Rückseite des Netzteils. Fasse die Platine nur an den Kanten an.

    • Lasse keine der offenen Lötstellen mit einer Metallfläche in Berührung kommen, das könnte einen Kurzschluss verursachen.

    • Drehe das Netzteil herum, um an den Gleichstromanschluss hinter dem Logic Board zu gelangen.

    • Um das Kabel abzutrennen, musst du die Verriegelung auf der Rückseite des Steckers, hinter dem Logic Board, drücken, dann kannst du den Stecker gerade herausziehen.

  36. X1O2EONkUfMWVDIU
    X1O2EONkUfMWVDIU
    afj3FkjCDfAuRAC3
    IpAy5PoZ5NsXFekL
    • Es ist vielleicht einfacher, wenn du den iMac für die folgenden Schritte auf die Rückseite legst.

    • Drücke die Raste an der Seite des Netzkabelsteckers mit dem flachen Ende des Spudgers nach innen.

    • Während du die Raste mit dem Spudger gedrückt hältst, kannst du das Netzkabel fassen und den Stecker gerade aus seinem Anschluss herausziehen.

    I didn't bother to remover the power supply lead in this stage but simply flippedthe circuit board over onto the lower body of the iMac (NOT placing it directly onto the metal but onto a sheet of plastic)

    Fettler -

  37. 2VMnTxjOOO1L43of
    • Entferne das Netzteil vom iMac.

  38. ZjTdOuevFThSNaSi
    ZjTdOuevFThSNaSi
    S4meAekVQZkISUTE
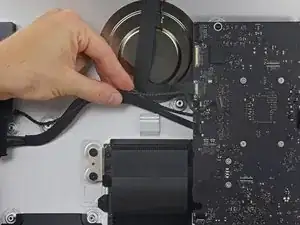
    • Ziehe den Stecker am Lüfterkabel gerade aus seinem Anschluss auf dem Logic Board.

  39. MrmKPSuUCopatoYl
    • Entferne die drei 10 mm Torx T10 Schrauben, welche den Lüfter am Rückgehäuse befestigen.

    • Die oberste Schraube ist mit einem Abstandshalter aus Gummi auf ihrem Kopf versehen, um das Display zu stützen. Lasse ihn, wo er ist.

  40. NDv2oOiGvHmIAG6I
    NDv2oOiGvHmIAG6I
    igO3bWrtnsJMJ5QJ
    • Entferne den Lüfter vom iMac.

  41. rAirT1GHZP1qpIqC
    rAirT1GHZP1qpIqC
    FI1BVEajFcTkxyGe
    fH3KYDKkVeWLdH2L
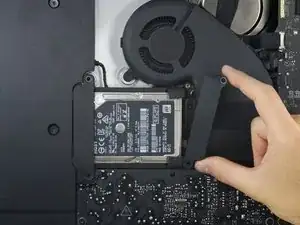
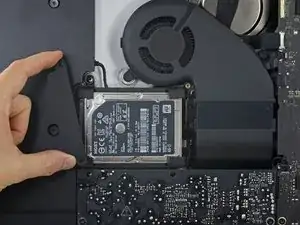
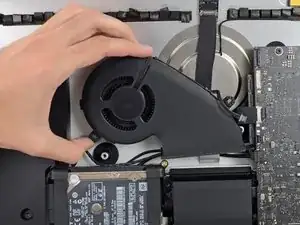
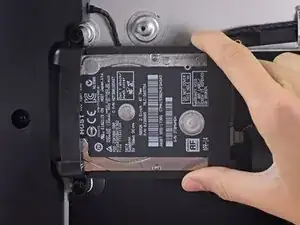
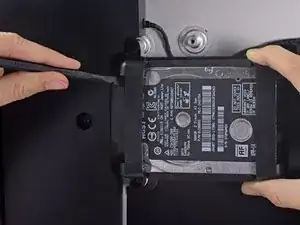
    • Hebe die Festplatte am Rand in der Nähe des Logic Board an und ziehe sie etwas aus ihrem Sitz.

    • Die Festplatte ist noch über die SATA Kabel für Daten und Stromversorgung angeschlossen, versuche also noch nicht sie ganz zu entfernen.

    The newer drives have rubber ends and an adhesive side, be careful removing them if replacing the drive and be sure they are securely pushed back into the holder

    Carl Schultz -

  42. xAT4mnLlMEmZaE1l
    xAT4mnLlMEmZaE1l
    nUVTcTkKjNk2phCg
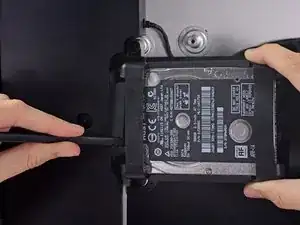
    • Löse das SATA Combo Kabel für Daten und Stromversorgung, indem du mit dem Spudger vorsichtig seinen großen Plastikverbinder weg von der Festplatte hebelst.

    When reconnecting the SATA cable, there is nothing to make the connector hold still, and it is hard to reach, so it took several tries. I ended up taking off the rubber baby buggy bumpers to get more room, and then jamming them back on after getting the SATA connector snugged up.

    bstaud -

    If by rubber baby buggy bumper, you mean left speaker, then yes, I agree. Reinstall the hard drive before the left speaker.

    jerrid_foiles -

    Kudo to @jerrid_foiles! I was going crazy trying to attach the SATA cable until I took the two screws out of the left speaker and slid the top end of it aside by about 3/4 inch. Make the whole process SO MUCH easier!!

    jiclark -

    We solved this by removing the hard drive tray screw, then inserting the cable into the SATA hard drive. Then hold the hard drive a bit out of the way to insert the 7.3mm hard drive tray screw.

    Marjie -

    Agree with this method, found it an impossible task to reconnect the SATA connector until removed the tray screw, then it was relatively easy to reconnect and then replace the tray screw.

    daveedwards -

    Also agree with this method!

    jmorphett5 -

  43. gPY6hXsOGJ1vn6ij
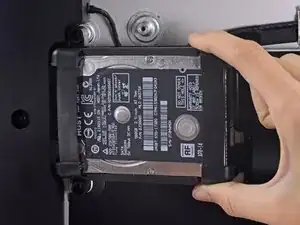
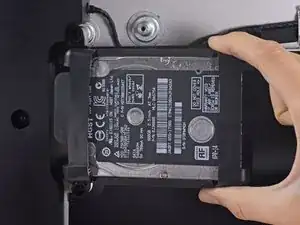
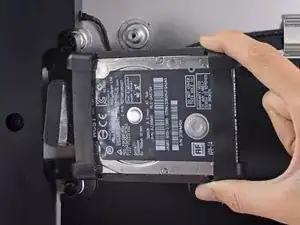
    • Entferne die Festplatteneinheit vom iMac.

    When reassembling, I found it easier to loosen the HD tray screw from Step 48 and pull the tray outwards from the left side in order to plug the SATA cable in more easily.

    Cool_Breeze -

    Thanks! I, too, had a hard time reconnecting the SATA cable.

    boboswell -

    I found this helpful too!

    Anwar -

    And DON’T do what I did, which is to remove the left speaker - which can easily lead to breaking the cable between the power on button and the power supply. The cable is routed through a hidden slot at the very bottom of the left speaker

    bsmith1 -

    I did loosen the speaker so I could get a tool behind the SATA cable to push it on to the SSD drive. Otherwise hard to align cable.

    Noah Ralston -

    I found the easiest way to connect the SATA cable was to not screw the plastic hard drive tray down until you plug the drive in. That way you can easily push the connector in and due to the cable you’ve got some wiggle room. You can position the tray then just lift one end of the drive up and secure the screw. Then just push the drive down.

    Chris Caldwell -

    This was the step that I had the most trouble with. I’m used to replacing a hard drive in a MacBook Pro, where the “plug” that you plug the drive into is a rigid thing that you can firmly press the hard drive into.

    With the iMac, the plug is situated on the end of a non-rigid cord, so the plug moves back when you try to snap a drive into it. Also, those two rubber gasket things that you adhere to the side of the drive really make it difficult to maneuver the now-overly-chubby drive towards the plug.

    After must frustration/concern, what I ended up doing was temporarily removing the rubber gasket things, using the “spudger” as kind of a lever behind the “plug on a cord” so that it didn’t move as much, and then pushed the gasket-less SSD into the plug.

    Once I got it connected, I put the rubber gaskets back on the sides of the SSD and kind of coaxed it down into place, using the pointy end of the spudger to get the chubby corner pieces to “sit” correctly in the rigid plastic tray that the SSD kind of rests in.

    Jack OnFlickr -

    From another comment elsewhere on this repair, I *highly* recommend removing the two screws holding the left speaker in place, then sliding it just a tad out of the way to be able to easily attach the SATA cable. You don’t have to move it much to make the whole process so much easier!

    jiclark -

  44. jWXmBog4lKr4HqkV
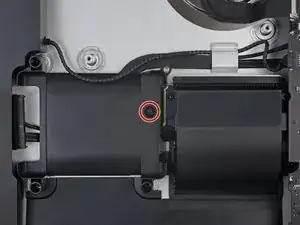
    • Entferne die 7,3 mm Torx T8 Schraube, welche den Festplatteneinschub am Rückgehäuse befestigt.

    it`s a t10 screw..! ;)

    happymac venezuela -

    I found it easier to connect SATA cable before fixing tray.

    Mārtiņš Jansons -

  45. qUxSodfw5NxJMghA
    • Entferne den Festplatteneinschub.

    I am following these procedures for the following: iMac Retina 4K - 21.5" - 3GHz Quad Core - Radeon Pro 555 2GB - 4GB/4GB (8GB total - 2 slots) 2400MHz DDR4 SO-DIMM - Mid 2017 - Model: MNDY2LL/A - iMac18,2 - A1418 - 3069. In my case, the SATA cable is clipped into the bottom of the hard drive tray. Pull the hard drive tray up slightly and angle to reveal clips. SATA cable pops out from the side of each clip.

    iannai29 -

    Better yet, after reading Step 49 - no need to remove SATA cable from the bottom of the hard drive tray.

    iannai29 -

  46. EVkS45CkS3Iu2YNC
    EVkS45CkS3Iu2YNC
    ZuQBSSUCOuYQLd2f
    • Ziehe das linke Lautsprecherkabel vorsichtig aus seinem Anschluss auf dem Logic Board heraus.

  47. TtGDfsaQYGANmgGx
    • Hole das Kabel zum linken Lautsprecher aus seiner Halteklammer an der Rückseite des Rückgehäuses heraus.

  48. wEDdKtKTxmGuxDDe
    wEDdKtKTxmGuxDDe
    LhH4UTiMVnoWq1cU
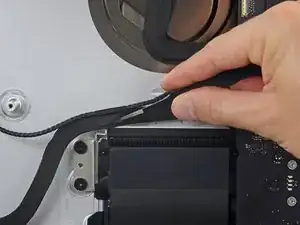
    • Hole ähnlich wie im vorigen Schritt das Geflecht aus SATA- und Versorgungskabeln aus der Halteklammer heraus.

  49. cGGPcPVZPPf1I1gP
    cGGPcPVZPPf1I1gP
    yAhJLP1k6kZTKoKU
    • Ziehe das Stück Klebeband ab, mit dem der linke Lautsprecherstecker und die SATA Versorgungs- und Datenkabel verbunden sind.

  50. VrbphVEAwWZ3NNVM
    VrbphVEAwWZ3NNVM
    Hi2DlRHisyTvoi3i
    L5GnIYiW3ZgYpm5j
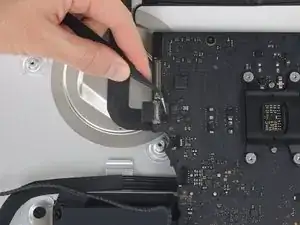
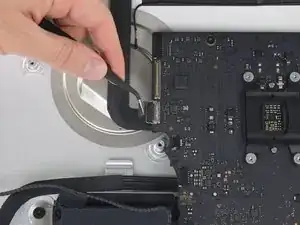
    • Klappe den metallenen Sicherungsbügel am Stecker des FaceTime Kamerakabels hoch.

    • Ziehe das FaceTime Kamerakabel gerade aus seinem Anschluss auf dem Logic Board heraus.

    • Dies ist ein empfindlicher Stecker, der leicht beschädigt werden kann.

  51. NMwtLbwURqmiS1Hd
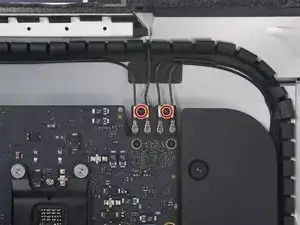
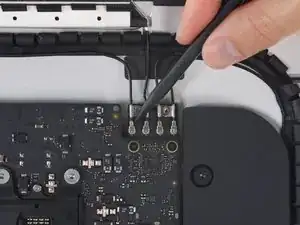
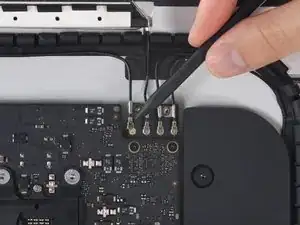
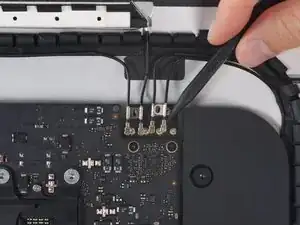
    • Entferne die beiden 4,0 mm Torx T5 Schrauben, mit denen die vier Antennenstecker an der AirPort/Bluetooth Karte befestigt sind.

  52. XW6dGXe3rUDVpHTU
    XW6dGXe3rUDVpHTU
    gBm6OrrXMZBEI4RV
    Gf5TshqSeHY1uE1Q
    • Heble alle vier Antennenstecker gerade nach oben und löse sie von ihren Anschlüssen auf der AirPort/Bluetooth Karte ab.

  53. VjRAN1ZSm2PTQFw2
    VjRAN1ZSm2PTQFw2
    etMu3QOg1kFDRrsO
    • Ziehe vorsichtig den Stecker am rechten Lautsprecherkabel gerade nach unten aus seinem Anschluss auf dem Logic Board heraus.

  54. 31WuMhdQcAf5APg3
    31WuMhdQcAf5APg3
    dCl6CHaWFVXjjCLA
    N4GNGjHeFoe3MXIP
    • Heble den Stecker am Kopfhörerkabel mit dem flachen Ende des Spudgers aus seinem Anschluss auf dem Logic Board heraus.

    • Schiebe das Kabel ein wenig nach rechts.

  55. 6PJQlAZBpAr2tOWS
    • Löse das Klebeband vom Abluftkanal ab.

  56. rFBrptATbIgcfcFT
    • Entferne folgende Torx T8 Schrauben, mit denen der Abluftkanal am Rückgehäuse befestigt ist:

    • Zwei 6,2 mm Schrauben

    • Zwei 4,7 mm Schrauben

  57. A6CN4kk2Qb3xm2d2
    A6CN4kk2Qb3xm2d2
    NQjsgCaEhcs4JNUf
    axtbr4ZFFH2Dapl1
    • Klappe den Sicherungsbügel am ZIF Verbinder des Mikrofonflachbandkabels mit der Spudgerspitze hoch.

    • Achte darauf, dass du nur am scharnierartigen Sicherungsbügel hebelst und nicht am Anschluss selbst.

    • Ziehe das Mikrofonflachbandkabel vorsichtig gerade aus seinem Anschluss heraus.

  58. OEFFfMmlYkoJFsIW
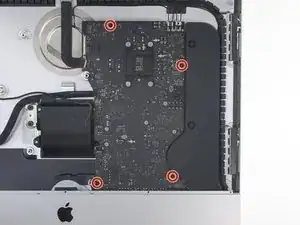
    • Entferne die vier 7,3 mm Torx T8 Schrauben, mit denen das Logic Board am Rückgehäuse befestigt ist.

  59. PINibihZhYFctKKx
    PINibihZhYFctKKx
    WSFDY3xp5IlAHndQ
    5RW2UJpNmpORTns1
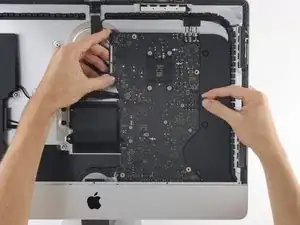
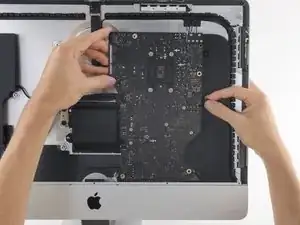
    • Kippe die Oberkante des Logic Boards vom Rückgehäuse weg.

    • Während du das Logic Board kippst, musst du den rechten Lautsprecherstecker nach rechts aus dem Weg des Boards ziehen.

    • Hebe das Logic Board gerade hoch und aus dem iMac heraus.

    • Achte darauf, dass sich das Board nicht an einem der Schraubenpfosten im Rückgehäuse verhakt.

    When repairing, I accidentally broke a small piece of what it seems to be a resistor. Mac still works fine and diagnostics reports no errors. Be careful when removing the mother carefully so it doesn’t hit the aluminium cover.

    Andres Urena -

  60. RqyaGT5MCfOASZyQ
    RqyaGT5MCfOASZyQ
    m2Rw1kh5RHbuF4JV
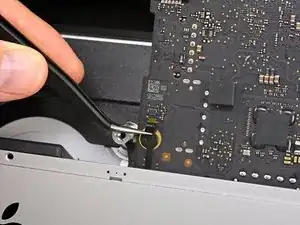
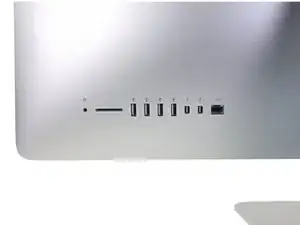
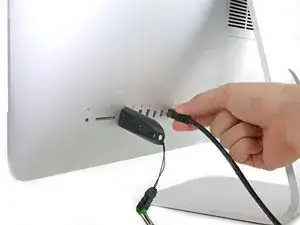
    • Achte beim Zusammenbau des iMacs sehr gut darauf, dass die I/O-Anschlüsse genau ausgerichtet sind. Das Logic Board kann schief sitzen, selbst wenn alle Schrauben angezogen worden sind.

    • Stecke einen USB-Stick und/oder ein Ethernetkabel ein, so dass das Logic Board beim Festziehen der Schrauben in der richtigen Lage sitzen bleibt.

  61. vNSIARcn2NisZRpR
    vNSIARcn2NisZRpR
    Qc2XdjK6mvJee5xU
    klgBtdWPAFabEZID
    • Der SATA Datenstecker besitzt eine Klammer, welche heruntergedrückt werden muss, damit er entfernt werden kann.

    • Drücke die Klammer mit dem Daumen herunter und hebe gleichzeitig den SATA Datenstecker hoch aus seinem Anschluss auf dem Logic Board, um ihn zu lösen.

  62. bo36KDSKuDmUFXaD
    bo36KDSKuDmUFXaD
    hnqxBimM2QtITALR
    • Fasse den Versorgungsstecker der Festplatte an und ziehe ihn vorsichtig aus seinem Anschluss auf dem Logic Board.

  63. JB5SEBNK1CVhFPft
    JB5SEBNK1CVhFPft
    QVxWk4BN1SdZnShN
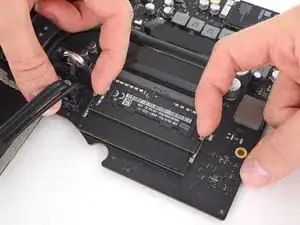
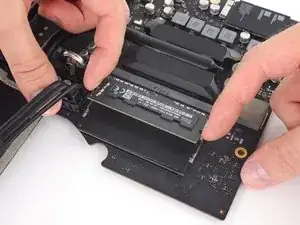
    • Eine Raste auf jeder Seite hält das RAM Modul fest. Drücke die Rasten mit den Fingern weg vom RAM Modul.

    • Wenn die Rasten gelöst sind, wird das RAM Modul leicht schräg hochspringen.

  64. VDxMQXnEiDrF6up3
    VDxMQXnEiDrF6up3
    cF3uwUIwYYSi2hWk
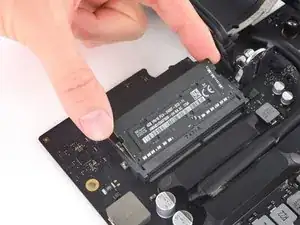
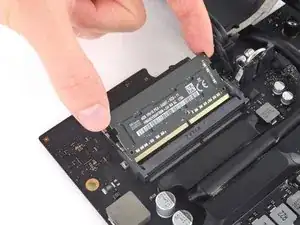
    • Hebe das RAM Modul bis zu einem Winkel von etwa 30° an und schiebe es heraus.

    • Fasse das RAM Modul beim Hantieren nur an den äußeren Kanten an. Achte darauf, dass du die goldfarbenen Kontakte an der Unterkante nicht berührst.

    • Um ein neues RAM Modul einzusetzen, musst du es mit dem gleichen Winkel wieder einschieben, bis es bündig sitzt, und dann herunterklappen, bis die Rasten einschnappen.

  65. ahfBjbNSyLTAEEWJ
    ahfBjbNSyLTAEEWJ
    hxFxURx1JUQla5jN
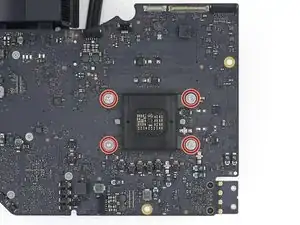
    • Löse die vier schwarzen Sicherheitsaufkleber ab, die die Befestigungsschrauben des Kühlkörpers bedecken.

    • Entferne die vier Torx T10 Schrauben, die den Kühlkörper auf der Rückseite des Logic Boards befestigen.

    • Ziehe beim Wiedereinbau diese Schrauben nur eine einzige Umdrehung an, und gehe dabei in einem Kreuzmuster vor. Dadurch wird die Spannung auf die Oberfläche der CPU gleichmäßig erhöht. Fahre mit dem allmählichen Anziehen der Schrauben fort, bis die Schrauben und die ganze Federplatte fest und flach am Logic Board anliegt.

  66. hQ5bsAINmXKGtiHE
    hQ5bsAINmXKGtiHE
    qQ62Y3gEw3ETCnGm
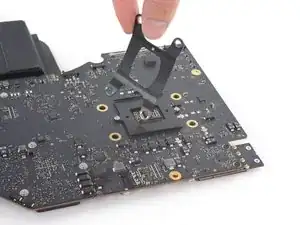
    • Hebe die Haltefeder und die Halterung des Kühlkörpers vom Logic Board ab.

  67. weK1cPOq2aXmXbDH
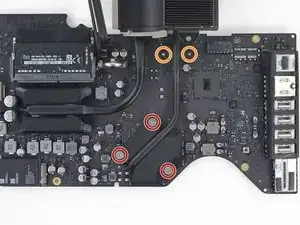
    • Löse die drei Torx T8 Schrauben, die den Kühlkörper über der GPU befestigen, ganz heraus. Diese Schrauben bleiben im Kühlkörper hängen.

    • Entferne die beiden 5,4 mm Torx T8 Schrauben, die das Wärmeableitungsrohr am Logic Board befestigen.

  68. OFfJVIdyiLW5nqCE
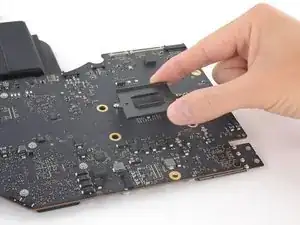
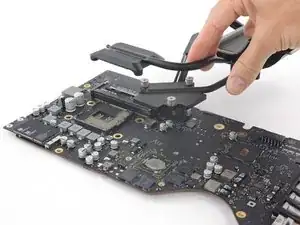
    • Wahrscheinlich wird die CPU beim Herausheben an der Unterseite des Kühlkörperes kleben bleiben. Achte darauf, dass sie nicht beschädigt wird.

    • Hebe die Kühlkörpereinheit vom Logic Board hoch und entferne sie.

    • Beim Zusammenbau des iMac musst du die CPU vom Kühlkörper lösen und getrennt vom Kühlkörper neu einbauen. Dies sorgt für einen korrekten Einbau und verhindert Schäden.

    • Folge unserer Anleitung für Wärmeleitpaste, um neue Wärmeleitpaste auf den Grafikprozessor (GPU) aufzutragen. Du musst auch neue Wärmeleitpads oder Wärmeleitpaste auf den VRAM Chips anbringen.

  69. YApPuCUsMVg6YPrs
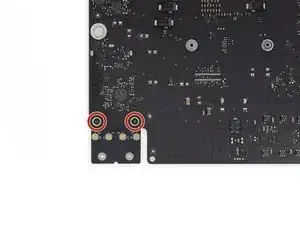
    • Entferne die beiden 3,3 mm Torx T5 Schrauben, welche die AirPort/Bluetooth Karte am Logic Board befestigen.

  70. WDUdywjEs1iUDrGa
    WDUdywjEs1iUDrGa
    MRMBswtVj1mSZFBC
    M1X2pkgXfKycMWCo
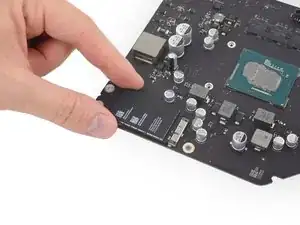
    • Hebe die AirPort/Bluetooth Karte leicht an und ziehe sie gerade aus ihrem Anschluss heraus.

    • Wende beim Herausziehen am Ende der AirPort/Bluetooth Karte nicht zu viel Kraft auf, du könntest sonst den Anschluss beschädigen.

    • Achte beim Zusammenbau darauf, dass die Karte richtig sitzt, bevor du die Schrauben wieder eindrehst.

    • Du erkennt den korrekten Sitz der AirPort/Bluetooth Karte daran, dass ihre Schraubenlöcher mit denen auf dem Logic Board übereinstimmen.

  71. iXrZPcBLKpIS1hHK
    • Nur das Logc Board bleibt übrig.

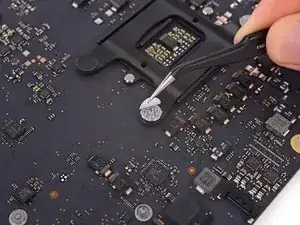
    • Wenn dein iMac mit einem Fusion Drive ausgestattet ist, musst du auch die SSD von der Rückseite des Logic Boards abnehmen und auf das neue Logic Board übertragen. Entferne die SSD mit Hilfe der nachfolgenden Schritte.

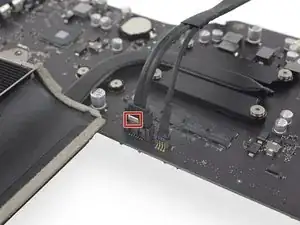
    • Auf dem Logic Board befindet sich auch die PRAM Batterie. Wenn das neue Board keine PRAM Batterie hat, kannst du die Batterie mit Hilfe dieser Schritte auf das neue Board übertragen.

    • Beim Zusammenbau des iMac musst du die CPU vom Kühlkörper lösen und getrennt vom Kühlkörper neu einbauen. So wird sichergestellt, das sie korrekt einbaut wird, und Schäden werden vermieden.

    • Folge unserer Anleitung für Wärmeleitpaste, um neue Wärmeleitpaste auf den Grafikprozessor (GPU) aufzutragen. Du musst auch neue Wärmeleitpads oder Wärmeleitpaste auf den VRAM Chips anbringen.

    • Achte beim Wiedereinbau des Logic Boards auf die korrekte Position der I/O Anschlüsse. Wenn das Board im Gehäuse sitzt, dann stecke einen USB- oder Thunderboltstecker in einen der Anschlüsse, um so die korrekte Ausrichtung sicherzustellen.

Abschluss

Um dein Gerät wieder zusammenzusetzen, folge den Schritten in umgekehrter Reihenfolge.

Adam O'Camb

Mitglied seit: 11/04/15

178849 Reputation

5 Kommentare

Hello, very good explanation .

Got a question please

I have the imac 4k 21.5 late 2015, can I change the motherboard? To be able to upgrade ram, does or fits in the 2015 body and with all parts?

Eleuterio Sousa Ramos -

I did it. Everything went very well, but the two thunderbolt plugs are not working after all. LAn and USb is doing well. Any suggestions about it?

Gunter Holder -

I am running into the same issue after upgrading the RAM and SSD. Have you found a fix?

William Sandidge -

Can the GPU be upgraded?
Mien Yockmann -

Re” I did it. Everything went very well, but the two thunderbolt plugs are not working after all. LAn and USb is doing well. Any suggestions about it?” You need to disassemble the iMac again to the point where the logic board is loose (step 58-59 on this guide). Connect a thunderbolt cable, a USB cable and and ethernet cable to the back of the iMac with the logic board in place but the logic board screws not tightened. This will ensure the ports are correctly lined. Tighten the logic board screws and finish the reassembly (at this point you can disconnect the cables.) . This should solve the problem.

jvilella -