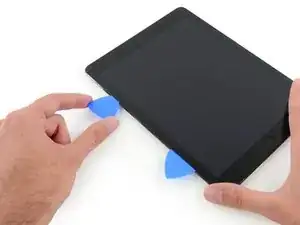
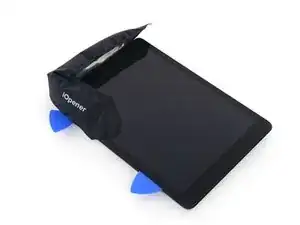
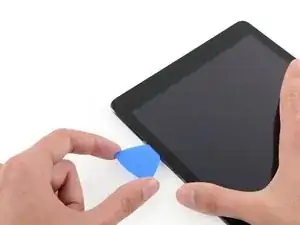
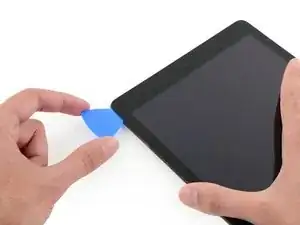
Einleitung

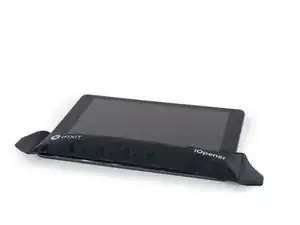
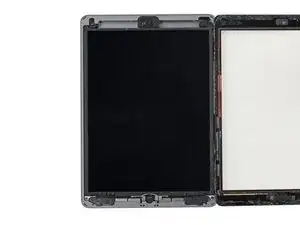
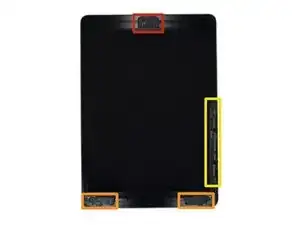
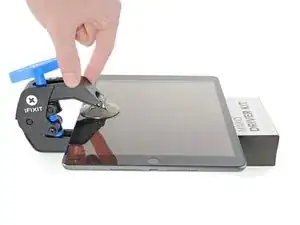
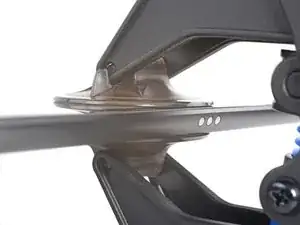
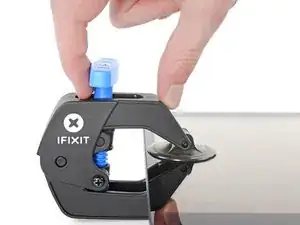
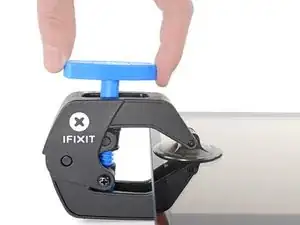
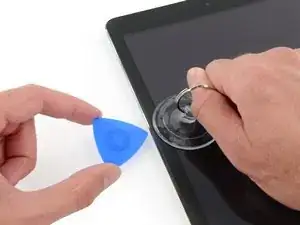
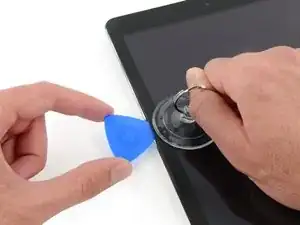
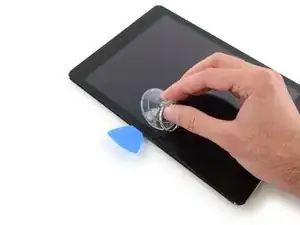
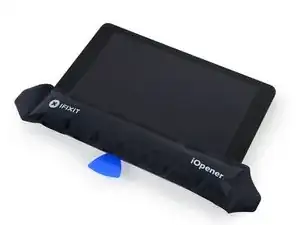
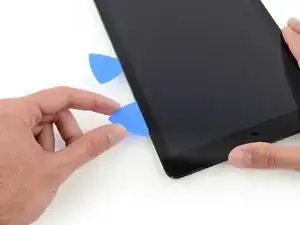
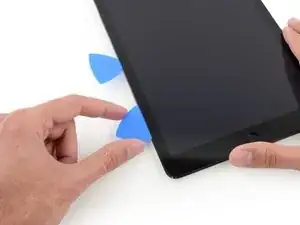
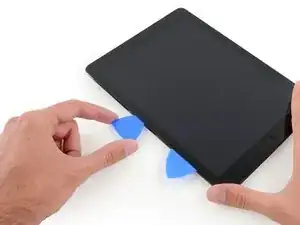
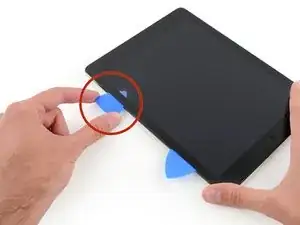
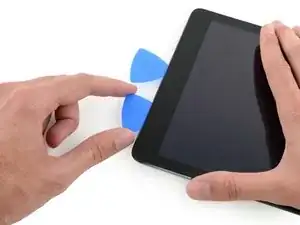
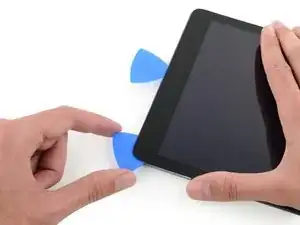
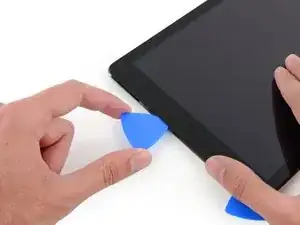
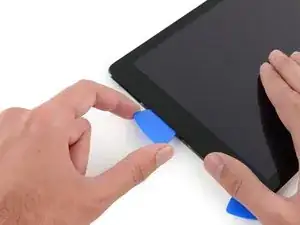
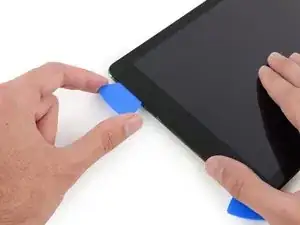
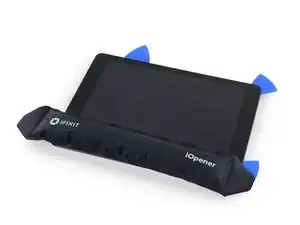
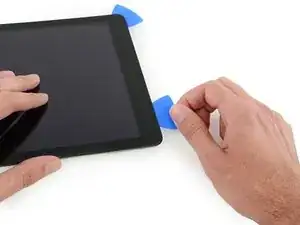
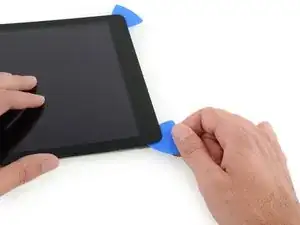
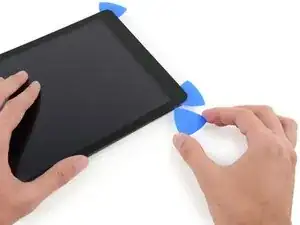
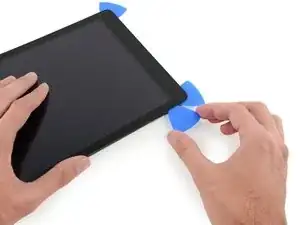
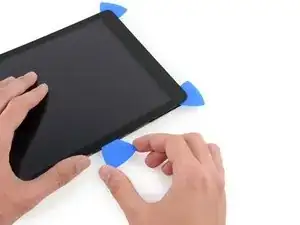
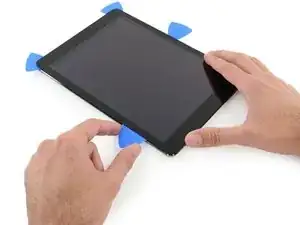
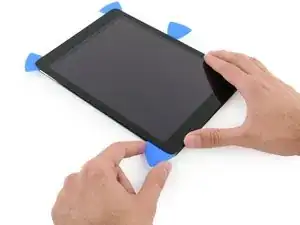
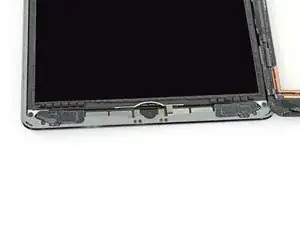
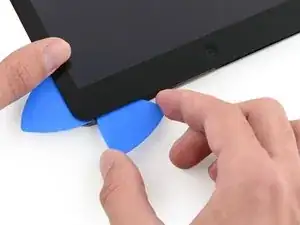
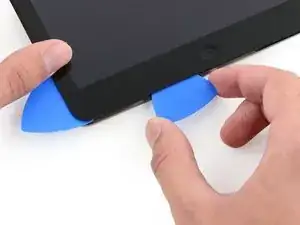
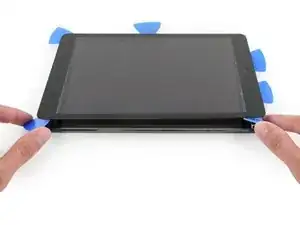
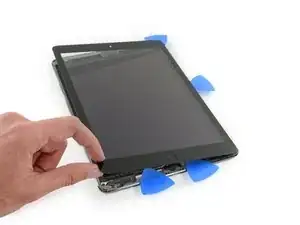
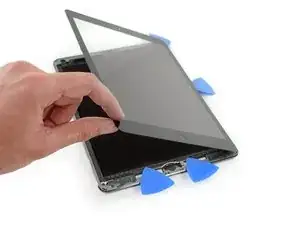
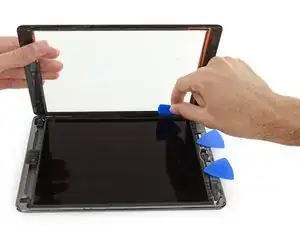
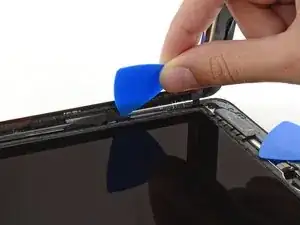
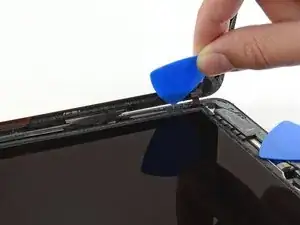
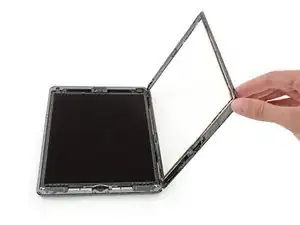
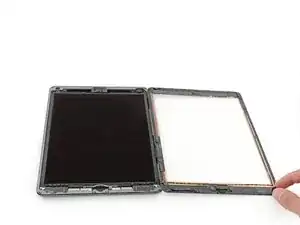
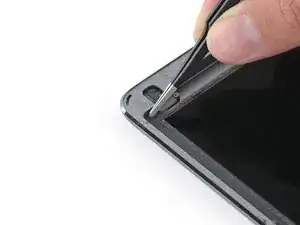
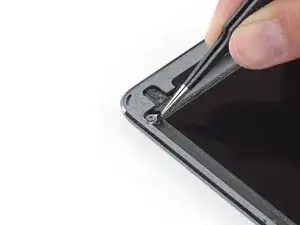
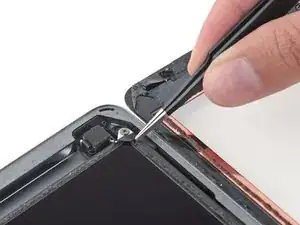
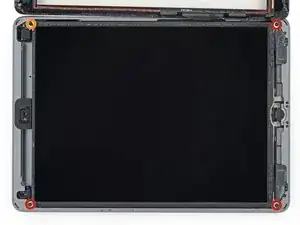
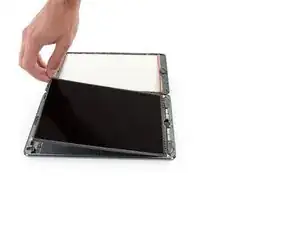
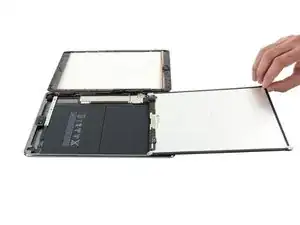
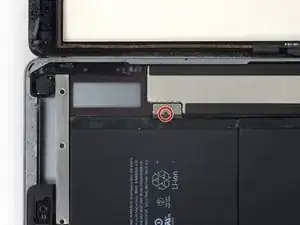
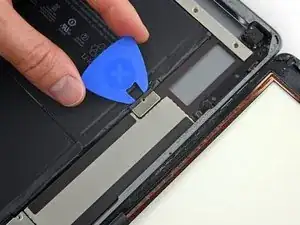
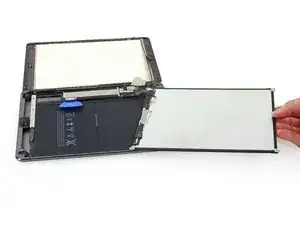
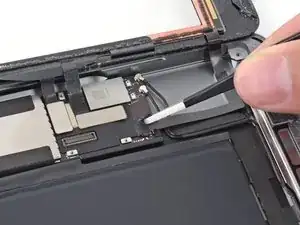
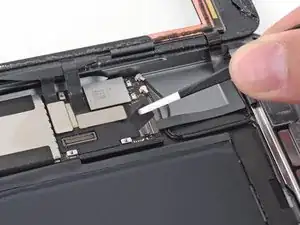
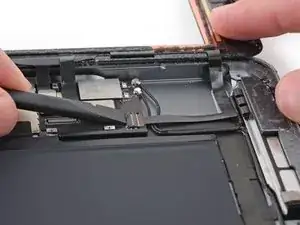
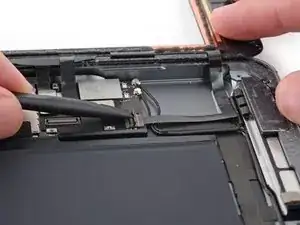
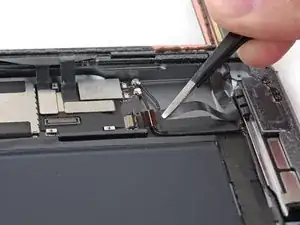
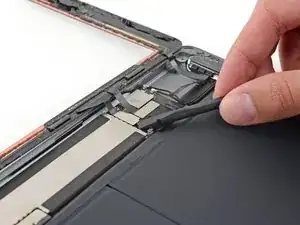
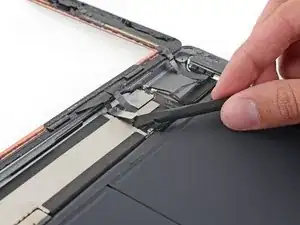
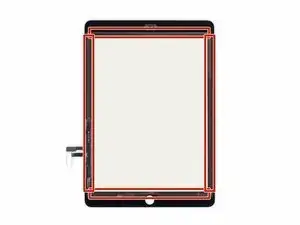
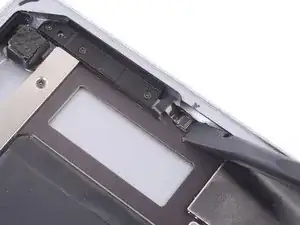
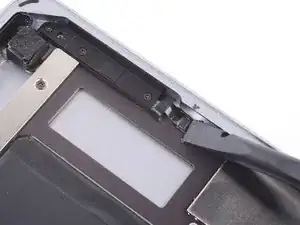
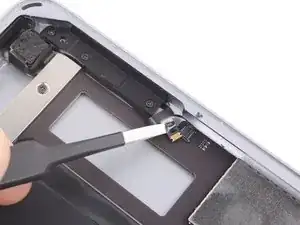
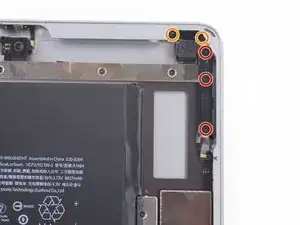
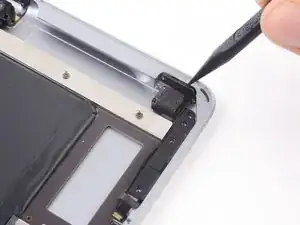
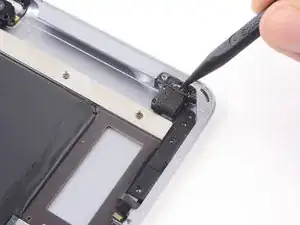
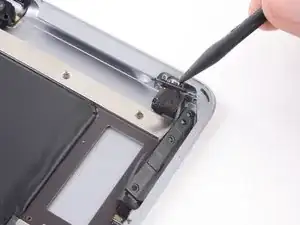
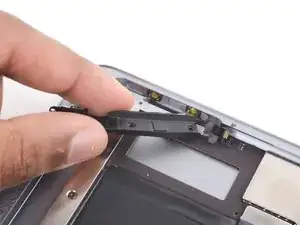
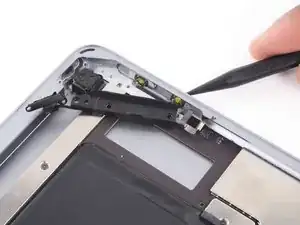
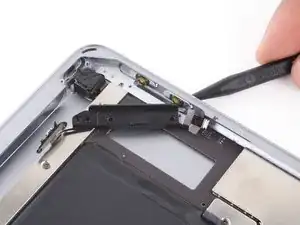
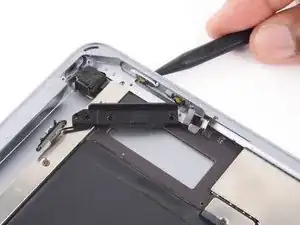
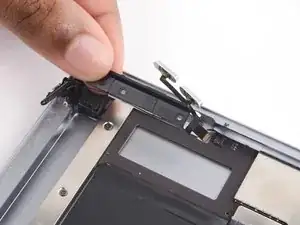
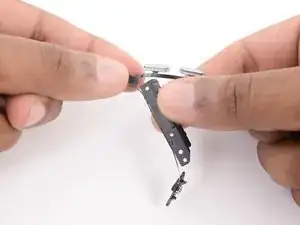
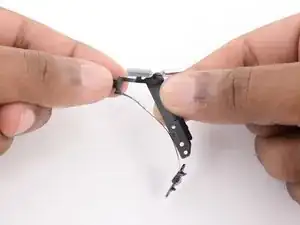
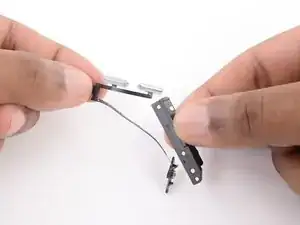
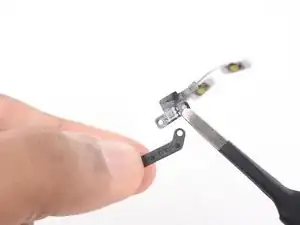
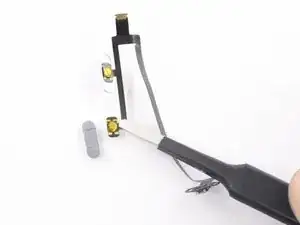
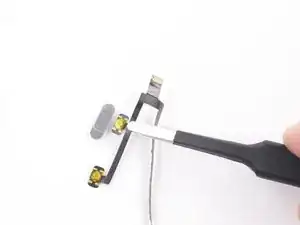
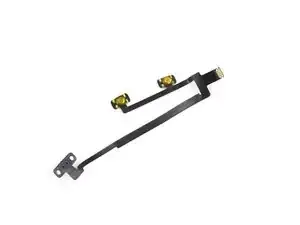
Hier wird der Austausch der Gehäusetasten sowie des Flachbandkabels gezeigt.

Warnhinweis: Die in der Anleitung beschriebene Methode zum Isolieren des Akkus ist überholt. Du kannst mit ihr die Akkukontakte dauerhaft beschädigen, bzw zerstören. Wenn du trotzdem den Akku auf diese Weise isolieren willst, dann befolge die Warnhinweise ganz genau und arbeite sehr sorgfältig. Wenn du aber weiterarbeitest, ohne den Akku zu isolieren, dann vermeide den Gebrauch von Metallwerkzeugen, außer wo unbedingt notwendig (z.B. um Schrauben zu entfernen). Dadurch beugst du einem Kurzschließen des Akkus und der empfindlichen Elektronik vor.

  1. PFpjwVSYrnq3JQap
    PFpjwVSYrnq3JQap
    RFsyoneYVYQDPSht
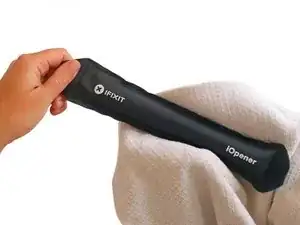
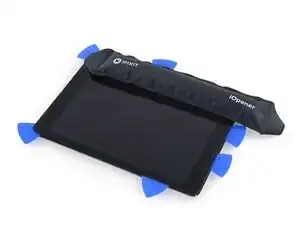
    • Wir empfehlen die Mikrowelle vor dem Gebrauch zu reinigen, da sonst Essensreste oder Ähnliches am iOpener hängenbleiben können.

    • Lege den iOpener in die Mitte der Mikrowelle.

    • Für sich drehende Mikrowellen: Stelle sicher, dass der Teller sich drehen kann. Wenn der iOpener hängenbleibt kann er überhitzen und sogar Feuer fangen.

    I didn't find this to be as hard as I had built it up in my mind to be; HOWEVER, saying that I need to say years ago I was the local Nokia service center in my town. But many years ago right after they got rid of analog times. Yeah. A classic installer/repairer mistake when starting something they haven't fixed or installed before is picking up the instructions, flipping through them; maybe even reading a section that is new-then tossing the instructions over the shoulder. "I got this." This usually comes right before something major gets broke. And I can tell you when you try to do it yourself and then mess it up horribly then take it to the repair shop. Well we called that "I can do it myself" syndrome and charged extra to put back together what they brought in in the box. Now knowing all this - I can't stress this enough because I am stupid, stupid, stupid. COVER YOUR SCREEN IN CLEAR BOXING TAPE AND READ ALL THE INSTRUCTION BELOW THROUGH TO THE END BEFORE EVEN ATTEMPTING THIS FIX. Take my advise.

    windizy -

    I didn't have an iOpener, so I used a wheat type heat bag. If you do this though, make sure you put a layer of plastic between your Mac and the bag, or you'll get condensation in places you don't want it.

    Martin Gray -

    I started out using the iOpener but switched to my wife's hairdryer. A heat gun or hair dryer proved to be much more convenient and is a time saviour. You can heat more and the glue becomes more fluid make the next steps with the opening picks much easier

    Jan Van Puymbroeck -

    I know this is obvious, but backup your iPad with iTunes before you start. I'd also turn off your passcode if you have one.

    Laurie Higgins -

    Ther first time you heat up the iOpener for this repair when its room temperature I had to heat it up for more than 30 seconds. I remember I had to heat it up for around 45 seconds. However, after that when you need to reheat it again during the repair 30 seconds will be enough.

    Yousef Ghalib -

    I used the wheat bag in a sensor microwave heating up to 65-70 deg C (155 def F).

    ian cheong -

    Get yourself a cherry pit bean bag the size of your iPad. Heat it, put the iPad on it for 3 to 5 minutes or so, reheat the cherry pit bean bag, again put your iPad on it. Then heat the iOpener and start working. The cherry pit bean bag will have to be reheated several times, but it will soften the adhesive so you have less problems with the iOpener

    Tim Feyaerts -

    The heating can be done very effectively (and quickly) with 3d printer heated bed. Make sure the bed is clean. Set the temperature to 60c, (130f ) and put the ipad face down for +/- 10 minutes. Repeat as needed throughout the “gentle prying” stages.

    polleyphony -

    The iOpener did not work at all for me.

    I had to use a heat gun and bring the edges of the case up to ~200 degrees (used an infrared thermometer to measure) before the glue would weaken. This obviously superheated the metal frame, so I also had to wear gloves to handle the phone while prying the back off with the included picks.

    Mike Jeanette -

    Repair instructions worked like a charm. Had to be patient with the iOpener and getting the screen off. I tried repeatedly without success until shifting the suction cup a bit to the left side where perhaps the glue had loosened up a bit more.

    Kyle -

    The iOpener, in my opinion, is of no help. Many warnings to say “don’t warm it too much”, but the glue doesn’t melt if not warm enough. As a result, a complete waste of time and energy. In addition, too much liquid in it, so it doesn’t lay on the device on a sufficient surface. I took a hairdryer and it worked much much better.

    laurentvidu -

    I used an immersion bath to heat this to 180F and applied it to the device until the outside temperature of the opener read 150F with an IR thermometer. Removing the screen took very little force with this method.

    breadandbits -

    My experience. I was replacing the screen which had been cracked and a little shattered in some places. The iopener is pretty much useless, so was the suction cup. The suction cup would probably be more useful if I was doing something besides the screen. Also you probably want the clean the screen before using it so it can get good suction. I used a hair dryer on high for a couple of minutes at a time (someone on this tread suggested that). I used my exacto knife and a razor blade to get into the adhesive. First the exacto to get the initial cut, then the razor blade to go a little deeper. Could have probably just used the razor blade, but the exacto has a little more finesse. I got the razor blade in and a little under the glass then I used the picks to wedge in. I didn’t want to risk anything using the razor blade too much. Used tape to keep the shattered glass together.

    trebor65 -

    My experience pt2

    Fortunately the shattering was mostly on the edges and most of it had adhesive on the back so it stuck together. Just take your time and work your way around following the guide to get the screen off. Have some goof off or goo be gone to clean the frame when putting the new glass on or putting the existing one back. (someone suggested that also, very good idea). Be careful of the LCD (you should know that). The cable on my LCD was pretty tight, so I propped it up while taking the cable cover off and when I put it back on I did the same thing. I just put a bottle on the battery and leaned the back of the LCD on that while attaching the cables and putting the screws back on the cover. Also be careful with the home button and the bracket on the back of it. I had enough old adhesive on left on the bracket that it stuck back to the new glass fine. So far only 12 hours in, so we will see how that holds up when the kids get at it.

    trebor65 -

    Another alternative if you do not have the iopener is to use a bed time hotwater bottle. Do not over fill it though. Just put enough hot water in to support the phone while you work around the adhesive.

    I use both the hot water bottle and iopener together on Samsung's. It makes life easier

    gazza667 -

    I followed the directions and heated my iOpener for 30 seconds in a 1000 watt microwave, and it came out at 160 degrees F, as verified by a infrared thermometer. This allowed me to separate the last bit of the back of my Samsung S8, which was already coming off due to a swollen battery (hence the reason for the repair).

    Dennis -

    Hallo,habe den Akku erfolgreich getauscht.Doch seitdem gibt es bei Telefonaten eine Rückkopplung für den anrufenden.Bei mir ist alles normal.Woran liegt das?Mfg

    Manu R -

    If you follow these instructions, you will crack your screen like I did. Heating the iOpener for 30 seconds, using it to melt glue, then waiting 10 minutes to reheat is useless. The iOpener can be used to maybe warm the glue on whatever side you aren’t working on. You need a hairdryer and/or a heat gun to melt the glue and separate the glass from the iPad.

    Anyone want to buy an old iPad with broken glass and a dead battery?

    mpulliam -

    Not everybody has a microwave. You should provide a target temperature for the iOpener and instructions for a conventional oven, or pot of warm water, or whatever. Although I will probably use a heat gun …

    Esmond Pitt -

    Three times heating opener and no luck. Tried pressing down gently on opener with a towel, and the opener broke. Wondering if I now replace table mats, fancy table cloth, etc. or will this stuff wash out.

    Not impressed so far. Maybe the hair dryer next.

    doug -

    I support the comments about the iOpener. Everyone has a hair drier, FHS, so get a cheap IR thermometer (£18) and blow heat until the area is 60+ deg C. Still takes w while, and getting the screen off is v scary, but just add more heat if you feel resistance.

    The rest of the kit is good, esp the magnetic screwdrivers.

    Richard O'Brien -

    No, everyone does not have a hairdryer. Some of us don’t even have hair. Thank goodness I already had an IR thermometer, though.

    nin10doh -

    #### WARNUNG WENN MINIMALSTER SPRUNG IM DISPLAY IST FUNKTIONERT DAS NICHT!!! ######

    Hatte einen winzigen, minimalen Sprung im Display. Ich dachte es könnte gehen, weil der Sprung “abgeschlossen” war. Er hat in einer Ecke ein winzige Glasteil rausgeschnitten. NEIN! Geht nicht. Habe alles mit viel Geduld dem iOpener und einem Föhn erhitzt. Es ist trotzdem sofort über das komplette Display zersprungen…

    T z -

    I’ve started with iOpener but changed very quickly to a heatgun. That was more efficient.

    Mizzoo, s.r.o. -

    I could not get the iOpener hot enough to melt the glue on my ipad 6. I heated for 45 seconds once and it was boiling and it still never worked. Thank goodness contributors mentioned using a hair dryer. Using an 1700w hair dryer on high did the trick to get the screen off. Still took some time and the case got pretty hot but be patient. It took twice as long and a lot more patience to get the battery out.

    Randal Haufler -

    I have an Ipad with touch screen issue, if i replace this part it should be Ok?

    janderson martin -

    WARNING - DO NOT MICROWAVE ON A METAL MICROWAVE RACK

    The metal microwave rack can heat up and melt through the iOpener cover letting the contents leak out.

    Not a big issue for me as I have a heat gun and used that instead.

    Run Up A Tree -

    I opened my iPad with the iOpener. Be patient! It may take quite a bit longer to it the iOpener in the microwave than it says in the guide. My microwave can only do 800W and I had to put the iOpener in several times (maybe a total of 90-120 seconds). I recommend that you have the transparent side up an watch the bag carefully. As long a the bag doesn't bloat up and the liquid doesn't start bubbling you should be fine. But I recommend to take the iO out from time to time to check it. (More comments in Step 6.)

    marcelflueeler -

    I gave upon the I opener and used a hairdryer. (Fixed an iPad 6)

    Tom Weber -

    iPad mini gen5. I used the iOpener. My microwave is 1200w with carousel. 30 sec got the iOpener to 155ºF. For the 2nd heating, after 10 minutes sitting, the temp was still around 125º so I only cooked it for 15 sec. Not enough increase so +5 sec more which me to 165-170ºF. This should be considered ballpark info because who knows the real output of the various microwaves and the quality of the IR tool used to determine temp.

    To successfully open my iPad mini I applied the iOpener twice to the left edge and twice to bottom. & once to R edge. Using the suction cup was difficult for me (I'm in my 70's so my hands don't work too well anymore). I had trouble holding the guitar pick and slipping them in (at an downward angle). In the end, sliding my thumbnail along the edge opened it very slightly and allowed the pick to get into the gap. I marked the ends of all my picks with a sharpie pen for the recommended 2mm insertion to avoid going in too deep. To get the screen open it took me approx 1 hour.

    jharrison -

  2. ylYXoFMbBeXNAIyj
    • Erhitze den iOpener für dreißig Sekunden.

    • Im Verlauf der Reparatur kühlt sich der iOpener wieder ab. Erhitze ihn dann noch einmal für dreißig Sekunden.

    • Achte darauf, den iOpener während der Reparatur nicht zu überhitzen. Eine Überhitzung bringt den iOpener möglicherweise zum Platzen.

    • Berühre niemals den iOpener, falls er aufgeschwollen aussieht.

    • Falls der iOpener in der Mitte immer noch zu heiß ist, um ihn anzufassen, dann benutze ihn weiter, bis er ein wenig herunter gekühlt ist, bevor du ihn erneut erhitzt. Ein ordnungsgemäß erhitzter iOpener sollte für bis zu 10 Minuten warm bleiben.

    I had to heat mine up for more than 30 seconds. After 30 seconds on high it was only warm. It had to keep trying different times and checking it until it got hot. I think the initial time that I put it in for was over a minute.

    whale13 -

    DO NOT USE IN NON ROTATING MICROWAVE! It will pop a hole. I had it in for 45 seconds the first time. It wasn't very hot inside and I saw it started to leak on the paper towel I put under it. Just a fair bit of advice. I think I will just stick with the heat gun. Loud but useful.

    Alex Jackson -

    I heated mine up for 30 seconds, tested, then again for 30 seconds. It felt adequately hot. Leaving it on the left side, per the instruction, for a minute did not loosen the adhesive. I ended up pulling the suction cup hard enough to shadder the old screen. Moral of the story, I don't think it gets hot enough safely to have an affect.

    Travis Dixon -

    There is a clear problem here with the heating part using the iopener things....no details are given. Whoever is testing them needs to make it clear - What temperature does it need to be? And for which phone models, because they differ in what's needed. It's only £10-15 for a laser guided temp sensor unit, and the designers/repairers should have one of those already for doing these kinds of repairs. Explaining half a repair, is worse than not explaining at all :-(

    assortedrubbish -

    All phones/devices differ it’s unrealistic and unsafe to put a exact time/temperature needed to soften the adhesive. It’s really quite simple you warm the device evenly and in a controlled manner just enough to enable pry tools and picks to begin separating. Best tool in my opinion but again this is because I have experience is a hot plate and heat gun both of which are used at nearly the lowest settings and I can handle flat palming the plate for almost 10 seconds I leave the device to conduct heat until approx it’s about 110 at most 120 ish this will be plenty to soften all the adhesive if any problem areas I use heat gun while prying. Again you need go slowly and learn with a throw away phone

    Greg Latta -

    I used a hot water bottle, works well as it covers the whole screen and stays hot for longer.

    dave -

    If I may suggest include your microwave wattage so people can get an idea on time for there own

    Patrick Storey -

    I agree with this.

    Jarl Friis -

    I ended up using a hair dryer. That iOpener thing took forever.

    mark fitzgerald -

    30 seconds sure isn’t cutting it… 45 didn’t get the screen of my iPad air 2 to budge either… even after resting on the ipad for 4 minutes.

    60 seconds in the microwave, the iOpener burst.

    I’ll get a new one and try once more with heating it 45 seconds and repeat that for 30 minutes like others have said here. If that doesn’t work it’ll have to be the heat gun.

    K

    Karl Marble -

    I can’t recommend the microwave. If the the iOpener becomes too hot, it bursts. Better put the opener in cooking water. Dry it and use it. Instead of an iOpener you can use hot/cool packs as well.

    Bernhard Keim -

    Great idea with using the heat packs. I will try that next time. Thank you

    Collins -

    Trust the directions! I forgot and left it in the Microwave too long and after 1 minute I had Mt Vesuvius - the iOpener burst and spewed the goodies out. The problem is, the Digitizer can be damaged by a hot air gun, so I had to tough out and remove the glue the hard way. I made it … with lots of patience! Tough lesson.

    Larry Bennett -

    I also used a hairdryer. I used it on the low setting and I cut a piece of carboard to protect the rest of the screen. The iFixit tool and method is vert tedious and very time consuming in comparison. With the hairdryer method you can literally have the display apart in a few minutes. Using your other hand nearby the area you are heating it should be very hot but not enough to burn your hand. You only have to heat metal part of case near glass edge. If you have a cellular model then you need to be very careful because the black antenna area is plastic. So less heat and work your way up in adding heat just enough to separate around the area but not so much you melt the plastic!

    Fixrights -

    iOpener was the worst part of the kit. Followed directions for :30 in microwave and took 4 trips to the microwave to loosen adhesive on left side of home button. I thought I was figuring it out and it was working well… even set a timer to wait 10 minutes between heating it up. Was on the right side and was on my 12th heat up when it exploded in the microwave. My only tip is that if you set it clear side up, as soon as you see any bubbles or boiling in the liquid, STOP! If you put a pot holder over the iOpener and press slightly to make good surface contact, that seemed to help. I finished heating with a “Corn Sack” that held heat better than the provided iOpener.

    digital_only -

    Mon iopener n'a pas tenu une réparation. Je ne vous conseille pas ce produit

    Berard Romain -

    Bonjour,

    Nous sommes désolés que votre réparation ne se soit pas déroulée comme prévu. Il se peut que le produit était défectueux. Veuillez contacter notre service client support@ifixit.com (boutique américaine) ou eustore@ifixit.com (boutique européenne) en décrivant ce qui s’est passé.

    Claire Miesch -

    Readers looking for temperature advice might check the comments of the previous instruction, as there are more there. I used an immersion bath to heat this to 180F and applied it to the device until the outside temperature of the opener read 150F with an IR thermometer. Removing the screen took very little force with this method.

    breadandbits -

    Thank you for posting some actual temperatures. I have a heat gun with a very fine self-temperature regulation setting capability.

    I will set it for 150-180 F, and use that to soften the adhesive.

    G Trieste -

    Get a heat gun.

    alesha adamson -

    I followed the directions and heated my iOpener for 30 seconds in a 1000 watt microwave, and it came out at 160 degrees F, as verified by a infrared thermometer. A second heating about 15 minutes later in the micro and it came out at 190 degrees F. Plenty hot enough to soften the adhesive for removing the back on my S8. Based on the comments above I think people just need to use more patience.

    Dennis -

    I used various time settings. It got very hot. It would soften the glue but not a whole lot. If my screen had been intact and I was replacing something that was not a digitizer, it may have worked. A broken screen makes the process significantly more difficult. I ended up breaking the home button cable. Good bye TouchID…

    cvela90 -

    After reading previous comments I didn't even use the i-opener. Used the heatgun ( hairdryer ) which works great for me. Maybe I was lucky as this is my first attempt at replacing a cellphone battery. Motoz 3

    Collins -

    It appeared 30 seconds were not enough, so I heated it more, by 5 seconds at a time until I got the right temperature about 70 degrees Celsius (measured with infrared pistol) to get the screen heated up to 60 C, the best for softening the glue. But the heat was quickly dissipating by the big aluminum back cover, so the best I got in 2 minutes of applying iOpener was around 45 C, which made the procedure difficult and having risk of breaking the screen. So I eventually abandoned iOpener and user a hot air gun with precise temperature setup. I set it to 90 C, which allowed me to open my iPad quickly and safely.

    Sergey Kofanov -

    I, too, ended up using a hot air gun. I’ve done earlier versions of iPad before but the adhesive used on this IPad 5 A1822 was particularly difficult to remove.

    Also, while the suction cup worked great when the glass is in tact, any cracks in the glass make the suction cup useless.

    manningrl -

    You need to remember here are different sizes of microwaves. I had the same issue.

    Heating on a smaller unit I used 45-60 seconds. That worked but was time comsuming

    William Draheim -

  3. Q3OPkaQyxV6cdnx3
    • Halte den iOpener an einem der flachen Enden und vermeide die heiße Mitte, während du ihn aus der Mikrowelle nimmst.

    • Der Beutel wird sehr heiß, sei vorsichtig beim Gebrauch. Lege dir am besten einen Topflappen bereit.

    I did this repair. I used a hair dryer, I think it works better: gets very hot fast.

    Cobus de Beer -

    I did too, you get far more control and no expense on fancy equipment.

    Billinski -

    Readers looking for temperature advice might check the comments of the previous instruction, as there are more there. I used an immersion bath to heat this to 180F and applied it to the device until the outside temperature of the opener read 150F with an IR thermometer. Removing the screen took very little force with this method. I don’t know how much microwaves vary in heating consistency with these pads, but knowing how inconsistent the temperature of a bowl of plain rice gets in my microwave, I wasn’t interested in even trying to use it for this.

    breadandbits -

    I used an electric griddle set to the lowest setting. It seemed to work very well.

    John -

    I vote for the hair dryer. The other methods work too but if you aren’t having any luck, switch to the hair dryer. While holding the iPad in my hand, I found that I am aiming the dryer at my finger at the same time and it gauges how hot it is. I stop when my finger can’t take it - maybe five seconds up close. Repeat as needed like I did.

    Robin -

    This thing melts when placed up side down in the microwave…

    Mark -

    If the maximum temperature for this iOpener is lower than the gadget glue minimum temperature, this device does not make sense.
    I think the maximum temperature for this iOpener is below 100⁰C and most gadget glue minimum temperature is higher than 100⁰C. So the iOpener is useless for many opening steps in repair guides. But who knows because temperature range is not specified for this iOpener.

    Jarl Friis -

  4. 2Nj3CEcEUHn2EtLQ
    2Nj3CEcEUHn2EtLQ
    lgRIBJjmHo2vTdda
    • Solltest du keine Mikrowelle haben oder benutzen wollen, folge diesem Schritt, um den iOpener in kochendem Wasser zu erhitzen.

    • Fülle einen Topf oder eine tiefe Pfanne mit ausreichend Wasser, um den iOpener komplett damit bedecken zu können.

    • Erhitze das Wasser (ohne den iOpener) bis es kocht. Schalte die Wärmezufuhr (Platte) aus.

    • Lege den iOpener für etwa 2-3 Minuten in das heiße Wasser. Stelle sicher, dass der iOpener komplett mit Wasser bedeckt ist.

    • Nimm den iOpener mit einer Küchenzange aus dem Wasser heraus.

    • Trockne den iOpener gründlich mit einem Küchen- oder Handtuch ab.

    • Der iOpener speichert die Hitze, und ist daher sehr heiß. Sei vorsichtig, und halte den iOpener nur an den Endlaschen, nicht in der Mitte.

    • Der iOpener kann jetzt verwendet werden. Solltest du den iOpener erneut erwärmen müssen, erhitze das Wasser nochmal bis zum Siedepunkt, schalte die Wärmezufuhr aus, und lege den iOpener wieder für 2-3 Minuten vollständig in das Wasser.

    What do I do if I don’t have a iopener?

    alexdelarge103@gmail.com -

    Use a hair dryer

    Edited To the max -

    2 or 3 cups Rice in a sock, heat for about 2 minutes. But, I recommend the iopener.

    Robert Garcia -

    When boiling in water you can put the iopener in a ziplock to keep it dry.

    Robert Garcia -

  5. cbHhknNQZuH52rXR
    cbHhknNQZuH52rXR
    fxTQqMPurYGyRJx1
    RVcvcMZjrVloNAUQ
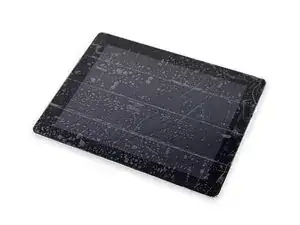
    • Wenn dein Touchscreen gebrochen ist, vermeide weitere Brüche und verletze dich nicht beim Berühren des Glases.

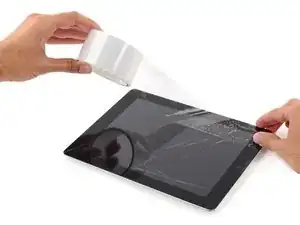
    • Klebe Paketband über den Touchscreen des iPads, sodass die ganze Oberseite bedeckt ist.

    • Das Klebeband deckt Splitter ab und hält den Touchscreen während des Entfernens zusammen.

    • Bitte befolge die restliche Anleitung wie beschrieben. Wenn das Glas einmal gebrochen ist, wird es während der Reparatur weiter brechen. Eventuell benötigst du einen Metallspatel, um das Glas zu entfernen.

    • Trage eine Sicherheitsbrille, um deine Augen zu schützen. Sei vorsichtig und beschädige nicht das LCD.

    If you add clear packaging tape, it will create bubbles and the suction cup will become inefficient. To me it was impossible to remove the glass with the suction cup. Since the glass was very cracked, I had to resort to some tweaking with strong tape and pull the this off.

    jfmartin67 -

    If your screen is significantly cracked to the left edge, abandon this entire setup, prepare yourself for a 5-6 hour repair, expect a lot of patience, a lot of cursing and some good old American ingenuity. The suction cup and picks will not work. You have to carefully crack the glass yourself (w/out damaging the panel underneath and carefully pull it apart from the inside to the outside edges. Use a hairdryer to soften the glue under the cracked panel along the edges. Then use an exacto-knife to separate the pieces of the glued panel from the frame body, all the way around the device. Watch out for the home button ribbon connector when using the exacto-knife. There will be glue residue left over, carefully apply some goo-gone to a small area of a paper towel and wipe gently around the frame body to loosen the glue. Then use the plastic spudger tool to scrape off the excess glue.

    The iPad repair is VERY difficult. If you are a working adult, hire a pro. This is not for the faint of heart.

    aaroncope -

    The hairdryer option was way faster and easier than the iOpener. Be VERY careful not to damage the LCD- one small mistake will cost you an extra $100!

    Mike Martin -

    but I’m not American

    Andrew Williams -

    If your digitizer is shattered, the tape will help, but you’re going to need extra picks. Or a razor blade. See below.

    Blair Miller -

    Friendly observation that the image on this step is actually of an older ipad model as the side bezels are far too big. I don't know if that matters to anybody but a noob might see it and think this manual doesn't apply to them. : )

    notalawyer -

    Thank you! Yes things like this matter so much. I successfully replaced an iPhone 6LCD&Screen from the guide. Next was my iPad 2 and the guide said nothing about the power flex cable. They were only stressing about not severing the wifi cable. I followed instructions carefully. Got the screen off and bam. Power flex severed because it was left out of the guide. I saw it in the comments after. I’ll never follow a guide here again without reading the comments. I did receive a discount code for my next purchase but it still caused a lot of inconvience.

    Haley Hodges -

    I had the same experience. My glass was cracked all the way to the left side and the suction cup would not pull the glass up. The packaging tape also didn't help. The heat caused it to lift. I finally abandoned the tape, used a heat gun aimed very carefully at each broken piece of the screen. The picks did work with patience, but I just pulled off each broken part of the glass. I also found that pulling up on one broken part while heating in front of me would let the next piece pull up. I continued heating and breaking all the way around. Do the right side last. Took about 1 hour to get it off, and another hour to clean the old glue off the frame. BTW thanks to this web site and all the comments! No way I would have done this without all the help here! I am now clean and waiting for my new digitizer. I couldn't free the battery (below), so I left it powered up, and verified it till worked before throwing away the old glass. Vince

    Vince Asbridge -

    Taping with package tape doesn't work. You'll need a very large piece of tape if you go this route.

    Travis Dixon -

    Just finished successful repair. I would add this: most folks will be here because of cracked screen. This is not easy; believe the 'complex' rating on this repair. I put tape on my screen because it was badly cracked. This made the suction cup useless, because it just sucked the tape off the scree.n. I used the razor blade technique which worked great, it should be used in the demo, and a good blade should be in the kit.

    dale kingsbury -

    I thought this shouldn’t be too hard - I only had some cracks in the glass, but then at every spot I worked on, the glass turned into nothing but tons of tiny shards. I had to use the points of the tweezers plowing along only the outer edge all the way around, sometimes with a razor blade and often using a hair dryer up close (briefly, over and over). After I got every bit of glass out, I used ordinary rubbing alcohol and Q-tips but I had to rub hard and quickly 100 times on each area to slowly dissolve the glue. I only scratched the LCD once slightly with a tweezer slip. The large chucks of display held together by the packing tape needs something under it to protect the LCD while you are working.

    Robin -

    Using Goo Gone to get rid of the adhesive residue is 20 times faster than using rubbing alcohol, even if it is 91% isopropyl alcohol.

    Skipping the iOpener and using a hair blowdryer, and using Goo Gone in place of the rubbing alcohol are 2 simple changes that will make this job much much easier than the default instructions if the screen is shattered.

    Scott Walker -

    I found the hair dryer is far more effective and less dangerous than using the iopener. If you overheat the iopener you end up pulling a hot plastic bag spewing hot glycerine out of your microwave! Not fun!

    Clifford Sullivan -

    I have an Ipad with touch screen issue, if i replace this part it should be Ok?

    janderson martin -

    Packing tape won’t do anything. You need to use duct tape to prevent glass shards from spraying everywhere. If your screen is only partially cracked (mine was the top only), modify the directions and focus on the areas that aren’t cracked first. I was able to get the lower 90% of the screen off, and then worked the cracked pieces with a heat gun and metal razor spudger. The entire repair took around 3 hours, and prob 2 hours and 30 min of that was getting the shards out and pieces off. And lots of cursing. I also told my kids if they crack another screen they are out of luck. I am not doing this again.

    Janie Hughes -

  6. DW4mglwsQfSf1ZHt
    DW4mglwsQfSf1ZHt
    gIrMbma3Qh3sjXeC
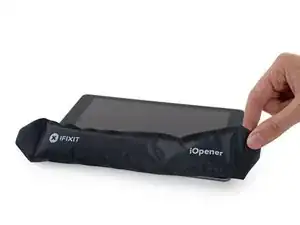
    • Lege den erhitzten iOpener auf die lange Seite links des Home Buttons.

    • Lass den iOpener für mindestens eine Minute liegen, um den Kleber zu erhitzen und zu lösen.

    The iOpener doesn't work because the heat isn't strong enough. I used a hair dryer which proved to be much more efficient.

    jfmartin67 -

    The iOpener didnt work for me either. seems like it gets hot enough but it must not. I spent 30 min with the iOpener, then tried a hair dryer.

    kinchma -

    “At least a minute.” Bullshit. Get the iOpener good and hot, place it on the area you’re going to work on clear side down, and cover it with a towel. Walk away for 2 minutes. Make yourself a drink — you’ll need steady hands later.

    Blair Miller -

    I've done this with an iOpener and at least in my case, it worked fine. You may have to modify the heating instructions though, since not all microwaves are created equal.

    Jeff Suovanen -

    ii i just did this and it took a while but i figured it out it is true this thing doesnt get hot enough BUT heat it 2 times and then the 3rd time when u place it on the ipad put the ipad box on top and then maybe a second ipad on top of the box so it kinda smashes i down but not too much for it to break and then wait for it to turn warm THEN use the succion THEN the gap appears. the glue is super strong on the ipads so yea it will take some time lol

    Joel Tyson -

    Doesn't work. Perhaps include more copy on exactly how to do it?

    Travis Dixon -

    The iOpener does not work. It simply it is not hard enough to soften the glue. The heat hair dryer method does not work either.

    Javier Lozada -

    The goal is simply to weaken the glue enough that you can use your suction cup to open up a tiny gap under the glass, so you can insert an opening pick and slice through the adhesive. It doesn't actually take all that much heat; the picks will do most of the work once you get them in there. iOpeners, hair dryers, heat guns all work fine in my experience—the iOpener is just a bit more foolproof because it won't get hot enough to cook the display panel underneath.

    Jeff Suovanen -

    I used iron..surprise!! yeah pretty fast tho…put a layer of fabric (towel in my case) ontop, along the edge of screen and start ironing..

    :-)

    carvelera -

    If using a hair dryer or heat gun make sure it is not too high heat. My heat gun has two settings, one 750 degree and an 1100. After using it on high I discolored the digitizer and warped the LCD slightly (only shows on pure white backgrounds). Low worked for the rest of the repair just fine. Also using a razor blade or something besides the pick works nice for the initial pry. Once you have a gap big enough, insert the pic and you’re all set.

    Robert -

    I don’t have an iOpener, my heat gun wasn’t handy. The last time I did something like this it was a 90-100 degree day, so I just put it out in the sun for a while, and it worked great. This time it’s fall, so I used a 420W halogen Light that I have for photography. (A standard heat lamp would probably work too, but might take longer.) I held it close to the light until it felt hot to the touch, just a couple minutes, then I left is sitting about 16” below the light for 5-10 minutes to sink in and warm uniformly. It worked great.

    For me, steps 8-31 were basically one step "Carefully pry off the digitizer glass with the plastic tools" took all of 30 seconds.

    Seth Childers -

    Although very hard this does work. The first time opening the ipad after buying it 8+ years ago it took about 3 times of heating the iopener. It did require an amount of pressure I did not expect but it did come open as instructed. I did add a towel and apply pressure to the iopener to make sure the heat transferred.

    hmcarbajal -

    The iOpener didn’t work for me at all, zero, it literally did nothing. I resorted to my heat gun on low and yeah you need to be super careful, but once I started the adhesive came off pretty easy.

    David Yutzy -

    I used a 2-level heat gun, too. Supposedly 707 degrees/923 degrees.

    I kept the heat gun about 1” away from the glass and used only the low setting. Even so, I did alter the digitizer pretty quickly in a few locations around the edge. It still functions fine, and you only see it under certain circumstances, so not a huge deal. But irritating. Be cautious about too much heat. It just looks like sort of a faint, polarized grid.

    Don’t be afraid to put tension on the glue and just hold it. If it is warm enough, the glue will relax under sustained tension. This isn’t a speed event. Don’t try to rush it, or you’ll break something.

    Now that those infrared surface thermometers have become so inexpensive, it would be great if someone posted a target temperature for softening the glue without damage. That would take some of the guesswork out of this process.

    Tim -

    If you heat the iOpener somewhat longer than they recommend, and get it about as hot as your hand can stand, then place it on the iPad and cover with a towel for at least 3 minutes. Then really be patient. I got a bit impatient, and took a chance and slipped a really fine “exacto-type” of blade vertically beside the suction cup as I lifted, and thankfully that worked. That made enough room to get one of the “guitar pick” wedges in. The rest went fine.

    Pete -

    I used the iOpener to soften the adhesive. I was extra careful and it took me about 90 minutes to get to Step 30. With my acquired experience I would say, it may be done in about 30 minutes. Most important: Be patient! You may have to reheat the iOpener a few times until you will be able to do Step 9. Once I had this part done, it was a lot easier. So I would say the first 60 minutes I spent on steps 1 through 9.

    marcelflueeler -

    I’ve been using a heat and isopropyl alcohol combo on iPhone screens with no problem. This specifically says “only” heat. I feel like she’s trying to tell me to keep a lid on my IA. Because I don’t know what other methods some rogue might be trying in their efforts to compromise adhesive.

    Audi Archer -

  7. 5TKgSukRFUPmFkHT
    5TKgSukRFUPmFkHT
    Oae2WWxYTCKFiR6Y
    4BGiBDTZJlJjFLMH
    • Es befinden sich viele empfindliche Komponenten unter dem Glas des iPads. Um Schäden zu vermeiden, erhitze und heble das Glas nur an den beschriebenen Stellen.

    • Wenn du die einzelnen Schritte ausführst, pass besonders an folgenden Stellen auf, wenn du das Glas entfernst:

    • Frontkamera

    • Antennen

    • Display und Touch Screen Kabel

    Don't assume anything!! I thought I was pulling on the screen connector and I was pulling on an antenna component instead. Didn't ruin its connection range but I sure remember doing it and now my iPad has a little internal flaw only I'm aware of.

    Travis Dixon -

    Correct me if I’m wrong but the LTE version apparently has 2 antennas on each side of the front-facing camera and it’s not shown on this post to avoid prying. I just scratched one of them following these instructions.

    Pacman -

    A note about the multiple image thumbnails - roll your mouse over them to get an animated effect, rather than clicking on them individually

    Rusty -

    I’ve been using a heat and isopropyl alcohol combo on iPhone screens with no problem. This specifically says “only” heat. I feel like she’s trying to tell me to keep a lid on my IA. Because I don’t know what other methods some rogue might be trying in their efforts to compromise adhesive.

    Audi Archer -

  8. j5Efbu3dCSJp1kDJ
    j5Efbu3dCSJp1kDJ
    WfNJNcGl1DDZ3d2d
    5pTMyL1yv4OcVWvW
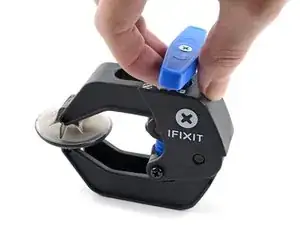
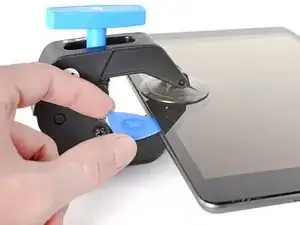
    • Wir haben die Anti-Clamp entwickelt, um das Öffnen von Geräten zu erleichtern. Die nächsten beiden Schritte zeigen, wie sie verwendet wird. Wenn du sie nicht benutzen willst, überspringe die nächsten zwei Schritte und folge einer anderen Methode.

    • Genaue Anweisungen für die Anti-Clamp findest du hier.

    • Drücke den blauen Griff zum Scharnier hin, um den Öffnungsmodus auszustellen.

    • Hebe das iPad so hoch, dass sich die Arme der Anti-Clamp über und unter dem Display befinden.

    • Bringe die Saugheber nahe an der linken Seitenkante des iPads an, einen auf der Vorderseite, den anderen auf der Rückseite.

    • Drücke die Saugheber auf den Oberflächen fest.

    • Wenn die Saugheber nicht gut auf den Flächen haften, dann klebe Paketband darüber.

  9. QwMjYvfKiPkyLuGV
    QwMjYvfKiPkyLuGV
    5WiTr6CYMVcCZsAL
    aQXRtJ4ahYVtyFvS
    • Drücke den blauen Griff vom Scharnier weg in die Stellung für den Öffnungsmodus.

    • Drehe den Griff im Uhrzeigersinn, bis du merkst, dass sich die Saugheber dehnen.

    • Achte darauf, dass sich die Saugheber weiterhin gegenüber stehen. Wenn sie sich nicht mehr gegenüber stehen, dann löse die Saugheber ein wenig ab und schiebe sie in die richtige Position.

    • Warte eine Minute, damit sich der Kleber allmählich ablösen kann und sich ein Spalt bilden kann.

    • Wenn der Spalt groß genug ist, dann setze ein Plektrum unter das Display ein.

    • Wenn es nicht gelingt, mit der Anti-Clamp einen ausreichend großen Spalt zu erzeugen, dann erwärme die Stelle nochmals und drehe den Griff eine halbe Umdrehung im Uhrzeigersinn weiter.

    • Drehe den Griff jeweils nicht mehr als eine halbe Umdrehung weiter und warte jedes Mal eine Minute lang. Gib der Anti-Clamp Zeit, ihre Arbeit zu erledigen.

    • Überspringe die nächsten zwei Schritte.

  10. gJnmHdpUyYU6Ica1
    gJnmHdpUyYU6Ica1
    viEoeYUmofDSjNud
    pASsvU4E1HVSBhOe
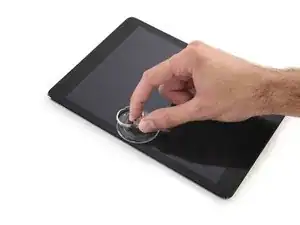
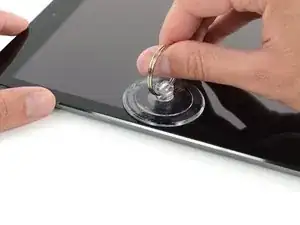
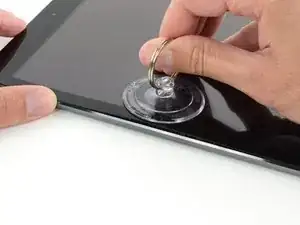
    • Befestige einen Saugheber auf der linken Seite in der Mitte des iPads.

    • Drücke den Saugnapf flach auf den Touch Screen.

    • Halte das iPad mit der einen Hand fest und hebe mit der anderen vorsichtig den Touch Screen vom Gehäuse.

    • Wenn das Display deines iPads sehr zersplittert ist, kann es hilfreich sein, es mit durchsichtigem Klebeband abzukleben, damit der Saugheber hält. Sonst kannst du auch ein Stück starkes Paketklebeband so falten, dass es einen Griff bildet.

    In this picture above, the glass isn't cracked at all so it helps the suction cup to be effective as it is hermetic. With cracked display, it won't work.

    jfmartin67 -

    Suction cup would not work for me. No amount of heating with iOpener or hair dryer would allow even the slightest gap to form. I ended up looking at some YouTube videos and used a razor blade. I put the razor blade perpendicular to the top glass, right at the edge of the glass and pushed down until the blade went down 1/4". Then heated some more and pried up the glass enough to put in an opening pick. I spent a lot of time working with the suction cup. Glue was just too strong.

    kinchma -

    It's funny that iFixit changed the image they used. Even they themselves realized how stupid it was to try a suction cup on taped up surface. C'mon guys! You should at least make foot notes for your readers and let them know what to do if the glass is already shattered. It's a slow methodical process that involves working with a iOpener type tool. I personally have one that looks like a prison shank (lol)

    Scott S -

    Not sure what you are referring to there—I see no evidence in the document history of the photos having been changed. Suction cup + packing tape can work, but it depends how badly the glass is broken and the quality of the tape. Sometimes it takes a couple attempts. You can also skip the suction cup and try using tape alone to pull on the panel, if your tape is sticky enough. There are no guarantees though, which is why we have the disclaimer right in Step 4 that the procedure can be pretty fussy if you're working with a shattered panel. Depending on where it's broken and how badly, you're going to have to improvise.

    Jeff Suovanen -

    Jeff, the change is evident from image 4, where all the surface is taped up. In this picture you show a clean not broken surface and yes, the suction cup works...

    Simone Gabbriellini -

    Ah, I see what you're saying! I can understand why you guys would assume that, but in reality the entire guide was originally photographed using an intact panel. We later added a step showing how to protect yourself if you have a shattered panel (with photos to go along with, obviously). I'm afraid it wouldn't be practical to re-shoot the entire guide every time we make a small change like that.

    Jeff Suovanen -

    The suction cup is useless if your glass is shattered. Use a new, sharp razor blade, and insert it vertically between the edge of the glass and the metal back of the iPad. Don’t worry about pressing too hard — there’s a lip that stops the blade from going in too far and damaging anything. You’ll probably have to do this several times, but eventually the blade will “bite” into the edge of the glass well enough for you to pry it up. Insert a pick underneath the razor, then remove the razor and continue as directed.

    Blair Miller -

    After having to read several comments on this screen removal and the clear packing tape, I too have to agree that the tape method does not work well at all if your screen is already shattered. I combined several methods, with lots of patience to remove the screen on my iPad Air 2. What I found it very helpful was the heat gun used for paint removal. The heat gun generates a lot of concentrated heat at lower air velocity, unlike generic hair dryer, so you must be very careful not to ruin the electronics, and risk burning your hands and anything around it. My heat gun that I purchased from Home Depot had a nozzle to direct and focus the heat on a small area. That was helpful in working small area at a time. This method work thoroughly well.

    Taiji Saotome -

    It would work if you leave iopener in microwave for 1 minute.

    Don’t trust the instruction from ifixit.

    you can put iopener in microwave for 1 minute without any harm.

    Note. you have to make sure that it is in cold position before you put it into microwave.

    phongsiri nirachornkul -

    Suction cup didn’t work for me either, went the razor blade route (using an exacto knife blade) with very minimal damage to the aluminum shell. Be warned, if your screen has cracked along the edge (as it almost 100% certainly has if you’re reading this guide), the screen will continue to shatter and splinter as you make your way around the edge. That’s when having the screen taped up well will be to your advantage. There’s also a good chance you’ll have to re-insert the razor blade on the other side of a fracture and start the lifting process again, but keep going, being sure to avoid the points called out in this guide and you should be fine.

    Also, do not apply the suction cup to an area of the screen with cracks and no tape. If you’re near the edge you run the risk of brutally shattering that area of the glass if the glass gives before the suction cup.

    Micah Sledge -

    In order to get this to work for me I had to heat the IOpener to over 104 C - I needed to get the screen over 40 C before the adhesive would loosen.

    Also I had to put the ipad on a towel - the granite countertop it was on was sucking the heat out too fast.

    Jack Williams -

    This step was brutal on my nerves - read about too many people ruining their iOpener and I don’t have a heat gun. I had to keep heating the iOpener incrementally hoping I wouldn’t pop it. … but if you’re patient, persistent, and cautious, you can definitely tell when you’re seeing separation. The iOpener ended up being WAY hotter than 30 seconds was getting me - borderline scorching my hands.

    William Thompson -

    Could not loosen the adhesive using the iOpener. Had to use hair dryer.

    Erwin yi -

    As the others noted, the suction cup is useless on a cracked screen, especially if you’ve applied tape (like the instructions say you should). The screen I was working on was busted up pretty bad, I ended up removing it and then going back to remove the edge glass and adhesive. When you have a really busted screen just take your time and use a heat gun or good hot hair dryer and it will eventually come off.

    I used an iSesame tool vs a razor to pry the edge (from a previous replacement project) but again, the iOpener and suction cup are useless.

    David Yutzy -

    Thank you for the comments above. I was using the iOpener unsuccessfully, then turned to the hair dryer and heated it up for over 3 minutes. This gave me the gap I needed to insert the opening pick and begin the process. So, with patience and a hair dryer, I was able to get the digitizer off.

    0812mgr -

    You really need a lot of patience here (30-45min). But then it works. The best way was with this plastic "crowbar" to get the beginning. You really have to press hard to get in between.

    Arne Meier -

    The suction cup provided in the toolkit didn't work on anything. Tape helped, but I eventually went in through a small cracked shard to create an entry point at the bezel

    Tom Weber -

    I've passed on the iOpener as suggested in these comments and have tried to use a hairdryer. heating on high at medium speed for 1 minute then trying the suction cup. heating for another minute then using the suction cup. Been doing this for 1/2 an hour but it isn't working. Need to take a break because I'm afraid I'm going to hurt in internal components of the iPad 6 (just trying to replace a dead battery) Any suggestions ???

    Just a guy -

  11. vCdsDqDSqKYdavRE
    vCdsDqDSqKYdavRE
    TsH5GkfTOA1aFD3K
    CRhqIHp4GnD3RHYQ
    • Platziere den Opening Pick in dem entstandenen Spalt.

    • Schiebe den Pick nicht tiefer in das iPad als den lackierten Rand. Andernfalls kannst du das LCD beschädigen.

    • Löse nun den Saugnapf vom Touch Screen.

    I found it much easier to use a single edge razor blade instead of the pick. After getting that inserted, it was easy to slip the pick between the blade and the case. Disclaimer - Razor blades are very sharp and you could easily hurt yourself or your iPad if you use one.

    donprius -

    This is an amazing tip! After trying for 10 minutes to use the pick with no luck, I grabbed a small razor blade and that worked perfectly to get me started!! Thanks!!

    Ashley Garner -

    The suction cup also didn’t work to create a gap - it cracked the screen when i tried to lift (the screen was already cracked). This was after rotating between the iOpener and a microwavable hot pack for food. The iOpener was around 175 degrees, it brought the surface of the iPad to 130. I was finally able to lift the glass using a razor blade and then the picks like donprius. I continued to use the iOpener to loosen the glue around the rest of the iPad but I think a heat gun would have been more efficient.

    Marc Ducret -

    You have to heat the glue really much, or you will, as i did, crack the glass.

    Linus Grüne -

    Best bet is to mark the pick with a sharpie line on how far your maximum limit is so you don’t damage the LCD.

    Jon Snyder -

    The iOpener works well, be patient and keep reheating until you can see the screen start to give a little. I kept putting mine in the microwave and it worked faster when the iOpener was hotter. 40 second intervals did the trick for me eventually

    Jackson Taylor -

    I spent an hour trying to lift the screen of an iPad Air first gen. The trick I found was that its a combination of lifting the screen a millimetre and then wiggling a razor blade vertically in the slot between the screen and the metal frame (yes its a microscopic slot). I used a hair drier on a section of the edge of the middle of the screen as above. The middle area allows for a bit of flexibility in the rail - we’re talking 0.5mm which is just enough for the razor.

    So hit a section of the screen edge with the drier till its hot to touch, do the suction cap thing as above, insert the blade vertically and wiggle it *ever so slightly* in the slot as you don’t want to break anything. Keep repeating this until you see even the slightest rise in the screen under the cap. At this point, remove the razor and insert the blue pick. It should easily dig in and under the screen, but no further than the black border.

    Remember, small wiggly steps will avoid breaking anything. Better a number of small heat and wiggles than a lift and snap.

    Rusty -

    for those who need to open more than one iPad, the iflex is safer and more effective than a razor blade. i use it to get started then switch to a pick

    iFlex Opening Tool (Öffnungswerkzeug)

    Stow -

    Yea, this suction cup cracked my glass. This made it near impossible to slide the picks around. I may try again another day, but I suspect it’s toast at this point.

    Jason Prothero -

    I should have noted the difficulty rating before thinking I could replace the battery myself. I could have saved myself the cost of replacing a cracked screen, which happened when I attempted this step. I did not want to overheat the iOpener but consequently, I could not get a pick inserted underneath the screen. (I think the glue must take a lot more heat than expected to melt.) So just a warning to more novice tinkerers—this repair wasn't the same as fiddling with screwdrivers and a million small parts.

    mlliu -

  12. LSHxkuvDXOfHLTCj
    • Erhitze den iOpener erneut und lege ihn erneut auf die linke Seite.

    • Überhitze den iOpener nicht während der Reparatur, sondern warte mindestens 2 Minuten, bevor du ihn erneut erhitzt.

    This says "Always wait at least two minutes before reheating the iOpener", however the iOpener itself has a warning printed upon it that says wait at least 10 minutes. And that 10 minutes warning is also mentioned in Step 2 above.

    Scott -

    Sorry about that! We fixed the text on this step. The two-minute interval was for an older version of the iOpener—the text printed on your iOpener will have the correct interval, which is indeed ten minutes. It can burst if overheated or reheated too quickly.

    Jeff Suovanen -

    It still says 2 Minutes up there in the warning

    Sandro Krumbein -

  13. AKajiYMuRpiYW1Ub
    AKajiYMuRpiYW1Ub
    6Y6lHbE2mWjFhNYY
    re6BCKFQt1aqamQs
    • Platziere nun einen weiteren Pick in dem entstandenen Spalt und ziehe diesen zur unteren Ecke. Dabei sollte sich der Kleber lösen.

    You guys really need to show how it's done when your iPad isn't perfect like the one pictured above.. C'mon..

    Scott S -

    This is for BATTERY REPLACEMENT not CRACKED SCREEN REPLACEMENT!!

    Corey Barcus -

    How do you slide the picks when the glass is broken? Even with the glass taped, it pulls away from the tape rather than the housing. I've just further shattered the glass with my attempts.

    chrisweiler -

    With my shattered screen, I was able to remove it using the suction cup slightly and a metal pry, had to break the edge glass some for removal also but it didn’t do damage. More layers of shipping tape helped to make the screen stay together better and come off more intact.

    Jackson Taylor -

  14. UjRWDMLf2a4ns5RB
    UjRWDMLf2a4ns5RB
    Mj2dVlfDgvg6mVIH
    2qKhC3OC3vbWPKBs
    • Führe den Pick an der Seite des Displays entlang, um den Kleber zu lösen.

    • Wenn der Pick am Kleber festhängt oder stockt, dann "rolle" den Pick an der Seite entlang, um den Kleber weiter zu lösen.

    This gives a false illusion to the difficulty of these repairs when you guys make guides using perfect devices. What about devices with dinged corners? A reader is gonna slap on a new screen and shatter it the second they apply pressure thinking it will fit into a dented corner lol

    Scott S -

  15. iuXiQUJAX4SURNbO
    iuXiQUJAX4SURNbO
    1LbBcTpyYjaaLJXd
    2fFDxI2GoD6WhcRS
    • Führe nun den ersten Pick hinauf bis zur oberen Ecke des iPads.

    • Siehst du den Pick durch das Glas? Keine Panik – ziehe es einfach wieder etwas raus. Meistens wird dadurch nichts beschädigt. Versuche dies aber zu vermeiden, weil der Kleber sonst das LCD oder Glas berühren könnte und sehr schwer zu reinigen ist.

    I managed to get a couple of fingerprints on the LCD.

    What's the best way to clean 'em off?

    What's the safest way?

    Mike McIntosh -

    What I’ve read, and seems to work, is gentle circular pressure with a very clean, dry microfiber cloth. Lacking that, use a TINY drop of water ON THE CLOTH, not on the LCD. Small amounts of alcohol can be used, in my experience, but only if the above don’t work, and with better results if used in small amounts and applied to the cloth, not the LCD.

    Bonnie Baxter -

    Can confirm. Microfiber with a little isopropyl worked great to clean off any adhesive or fingerprints from mine. Thanks for the tip.

    Robert -

    If you dare to use alcohol on your device, at least use isopropyl alcohol, not ethanol!!!

    Pierre-Aurélien -

  16. ExVsRTYXI1ULiVWP
    • Erhitze den iOpener erneut und platziere ihn auf dem oberen Rand des iPads über der Frontkamera.

    • ACHTUNG: Den iOpener während des Reparaturprozesses nicht überhitzen. Warte mindestens zwei Minuten, bevor du ihn erneut erhitzt.

    • Wenn du einen flexiblen iOpener besitzt, kannst du ihn so verbiegen, dass er gleichzeitig die obere linke Ecke und den oberen Rand erwärmt.

  17. r6PMwnNoqHqPDIZb
    r6PMwnNoqHqPDIZb
    fYwccxpTiRSOIqVd
    XZHVIgyFdy1QDKII
    • Schiebe das Opening Pick um die obere linke Ecke herum, damit der Klebstoff gelöst wird.

  18. yXL2cvSwMDcjKNG6
    yXL2cvSwMDcjKNG6
    FvdRFvwNZ3ay5hOP
    5B1bL5KFOi3ODYTE
    • Ziehe das Opening Pick entlang der oberen Kante bis kurz vor die Frontkamera und halte dann an.

    • Das dritte Bild zeigt, wo die Frontkamera und ihr Gehäuse im iPad platziert sind.

    • Versuche, nicht mit dem Opening Pick über die Frontkamera zu streifen, denn sonst könntest du Klebstoff auf die Linse schmieren oder sogar die Kamera beschädigen. Die folgenden Schritte beschreiben genau, wie du Komplikationen mit der Frontkamera am besten vermeiden kannst.

  19. ZgSSjqygXHorY6tw
    ZgSSjqygXHorY6tw
    UEnI1soQu3c2o6Gn
    u22KHx1KcRINTmOw
    • Ziehe das Opening Pick leicht heraus und schiebe die Spitze sehr vorsichtig am oberen Rand des iPads auf Höhe der Frontkamera entlang.

    At this point I’d use paper tape on the margins of the screen to mask off areas where you should use caution with the pick. Its just a visual reminder not to run the picker too deep in these areas. They are: the camera lens, lower right hand side and where the two antenna are along the base. Step 6 third image highlights these areas.

    Rusty -

  20. 3uiJJQEGQYqDDvQb
    3uiJJQEGQYqDDvQb
    Gh5DjyO4CAqOdikH
    cUYg55ZxydIKgynu
    • Lass das Opening Pick gleich hinter der Frontkamera stecken.

    • Nimm ein zweites Opening Pick und setze vor der Frontkamera erneut an. Nun schiebe das Opening Pick in die linke Ecke, um den Klebstoff an diesem Rand vollends zu lösen.

  21. xFYxwFSBsRTiUyQU
    xFYxwFSBsRTiUyQU
    USTIycuZtm5LlfhE
    LIIscNSluuRqnPfF
    • Nun kannst du das erste Opening Pick wieder tiefer hineinschieben und von der Kamera weg bis in die Ecke ziehen.

  22. k3tKRDGNNaetXDsf
    • Behalte die drei Opening Picks in den Seiten des iPads an denen der Kleber schon gelöst wurde, sodass dieser sich nicht erneut verklebt.

    • Erhitze den iOpener und platziere ihn auf der letzten unbearbeiteten Seite.

  23. 1GQRTSkmTOrcbbbN
    1GQRTSkmTOrcbbbN
    KufsZrl6J2QKcHtW
    • Schiebe den Opening Pick in die obere rechte Ecke des iPads, um den Kleber dort vorsichtig zu lösen.

    • Lasse den Opening Pick an Ort und Stelle, um zu verhindern, dass der Kleber sich wieder versiegelt und nimm dir für den nächsten Schritt einen neuen Opening Pick.

  24. 2JCBSm2LNI1tbGnc
    2JCBSm2LNI1tbGnc
    H2xHKmG5XGOlFfgo
    HLRUNMGLaiQ4NsrJ
    • Führe einen neuen Opening Pick in das iPad ein und schiebe ihn in die Mitte der rechten Kante des iPads, um den Kleber der Kante entlang zu lösen.

    • Die Display-Kabel befinden sich etwa auf halbem Weg von der Unterseite des iPads. Stoppe mit dem Opening Pick, wenn du dich ca. 11 cm von der Unterseite des iPads entfernt befindest.

    Why there’s such an obsession with not damaging the cables is beyond me. Be careful, so as not to damage what the cables are connected to. But the cables are part of the replacement digitizer, so if you nick or even slice through them (like I did with the one closest to the bottom) don’t worry about it.

    Blair Miller -

    Keep in mind that some people are here to open an intact display to replace internal components! In those cases, keeping the cables un-harmed is quite important ;)

    Sam Goldheart -

    My digitizer WAS ok and I was only replacing the battery I wasn't careful enough when coming around the side with the pics and got a hold of the cable just enough with the pic to pull it off the underside of the panel. The battery replacement went great other than now I have to replace the digitizer. :(

    BE CAREFUL WITH THIS STEP!!!

    Dylan Bouterse -

    And if you are replacing the digitizer, you have to reuse the fingerprint sensor home button. I sliced through mine and now I’ll not have fingerprint sensor. Each home button is matched to the main board and if switched out you will loose that sensor ability.

    David -

    Like others, I damaged my digitizer cable while doing a battery replacement. It would be a good idea to use some blue tape to mark the spots to avoid during the glue slicing procedure.

    donprius -

    I also damaaged the digitizer cable while doing a battery replacement. Use just the tip of the opening pick.

    Dean Gross -

    People need to realize iFixit routinely duplicates instructions for more than one type of repair/replacement. However, all of the comments are combined, which leads to confusion.

    laura moon -

  25. LkfmtbgAqUOpJ2gO
    • Lasse die Opening Picks an Ort und Stelle und lege den erneut aufgewärmten iOpener auf die Seite des iPads mit dem Home Button.

  26. VCgCYGpj4rC2Il13
    VCgCYGpj4rC2Il13
    KJIB31CbqQIsqUGw
    gvHHNylZmQvEAJVg
    • Schiebe den unteren linken Opening Pick in die untere linke Ecke, um den Kleber auf dieser Ecke zu trennen.

    • Lasse den Opening Pick in der Ecke. Gehe damit kein Stück weiter und entferne nicht den Opening Pick aus dem iPad.

    • Das dritte Bild zeigt die beiden Antennen und den Hohlraum des Home Buttons im unteren Bereich des iPads.

    • Die folgenden Schritte führen dich so, dass du Schäden an den Komponenten vermeiden wirst. Verwende Hitze und Hebelwirkung nur da, wo es von dir in der Anleitung verlangt wird.

  27. 3PCIHaK6lXM3okKM
    3PCIHaK6lXM3okKM
    QmhTwClipPILWGZl
    cpUdUHoDGShIQgGC
    • Lasse den Opening Pick aus dem letzten Schritt genau dort wo du aufgehört hast, um zu verhindern, dass der Kleber sich wieder versiegelt.

    • Schneide mit einem neuen Opening Pick vorsichtig über die linke Antenne, stoppe kurz vor dem Home Button.

    • Schneide mit dem Opening Pick nur von der äußeren Kante Richtung der Mitte des iPads. Bewege das Opening Pick nicht zurück in Richtung der äußeren Kante, da die Bewegung in diese Richtung die Antenne beschädigen kann.

    • Wenn du den Opening Pick mehrmals über den unteren Bereich bewegen musst, entferne ihn und setze ihn an der äußeren Ecke wieder ein. Bewege dich dann wieder Richtung Mitte.

    • Lasse den Opening Pick an Ort und Stelle und springe zum nächsten Schritt.

  28. mUbC61nFQGD3IPHQ
    mUbC61nFQGD3IPHQ
    rtTkvkEpdQgBwKsp
    cIbGZCi4aqZLARtE
    • Nimm ein neues Plektrum und schiebe es an die Stelle des vorherigen Plektrums.

    • Fahre am Home Button und der rechten Antenne nur mit der äussersten Spitze des Plektrums entlang, um den Kleber zu entfernen.

  29. 3QykUJOBpUgB3r5W
    3QykUJOBpUgB3r5W
    IZRPVODhd5dWHXsg
    KXZBxPMUpkD3e5xR
    • Wenn der Kleber gelöst ist, kannst du das Plektrum in der Nähe der rechten Ecke einsetzen. Schiebe das Plektrum nach links und halte kurz vor dem Home Button an.

    • Führe wie bei der linken Antenne das Plektrum nur von der äußeren Kante in Richtung Mitte. Andersherum könnte dies die Antenne beschädigen.

    This step needs a BIG CAVEAT to not insert the pick far enough to damage the home button/touch ID cable, as it is DIRECTLY above where you’re directing people to insert the pick. I just ruined a ribbon cable by following this guide too closely.

    tabormeister -

    Sadly only after damaging my home button flex cable, I read your comment. There should be a big warning here as it is very easy to tear this cable.

    Bouke -

    I also damaged the home button cable. Check the placement of the cables in steps 37-44.

    Paul Klein -

  30. FvSGif2mnZP5gaIc
    • Erhitze den iOpener und lege ihn auf die Seite der Lautstärketasten des iPads.

  31. QjTVIhZwQupEXj6r
    QjTVIhZwQupEXj6r
    QFNHCLpff5RVZ12O
    • Sei sehr vorsichtig bei diesem Schritt. Nimm dir Zeit und sei dir sicher, dass der Kleber erwärmt und lose ist. Überprüfe außerdem, ob du den kompletten Kleber mit einem Plektrum gelockert hast. Sollte dies nicht der Fall sein, erwärme ggf. den iOpener wieder und führe die letzten Schritte noch einmal sorgfältig durch.

    • Auf der den Lautstärketasten gegenüberliegenden Seite solltest du ein Plektrum in jede Ecke eingesteckt haben. Drehe die Plektren um die Scheibe leicht an zu heben - so löst du auch den letzten Kleber entlang der Kante mit dem Displaykabel.

    • Solltest du mehr Widerstand als gewöhnlich bemerken, lasse die Plektren wo sie sind. Erhitze den iOpener und lege ihn auf die Problemstellen auf, um den wiederspenstigen Kleber wieder zu erweichen.

    You will end up having to scrape the outter ledge to remove the old screen. I bled and got glass shards everywhere. Good luck!

    Travis Dixon -

    That won't happen if you use gloves and protective glasses!

    tanner85 -

  32. uAaZYGVVaiROjmFT
    uAaZYGVVaiROjmFT
    qcLoHc5AycwhgqJT
    • Hebe langsam und vorsichtig das Display an, um den Kleber entlang der Kante mit dem Displaykabel zu lösen.

    This is very tricky if the screen is cracked (which I would assume most people are replacing the screen because of a crack). Use duct tape to try and secure the shards as much as possible, but be prepared for shards flying everywhere. Search for videos on cracked screen removal, there’s a good ifixit one. Maybe they can link it here? I finally was able to get it all by using a heat gun and metal spudger/razor like the guy in the video.

    Janie Hughes -

  33. DgUIVaKlihTaqwLU
    DgUIVaKlihTaqwLU
    Os4NBQ2FQooXM1Ny
    DReXmNyHonEurCJU
    • Während du das Front Panel Glas hebst, nutze ein Plektrum, um auch den letzten Kleber zu lösen.

    • Sei sehr vorsichtig um die Displaykabel nicht zu beschädigen.

    Detailed pictures that better indicate the difference between the remaining adhesive and the two mylar cables (the very cables you are trying to avoid damaging!) would be much appreciated. On my unit the two were VERY hard to distinguish.

    dlcatftwin -

    This step does not need to be performed here. I cut this adhesive once I had removed the lcd and display cables. This makes it much easier to avoid damaging anything. Just prop the glass up on something while you perform steps 31 - 42, then cut remaining adhesive and remove.

    Robert -

    The front camera has a black bezel cover but it is attached to the broken glass digitizer. Peel it off and save it. I plan to tack glue it to the camera instead of gluing it back to the new digitizer glass. It has two alignment bumps so maybe it doesn’t need gluing to either side but I found it on the ground when it came off of the the broken digitizer. I almost tossed it as part of the broken glass.

    Robin -

  34. kJe2hUFvw2lNaRNS
    kJe2hUFvw2lNaRNS
    ayc5GO4c5KUVsvU5
    • Wenn erst einmal jeglicher Kleber entfernt bzw. gelöst wurde, kannst du die Frontglasscheibe wie eine Buchseite öffnen und auf die Arbeitsfläche ablegen.

    • Reinige beim Wiederzusammenbau die Klebstoffreste auf dem Gehäuse sowie auf der Frontglasscheibe (sofern du es wieder verwendest) mit Isopropylalkohol und ersetze den Kleber durch vorgestanzte Klebestreifen. Benutze dazu unsere Anleitung zum Einsetzen von Display-Klebestreifen.

    • Ein Flexkabel kann leicht zwischen dem Frontglas und dem iPad-Rahmen während der Wiedermontage eingeklemmte werden. Achte auf die Flexkabel und stelle sicher, dass sie vorsichtig unter dem Rahmen gefaltet und gesteckt sind. Wird ein Flexkabel vollständig flach gedrückt, kann es so beschädigt werden, dass eine Reparatur nicht mehr möglich ist.

    my replacement digitizer has rigid flex with adhesive tape where the connectors extend. how does this “fold” back inside the frame?

    David -

    Same here. I removed the adhesive tape, but now what?

    Dvi -

    It looks like I have the same or similar question: the “hinge” part of the digitizer cables (the flap portion) looks like it is supposed to tuck into the crevice between the LCD panel and the side of the aluminum body - my replacement (from iFixit) has sticky contact on the upper side of this flap, making me think that its supposed to adhere to the side of the LCD panel, but the instructions do not make this clear - is my assumption correct?

    dlcatftwin -

    Or, does the flap adhere to the underside of the front panel’s right edge?

    dlcatftwin -

    I attempted to put this protrusion underneath the LCD, and it kept coming up above the LCD. As there were no instructions, I put it as best as I could underneath the LCD as I cannot imagine that it folds up against itself?

    Dvi -

    I tried to put it ‘inside’ the case but was not able to - at the end, I just glued it against the front glass.

    I must have done something wrong with the new home-button assembly as the fingerprint sensor does not work anymore - However, I am not going to go through that repair again so passcode it is.

    Michael Berneis -

    My screen from ifixit had the rigid flaps with adhesive also. I removed adhesive and adhered it to the new glass, it worked fine and solved the problem with the flaps not pushing down.

    Jackson Taylor -

    if there is adhesive glue on the inside of the digitizer and the top of the LCD what do you recommend to clean it.

    scprillwitz -

    Don’t throw away your old screen until you take the home button off of it! My screen was shattered and I kind of have a phobia of broken glass, so I bundled it all up and threw it into the trash can immediately. Next day when I went to continue the job I was sad that my roommate had finally taken out the trash for once and my home button was halfway to the dump by then.

    Sparky -

    Cleaning with isopropyl alcohol is not really working well. I am using it with a qtip. Is there a certain way you recommend in order to actually the adhesive off?

    Brooke Parkhouse -

    Yes, the flap seemed to want to be attached to the glass, not go down the slot. All went together well, except that my home button doesn’t work. I suspect the connections wasn’t right, although I did my best to (gently but firmly) push it in. Too late to do anything about it now.

    Mussollini -

    I got my repair kit yesterday, had a go at it today on my iPad Air 1 (A1474). I’ve opened up phones before (the kind that open up easily), but first time dealing with a glued-together device. Anyway I got there, and now I’m putting things back together. I have a question regarding the pre-cut adhesive to hold the glass back on. Is it meant to be applied to the glass, or the frame?

    SHL -

    Ok never mind - I just looked at the digitizer for this iPad and saw that the adhesive is preapplied to the glass, which confirms my suspicions. Now I can proceed and bring this repair to a conclusion.

    SHL -

    And it’s done! Doing the battery calibration now, but I’m relieved that the battery is working. I did turn on the iPad prior to removing the blue strips on the adhesive to make sure it was working before committing to fix the glass in place.

    To reiterate the point, the adhesive strips go on the glass. The way they are packaged with the clear plastic makes it go very smoothly.

    There are 2 oversize pieces of plastic sandwiching the adhesive sections. These keep the strips in their original shape free of dust off until you are ready to use them. Once you remove these, there is another clear plastic strip which has an inside edge that matches the adhesive section’s inside edge. This plastic allows you to position the adhesive accurately on the glass while keeping your fingers away from it. This is especially important on the right side where the digitizer cables are. Once you remove this clear plastic, there is still the blue film with pull tabs. You can leave these on to do a power up test, then remove them. …cont

    SHL -

    … After doing the power on check, you can also check that all the buttons work, home button, camera, speakers etc. Then I turned it off (probably wasn’t necessary), removed the blue strips and pressed the glass in. For this last step I suggest lining up the left edge of the glass with its corresponding edge in the aluminum shell, and then gently pressing down on the right side. ALSO: while doing this last step, look carefully at the right side for the ribbon cables there. In my case (reusing original digitizer), they were protruding just a smidge, so I used the spudger to just nudge it a bit and they got into place, and then I pressed the right side down. I then pressed down all around the edges of the glass.

    SHL -

    quick question... if this is a replacement, why are we worrying about the digitizer cables? My glass is shattered pretty bad on the to the left of the home button where he says to work. So I can't apply suction cup there. I don't understand the need to be concerned about the cables if the digitizer is going to be trashed...

    Michael M -

  35. UQQJiYXiSLt3Zr2u
    UQQJiYXiSLt3Zr2u
    OJTZ4aYLeO5gC61M
    TkO1pHHgA6i3OCYF
    • Entferne alle Klebestreifen, die die LCD Schrauben verdecken.

  36. 6wPXjMS5UTeeaDtD
    • Entferne die folgenden Kreuzschlitzschrauben, die das LCD befestigen:

    • Drei 4,0 mm Schrauben

    • Eine 4,8 mm Schraube

    Use the provided replace screen case's square compartments to place your screws into as you remove them. Really helpful and you likely won't mess up.

    Travis Dixon -

    I tape a stripe of double sided tape on my workbench. You can place the screws on the tape on the location where the screw would be if it was in the screen assembly. In this step, your screws would be in the four corners of the tape stripe, with the longest screw (4,8mm) in the upper left corner. The other screws from the next steps can also be placed on the tape this way.

    Brecht Bocket -

    **I believe you mean the “top Right corner” Is where the longer screw goes.. not left.

    Amanda Felske -

    ! went to Office World bought 4 packs of bluetac stuck them on a sheet of paper to give approximately size and shape of iPad put it in a flat cardboard box

    John Smith -

    Where can I buy these screws please ?

    Anthony Roberts -

  37. cR6vVoaWkLnrHZnU
    cR6vVoaWkLnrHZnU
    PjWMBMpFkiFMvo4h
    ycK5lK3MntiqbwwB
    • Versuche nicht das LCD ganz abzulösen. Es ist immer noch mit dem iPad an dem Ende mit dem Home Button über verschiedene Kabel verbunden. Hebe nur am Ende mit der Frontkamera hoch.

    • Benutze das flache Ende eines Spudgers um das LCD aus seinem Bett zu lösen. Hebe grade soweit an, bis du es mit den Fingern greifen kannst.

    • Klappe das LCD um wie die Seite eines Buches, hebe es in der Nähe der Kamera an und Klappe es in Richtung des Home Buttons auf die Rückseite.

    • Sei vorsichtig und achte auf Kabel, wenn du das LCD umklappst.

    • Lege das LCD auf seine Vorderseite, um an die LCD-Kabel heranzukommen.

    • Lege das LCD auf eine weiche, saubere, fusselfreie Unterlage.

    Got a cracked screen from toddler stepping on the iPad. My repair went well, everything worked. Except I scratched the LCD. It seems to scratch easily.

    At this step, be careful when folding over the screen, as it may scratch on the aluminum frame (third picture). When they say “soft lint free surface” that is needed, specifically where the LCD meets the frame. Place a thin cloth like sunglass cleaning cloth over the edge of the frame.

    Cobus de Beer -

  38. TpXsLubuOLsZMUPg
    TpXsLubuOLsZMUPg
    LAcvxpjpfWIdE36i
    1QiOl5J5OubEbiYM
    • Entferne die einzelne 2,3 mm Kreuzschlitzschraube , mit der der Akkustecker am Logic Board befestigt ist.

    • Um das Risiko eines Kurzschlusses zu vermeiden, kannst du ein Akkutrennstück (battery blocker) oder ein zugeschnittenes Plektrum benutzen, um den Akku abzutrennen.

    • Sei äußerst vorsichtig, wenn du den Akku mit einem Akkutrennstück abtrennst. Die Kontakte am Akku sind sehr empfindlich und können leicht dauerhaft beschädigt werden.

    • Schiebe ein Akkutrennstück unter den Bereich mit dem Akkustecker auf dem Logic Board, und lasse es dort während du arbeitest.

    • Wenn es schwer fällt, das Akkutrennstück unter das Logic Board einzusetzen, dann probiere, den Akku mit einer Spielkarte abzutrennen.

    Not having the isolation pick, I used 2 thin guitar picks instead, which did the job fine.

    goodcyning -

    I couldn't disconnect the battery connector - I applied some force, nothing happened and I was afraid of applying too much force - so I just left it connected and I was very careful not to short out any terminals with metal tools. I completed the repair without any other issues and the iPad now seems to be working fine.

    Peter Gray -

    Mine was missing. Made one with scissors but still didn't do the trick. I just worked with the batteries still plugged in.

    Travis Dixon -

    Couldn’t get the battery terminal disconnected so I continued with repair. I didn’t short anything but now it won’t do anything. It worked before, just a cracked glass to replace. Any solutions?

    Tech-ER -

    Why do you say you didn’t short anything? Your result would seem to suggest otherwise

    John Marx -

    I don’t know if it applies to the iPad Air, but I saw elsewhere in my researches in reference to a iPad mini (or was it an iPod mini?) that disconnecting the LCD and/or digitizer with the battery still connected will blow a “fuse” for the backlight. Might yours still be working, just with no screen illumination whatsoever? Dunno. Just a thought.

    It apparently can be repaired, but is no longer a DIY job.

    Tim -

    try lifting the board and not blocking the connector. If you block the connector there are pins that could be damaged.

    Bryan Cruse -

    A replacement of the battery connector is required if pins are bent should you get power on or charge issue after battery disconnection. This can be replaced with the right tools and low melt solder to remove the connector and replace.

    Best method to disconnect battery is to carefully lift the logic board near the battery connector enough to slip a piece of thin plastic or paper between the batter connector and the logic board battery connector and pins.

    Failing to isolate battery so can result in blown back light or touch filters or diodes in backlight circuit.

    At the very least run down the battery flat prior to repair but you are really best to isolate battery.

    markduff -

    From a repair point of view. This connector is a royal pain. For assembly it's great, well, nearly great.

    This connector is SOLDERED to the motherboard side. Never lever this on the motherboard side, I will call it the right hand side. It will break leaving it's soldered pins behind. Yes I did it.

    The pins, on the battery side of this connector, just rest on the batteries plated pads. They are kept under tension by the screw. It should be noted though that removal of the screw will not disconnect the connector pins from the battery pads. Natural tension is still present.

    I suggest strongly that you take a look at the battery connector online to see the nature of the pins and you will see that some are quite delicate.

    The tools purpose is to raise the battery side of the connector ; the left side, so there is some clearance between the pins and the batteries pads. If you have seen a picture of this connector then you will realise the potential of damage to this connector and will have a better idea of what to do.

    Biskwit2 -

    Contd.

    Lifting the connector and simultaneously sliding a thin piece of card or plastic under the pins should be done carefully. In fact, to minimise damage I just slid it under ONE of the main battery pins, plus or minus, which are in the middle and quite robust compared with the tiddlers on the side of the connector.

    The second point, the battery and the motherboard have protection circuitry. When I broke my connector the battery dropped to 0.5V at the terminals. Connecting the charger, when all the connections were sound and not shorted raised it from the dead back to over 3.2V

    Biskwit2 -

    I replaced the battery, and got things hooked backup. For the test, the screen came on, digitizer seemed to be functioning fine. But I couldn’t get it to charge. I used the i-fixit battery blocker by using my spooger to put a little up pressure on the board, and then sliding the blocker in. I don’t think I damaged the pins, but its possible. This is a friends ipad, and its obviously been dropped a few times. I started eye balling the charging port, it LOOKS ok, but looks can be deceiving. When plugged in, even trying different cables, the ipad is not showing the charging symbol. Some of the comments here seem to imply, if I damaged the battery connection pins, I would still get a charging symbol. My question is, if I damaged those battery connector pins, would the ipad show the charging icon or not? Should I be looking at replacing the charging port?

    Mike Lindsay -

    If you gently use the plastic opening tool as shown in step 94 to lift the board slightly it makes it MUCH easier to slide the battery blocker in.

    Kevin -

  39. pSXagHwbWDIelll2
    • Entferne die drei 1,4 mm Kreuzschlitzschrauben von der Halterung des Displaykabels.

    Be careful when re-installing screws on reassembly. I mistakenly put the longer screw from the battery connector in the outboard hole, and wound up twisting off the lug that is only lightly soldered to the metal below. Still have 2 screws and system seems to work fine.

    Brian Anderson -

  40. CDkvW2pOADbCE5mp
    CDkvW2pOADbCE5mp
    bALHMflYomoDEAom
    • Mit dem flachen Ende eines Spudgers kannst du ganz vorsichtig die Halterung des Displaykabels senkrecht aus der Hauptplatine heben.

    • Der Verbinder des Displaykabels ist auf der Unterseite der Halterung angebracht. Schiebe deswegen den Spudger nicht zu weit unter die Halterung, du könntest den Verbinder beschädigen.

    bough my digitizer from ebay and have everything done up to this step. The screwdriver the kit came with said to be a #000 but it stripped the screw on the plate... I have tried rubber bands, tape and paper to no avail...anyone got an idea on how to remove the screw. Also I am currently studying in St. Kitts and they lack some products found in the US.

    originalpaintballpanda2 -

    I'm sure you've moved past this by now, but I've had some success with stripped screws using a comparable, if slightly larger flathead screwdriver. The screwdrivers that come in those kits tend to suck quite a lot... iFixit actually has a guide for stripped screws: Wie man eine rundgedrehte Schraube entfernt

    goodcyning -

    Does anyone know where I could purchase a replacement display cable bracket?

    gwarren -

    Note:Be rly carefule with unplugin homebutton-connection.

    The plug-connection (Homebutton) is not similar to the plug connections the basic-plugs got.

    The homeputton-plug-connection is sensetiv and cant unplug easly.

    IPad -

  41. 2oYyLIWDGMDwn5ni
    • Entferne das LCD.

    Andddddd continue this iFix folks! It's not a matter of working backwards. Most people must have cracked screens and end up having to rip the screen off and won't have a chance to inspect connections.

    Travis Dixon -

    He is far from complete…..if lcd is being replaced its probably because top screen is busted too. He didn’t show anything about how to remove the cables for that.

    B. A. Computer Services -

    If the battery blocking method is outdated and dangerous, why not show us the new, safer method? Just a thought.

    hdrjunkie -

    There is a separate guide for replacing the outer glass ;)

    Gerald Bowen -

  42. uk4S5MILAtUfWLeZ
    uk4S5MILAtUfWLeZ
    CTZZMLke1DGQ4ZHv
    • Entferne vorsichtig das Klebeband, welches den Anschluss des Home Buttons schützt.

    I totally skipped steps 39-98 I didn’t see any need to remove all these components and the logic board just to get the battery out. I gently pried up the board where the battery connector goes in, slipped it out, and slipped in the new one.

    Seth Childers -

    That is a great tip. There is plenty of space inside the case to lever out the battery without taking out all of the components. I laid the iPad on top of a large bean bag, heated for 3 minutes in the microwave. After 4-5 minutes, I was able to lever out the battery with the spudger and the credit cards. It came out after a few minutes of careful levering and cramming the credit cards under the battery. I unscrewed the earphone connector and carefully taped it back to the iPad housing with paint tape to have more room to maneuver.

    Jonathan Koehler -

    I second this.

    Just be careful to make sure you don’t squish or tear any wires or anything else surrounding when you’re fighting with the batteries, and it’s still way easier than removing everything else in there first.

    I’ll add one bit, though. The hole in the battery connector that accepts the screw through the logic board also apparently slips over a pin in which the screw seats. I couldn’t see that. So when I got the last bit of battery adhesive to let go, the pin tore out the battery connector hole. Since I was replacing the battery, it wasn’t a problem, but did produce a little conductive piece that I had to fish out before putting anything back together. Wouldn’t want that little torn out piece running around in there to short something out later.

    Also, that pin will locate the battery correctly, so that in one of the last steps of reassembly, the battery connection screws together properly. Make sure you find it before the battery adhesive grabs on to the back of the case.

    Tim -

    Careful removing the tape. The home button has a zif connector and if you aren’t careful the tape can rip the zif flap right off. You might have to hold it down while you pull it off or pull the tape from a different direction to make sure you dont tear the zif tab off.

    Sarah Ybarra -

  43. eyeiRImJcUhkMf6A
    eyeiRImJcUhkMf6A
    qxSAGAAulqJs2IPR
    IWJg6xKVGkNYcK53
    • Nutze die flache Seite des Spudgers, um die Abdeckung des ZIF-Anschlusses zu öffnen.

    • Entferne jetzt das Kabel aus dem Anschluss, indem du vorsichtig und gleichmäßig in horizontaler Richtung daran ziehst.

    I got through the repair, only to have the new screen give me problems that I can not find solutions to any where. The digitizer is working on its own without my input, it will start apps, switch windows, etc. I have pulled up the new screen and checked my ribbons and cables seem to be fine. ANY IDEAS??

    Moses Roman -

    Moses Roman

    Same exact problem that I have. I think it has something to do with the glass touching the ipad. Something like on the iPad mini, where you had to cover some areas beside the home button.

    I would love to see a real solution, as im stuck with unhappy customers and frustrated me :)

    Bilal Kinali -

    I had mine replaced TWICE by a local repair shop. Soon noticed both times that the iPad would soon go haywire after a few minutes use with random clicks, ghost typing, opening apps, etc.

    The iPad Air's such a poor quality, un-durable product anyway. I only had my screen replaced in the first place because it cracked with no apparent drop or trauma and Apple wouldn't replace.

    daviddesignbristol -

    I have also the same issue, does anyone know what the problem is?

    Please give us some feedback.

    Elektromic -

    Have seen this with multiple repairs where the digitizer was replaced. In each case it was a problem with the digitizer cables where it gets tucked under the glass near the edge of the frame. Not yet sure if they are badly made digitizers or if the cable gets damaged trying to tuck it under frame during installation.

    RayM -

    To avoid the digi sending the ipad crazy. In the same way you tape the copper/silver edges on the back of the glass for the iPad Mini. You tape all the way around, making sure not to dirty the protective cover when placing back down after taping one edge.

    Make sure all the metal surround is cover by tape, but careful not too go over the edges too much. It will be visible when using the device.

    Like i said earlier, the real skill is not too dirty the screen when lifting the protective sheet.

    Have fun!

    Josh -

    Thanks man, I'll give it a try. Any idea what kind of tape should I buy?

    Luis Tamborrell -

    Kapton tape otherwise known as heat tape or polyamide tape

    Neil Davis -

    Just fitted the screen, the digitizer works, display all good but I had a message saying I could not use touch ID and the home button doesn’t work at all…is this expected?

    Paul Kelly -

    I break the ZIF connector. Is tat touch connecter.?

    aiyathurai Aathee -

    How do you take the ribbon cable off from the home button site???

    BP Thompson -

    Pull the ribbon horizontally out, not up

    Rusty -

  44. l5OJQEfABRtXA2aH
    l5OJQEfABRtXA2aH
    6BEwXARifGl6LWtA
    LqmAErATbXR2rtFM
    • Nutze die flache Seite des Spudgers (oder einen Fingernagel), um die beiden Digitizer-Kabel vom Logic Board zu lösen.

    • Um Beschädigungen deines iPad vorzubeugen, heble nur am Kabel und nicht am Anschluss auf dem Logic Board selber.

    What are those connectors for because i kinda half broke the left one on the screen on the glass frame and now the lcd wont turn on

    SuperCow_man -

  45. SQA6OALarfTfYlrM
    SQA6OALarfTfYlrM
    jWUSiX3MVmNJf5nD
    • Löse vorsichtig das Home Button Kabel aus der Verklebung, die es am Gehäuse fixiert.

    THIS PICTURE IS PERFECT AND PERTANANT TO THE NEXT STEP REGARDING “GHOST OR PHANTOM TOUCH” - See that foam around the edges? For some reason, the ifixit replacement digitizer doesn’t come with it (but it does come with new adhesive applied already.) With your screen, also purchase their “tesa tape” : Tesa 61395 Tape / 4 mm - it comes in different widths fyi. I choose 4mm as advised by a staff member.

    scottgogos -

    On the replacement screen I received from you, the home screen ribbon cable does not fully seat inside the Zif connector like the original and will not lock in place as a result. It seems too fat. Any tips to make it work?

    Greg DeCelle -

    I can’t think of any reason for that other than it’s the wrong display for your model, or it’s defective. Double-check the model very carefully and make sure you ordered/received a compatible part. If you ordered from iFixit, contact customer support directly for returns or exchanges. Good luck!

    Jeff Suovanen -

    I didn’t receive any of the two sided tape…I assume it needed to be ordered separately??

    So, when I removed the glass, the bottom cable tore and I have to replace it. The video is not as clear regarding replacement. The old button had a round rubber gasket but the new one does not. No inst. how to re-use it. I can’t attach and keep in place the new button.

    Michael Goss -

    In a previous repair, i broke the zif, what you want to do is hold it down while removing the tape, otherwise it will pull the parts up with it.

    Since it was broke i put a piece of electrical tape on top for the pressure the zif would push down, then another piece from the screw hole to the bend in the cable, so it does not come loose when putting back together.

    Neil Rogers -

  46. dWRlQ2hFbWhAvMVF
    dWRlQ2hFbWhAvMVF
    BZgXIeHJYVBC6JCL
    • Entferne nun das Frontglas.

    • Wische beim Zusammenbau jeglichen Staub oder Fingerabdrücke von der Innenseite des Front Panels ab, so dass du ein völlig sauberes Display erhältst.

    • Wenn du Probleme mit dem neuen Touchscreen des iPads durch Phantomauslöser hast, kannst du an den markierten Stellen auf der Rückseite sehr dünnes Isolierklebeband befestigen, so wie z.B. unser Kaptonband (Polyimidband). Ersatzteile von iFixit sind schon mit geeigneter Isolierung versehen, bei ihnen sollte das nicht nötig sein.

    • Ohne die richtige Isolierung können diese Bereiche des Touchscreens Kontakt zu anderen Bauteilen herstellen, so entstehen die Fehlfunktionen.

    • Die Isolierschicht ist unauffällig. Sie unterscheidet sich von den Schaumstoffstreifen gegen das Eindringen von Staub, wie sie in vielen iPads zu finden sind.

    In your conclusion, which doesn't have a comments area, you say to reverse the procedure - simple enough, BUT what about the sticky adhesive residue along the edges of the (a) the just-remove-glass (if re-using) and (b) along the 'inside' edges of the iPad chassis? Typically Apple says to remove the adhesive residue (careful) with alcohol wipes (lint free & 98% isopropyl). Thanks for the instructions!

    Joe Kazura -

    the hardest part of this repair for me is actually aligning the ribbons (especially on the aftermarket version) so they don't jumble and cause the glass to mush away from the adhesive leaving a gap. Would would be very helpful to see how to fold the ribbon cables back on the aftermarket digitizers. They are slightly different than the originals, or at least they appear different. This repair is super useful but we could really use a step 44 because re-assembly has a sequence and a folding technique.

    TJ Hellmuth -

    The ribbon cable is a little tricky to figure out. But if you look closely at the old ( Broken) screen you will see they stick to the underside of the screen thin the remaining ribbon slides down into the ipad between the display and ipads frame.

    I used a heat gun and suction cups to loosen screen.

    This was a very good ifix ii

    Rowell -

    Reassemble huh? What about how to move the home button to the new panel?

    xsubguy -

    This is what I need too!

    Sarah Ybarra -

    It is not as simple as reverse disassembly steps, the ribbon cables need to be tucked into the pocket on the side of the iPad. There is tape on them that has to adhere to the side of the digitizer too. Mine did not make it all the way down into the gap, and stuck on the other adhesive, now I have a gap by these two cables. To tuck these into this area is difficult at best. I now need to remove the glass, hoping it does not shatter and purchase more tape.

    Other than this the task was not bad.. BTW: YES People use the capton tape

    Randall Hooper -

    I’ve read that people are putting glue at each corner. I haven’t figured out what glue. One person said Glue Dot 1” 16lb, another said rubber cement, 1 video shows 5 min epoxy… Heard that some sort of glue (not super glue) needs to be used to avoid the glass lifting later on. And to use 3m red tape along the edges. I’ve been searching for which glue because I still have an ipad air to do screen replacement on.

    tsolorio -

    Would be helpful if the tape were listed in the master supplies for the guide. I got the whole kit overnighted, but then had to wait a week to get the tape from Amazon (since I wasn’t going to shell out another $50 for overnight shipping). Otherwise, it’d be nice to know if the displays through iFix it included the foam or not—mine didn’t.

    Micah Sledge -

    Second the concern about the foam. I bought the full repair kit, but was surprised there wasn’t already polyimide tape on the digitizer or in the kit. At least mention that it needs to be purchased extra.

    Ronny Barlow -

    @baron9 The displays we sell have the proper insulation and don’t require any tape. That note is more for folks who use our guides while buying the parts from somewhere else. (They tend to complain here, even though it’s the part that’s at fault, not the guide.) I’ve updated the instructions to try to make things a little more clear. Sorry about that!

    Jeff Suovanen -

    My digitizer kit from ifixit also looks like it is missing the polyimide tape on the digitizer. Can someone confirm that i do not need to get the tape with the original ifixit kit and just slap the digitizer on there?

    Alex -

    what is the difference between the right and left antenna?. My right antenna is damage and cant find a replacement. Can I use only the left one?

    Daniel C -

    I did not realize that aftermarket screens (besides the one ifixit sells) do not come with adhesive strips. Well worth the time to figure out what kind of adhesive you’re going to use to re-adhere the glass before you begin. Stopping while you’re so close to the end of the repair (or having to open the ipad up again after the screen doesn’t stick back down) is slightly frustrating.

    Robert -

    I used a b-7000. 48 h cure time.

    Jean masaoka -

    Thank you for your guide, it helped me fix my son’s iPad!

    Bill -

    Just wanna say thank you. I replaced my LCD and digitizer today…. took a LOT longer to get that adhesive off than I expected. And the IOpener busted in my microwave despite following all directions (eg only 30 sec at a time, out for at least 10 min before reheating. So that sucked. Turns out the rice in a sock worked pretty well too.

    GC Mitts -

    Regarding assembly: even with carefully tucking the ribbon cables down the side while reassembling, it’s still hard to get that area to stick down.

    Gary Wolfe -

    Some advice when reassembling that I have learned in the hard way.

    One good hint is to those who buy replacement parts that are not exactly the original ones. Some of the parts come with a 3M adhesive tape on the tab of the flex cables (I guess original parts are already folded and glued). I would strongly recommend to be very careful when you try to glue it on the front panel and maybe watch a video on how to fold it properly, so as not to fold or pinch the flex cable on an unrepairable way. Also, some of the low cost parts come with a very strong protection sticker on the front glass. It is advisable that you peel off the sticker before reassembling the ipad in order to not end up ruining the glue that was supposed to hold the front panel .

    Jean masaoka -

  47. YZhFSVUN24FJkGJH
    YZhFSVUN24FJkGJH
    xqRp4XpVPpy4EWoL
    GSJGwRhThVFkIVfx
    • Klappe den Sicherungsbügel am ZIF Verbinder der Gehäusetasten auf dem Logic Board mit dem flachen Ende des Spudgers hoch.

    • Ziehe das Kabel zu den Gehäusetasten mit einer Pinzette aus dem ZIF Verbinder.

  48. lZ6rnkkaeIpnicjb
    • Entferne die fünf folgenden Kreuzschlitzschrauben #000:

    • Drei mit 2,3 mm sichern die Halterung des Lautstärkereglers

    • Zwei mit 2,3 mm sichern die Halterung des Einschaltknopfs

  49. X4PtMLTXcIVApSY6
    X4PtMLTXcIVApSY6
    CGeX6RxG1QIfHrVK
    jPjPXUjUwNxUmP2w
    • Hebe den Einschaltknopf mit der Spitze eines Spudgers aus seinem Sitz im Gehäuse.

    • An dieser Stelle hebt sich vielleicht auch die Halterung der Lautstärketasten aus ihrem Sitz. Entferne sie nicht ganz, denn das Kabel daran ist immer noch am Gehäuse verklebt.

  50. Eh2ioYjJOdDBmwrM
    • Hebe die Halterung der Lautstärketasten aus ihrem Sitz im Gehäuse, entferne sie aber nicht.

    • Hebe sie nur so hoch an, um an die Lautstärkeschalter auf der Rückseite der Tastenabdeckungen zu gelangen.

  51. JiRJKjxBxfDS1WoH
    JiRJKjxBxfDS1WoH
    dtbtErSmy1jXiNj2
    CVBGXWdjsfTMYneS
    • Schubse die beiden Lautstärketastenabdeckungen mit der Spudgerspitze aus ihrem Sitz im Gehäuse.

  52. AgkKg6wooptJXGFp
    • Entferne die Gehäusetasteneinheit.

    • An dieser Stelle besteht die Einheit aus der Halterung der Lautstärkeregler, der Halterung des Einschaltknopfs, zwei Abdeckungen über den Lautstärketasten und dam eigentlichen Flachbandkabel.

    • In den nachfolgenden Schritten wird beschrieben, wie das Flachbandkabel zum Austausch freigelegt wird.

  53. DYMuCXU6nxhYGm2V
    DYMuCXU6nxhYGm2V
    RapmWtklmNiGYJIR
    LLijoR4QjvrYKCTi
    • Ziehe vorsichtig das Flachbandkabel der Gehäusetasten aus der metallenen Halterung der Lautstärketasten.

  54. txkw2OUHbkTSxruD
    txkw2OUHbkTSxruD
    rEHLAc3HBjsCdLQY
    DTJkrpgRgLJNMjMQ
    • Löse mit Hilfe einer Pinzette den Einschalter aus seiner Plastikhalterung.

    • Löse vorsichtig die beiden Schalter der Lautstärkereglung aus ihren jeweiligen Tastenabdeckungen.

  55. TXRNpptdGhKJ26Jf
    • Das Flachbandkabel zu den Tasten ist frei.

Abschluss

Um dein Gerät wieder zusammenzusetzen, folge den Schritten in umgekehrter Reihenfolge.
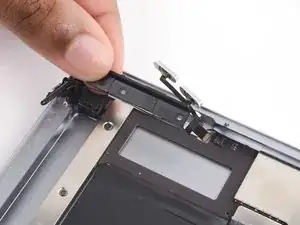
Evan Noronha

Mitglied seit: 06/02/15

219164 Reputation

0 Kommentare