Einleitung
Folge dieser Anleitung, um das Frontglas mit integriertem Digitizer an deinem iPad Air zu ersetzen.
Wenn du den Akku mit dem speziellen Plektrum ("Akkublocker") abtrennen willst, musst du sehr vorsichtig sein. Die Kontakte des Akkus sind sehr empfindlich und können leicht dauerhaft beschädigt werden. Wenn du aber weiterarbeitest, ohne den Akku zu isolieren, dann vermeide den Gebrauch von Metallwerkzeugen, außer wo unbedingt notwendig (z.B. um Schrauben zu entfernen). Dadurch beugst du einem Kurzschließen des Akkus und der empfindlichen Elektronik vor.
Werkzeuge
Ersatzteile
-
-
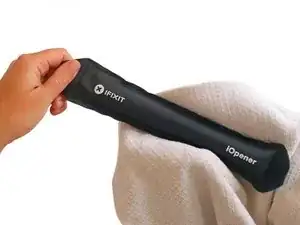
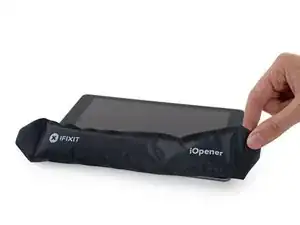
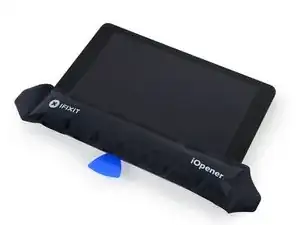
Erhitze den iOpener für dreißig Sekunden.
-
Im Verlauf der Reparatur kühlt sich der iOpener wieder ab. Erhitze ihn dann noch einmal für dreißig Sekunden.
-
-
-
Halte den iOpener an einem der flachen Enden und vermeide die heiße Mitte, während du ihn aus der Mikrowelle nimmst.
-
-
-
Fülle einen Topf oder eine tiefe Pfanne mit ausreichend Wasser, um den iOpener komplett damit bedecken zu können.
-
Erhitze das Wasser (ohne den iOpener) bis es kocht. Schalte die Wärmezufuhr (Platte) aus.
-
Lege den iOpener für etwa 2-3 Minuten in das heiße Wasser. Stelle sicher, dass der iOpener komplett mit Wasser bedeckt ist.
-
Nimm den iOpener mit einer Küchenzange aus dem Wasser heraus.
-
Trockne den iOpener gründlich mit einem Küchen- oder Handtuch ab.
-
Der iOpener kann jetzt verwendet werden. Solltest du den iOpener erneut erwärmen müssen, erhitze das Wasser nochmal bis zum Siedepunkt, schalte die Wärmezufuhr aus, und lege den iOpener wieder für 2-3 Minuten vollständig in das Wasser.
-
-
-
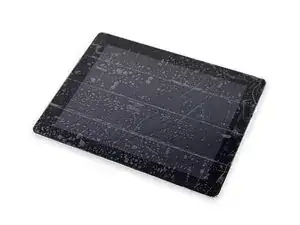
Wenn dein Touchscreen gebrochen ist, vermeide weitere Brüche und verletze dich nicht beim Berühren des Glases.
-
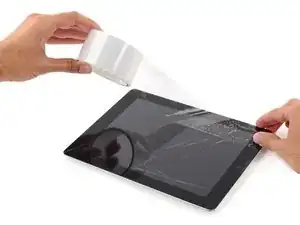
Klebe Paketband über den Touchscreen des iPads, sodass die ganze Oberseite bedeckt ist.
-
Bitte befolge die restliche Anleitung wie beschrieben. Wenn das Glas einmal gebrochen ist, wird es während der Reparatur weiter brechen. Eventuell benötigst du einen Metallspatel, um das Glas zu entfernen.
-
-
-
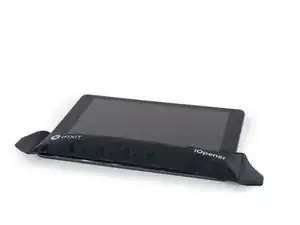
Lege den erhitzten iOpener auf die lange Seite links des Home Buttons.
-
Lass den iOpener für mindestens eine Minute liegen, um den Kleber zu erhitzen und zu lösen.
-
-
-
Wenn du die einzelnen Schritte ausführst, pass besonders an folgenden Stellen auf, wenn du das Glas entfernst:
-
Frontkamera
-
Antennen
-
Display und Touch Screen Kabel
-
-
-
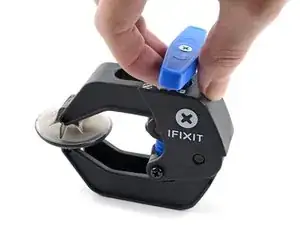
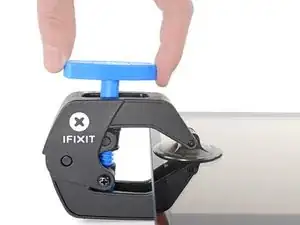
Drücke den blauen Griff zum Scharnier hin, um den Öffnungsmodus auszustellen.
-
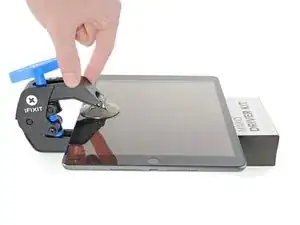
Hebe das iPad so hoch, dass sich die Arme der Anti-Clamp über und unter dem Display befinden.
-
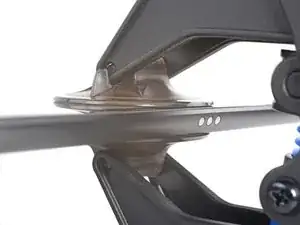
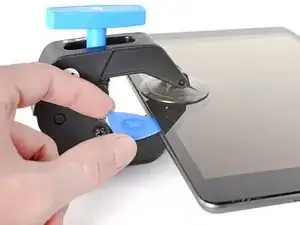
Bringe die Saugheber nahe an der linken Seitenkante des iPads an, einen auf der Vorderseite, den anderen auf der Rückseite.
-
Drücke die Saugheber auf den Oberflächen fest.
-
-
-
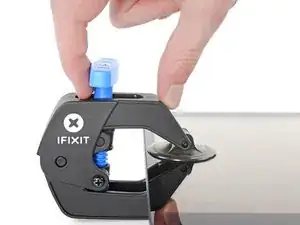
Drücke den blauen Griff vom Scharnier weg in die Stellung für den Öffnungsmodus.
-
Drehe den Griff im Uhrzeigersinn, bis du merkst, dass sich die Saugheber dehnen.
-
Warte eine Minute, damit sich der Kleber allmählich ablösen kann und sich ein Spalt bilden kann.
-
Wenn der Spalt groß genug ist, dann setze ein Plektrum unter das Display ein.
-
Überspringe die nächsten zwei Schritte.
-
-
-
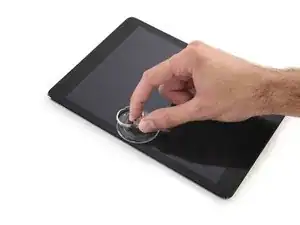
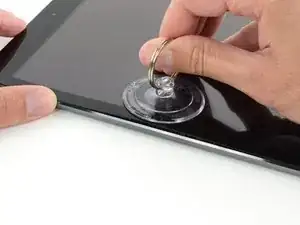
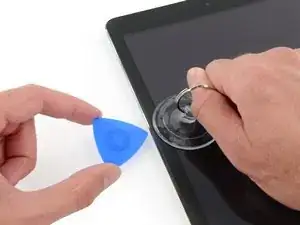
Befestige einen Saugheber auf der linken Seite in der Mitte des iPads.
-
Drücke den Saugnapf flach auf den Touch Screen.
-
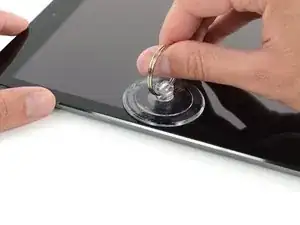
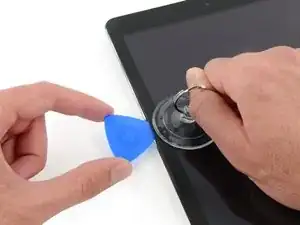
Halte das iPad mit der einen Hand fest und hebe mit der anderen vorsichtig den Touch Screen vom Gehäuse.
-
-
-
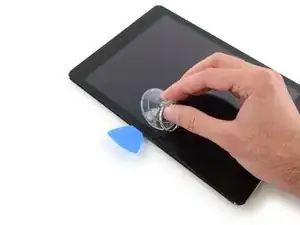
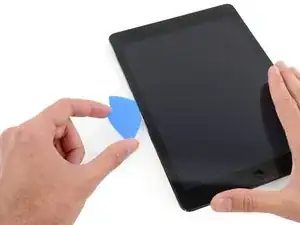
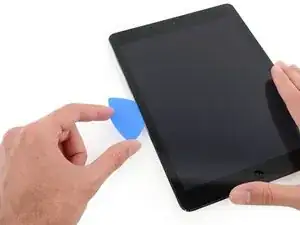
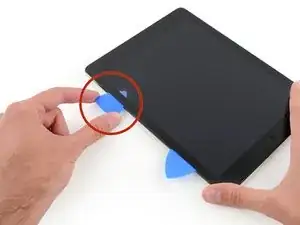
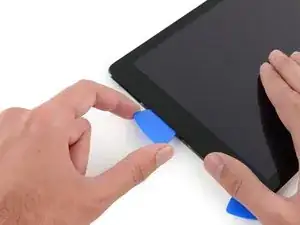
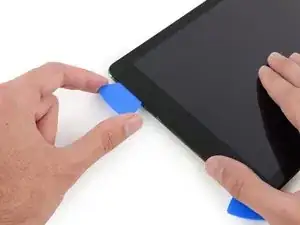
Platziere den Opening Pick in dem entstandenen Spalt.
-
Löse nun den Saugnapf vom Touch Screen.
-
-
-
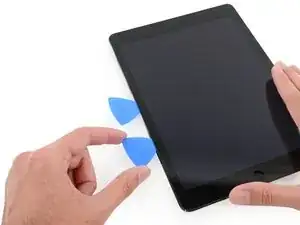
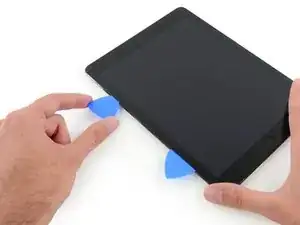
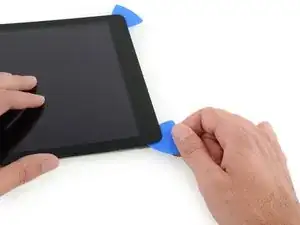
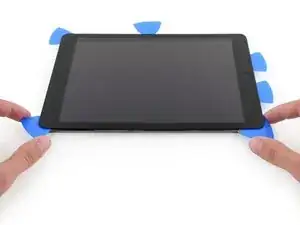
Platziere nun einen weiteren Pick in dem entstandenen Spalt und ziehe diesen zur unteren Ecke. Dabei sollte sich der Kleber lösen.
-
-
-
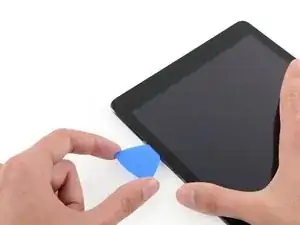
Führe den Pick an der Seite des Displays entlang, um den Kleber zu lösen.
-
Wenn der Pick am Kleber festhängt oder stockt, dann "rolle" den Pick an der Seite entlang, um den Kleber weiter zu lösen.
-
-
-
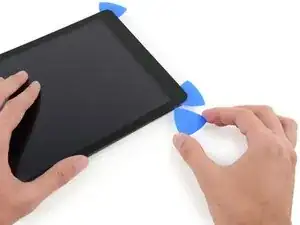
Führe nun den ersten Pick hinauf bis zur oberen Ecke des iPads.
-
Siehst du den Pick durch das Glas? Keine Panik – ziehe es einfach wieder etwas raus. Meistens wird dadurch nichts beschädigt. Versuche dies aber zu vermeiden, weil der Kleber sonst das LCD oder Glas berühren könnte und sehr schwer zu reinigen ist.
-
-
-
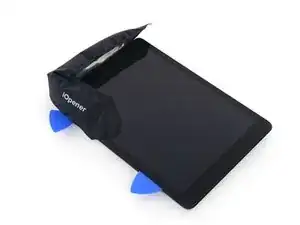
Erhitze den iOpener erneut und platziere ihn auf dem oberen Rand des iPads über der Frontkamera.
-
-
-
Ziehe das Opening Pick entlang der oberen Kante bis kurz vor die Frontkamera und halte dann an.
-
-
-
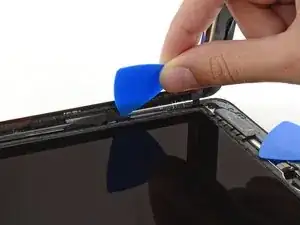
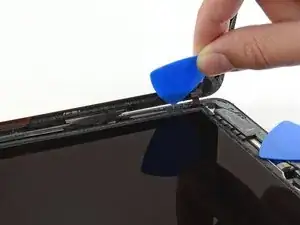
Ziehe das Opening Pick leicht heraus und schiebe die Spitze sehr vorsichtig am oberen Rand des iPads auf Höhe der Frontkamera entlang.
-
-
-
Lass das Opening Pick gleich hinter der Frontkamera stecken.
-
Nimm ein zweites Opening Pick und setze vor der Frontkamera erneut an. Nun schiebe das Opening Pick in die linke Ecke, um den Klebstoff an diesem Rand vollends zu lösen.
-
-
-
Nun kannst du das erste Opening Pick wieder tiefer hineinschieben und von der Kamera weg bis in die Ecke ziehen.
-
-
-
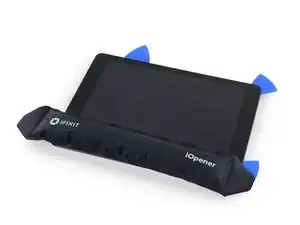
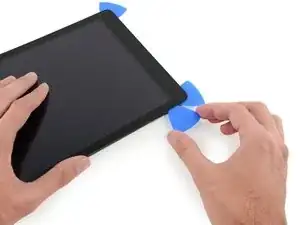
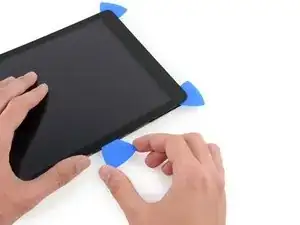
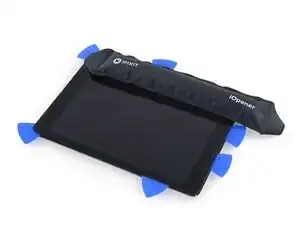
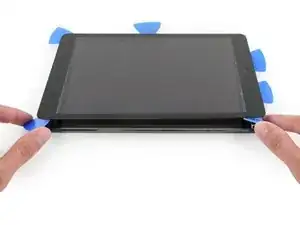
Behalte die drei Opening Picks in den Seiten des iPads an denen der Kleber schon gelöst wurde, sodass dieser sich nicht erneut verklebt.
-
Erhitze den iOpener und platziere ihn auf der letzten unbearbeiteten Seite.
-
-
-
Schiebe den Opening Pick in die obere rechte Ecke des iPads, um den Kleber dort vorsichtig zu lösen.
-
-
-
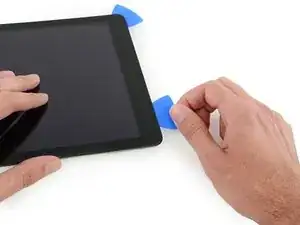
Führe einen neuen Opening Pick in das iPad ein und schiebe ihn in die Mitte der rechten Kante des iPads, um den Kleber der Kante entlang zu lösen.
-
-
-
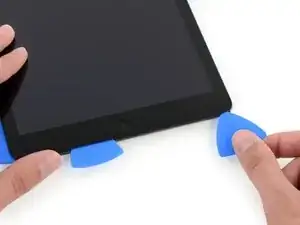
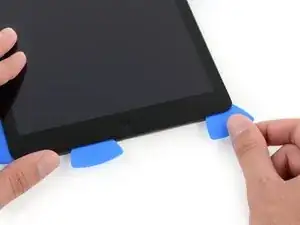
Lasse die Opening Picks an Ort und Stelle und lege den erneut aufgewärmten iOpener auf die Seite des iPads mit dem Home Button.
-
-
-
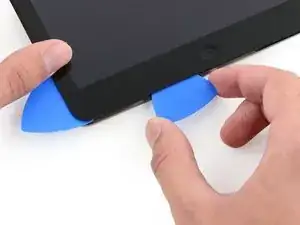
Schiebe den unteren linken Opening Pick in die untere linke Ecke, um den Kleber auf dieser Ecke zu trennen.
-
Lasse den Opening Pick in der Ecke. Gehe damit kein Stück weiter und entferne nicht den Opening Pick aus dem iPad.
-
Die folgenden Schritte führen dich so, dass du Schäden an den Komponenten vermeiden wirst. Verwende Hitze und Hebelwirkung nur da, wo es von dir in der Anleitung verlangt wird.
-
-
-
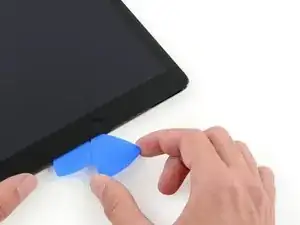
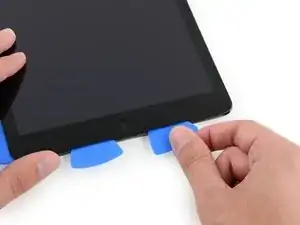
Schneide mit einem neuen Opening Pick vorsichtig über die linke Antenne, stoppe kurz vor dem Home Button.
-
Lasse den Opening Pick an Ort und Stelle und springe zum nächsten Schritt.
-
-
-
Nimm ein neues Plektrum und schiebe es an die Stelle des vorherigen Plektrums.
-
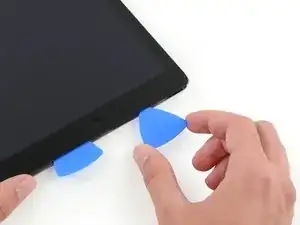
Fahre am Home Button und der rechten Antenne nur mit der äussersten Spitze des Plektrums entlang, um den Kleber zu entfernen.
-
-
-
Wenn der Kleber gelöst ist, kannst du das Plektrum in der Nähe der rechten Ecke einsetzen. Schiebe das Plektrum nach links und halte kurz vor dem Home Button an.
-
-
-
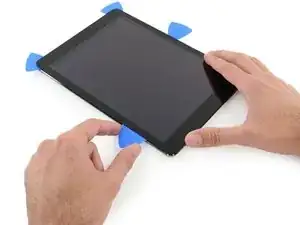
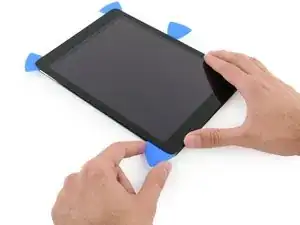
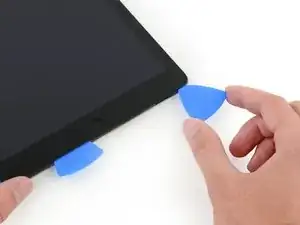
Auf der den Lautstärketasten gegenüberliegenden Seite solltest du ein Plektrum in jede Ecke eingesteckt haben. Drehe die Plektren um die Scheibe leicht an zu heben - so löst du auch den letzten Kleber entlang der Kante mit dem Displaykabel.
-
-
-
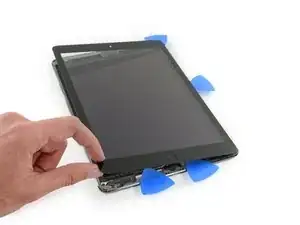
Hebe langsam und vorsichtig das Display an, um den Kleber entlang der Kante mit dem Displaykabel zu lösen.
-
-
-
Während du das Front Panel Glas hebst, nutze ein Plektrum, um auch den letzten Kleber zu lösen.
-
-
-
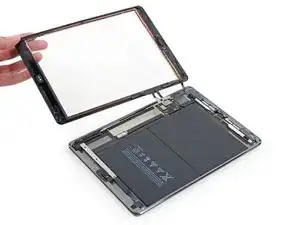
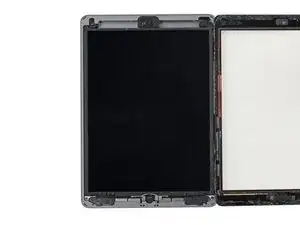
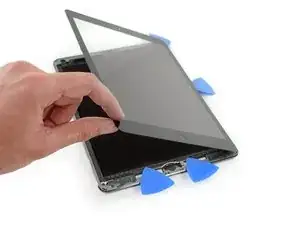
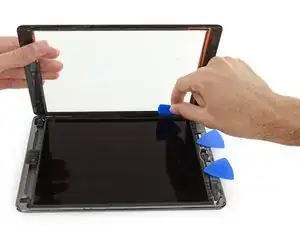
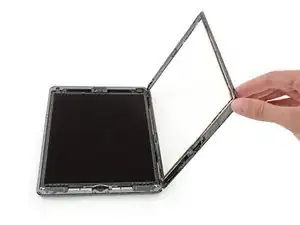
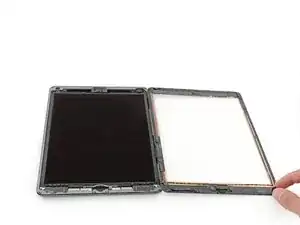
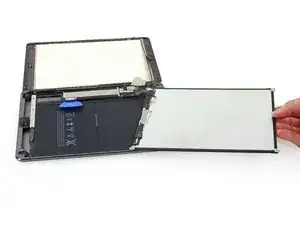
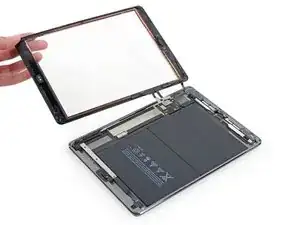
Wenn erst einmal jeglicher Kleber entfernt bzw. gelöst wurde, kannst du die Frontglasscheibe wie eine Buchseite öffnen und auf die Arbeitsfläche ablegen.
-
-
-
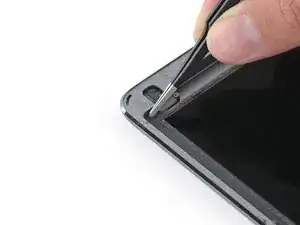
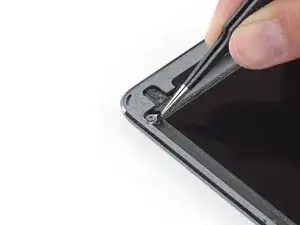
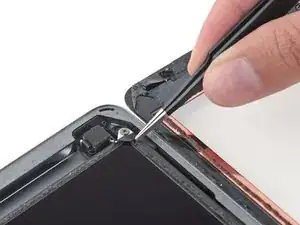
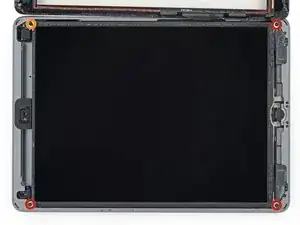
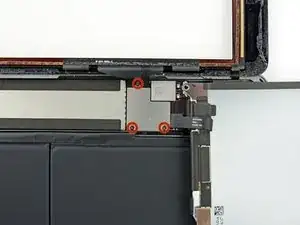
Entferne die folgenden Kreuzschlitzschrauben, die das LCD befestigen:
-
Drei 4,0 mm Schrauben
-
Eine 4,8 mm Schraube
-
-
-
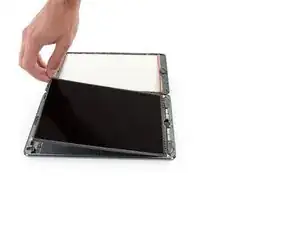
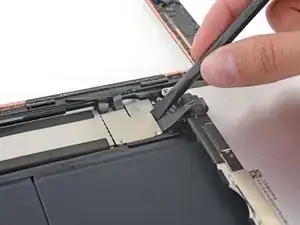
Benutze das flache Ende eines Spudgers um das LCD aus seinem Bett zu lösen. Hebe grade soweit an, bis du es mit den Fingern greifen kannst.
-
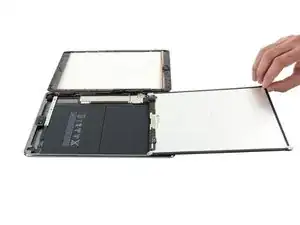
Klappe das LCD um wie die Seite eines Buches, hebe es in der Nähe der Kamera an und Klappe es in Richtung des Home Buttons auf die Rückseite.
-
Lege das LCD auf seine Vorderseite, um an die LCD-Kabel heranzukommen.
-
-
-
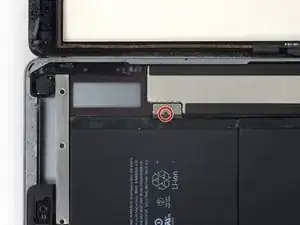
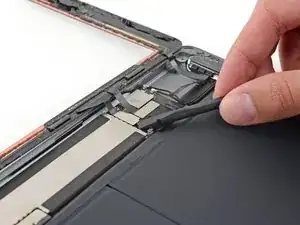
Entferne die einzelne 2,3 mm Kreuzschlitzschraube , mit der der Akkustecker am Logic Board befestigt ist.
-
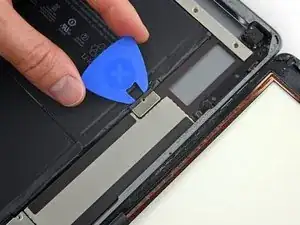
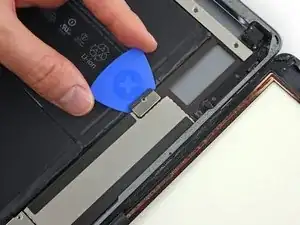
Schiebe ein Akkutrennstück unter den Bereich mit dem Akkustecker auf dem Logic Board, und lasse es dort während du arbeitest.
-
Wenn es schwer fällt, das Akkutrennstück unter das Logic Board einzusetzen, dann probiere, den Akku mit einer Spielkarte abzutrennen.
-
-
-
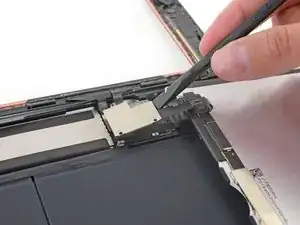
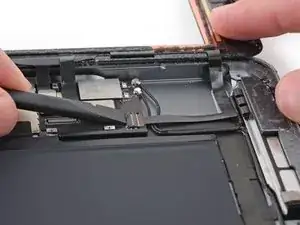
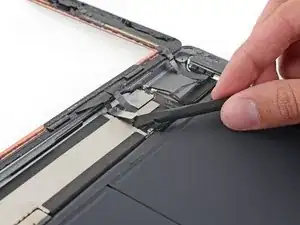
Mit dem flachen Ende eines Spudgers kannst du ganz vorsichtig die Halterung des Displaykabels senkrecht aus der Hauptplatine heben.
-
-
-
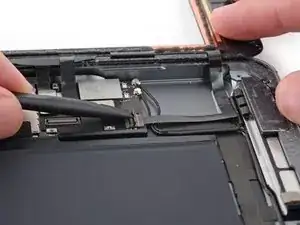
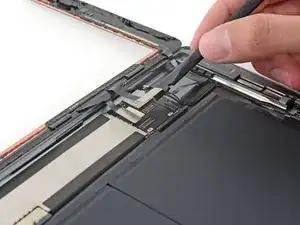
Nutze die flache Seite des Spudgers, um die Abdeckung des ZIF-Anschlusses zu öffnen.
-
Entferne jetzt das Kabel aus dem Anschluss, indem du vorsichtig und gleichmäßig in horizontaler Richtung daran ziehst.
-
-
-
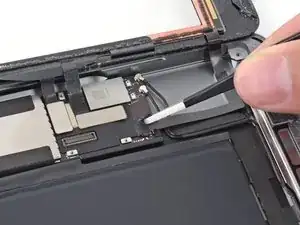
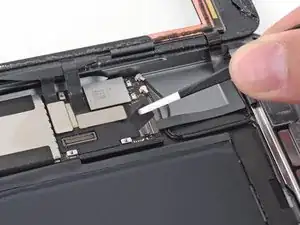
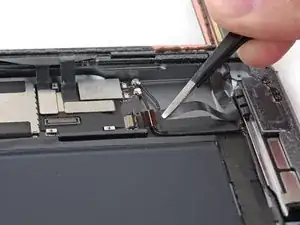
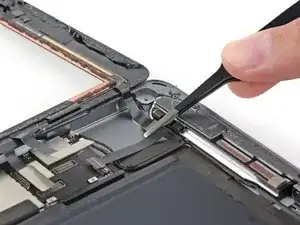
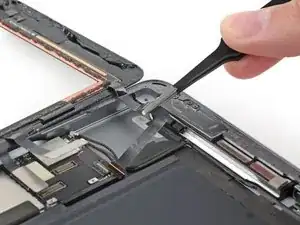
Nutze die flache Seite des Spudgers (oder einen Fingernagel), um die beiden Digitizer-Kabel vom Logic Board zu lösen.
-
-
-
Entferne nun das Frontglas.
-
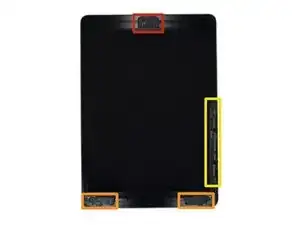
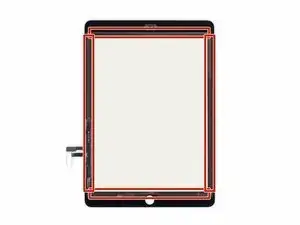
Wenn du Probleme mit dem neuen Touchscreen des iPads durch Phantomauslöser hast, kannst du an den markierten Stellen auf der Rückseite sehr dünnes Isolierklebeband befestigen, so wie z.B. unser Kaptonband (Polyimidband). Ersatzteile von iFixit sind schon mit geeigneter Isolierung versehen, bei ihnen sollte das nicht nötig sein.
-
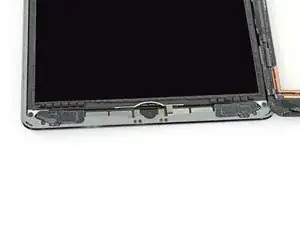
Um dein iPad wieder zusammenzubauen, folge dieser Anleitung in umgekehrter Reihenfolge. Vergewissere dich, dass die beiden Metallplättchen in der Nähe des Home Buttons vom alten Display übernommen wurden. Ohne diese Metallplättchen wird dein neues Display nicht richtig funktionieren. Du kannst ersatzweise ein kleines Stück Klebeband über die Metallflächen in der Nähe des Home Buttons kleben.
89 Kommentare
Actually, I didnt remove the crashed front panel(the old one) as this guide. The edge of front panel didnt stick so much with the cover case, so I use force to tear off the crumbled edge. Be prepared for the "dust of glass", it will really hurt your body, if you plan to do as my way.
Additionally, there is another difficulty part of me. When I stick the new panel on. There is always some small dust between the screen and the front panel.
yzg1199 -
Great guide, a lot harder with a cracked screen due to no flat surfaces for suction cup but eventually got it off, thanks
How to put it back? LCD + digitizer do not want to "cooperate" in ribbons area
Use the spudger to gently push or pull them into the slot. That's what I did. It's charging now so I don't know if it works yet or not




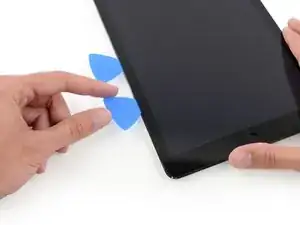
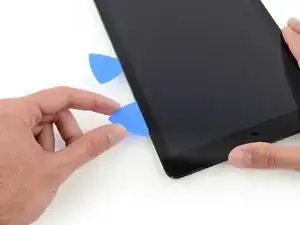
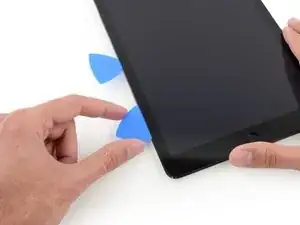
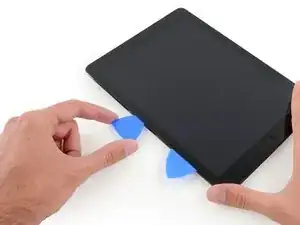
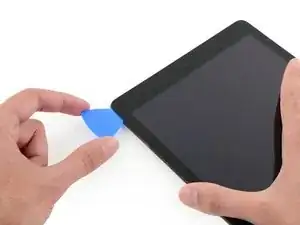
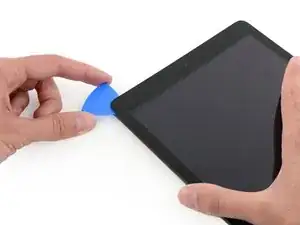
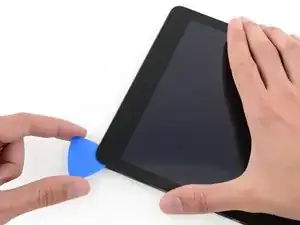
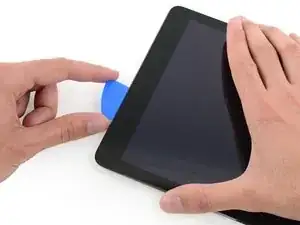




I didn't find this to be as hard as I had built it up in my mind to be; HOWEVER, saying that I need to say years ago I was the local Nokia service center in my town. But many years ago right after they got rid of analog times. Yeah. A classic installer/repairer mistake when starting something they haven't fixed or installed before is picking up the instructions, flipping through them; maybe even reading a section that is new-then tossing the instructions over the shoulder. "I got this." This usually comes right before something major gets broke. And I can tell you when you try to do it yourself and then mess it up horribly then take it to the repair shop. Well we called that "I can do it myself" syndrome and charged extra to put back together what they brought in in the box. Now knowing all this - I can't stress this enough because I am stupid, stupid, stupid. COVER YOUR SCREEN IN CLEAR BOXING TAPE AND READ ALL THE INSTRUCTION BELOW THROUGH TO THE END BEFORE EVEN ATTEMPTING THIS FIX. Take my advise.
windizy -
I didn't have an iOpener, so I used a wheat type heat bag. If you do this though, make sure you put a layer of plastic between your Mac and the bag, or you'll get condensation in places you don't want it.
Martin Gray -
I started out using the iOpener but switched to my wife's hairdryer. A heat gun or hair dryer proved to be much more convenient and is a time saviour. You can heat more and the glue becomes more fluid make the next steps with the opening picks much easier
Jan Van Puymbroeck -
I know this is obvious, but backup your iPad with iTunes before you start. I'd also turn off your passcode if you have one.
Laurie Higgins -
Ther first time you heat up the iOpener for this repair when its room temperature I had to heat it up for more than 30 seconds. I remember I had to heat it up for around 45 seconds. However, after that when you need to reheat it again during the repair 30 seconds will be enough.
Yousef Ghalib -
I used the wheat bag in a sensor microwave heating up to 65-70 deg C (155 def F).
ian cheong -
Get yourself a cherry pit bean bag the size of your iPad. Heat it, put the iPad on it for 3 to 5 minutes or so, reheat the cherry pit bean bag, again put your iPad on it. Then heat the iOpener and start working. The cherry pit bean bag will have to be reheated several times, but it will soften the adhesive so you have less problems with the iOpener
Tim Feyaerts -
The heating can be done very effectively (and quickly) with 3d printer heated bed. Make sure the bed is clean. Set the temperature to 60c, (130f ) and put the ipad face down for +/- 10 minutes. Repeat as needed throughout the “gentle prying” stages.
polleyphony -
The iOpener did not work at all for me.
I had to use a heat gun and bring the edges of the case up to ~200 degrees (used an infrared thermometer to measure) before the glue would weaken. This obviously superheated the metal frame, so I also had to wear gloves to handle the phone while prying the back off with the included picks.
Mike Jeanette -
Repair instructions worked like a charm. Had to be patient with the iOpener and getting the screen off. I tried repeatedly without success until shifting the suction cup a bit to the left side where perhaps the glue had loosened up a bit more.
Kyle -
The iOpener, in my opinion, is of no help. Many warnings to say “don’t warm it too much”, but the glue doesn’t melt if not warm enough. As a result, a complete waste of time and energy. In addition, too much liquid in it, so it doesn’t lay on the device on a sufficient surface. I took a hairdryer and it worked much much better.
laurentvidu -
I used an immersion bath to heat this to 180F and applied it to the device until the outside temperature of the opener read 150F with an IR thermometer. Removing the screen took very little force with this method.
breadandbits -
My experience. I was replacing the screen which had been cracked and a little shattered in some places. The iopener is pretty much useless, so was the suction cup. The suction cup would probably be more useful if I was doing something besides the screen. Also you probably want the clean the screen before using it so it can get good suction. I used a hair dryer on high for a couple of minutes at a time (someone on this tread suggested that). I used my exacto knife and a razor blade to get into the adhesive. First the exacto to get the initial cut, then the razor blade to go a little deeper. Could have probably just used the razor blade, but the exacto has a little more finesse. I got the razor blade in and a little under the glass then I used the picks to wedge in. I didn’t want to risk anything using the razor blade too much. Used tape to keep the shattered glass together.
trebor65 -
My experience pt2
Fortunately the shattering was mostly on the edges and most of it had adhesive on the back so it stuck together. Just take your time and work your way around following the guide to get the screen off. Have some goof off or goo be gone to clean the frame when putting the new glass on or putting the existing one back. (someone suggested that also, very good idea). Be careful of the LCD (you should know that). The cable on my LCD was pretty tight, so I propped it up while taking the cable cover off and when I put it back on I did the same thing. I just put a bottle on the battery and leaned the back of the LCD on that while attaching the cables and putting the screws back on the cover. Also be careful with the home button and the bracket on the back of it. I had enough old adhesive on left on the bracket that it stuck back to the new glass fine. So far only 12 hours in, so we will see how that holds up when the kids get at it.
trebor65 -
Another alternative if you do not have the iopener is to use a bed time hotwater bottle. Do not over fill it though. Just put enough hot water in to support the phone while you work around the adhesive.
I use both the hot water bottle and iopener together on Samsung's. It makes life easier
gazza667 -
I followed the directions and heated my iOpener for 30 seconds in a 1000 watt microwave, and it came out at 160 degrees F, as verified by a infrared thermometer. This allowed me to separate the last bit of the back of my Samsung S8, which was already coming off due to a swollen battery (hence the reason for the repair).
Dennis -
Hallo,habe den Akku erfolgreich getauscht.Doch seitdem gibt es bei Telefonaten eine Rückkopplung für den anrufenden.Bei mir ist alles normal.Woran liegt das?Mfg
Manu R -
If you follow these instructions, you will crack your screen like I did. Heating the iOpener for 30 seconds, using it to melt glue, then waiting 10 minutes to reheat is useless. The iOpener can be used to maybe warm the glue on whatever side you aren’t working on. You need a hairdryer and/or a heat gun to melt the glue and separate the glass from the iPad.
Anyone want to buy an old iPad with broken glass and a dead battery?
mpulliam -
Not everybody has a microwave. You should provide a target temperature for the iOpener and instructions for a conventional oven, or pot of warm water, or whatever. Although I will probably use a heat gun …
Esmond Pitt -
Three times heating opener and no luck. Tried pressing down gently on opener with a towel, and the opener broke. Wondering if I now replace table mats, fancy table cloth, etc. or will this stuff wash out.
Not impressed so far. Maybe the hair dryer next.
doug -
I support the comments about the iOpener. Everyone has a hair drier, FHS, so get a cheap IR thermometer (£18) and blow heat until the area is 60+ deg C. Still takes w while, and getting the screen off is v scary, but just add more heat if you feel resistance.
The rest of the kit is good, esp the magnetic screwdrivers.
Richard O'Brien -
No, everyone does not have a hairdryer. Some of us don’t even have hair. Thank goodness I already had an IR thermometer, though.
nin10doh -
#### WARNUNG WENN MINIMALSTER SPRUNG IM DISPLAY IST FUNKTIONERT DAS NICHT!!! ######
Hatte einen winzigen, minimalen Sprung im Display. Ich dachte es könnte gehen, weil der Sprung “abgeschlossen” war. Er hat in einer Ecke ein winzige Glasteil rausgeschnitten. NEIN! Geht nicht. Habe alles mit viel Geduld dem iOpener und einem Föhn erhitzt. Es ist trotzdem sofort über das komplette Display zersprungen…
T z -
I’ve started with iOpener but changed very quickly to a heatgun. That was more efficient.
Mizzoo, s.r.o. -
I could not get the iOpener hot enough to melt the glue on my ipad 6. I heated for 45 seconds once and it was boiling and it still never worked. Thank goodness contributors mentioned using a hair dryer. Using an 1700w hair dryer on high did the trick to get the screen off. Still took some time and the case got pretty hot but be patient. It took twice as long and a lot more patience to get the battery out.
Randal Haufler -
I have an Ipad with touch screen issue, if i replace this part it should be Ok?
janderson martin -
WARNING - DO NOT MICROWAVE ON A METAL MICROWAVE RACK
The metal microwave rack can heat up and melt through the iOpener cover letting the contents leak out.
Not a big issue for me as I have a heat gun and used that instead.
Run Up A Tree -
I opened my iPad with the iOpener. Be patient! It may take quite a bit longer to it the iOpener in the microwave than it says in the guide. My microwave can only do 800W and I had to put the iOpener in several times (maybe a total of 90-120 seconds). I recommend that you have the transparent side up an watch the bag carefully. As long a the bag doesn't bloat up and the liquid doesn't start bubbling you should be fine. But I recommend to take the iO out from time to time to check it. (More comments in Step 6.)
marcelflueeler -
I gave upon the I opener and used a hairdryer. (Fixed an iPad 6)
Tom Weber -
iPad mini gen5. I used the iOpener. My microwave is 1200w with carousel. 30 sec got the iOpener to 155ºF. For the 2nd heating, after 10 minutes sitting, the temp was still around 125º so I only cooked it for 15 sec. Not enough increase so +5 sec more which me to 165-170ºF. This should be considered ballpark info because who knows the real output of the various microwaves and the quality of the IR tool used to determine temp.
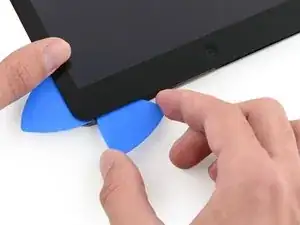
To successfully open my iPad mini I applied the iOpener twice to the left edge and twice to bottom. & once to R edge. Using the suction cup was difficult for me (I'm in my 70's so my hands don't work too well anymore). I had trouble holding the guitar pick and slipping them in (at an downward angle). In the end, sliding my thumbnail along the edge opened it very slightly and allowed the pick to get into the gap. I marked the ends of all my picks with a sharpie pen for the recommended 2mm insertion to avoid going in too deep. To get the screen open it took me approx 1 hour.
jharrison -