Einleitung
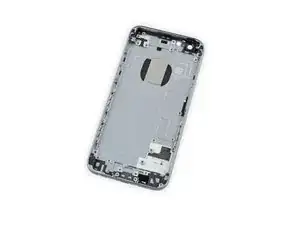
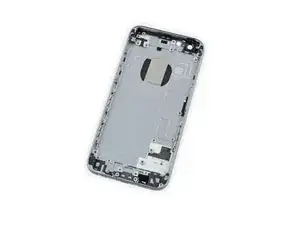
Benutze diese Anleitung, um das Rückgehäuse austauschen, wenn es verbogen oder sonstwie beschädigt ist, oder einfach aus optischen Gründen. Das Rückgehäuse dient als Chassis des iPhone, das bedeutet, dass du alle Bauteile entfernen musst.
Die Anleitung hilft dir auch beim Austausch folgender Teile:
- NFC Halterung
- Lautsprecher Befestigung
- Mikrofonhalterung
- Klammern des Front Panels
Werkzeuge
Ersatzteile
-
-
Entferne die beiden 3,4 mm P2 Pentalobe Schrauben an der Unterseite des iPhones links und rechts vom Lightning-Anschluss.
-
-
-
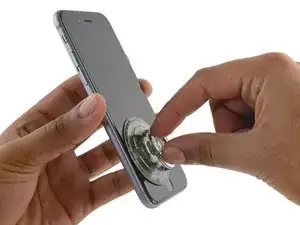
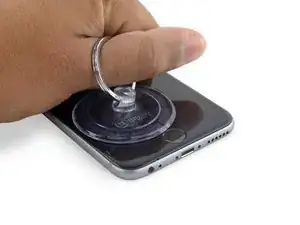
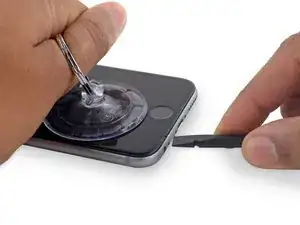
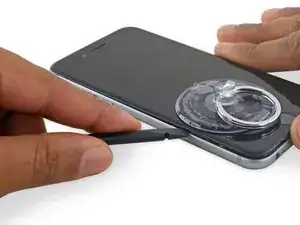
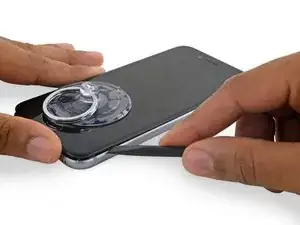
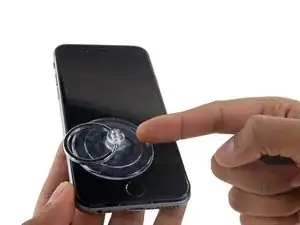
Bringe einen Saugheber an der unteren linken Ecke der Display-Einheit an.
-
Achte darauf, den Saugheber nicht auf den Home Buttons zu setzen.
-
-
-
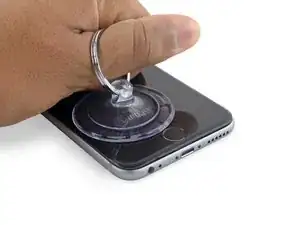
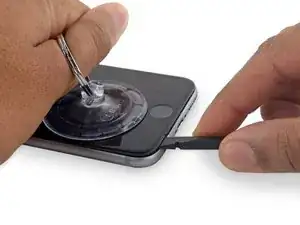
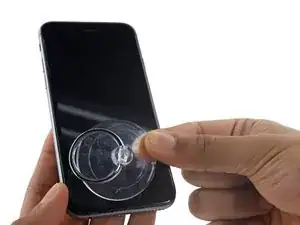
Halte das iPhone mit einer Hand fest und ziehe am Saugheber, um das Front Panel vom Rückgehäuse zu trennen.
-
-
-
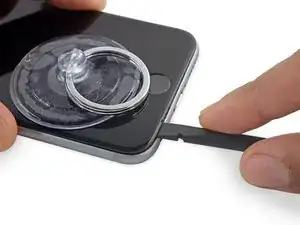
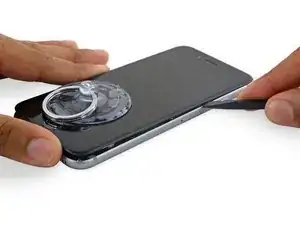
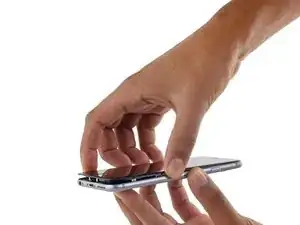
Platziere die flache Seite des Spudgers in den Spalt zwischen Display und dem hinteren Gehäuse, direkt über dem Kopfhöreranschluss.
-
-
-
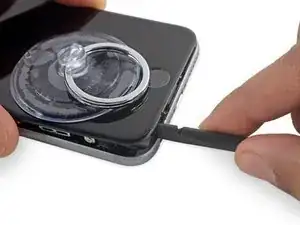
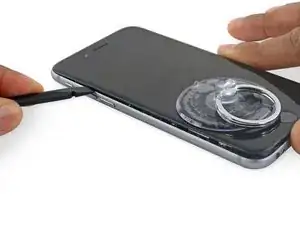
Drehe den Spudger in eine hochkante Position, um den Spalt zwischen Display-Einheit und dem Rest des iPhones zu vergrößern.
-
-
-
Füge das flache Ende auf der linken Seite des iPhones ein, zwischen Display-Einheit und Rückgehäuse.
-
Fahre mit dem Spudger auf der linken Seite in Richtung obere Hälfte des iPhones, um den Kleber zu trennen und die Klammern zu lösen.
-
-
-
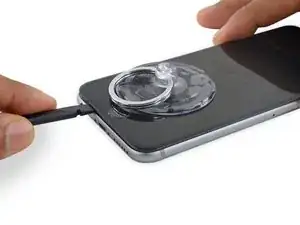
Entferne den Spudger und füge ihn erneut im unteren Teil des Gerätes ein, genau dort wo du mit dem Öffnen begonnen hast.
-
Fahre mit dem Spudger in Richtung rechte untere Ecke des iPhones.
-
-
-
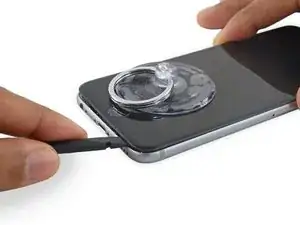
Fahre mit dem Spudger weiter die rechte Seite hoch, löse dadurch den Kleber und die noch festsitzenden Klammern.
-
-
-
Nutze den Saugnapf, um das Display zu öffnen, dadurch sollte auch der letzte festsitzende Kleber entfernt werden.
-
-
-
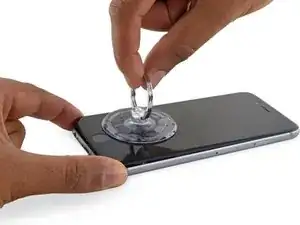
Ziehe an der Kunststoff-Noppe, um die Vakuumversiegelung am Saugnapf zu lösen. Entferne dann den Saugnapf von der Displayeinheit.
-
-
-
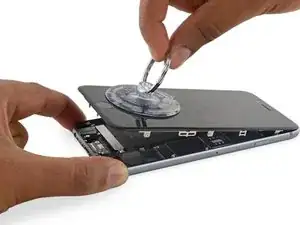
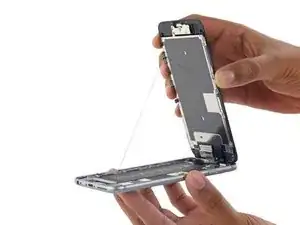
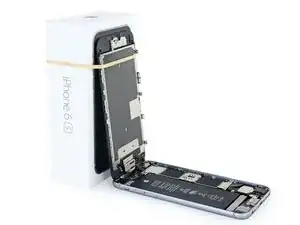
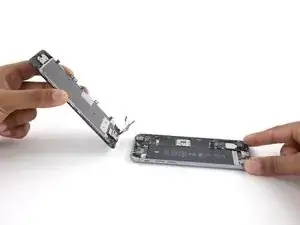
Öffne das iPhone, indem du das Home Button-Ende des Front Panels vom hinteren Gehäuse wegklappst und dabei die Oberkante des Mobiltelefons als Scharnier verwendest.
-
Öffne das Display um ca. 90 Grad und lehne es gegen etwas, damit es abgestützt ist, während du am Gerät arbeitest.
-
Befestige das Display mit einem Gummiband, während du arbeitest. Das verhindert ein ungewolltes Dehnen der Displaykabel.
-
-
-
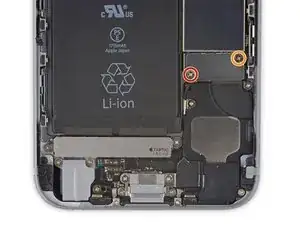
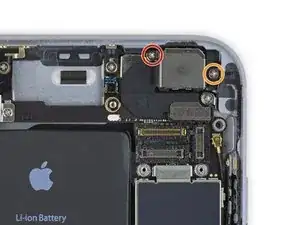
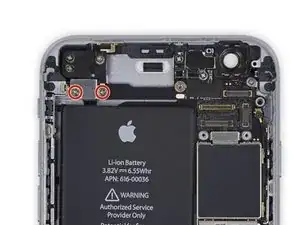
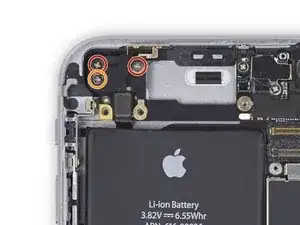
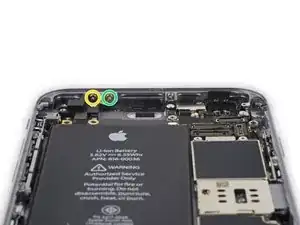
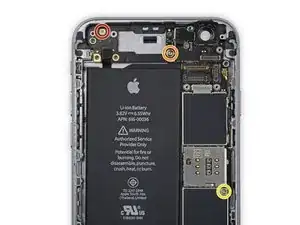
Entferne die beiden Kreuzschlitzschrauben von der Kabelabdeckung des Akkuanschlusses. Sie haben folgende Längen:
-
Eine 2,9 mm Schraube
-
Eine 2,2 mm Schraube
-
-
-
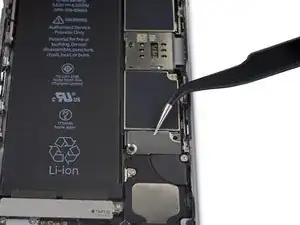
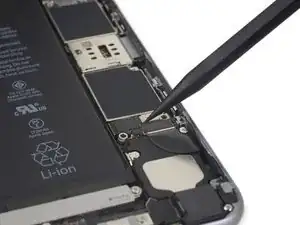
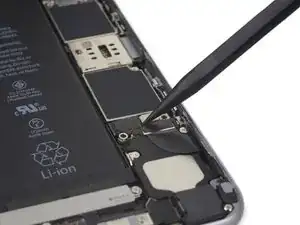
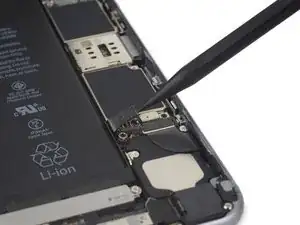
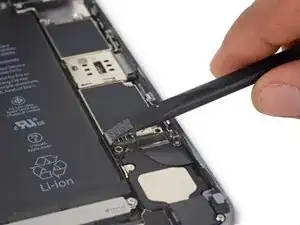
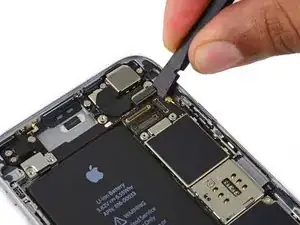
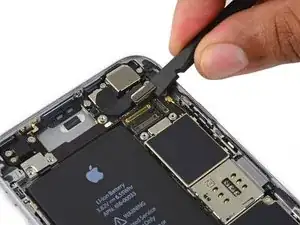
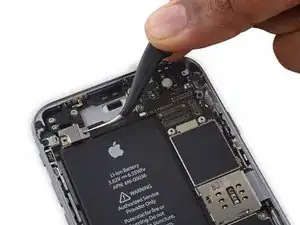
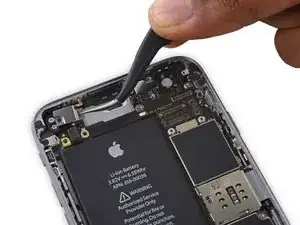
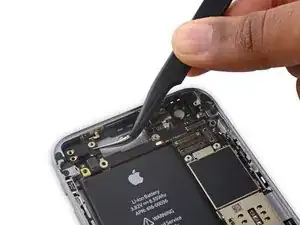
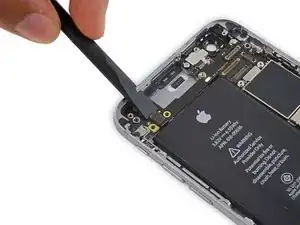
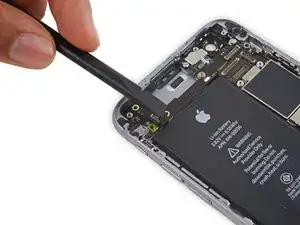
Heble den Akkustecker mit dem spitzen Ende eines Spudgers vorsichtig von seinem Anschluss auf dem Logic Board.
-
-
-
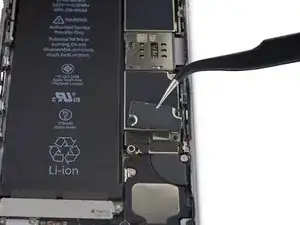
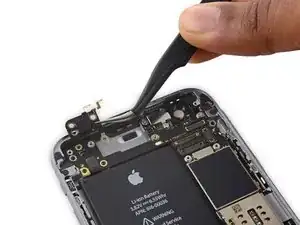
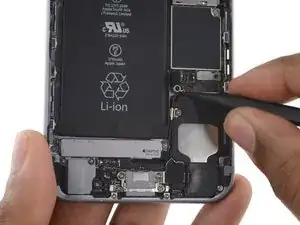
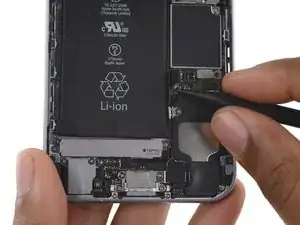
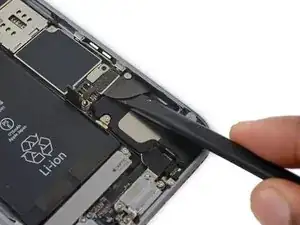
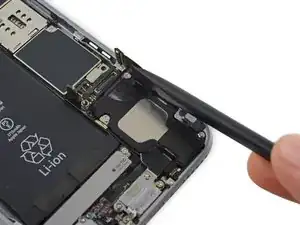
Drücke den Akkustecker vom Logic Board weg, so dass es während der Reparatur nicht zu einer unbeabsichtigten Verbindung mit dem Anschluss kommt.
-
-
-
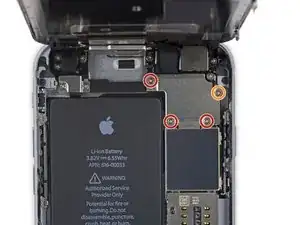
Entferne die folgenden vier Kreuzschlitz Schrauben, die die Kabelhalterung befestigen:
-
Drei 1,2 mm Schrauben
-
Eine 2,8 mm Schraube
-
-
-
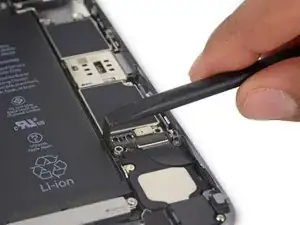
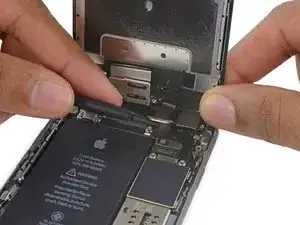
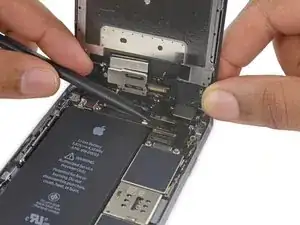
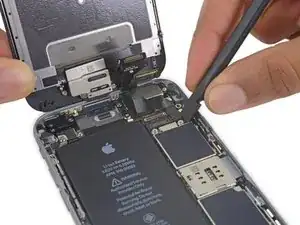
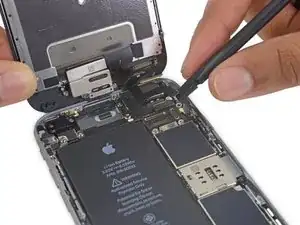
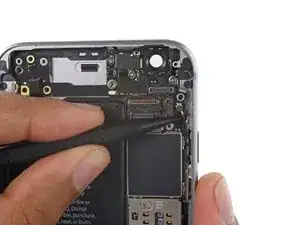
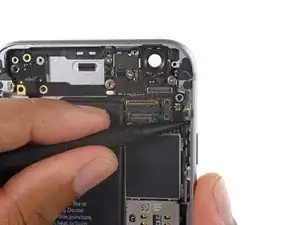
Löse mit dem Spudger oder einem Fingernagel den Stecker des Frontkamerakabels von seinem Anschluss vom Logic Board, indem du es gerade nach oben hebelst.
-
-
-
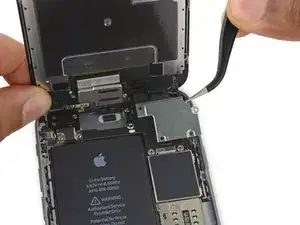
Löse den Stecker des Digitizerkabels vom Logic Board, indem du es gerade nach oben hebelst.
-
-
-
Löse den Stecker des Displaydatenkabels aus seinem Anschluss auf dem Logic Board, indem du es gerade nach oben hebelst.
-
-
-
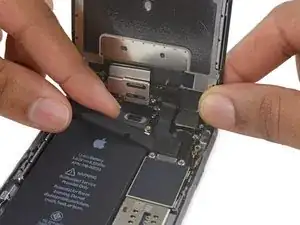
Entferne die Displayeinheit.
-
Halte beim Zusammenbau hier an, wenn du die Klebestreifen an den Kanten des Displays ersetzen willst.
-
-
-
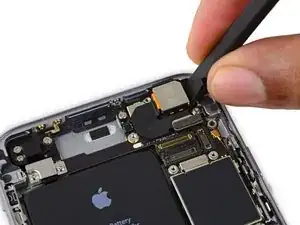
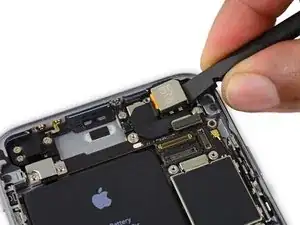
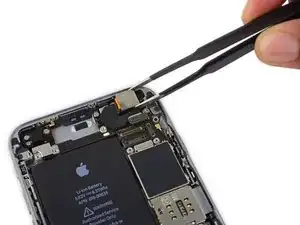
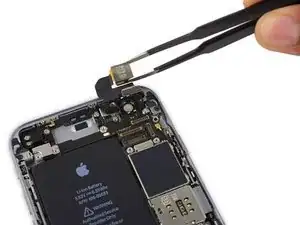
Verwende das flache Ende eines Spudgers, um die Rückkamera aus ihrem Anschluss auf dem Logic Board zu lösen.
-
-
-
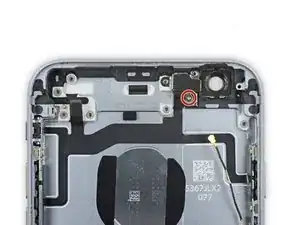
Entferne die beiden Kreuzschlitzschrauben über der Halterung der Rückkamera:
-
Eine 1,6 mm Schraube
-
Eine 2 mm Schraube
-
-
-
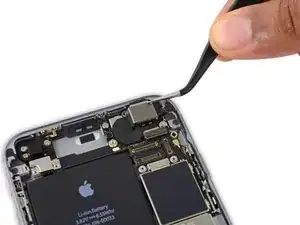
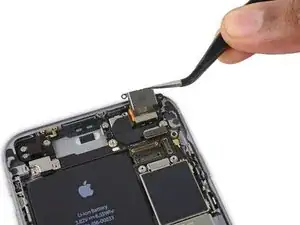
Führe einen Spudger zwischen dem Rückgehäuse und dem Kameramodul an der Seite der Kamera ein.
-
Setze den Hebel vorsichtig an der Kamera an, um sie aus ihrem Gehäuse zu schubsen.
-
-
-
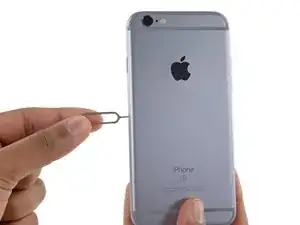
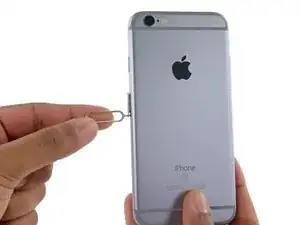
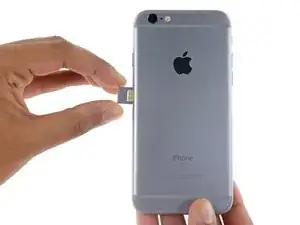
Führe ein SIM-Kartenauswurf-Werkzeug oder eine Büroklammer in das kleine Loch im SIM-Kartenfach ein.
-
Drücke, damit das Fach herauskommt.
-
-
-
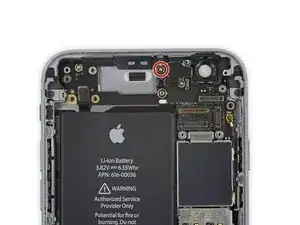
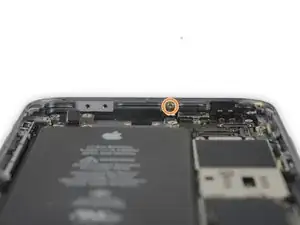
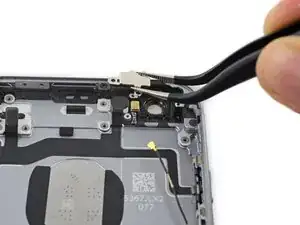
Entferne die zwei 2,3 mm Kreuzschlitz Schrauben, die die Abdeckung des oberen Komponentenkabels befestigen.
-
-
-
Entferne die folgenden fünf Kreuzschlitz Schrauben, die die obere linke Wlan-Antenne befestigen:
-
Zwei 1,5 mm Schrauben
-
Eine 2,3 mm Schraube
-
Eine 1,9 mm Schraube
-
Eine 2,0 mm Schraube
-
-
-
Verwende das flache Ende des Spudgers, um das Audiokabel von seinem Anschluss auf dem Logic Board zu trennen.
-
-
-
Nutze das spitze Ende eines Spudgers, um das Antennenkabel von seinem Anschluss in der oberen rechten Ecke des Logic Boards zu lösen.
-
-
-
Nutze das spitze Ende eines Spudgers, um das Antennenkabel von seinem Anschluss in der unteren linken Ecke des Logic Boards zu lösen.
-
-
-
Schiebe das flache Ende vom Spudger unter das Flachbandkabel vom Lightning Anschluss. Nun hebst du es an, um das Kabel von seinem Anschluss auf dem Logic Board zu lösen.
-
-
-
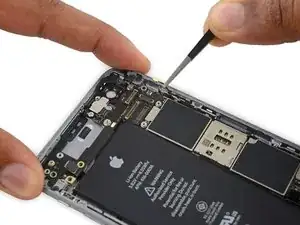
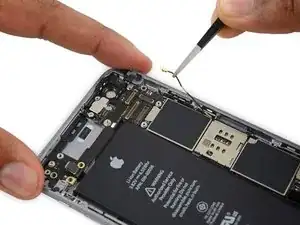
Jetzt ziehe vorsichtig das Antennenkabel hoch, um es von den zwei Clips an der rechten Seite des Logic Boards wegzuführen.
-
-
-
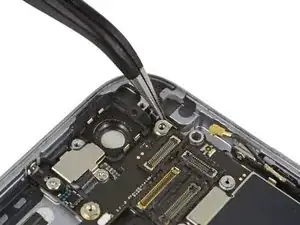
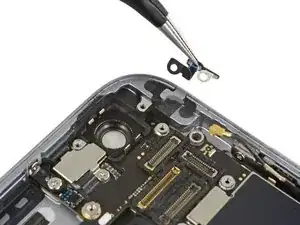
Entferne die 1,3 mm Kreuzschlitz Schraube, die die NFC-Halterung am Logic Board befestigt.
-
-
-
Entferne die folgenden zwei Kreuzschlitz Schrauben:
-
Eine 2,5 mm Schraube an der Oberseite vom Logic Board
-
Eine 1,4 mm Schraube im oberen Rand des Rückgehäuses
-
-
-
Entferne nun die letzten drei Schrauben, die das Logic Board im Rückgehäuse befestigen:
-
Eine 1,9 mm Kreuzschlitz Schraube
-
Eine 2,5 mm Sechskantschraube
-
Eine 1,8 mm Kreuzschlitz Schraube
-
-
-
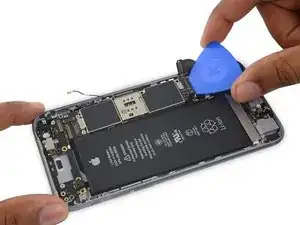
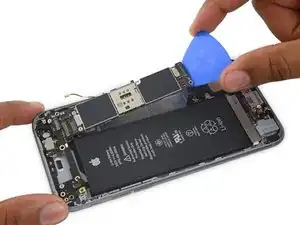
Schiebe ein Opening Pick (Plektron) unter die Unterkante des Logic Boards, zwischen Board und Lautsprecher.
-
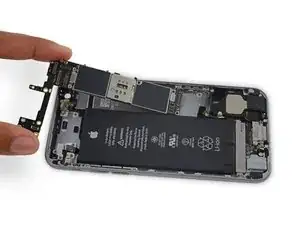
Verwende das Opening Pick, um das Logic Board vorsichtig aus dem Gehäuse zu heben.
-
Jetzt kannst du das Logic Board entfernen.
-
-
-
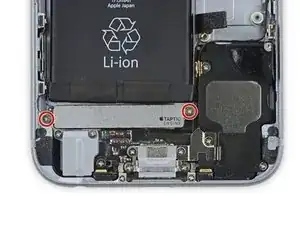
Entferne die beiden 1,5 mm Kreuzschlitzschrauben an der Taptic Engine
-
Entferne die Taptic Engine.
-
-
-
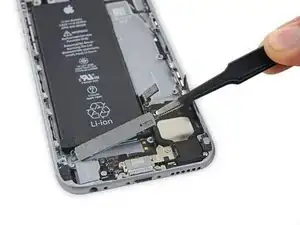
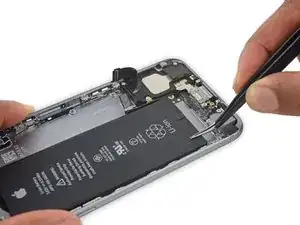
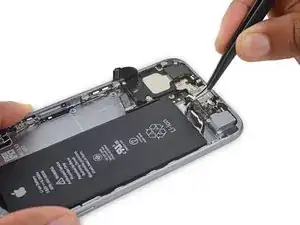
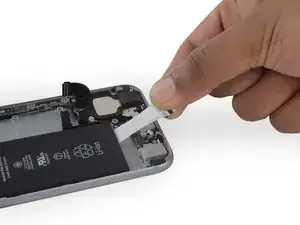
Verwende eine Pinzette, um die Spitzen der Batterieklebestreifen am unteren Rand der Batterie zu entfernen.
-
-
-
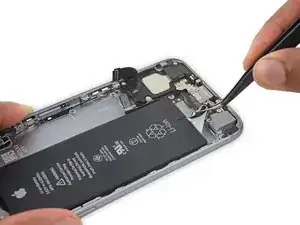
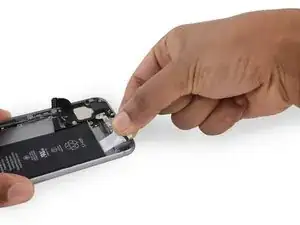
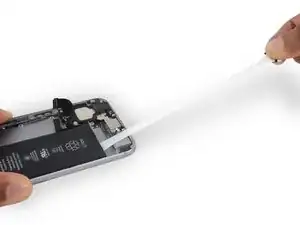
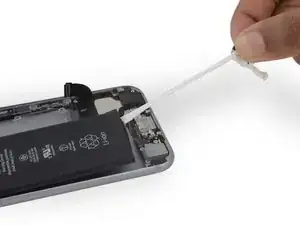
Ziehe einen der Klebestreifen gerade heraus, in Richtung der Unterseite des iPhone.
-
Für beste Ergebnisse ziehst du den Streifen in einem Winkel von 60 ° oder weniger heraus.
-
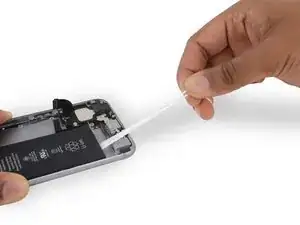
Weiterziehen, bis der Streifen vollständig entfernt ist.
-
Wenn einer der Klebestreifen während dieser Prozedur unter der Batterie abreißt und nicht erreicht werden kann, entferne den restlichen Streifen und gehen dann zu Schritt 48.
-
-
-
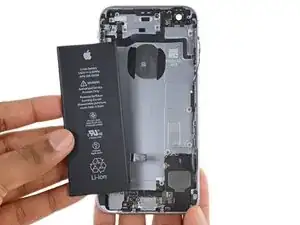
Wenn du alle drei Klebestreifen erfolgreich entfernt hast, fahre mit dem nächsten Schritt fort. Andernfalls musst du den Akku aus dem hinteren Gehäuse herausziehen.
-
Bereite einen iOpener vor und wende ihn auf die Rückseite des hinteren Gehäuses direkt über die Batterie an. Alternativ kannst du Hitze mit einer Heißluftpistole oder Fön erzeugen.
-
Nach etwa einer Minute, drehst du das Telefon um und verwendest eine Plastikkarte, um den verbleibenden Kleber hinter der Batterie zu entfernen.
-
-
-
Drehe die einzelne 1,3 mm Kreuzschlitzschraube an der Halterung des Blitzes heraus.
-
Entferne die Halterung des Blitzes.
-
-
-
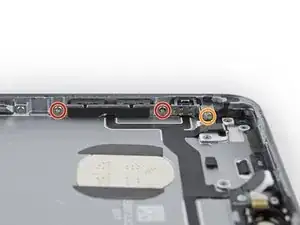
Entferne folgende fünf Kreuzschlitzschrauben:
-
Zwei 2,5 mm Schrauben in der linken Kante des Rückgehäuses
-
Eine 2,1 mm Schraube #000 in der linken Kante des Rückgehäuses
-
Zwei 2,1 mm Schrauben in der rechten Kante des Rückgehäuses
-
-
-
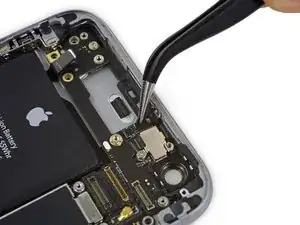
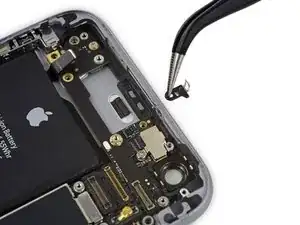
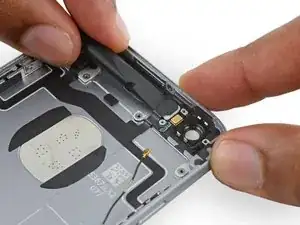
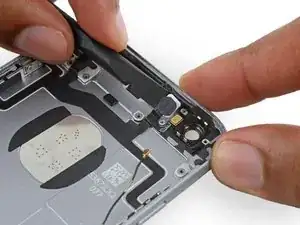
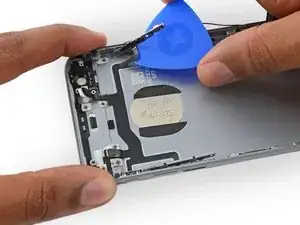
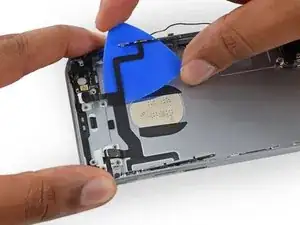
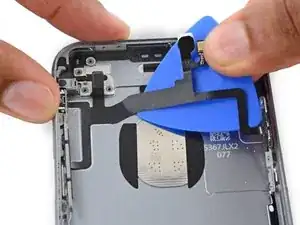
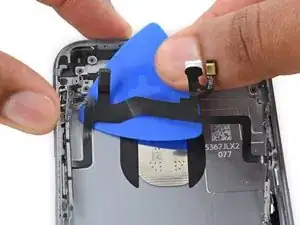
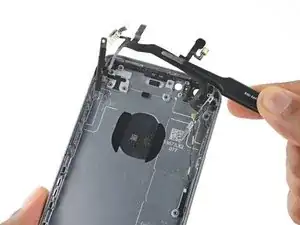
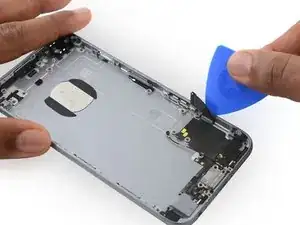
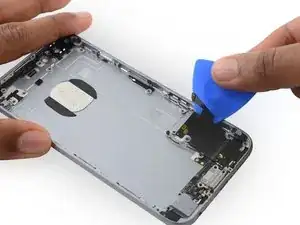
Schiebe ein Plektrum zwische das obere Komponentenkabel und das Rückgehäuse.
-
Trenne das Kabel vorsichtig vom Rückgehäuse.
-
-
-
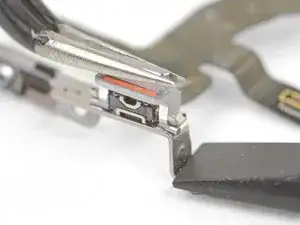
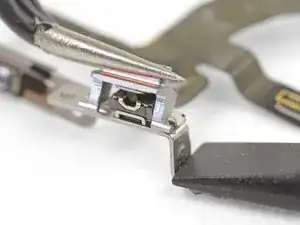
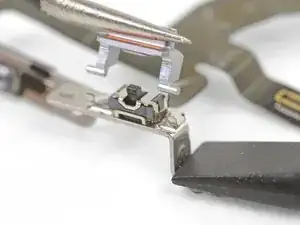
Wenn das Ersatzteil nicht mit der Abdeckung des Stumm-Schalters geliefert wurde, musst du die Schalterabdeckung entfernen, und sie auf das neue Teil übertragen.
-
Drücke die Schalterabdeckung mit dem flachen Ende des Spudgers nach unten und halte die alte Halterung gut fest.
-
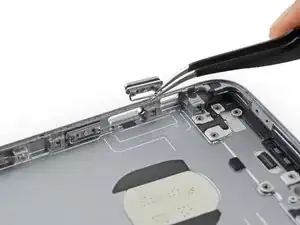
Verwende eine Pinzette oder deine Finger, um die Schalterabdeckung vorsichtig zu schwenken, so dass die Schalterabdeckungsstifte aus ihren Clips herausgleiten.
-
Hebe die Schalterabdeckung gerade nach oben weg.
-
-
-
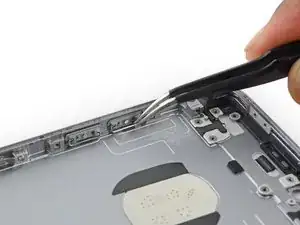
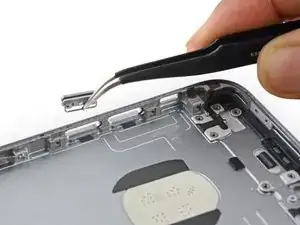
Fasse die Metallleiste hinter einer der beiden Tastenabdeckungen der Lautstärkeregelung an und ziehe die Tastenabdeckung aus ihrem Sitz im Rückgehäuse.
-
Wiederhole den Vorgang für die andere Tastenabdeckung.
-
-
-
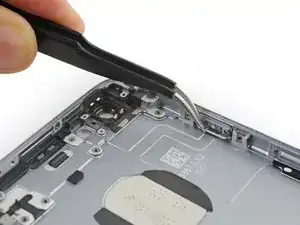
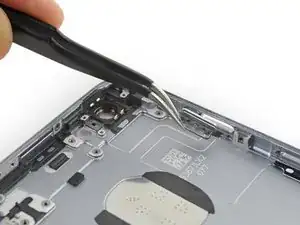
Fasse die Metallleiste auf der Rückseite der Einschalttastenabedeckung.
-
Entferne die Einschalttastenabdeckung.
-
-
-
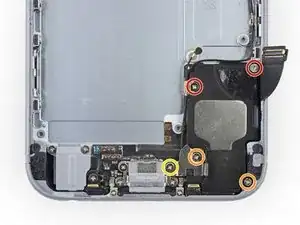
Der Lautsprecher ist mit fünf Kreuzschlitzschrauben am Gehäuse befestigt. Drehe sie heraus:
-
Zwei 2,6 mm Schrauben
-
Zwei 2,3 mm Schrauben
-
Eine 3,0 mm Schraube
-
-
-
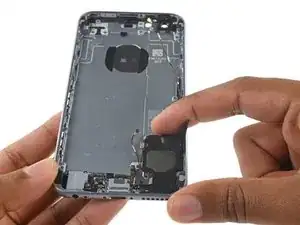
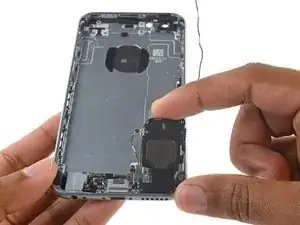
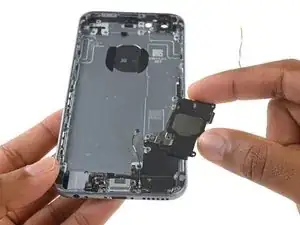
Hebe den Lautsprecher mit den Fingern aus seinem Sitz im Gehäuse.
-
Entferne die Lautsprechereinheit.
-
-
-
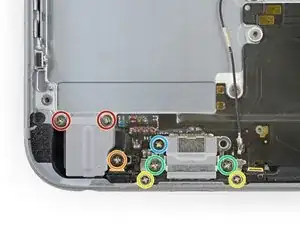
Entferne folgende acht Kreuzschlitzschrauben:
-
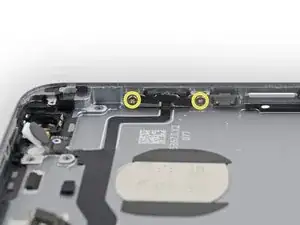
Zwei 2,9 mm Schrauben an der Kopfhörerbuchse
-
Eine 3,7 mm Schraube an der Mikrofonhalterung
-
Zwei 1,3 mm Schrauben an der Unterkante des iPhone
-
Zwei 1,9 mm Schrauben an jeder Seite des Lightning Connectors
-
Eine 3,0 mm Schraube links vom Connector
-
-
-
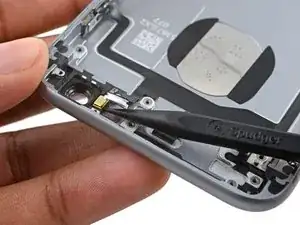
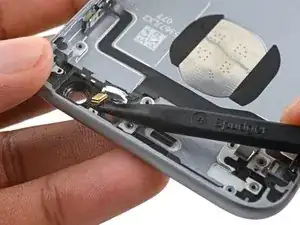
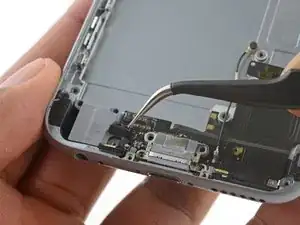
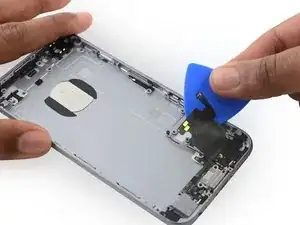
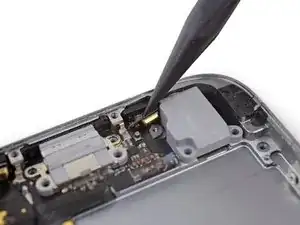
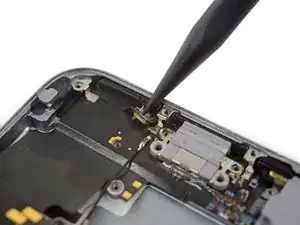
Setze ein Opening Pick (Plektrum) zwischen Lightning Connector Einheit und Rückgehäuse. Löse so die Klebeverbindung, die das Flachbandkabel befestigt.
-
-
-
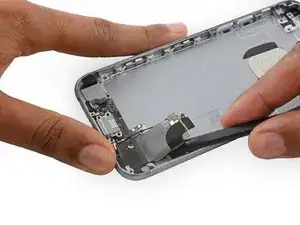
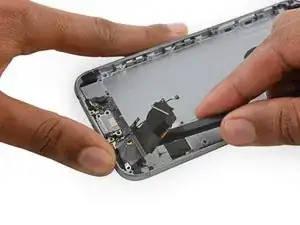
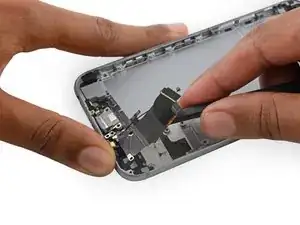
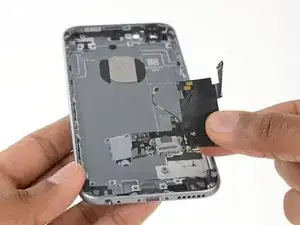
Löse mit dem flachen Ende des Spudgers weiterhin die Lightning Connector Einheit vom Rückgehäuse.
-
Um dein Gerät wieder zusammenzusetzen, folge den Schritten in umgekehrter Reihenfolge.
8 Kommentare
I can't get the phillips 000 screw out on step 52, now it's become too hollow within to open. What do I do?
Stripped screws are the worst! We have a guide on how to remove stripped screws that you may find helpful. Remember to maintain lots of pressure on the screw and stop applying force and try a different method if the bit is still slipping.
Every thing works fine except I have no sound, either on speakerphone or normally. Did I break the upper component cable? I've checked all the plug connections and they seem ok.
I have no sound at all from the normal speaker or in speakerphone mode. I have good cellular and Wi-Fi connections and the phone sees to work perfectly otherwise. The battery charges fine through the Lightning connector. Can't use it as a phone though! Did I break the upper component cable in the disassembly? Any other ideas?








Hi, just got the repair kit that came with IPhone 6S battery. I felt that there’s no explanation on which tool to use to remove the two 3.4mm P2 Pentalobe screws. It’s not helpful just to say “Remove the two 3.4 mm P2 Pentalobe screws on the bottom edge of the iPhone, next to the Lightning connector. “. It’s more important to explain how and what tool to use. The repair tool kit tools were not marked at all and it’s not right to assume that people know which tool or part to use. Please kindly address this issue. Thanks. Janet
Janet Monaghen -
@beingchen For the P2 pentalobe screws you should use the driver bit marked P2. Might be a little hard to see but it’s there, etched into the side of the bit.
Jeff Suovanen -
It’s very clear which tool you need. As it says these are “3.4 mm P2 Pentalobe screws” - so you need a 3.4 mm P2 Pentalobe screwdriver…
alexanderbrix1987 -
Just a P2 driver—3.4 mm is the length of the screw.
Jeff Suovanen -
If you can’t identify which screwdriver in the kit to use, you probably shouldn’t be working on your phone. Just sayin’
Keith Hockenbeck -
This is very useful
https://www.jerryrigeverything.com/wp-co...
sam distefano -
Is it ok to replace the battery if the phone screen is broken?
Reem -
Of course! As long as the screen and battery are disconnected from the motherboard, you can replace anything!
Charles Bejarano -
is it possible to change my battery on my iphone 6s and use a battery that has been already used in another 6s
morgan durnford -
Yeah it would work, but if the battery heath on the 2nd battery is bad, just get a new one.
Charles Bejarano -
@moe6802 Removing the battery can damage it, and it shouldn’t be used afterward. It may seem fine, but even minor battery damage can lead to a fire hazard. Not worth it for such a cheap part. If you need a battery, just get a new one.
Jeff Suovanen -
How do you discharge a battery? Do you just let the battery drain or is there something less time consuming that you can do?
Matthew Petts -
There is no easy way to discharge the battery in “less time”. Perhaps the fastest way is to play a visually-complex modern game or otherwise make your phone do a lot of work.
Lance J -
So my phone screen is completely black causing me to see nothing that is on my screen. And the battery is above 25%, near 100%. What do I do??
Jessica I -
you should post a question on the answers forum
Seizure Salad -
you should post a question on the answers forum
Seizure Salad -
I can’t the screws with the P2, seems that the screws are stuck, what can i do?
Alberto Jabiles -
My kit came with 3 screws. Are those to replace these 2 P2 screws? And what’s the third one for?
Daniel Morse -
If it came with 3 screws, then it’s an extra one just in case if a replacement screw gets lost.
Charles Bejarano -
My display is cracked/broken and not functioning. The slide bar doesn’t work. How do I shut down my phone?
Timothy Huss -
i have replaced several ipod batteries and laptop work, but these screws seem to loose but do not come out. how am i to remove them.shake the iphone?it seems the ioen is not in my kit, is that how to remove them?
this seems idiotic but i remember some other system magnets that firt make your screws easier to keep, but this might be changed….any video? this seems 1st step blues!!!!
makinfilms -
never ind ishook it… is that in the guide?….iopener is not in the kit……never was before is this an upsell? do i skip it? i dont have it
makinfilms -
My screws aren’t coming out either. I’ve loosened them, but they aren’t coming out. I’ve shaken the phone, given it some slight bangs…nothing.
Jesse Fisher -
The following info is not given until step 21 in the instructions, and probably too late at that.
DO NOT disconnect or reconnect any of the cables in this device until the battery itself has been disconnected!
Don’t skip that step, intending to do it at the end, as you may damage the phone.
ffissk -
2 thoughts:
1) Really? Steps 14-17 are about disconnecting the battery first, and step 17 notes “so it doesn’t get reconnected while you work.” How’d you get to step 21 and miss 14-17?
2) These pages are user-editable. (Probably (hopefully) “curated” by iFixit staff.) You should add a warning to step 17 (or step 24).
Bass Clef -
NOW THAT YOU’VE REMOVED 2 SCREWS, and
BEFORE YOU SNEEZE them into oblivion, or under the refrigerator (which is the same in many houses)
MAY I suggest:
1) Obtain:
— a piece of paper, such as normal printer paper (not too much writing on one side)
— a piece of tape, not too sticky, like masking tape (duct tape would be bad)
——— 1-1.5 inches (2.5-4 cm) wide
——— 6-8 inches (15-20 cm) long
— a pencil (or pen)
2) Put the paper on the side of your work area
3) Lay the tape, sticky side up, on the paper
4) Fold each end of the tape (~1 inch/2.5cm) back under itself, so the folded part faces the paper. Press the folded-back tape onto the paper
You now have Sneeze & Wind Insurance for your tiny bits!
5) Put the 2 pentalobes end down on the top end of the tape, next to each other. Push them a little onto the tape so they stick
6) Use your pencil to note on the paper next to the screws: “1. Pentalobes”
Now you may proceed with dissassembly, without worrying about telling the 1.5mm from the 1.6mm screws.
or about sneezing!
Bass Clef -
My phone has a bad battery and a bad connector and I wasn’t able to get all of my photos before it died. Is there any chance I won’t lose them when I replace the battery? Or, is there any way to charge a 6s battery with a bad connector?
Liz R -
There is a great chance that photos, which are stored to flash memory, which is solid state memory, which is not affected when power is lost, will be there, right where you left them, once you restore power to your device. You could install a partially charged battery into your phone and then retrieve the important things, like your photos, if you don’t intend to continue using the phone. Else look at replacing the lightning connector assembly. Here: iPhone 6s Lightning Connector Einheit austauschen
TimD -
The P2 is not getting the screws loose at all. I have tried this several times and no budge on my iPhone 6s.
Cassandra Vigil -
To avoid to be screwed by lost or mixed screws:
- Use magnetic pad, wipeable
- Write the ifixit- steps next to the screws (maybe even with their sizes) and other bits removed
with a non-permanent marker
- When finished, simply wipe the pad, and it’s ready for the next repair
Hope that helps.
Ulrich Janßen -
I found a pentalobe 1 driver to work much better.
joelkevinjones -
The suction cup didn’t hold at all. I tried Windex and then hospital grade alcohol, but nothing worked. Finally had to use two exacto knife blades to begin lifting the screen. As soon as I got a little gap, used the spudger tool the rest of the way, The small philips driver didn’t fit the screws exactly, but with a little effort they came out. My battery adhesive strips snapped immediately and I had to remove the original battery the “hard way”. The kit came with replacement display adhesive but no explanation how to use it. I got some on - so better than nothing. Overall I’m happy with the results, and the new battery is charging now.
Daniel Wolf -
First step problem? Couldn’t get the screws out. I checked my other iPhone and realized the screws were missing!Just started prying it apart.
Hoyt Smith -
I went through the whole procedure, replaced the battery and got the screen back on. Then the 2 pentalope screws would not go into their sockets. They sink in all the way and spin, but it appears there are no threads to grab. The screen seems to be in position since I can insert a plug into the headphone jack without trouble. Did anyone else have this problem. Using the phone now with no screws. Yikes.
Walter Plante -
Hi Walter, in case you’re still dealing with this or anyone else has the same problem, check that the screw bosses on the bottom of the screen are straight and line up with the screw holes on the case. They should be at a 90° angle to the screen, but they’re easy to accidentally bend and could’ve gotten flattened against the screen.
Adam O'Camb -
I recommend a loop of tape attached to the table, and placing the screws on the tape in the order they were taken out. identifying the screws to put back is a simple matter of going the other way back up the tape.
David Taylor -
Did the repair for the second time, each time faster and easier. This steps by step is amazing and crystal clear no mistake possible.
Jean-Gabriel Duquesnoy -