Introduction
For an easier repair, use our fix kit and follow this shorter guide to replace your iPhone’s entire screen.
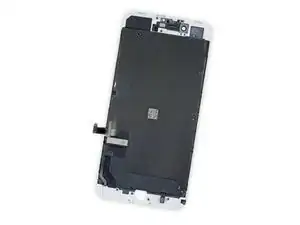
For more advanced fixers, this guide will help you replace only the iPhone 8 Plus LCD and digitizer assembly (a.k.a. the bare “front panel”). This requires you to transfer several components from your original screen to the new one before installing it—including the front-facing camera, earpiece speaker, LCD shield plate, and home button assembly.
For all screen/display repairs, it's important to carefully transfer the original home/Touch ID sensor onto the new display in order for it to function. The solid-state home button is paired to its original logic board by Apple, so replacing it will render it unusable.
Note: If your iPhone’s auto brightness feature does not work properly after your screen repair, make sure your iPhone is updated to iOS 12. True Tone functionality is disabled after a screen replacement, even when using an original Apple screen.
Tools
-
-
Power off your iPhone before beginning disassembly.
-
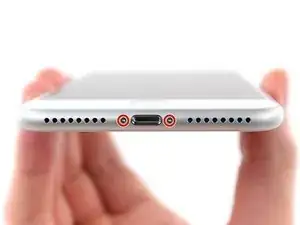
Remove the two 3.5 mm pentalobe screws from the bottom edge of the iPhone.
-
-
-
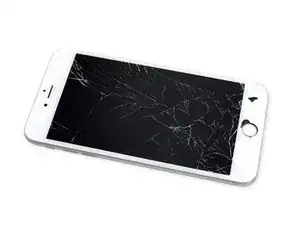
If your display glass is cracked, keep further breakage contained and prevent bodily harm during your repair by taping over the glass.
-
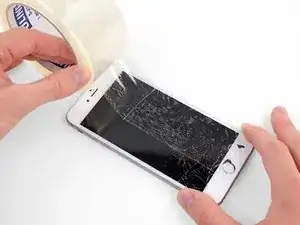
Lay overlapping strips of clear packing tape over the iPhone's display until the whole face is covered.
-
If the broken glass makes it difficult to get a suction cup to stick in the next few steps, try folding a strong piece of tape (such as duct tape) into a handle and lifting the display with that instead.
-
-
-
Use a hairdryer or prepare an iOpener and apply it to the lower edge of the iPhone for about 90 seconds in order to soften up the adhesive underneath.
-
-
-
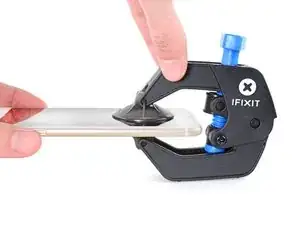
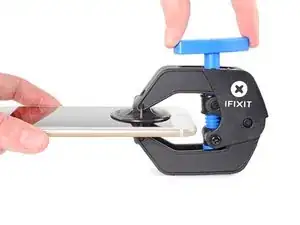
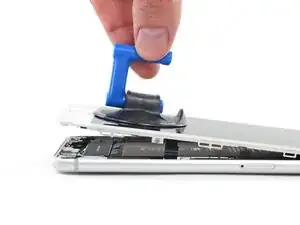
The next two steps demonstrate the Anti-Clamp, a tool we designed to make the opening procedure easier. If you aren't using the Anti-Clamp, skip down two steps for an alternate method.
-
Pull the blue handle towards the hinge to disengage opening mode.
-
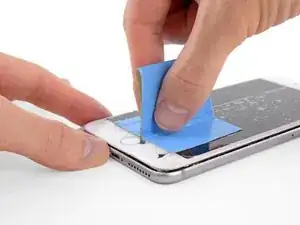
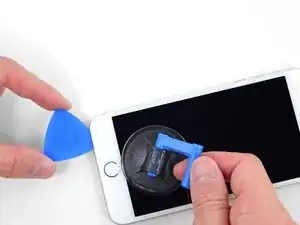
Position the suction cups near the bottom edge of the iPhone just above the home button—one on the front, and one on the back.
-
Push down on the cups to apply suction to the desired area.
-
-
-
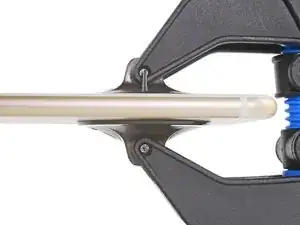
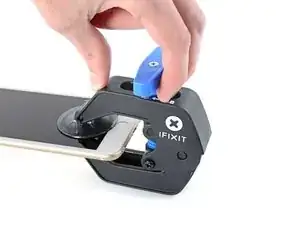
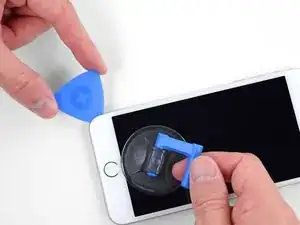
Push the blue handle away from the hinge to engage opening mode.
-
Turn the handle clockwise until you see the cups start to stretch.
-
Wait one minute to give the adhesive a chance to release and for the bottom of the screen to open.
-
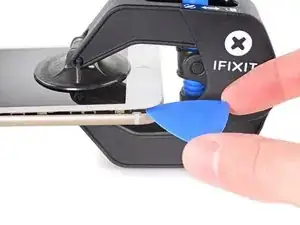
Insert an opening pick under the screen when the Anti-Clamp creates a large enough gap.
-
Skip the next two steps.
-
-
-
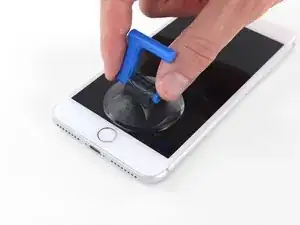
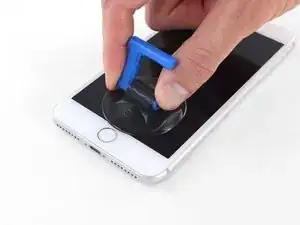
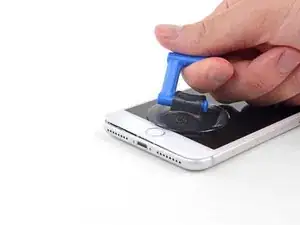
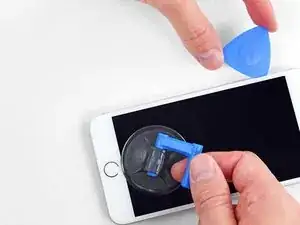
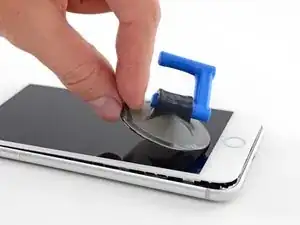
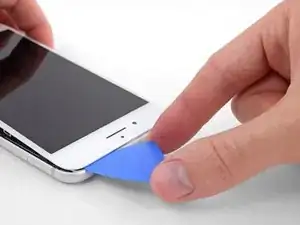
Pull up on the suction cup with firm, constant pressure to create a slight gap between the front panel and rear case.
-
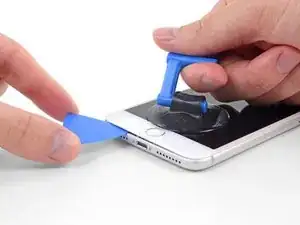
Insert an opening pick or other thin pry tool a few millimeters into the gap.
-
-
-
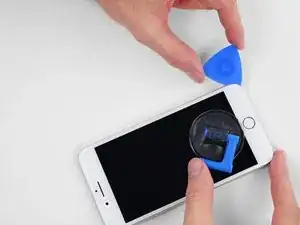
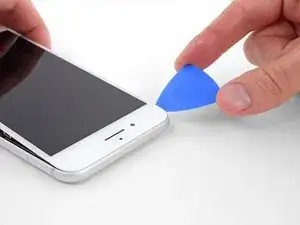
Slide your pick around the corner and up the left edge of the phone, moving towards the volume control buttons and silent switch, breaking up the adhesive holding the display in place.
-
Stop near the top left corner of the display.
-
-
-
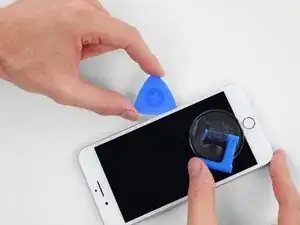
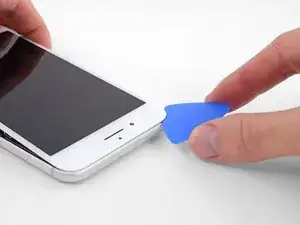
Re-insert your tool at the lower right corner of the iPhone, and slide it around the corner and up the right side of the phone to separate the adhesive.
-
-
-
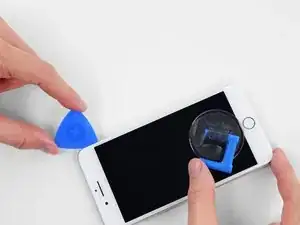
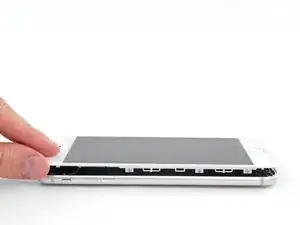
Slide an opening pick underneath the display along the top edge of the phone to loosen the last of the adhesive.
-
-
-
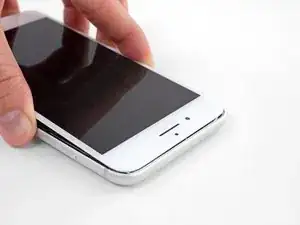
Slide the display assembly slightly down (away from the top edge of the phone) to disengage the clips holding it to the rear case.
-
-
-
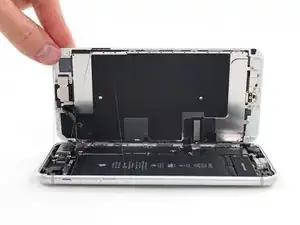
Open the iPhone by swinging the display up from the left side, like the back cover of a book.
-
Lean the display against something to keep it propped up while you're working on the phone.
-
-
-
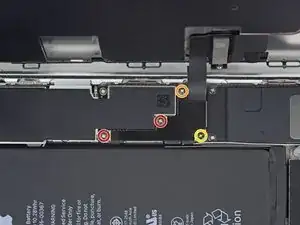
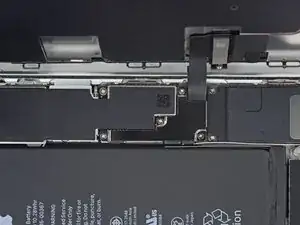
Remove four Phillips (JIS) screws securing the lower display cable bracket to the logic board, of the following lengths:
-
Two 1.3 mm screws
-
One 1.4 mm screw
-
One 2.7 mm screw
-
-
-
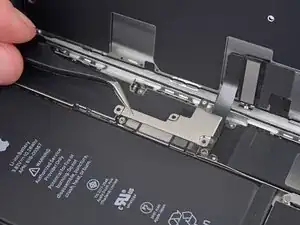
Use the point of a spudger to pry the battery connector up from its socket on the logic board.
-
Bend the connector cable up slightly to prevent it from accidentally making contact with the socket and providing power to the phone during your repair.
-
-
-
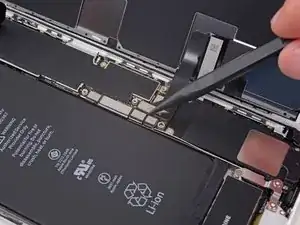
Use the tip of a spudger or a fingernail to disconnect the large lower display connector by prying it straight up from its socket.
-
-
-
Disconnect the second lower display cable connector, directly behind the one you disconnected in the previous step.
-
-
-
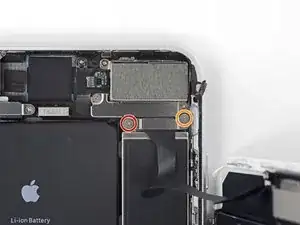
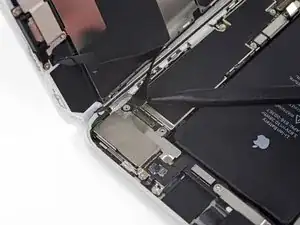
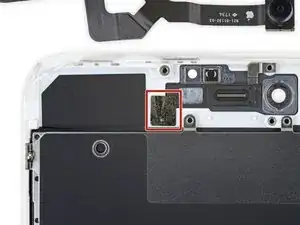
Remove the two tri-point Y000 screws securing the bracket over the front panel sensor assembly connector:
-
One 1.0 mm screw
-
One 1.2 mm screw
-
-
-
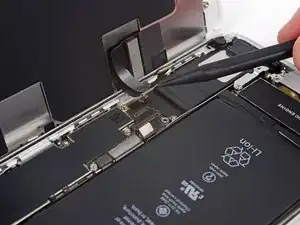
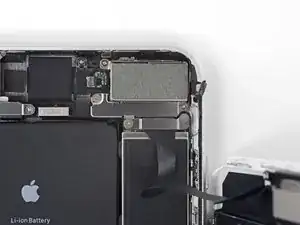
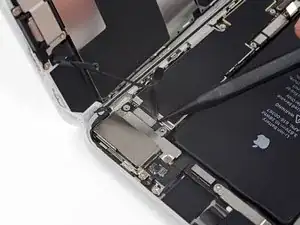
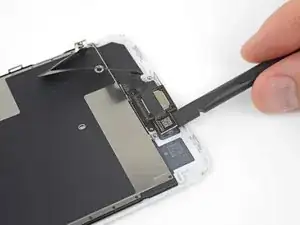
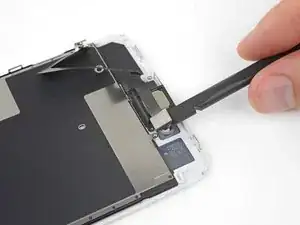
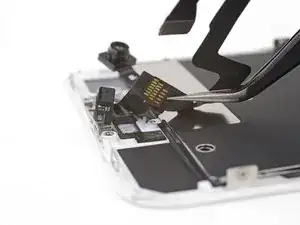
Use the tip of a spudger or a fingernail to disconnect the front panel sensor assembly connector from its socket.
-
-
-
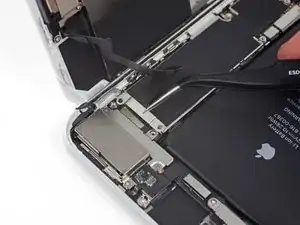
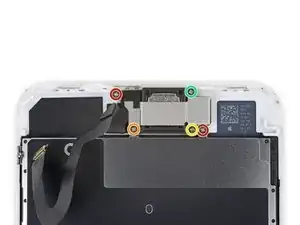
Remove the five Phillips screws securing the earpiece speaker bracket:
-
Two 1.8 mm screws
-
One 2.3 mm screw
-
One 2.4 mm screw
-
One 2.8 mm screw
-
-
-
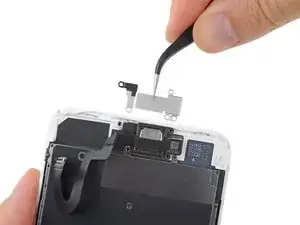
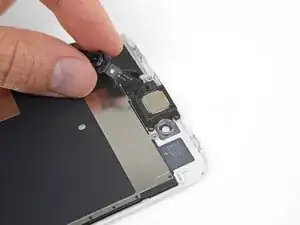
Use the flat end of a spudger to lift the front-facing camera from its housing.
-
Gently bend the camera ribbon cable to the side to clear the way to the earpiece speaker underneath.
-
-
-
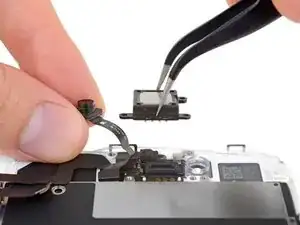
Gently fold the camera and attached ribbon cable toward the bottom of the iPhone to allow access to the components underneath.
-
-
-
Use a hairdryer or heat gun or prepare an iOpener and apply it to the top front of the display for about a minute, in order to soften the adhesive securing the sensors.
-
-
-
Slide a spudger under the ambient light sensor flex cable, and lift the sensor out of its housing.
-
-
-
Slide the tip of a spudger underneath the proximity sensor flex cable, and lift the sensor out of its housing.
-
-
-
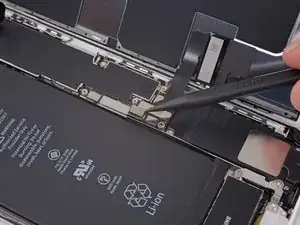
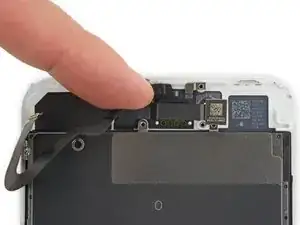
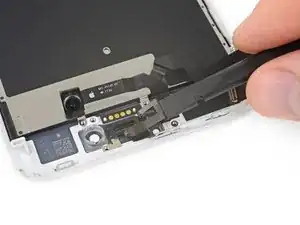
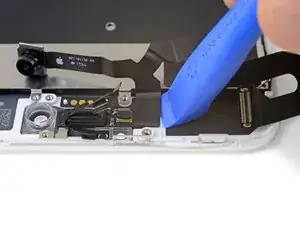
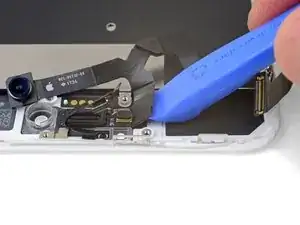
Insert the sharp edge of an iFixit opening tool underneath the camera assembly's flex cable, on the opposite side from the front-facing camera.
-
Pry up to separate the edge of the flex cable from the back of the display.
-
-
-
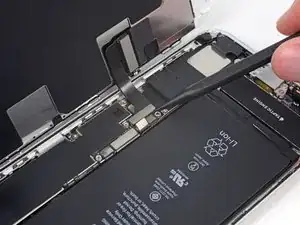
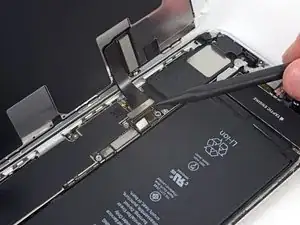
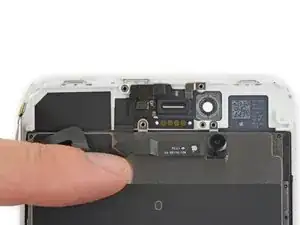
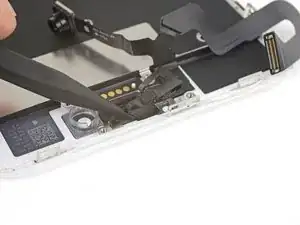
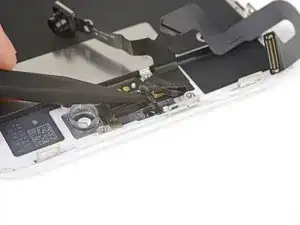
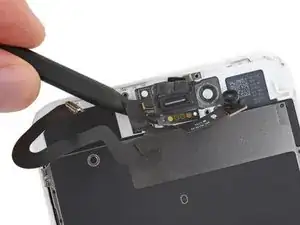
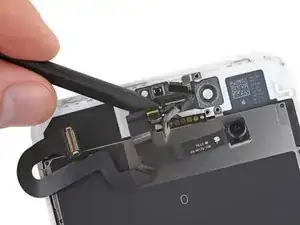
Insert the point of a spudger underneath the same portion of the flex cable that you separated in the previous step.
-
Continue separating the remainder of the flex cable, pushing the spudger underneath the row of circular gold earpiece speaker contacts.
-
-
-
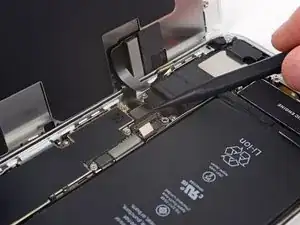
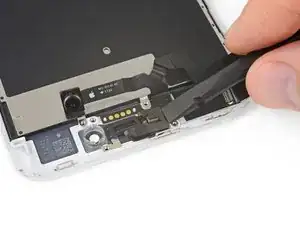
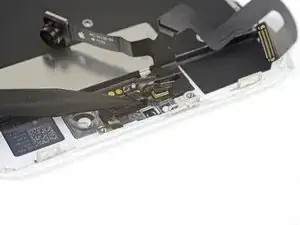
Remove the front camera and sensor cable assembly.
-
A piece of black double-sided insulating tape lies between the display and three rows of copper contacts on the back of the camera/sensor cable. It may remain stuck to the display, or it may come off with the cable.
-
-
-
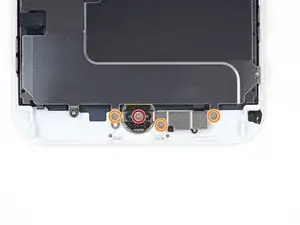
Remove the four Y000 screws securing the bracket over the home/Touch ID sensor:
-
One 1.2 mm screw
-
Three 1.3 mm screws
-
-
-
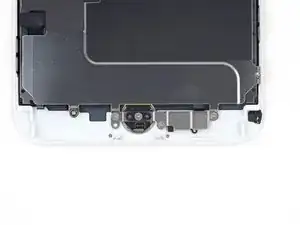
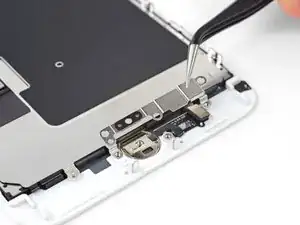
Pry under the left edge of the home button cable connector to disconnect it from its socket.
-
-
-
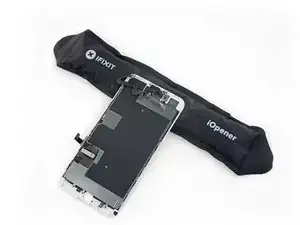
Flip the display assembly over. Use a hairdryer or prepare an iOpener and apply it to the lower edge of the display for about 90 seconds in order to soften up the adhesive underneath.
-
-
-
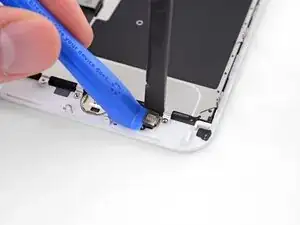
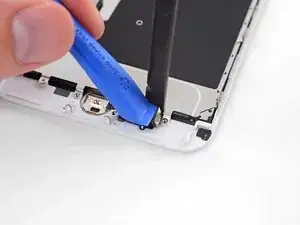
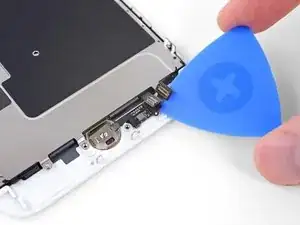
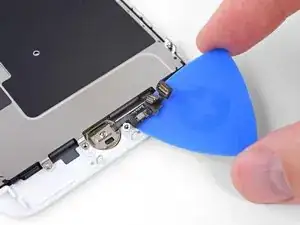
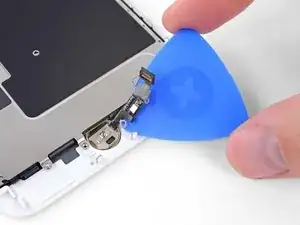
Use an opening pick to gently separate the adhesive holding the home/Touch ID sensor cable to the back side of the display panel.
-
-
-
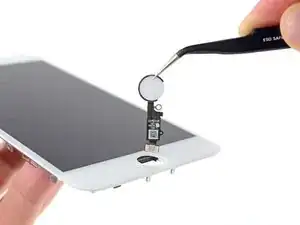
Remove the home/Touch ID sensor assembly by lifting it through the front side of the display.
-
-
-
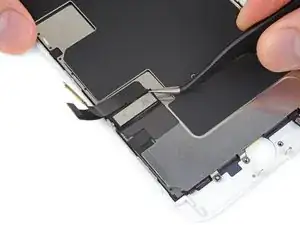
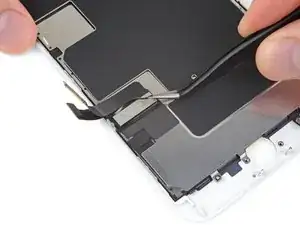
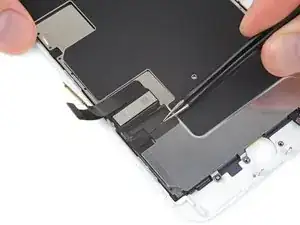
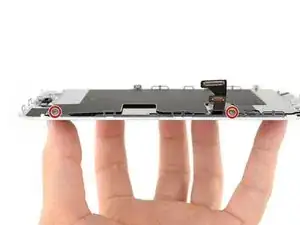
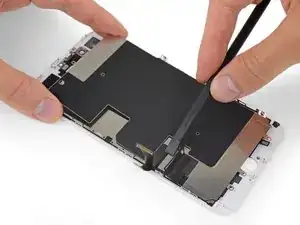
Peel back the upper, rectangular portion of the LCD shield plate sticker to separate it from the flex cable underneath.
-
-
-
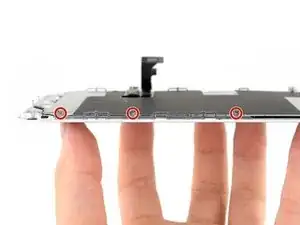
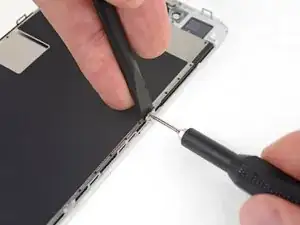
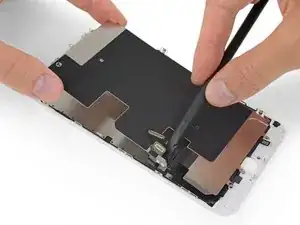
Lift the LCD shield plate while pressing down on the flex cable it surrounds.
-
Feed the flex cable through the cutout in the LCD shield plate, being careful not to snag it.
-


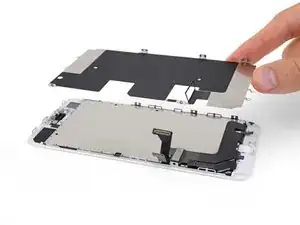

Compare your new replacement part to the original part—you may need to transfer remaining components or remove adhesive backings from the new part before installing.
To reassemble your device, follow the above steps in reverse order.
Take your e-waste to an R2 or e-Stewards certified recycler.
Repair didn’t go as planned? Check out our Answers community for troubleshooting help.

8 comments
Bonjour,
Savez-vous si le problème de la fonction True Tone est résolu sous iOS 12.3.1 ?
Merci pour votre tutoriel : )
Merci pour votre réponse.
Cancan -
Truetone - Has anybody used the eprom programmer devices to transfer the id from the previous screen to the new one to rectify the truetone absence?
hardijs -
I got hold of a iPhone 8 Plus with cracked screen that I am planning to fix.
Already got all new part that I think I need.
Here is my problem:
When I tried to take out the screen from my phone, (step 15-18) I was curious about the new screen, so I tried to connect it. It was completely dead! Then I tried the old cracked one, and suddenly that was dead to! This is a phone that some fool has been inside earlier and changed battery, but I suspect he has done some more really stupid things. The Taptic Engine is living its own life and vibrating every time I slightly touch the home button. (I have a new Taptic Engine) The phone is also full of dust and small particles that does not belong there. One tri-point Y000 screw (step 18) is even missing! Now the biggest problem is that both screens are pitch black! I know the phone is on, because I hear voice command speak when I turn on the power. What could this be? The screen worked before I tried to change it?!…
Hi smikalsen,
Did you disconnect the battery when you swapped the screens? If not, there is a chance that the screen backlight circuits are damaged as a result of disconnecting/reconnecting to a powered phone. With a screen connected and the phone powered on, shine a bright light directly at the screen. If you can faintly see the screen, it means that the LCD is working but the backlight is broken.
what do I do about super stripped screws?
Ean Palacios -
I’m sorry, your comment slipped past my radar earlier. For future fixers that might see this and ask the same question, you can check out our stripped screw guide for some detailed advice.
Adam O'Camb -
Do you need a toolkit like the essential toolkit
Adam Palmer -
Hi Adam. Having a tool kit with all of the listed parts above is best. The screw heads are very small and each set of screws needs a very specific type of driver to remove them without stripping any of them.
Kyle Luksa -